Let the color explosion commence

Toby can’t stand painting! He likes the building and the constructing… but not the painting. Me, I love to paint! I don’t know if it’s the actual act of painting so much as the complete change in the feel of a house once there are colors on the walls! I think, next to actually moving in, it’s my favorite part of a new house!

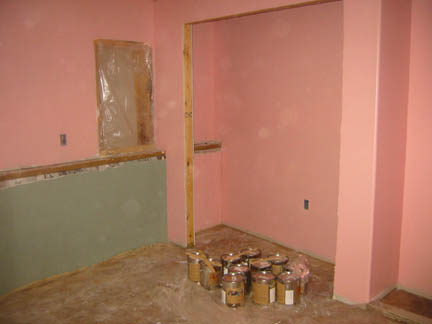
Kaia requested Pink and Green for her room. I know, the pictures look a bit like pepto bismal, but it’s actually a nice color, and the green tones it down a bit. The plan is to paint flowers, grass, fairies and such on the green lower portion of the back wall.

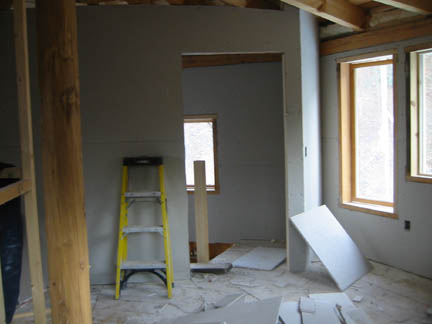
(Sorry for the drywall dust on the lens) Here I am, finishing up the walls, music blasting… Somewhere in this picture is Kaia’s secret room! Can’t see it? Mission accomplished, then!! 🙂 I like how my shadow looks in this one!
painting-kaias1.jpg

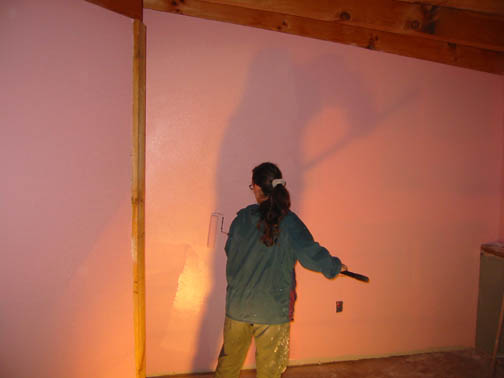
This is the back wall (which will have a shelf on it), closet, and to the right of the closet will be a floor to ceiling book shelf! Trim and shelving go up next. Then I will clean the floors!
painting-kaia3.jpg

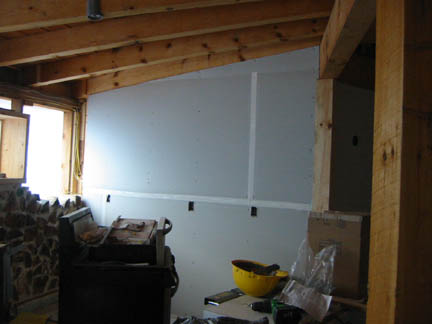
Here I’m working on trimming out the Mechanical room (we call it that because it will house all the solar mechanical stuff, but it will also be a laundry/mudroom) I used the same green in here that was in kaia’s room. I really like the color!
painting-mudroom1.jpg

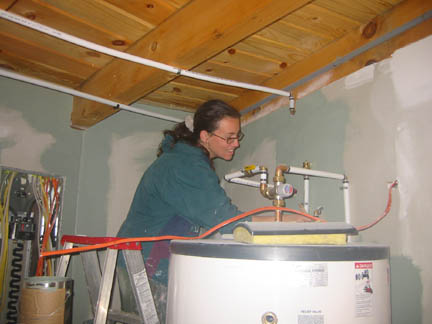
Again, sorry for the dust on the camera lens. This room has no windows, so it’s hard to get good lighting in the room. The color looks kind of bland in the picture, but it’s really pretty. This is also a nice pic of our new water tank! It’s 120 gallons!! lots of storage capacity for the solar hot water. To the bottom right of the pic is the tubing that runs through the floors for radiant heating. I can’t wait to test that out!!
painting-mudroom2.jpg

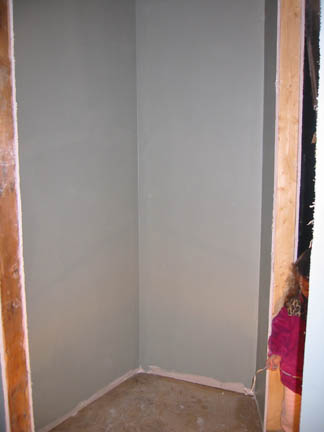
And finally, the pantry. Floor to ceiling shelves on both sides here too! yahoo!! This room leads from the Mechanical room and opens up right next to the kitchen. The kitchen will be a yellowy orange color that goes great with this green.
painting-pantry.jpg

Tomorrow, I hope to tackle the downstairs bathroom!

Oh, I forgot to mention the paint!!  It’s called Earthpaints.  They are locally made, sustainable, non-toxic paints!!  I love them!  I didn’t feel at all sick or head-achey after painting and breathing them in all day.  They are also a little thicker than traditional store bought paints, so they don’t splash all over the floor.  But, the coverage is still pretty good!  And they are self priming.  So, I put two coats of paint directly on the drywall in kaia’s room.  The green is darker and only took one coat for the Mec. room and pantry (two coats would make it more durable though).  Great stuff!!  You should look into it if you are going to be painting!!  (Oh, I know I’d mentioned wanting to do milk paints, but once I did the cost calculations for the special primers that I would need and natural colorants and all that stuff, the Earthpaints were actually cheaper and less time consuming!)

scrawny snoman

snowman.jpg

We had our first snow of the year this past week and it stayed about 2 hours before melting.  Poor Kaia wanted to build a big snow man so badly.  We scraped the snow off of the car and built this sad little man.  He’s about 8 inches tall.  He was melted by the next morning and she was very sad.

I woke up this morning after another warm night without the stove lit, and thought about global warming… wondering if I need to start planting tropical fruits in the yard!  Then Toby told me that we are supposed to be getting a cold from this week.  It’s going from 55 degrees tomorrow to highs in the 30s, lows in the teems with a wind chill in the negatives!!!   No pineapples in my yard this year 🙂

More pictures

Kaia is just getting to bed… she was out at the house helping us light our first fire in the new stove!

But first, some pictures!

The drywall is all up. They finished in a little over a day! New guys came out this morning to start the mudding! Unfortunately, the hangers left big piles of drywall everywhere. So, I’ve got a day of cleaning up scheduled for me on Wed.

Here’s the door to the master bedroom upstairs… it looks so different with the drywall up. I can’t wait to get some color on those walls!

drywall1.jpg

Here’s part of the kitchen. You can see a cordwood wall on the left. That is one of the ones that has the most work still to be done. We’ve put up plastic over all the holes and hooked up the stove today so we can try to keep the house warm… for the sake of the cordwood mortar and the drywallers.

drywall2.jpg

Here are the mudding guys. They were really fast! I love the stilts!! They both turned around and stopped working to pose for me when they saw I had a camera 🙂
drywall3.jpg

And here is our first fire in our new little stove! Woohoo!  It’s supposed to get into the teens tonight, and we are worried about the mortar.  It’s been a little over a week since we last laid cordwood, but still… we don’t want the walls falling apart because it didn’t set up right.  So, hopefully the stove will warm the place up enough.
firstfire1.jpg

firstfire2.jpg

So, as far as getting in touch with the guy who was jumping on the trampoline when her leg broke, I’ve written a long letter, but I have decided not to send it. I really just needed to get some stuff off of my chest and I don’t think it will do any good to make them feel guilty about it. I do feel like he needs to know what happened, but I am letting it go. I have enough stress in my life right now without having to put more energy into this.

I know… I know…

I said I’d post pictures a week ago… and here we are.

Well, in the past week all the dry wall has gone up.  I was waiting for them to mud it before I took pictures, but I may take some and post ’em anyway…  We also have a 165 foot trench going from our well to our house.  Toby and I laid the water pipe and electric wires in it today, before the rain started.  Tomorrow, we hope to hook up the stove so we can heat the house.  There are still large holes in the cordwood walls, but we will probably put up some plastic to try to keep the place warm so the walls will try properly.

Kaia got her cast off on Thursday.  Doc says her bones look great and she has no restrictions.  She’s walking with a limp while she works out the stiffness and gets more confident.  Occasionally her leg will hurt and then she gets scared again about using it.  You know, I’ve been trying to get in touch with the guy who was jumping on the trampoline with her and double bounced her when her leg broke.  I was kind of expecting to hear from him or his wife to ask how Kaia was doing, but it’s been a month since it happened and I haven’t heard a peep.  I didn’t know who he was so, I asked a friend who goes to a library story time with them to get their contact info.  Really, I just wanted to let them know what happened so he would stay off the kids equipment next time… Guess what… the wife refused to give out her contact info!  She knew Kaia broke her leg and hasn’t even told her husband!!  She didn’t want to upset him!!  Then she had the nerve to ask my friend if I wanted money!  Can you believe the nerve??!!  MY child has a broken leg and she doesn’t have the balls to say “I’m sorry” or to even tell her husband what the consequences of his actions were!!!  When I have the quiet of mind to be able to compose a letter, I’m going to have to put a few words to paper and let them know some of the hell that we’ve gone through in the past month because of their actions!

Another cordwood party

We had great weather for our cordwood party today… low 60’s!  And it is supposed to be like this all week.  Unfortunately we weren’t able to finish like we had hoped we would.  We had problems getting the lime mortar to the right consistency.  It was too wet and mushy, no matter what we did.  We think the sand was just to wet, so we are going to try to dry it out a little before we mix more mortar.  I know, it’s my fault for wanting the white lime walls instead of the gray concrete mortar.  If we used concrete, it sets up much faster, so we wouldn’t have to worry so much about freezing weather, and you can control the moisture a lot easier… but the lime mortar is so much prettier (and it’s better for the environment).  The inside of a cordwood house is already so much darker just because of all the wood, so the white mortar brightens it up a lot!

Still, we were able to completely seal up 2 walls on the outside (there’s still a little work to be done on the inside) and build up on 3 other sections.  Lesson for today:  Cordwood will take longer than you think it will, and if you plan on that, it will still take longer than you plan!!  I will post more pictures tomorrow when we’ve had time to do a little clean up.  The picture below is the finished sections.  We will ‘point’ them tomorrow (clean/smooth the mortar) and sand the wood later on so it isn’t all messy with mortar.

cordwoodfinishedwalls.jpg

This section will be above the kitchen sink… I love the variation in color in the bottles.  Kristine, that’s your blue triangle, and Yia Yia Shannon, that’s your green triangle, Mom, the teal one in the middle is yours and the brown rectangle is an antique brandy bottle I gave to Toby.
cordwoodoversink.jpg

We also picked up our stove and got some help unloading the very heavy thing into our home.  Here it is happily nestled in it’s little crate.  (Kaia looks very festive, doesn’t she?  She’s wearing her mermaid suit, but you can’t see the tail in this picture 🙂
stove1.jpg

The boys couldn’t lift it, so I had to carry it in myself!  🙂
I know…. the pictures aren’t great, but I hope to post more cordwood and stove pics tomorrow!  Maybe we will have the stove hooked up!!

Thanks to all our friends (old and new) who came out to help!

Soapstone stove

tribute_lg.jpg

We ordered our wood stove!  A Hearthstone ‘tribute’. It should be in this coming week!  Woohoo!  We debated between a locally made ‘Appalachian Stove’, which cost $1000 less than this one, and the tribute.  But, in the end, the reviews, cool look of the soapstone, and the hefty construction of this stove won out with us.  Guess we’d better move all the construction crap out of the living room so we can put the stove in!

Pictures for you Picture Freaks!

So, I’m hearing through the grape vine, that we don’t have enough house pictures for you picture mongers!  Well then, here you go!

We’ve been doing lots of little things, trying to get the house closed up.  All but two of the windows are hung.  The doors are in and the door knobs are set.  We’ve been doing cordwood on sunny days….

Here’s the front door.  I know, it looks a little run down, but it’s just dirty.  Once I clean it up, clean the window, and paint if red it will be fabulous!!
frontdoor.jpg

Here are the french doors that lead into the dining room.  Aren’t they nice.  They were another Habitat for Humanity find.  We spent a pretty penny on the specially made locks, hinges and handle, but it still cost less then new doors would have.

french-doors.jpg

These Pella windows are the only ones we bought new.  They cost more than all the other windows  combined!  But, we decided it was important to have an operable window in the living room, ’cause all the others are fixed.  So, now we will have some good airflow through the room.  Can you see the triangle windows are in too?   (We’ve got windows with green frames… brown, white, neutral…. I think we will leave them varied colors.  It’s kinda cool.)
cordwood-windows.jpg

Today, we worked on bringing up the cordwood wall in the kitchen.  It’s one of the lowest.  But, once we get the wood to the window, the rest will go pretty quickly.  We did about 3 layers today… these wide walls take a while!!
cordwood-kitchen2.jpg

Here I am making a little somethin’ special for this wall.
making-flower.jpg

Kaia joined me and made a flower of her own.  Mine is blue/yellow, hers is red/yellow.  Cool, eh?

cordwood-flower2.jpg

Oh, for those of you who might be interested, we are hoping to have another (maybe our last, wohoooo!) cordwood party this Sat. Dec. 8th.  If you want to join us, we would love to have you!!