I’ve been reading a lot of books on food lately… Real Food by Nina Planck, Animal, Vegetable, Miracle by Barbara Kingsolver, Know your Fats by Mary Enig… All of them have got me thinking about my own use and consumption of fats. I primarily use Olive Oil (imported), Coconut Oil (imported), and Butter (haven’t found a local farm supply, yet) in my cooking. And though all of these oils are healthy fats (non -hydrogenated), none of them are local, and they can cost a pretty penny. So, I decided to head down the road to a sweet family run farm and get some fatback! Hickory Nut Gap Farm raises their animals organically, free range, grass fed, and with love. AND They sold me the fatback for $1/pound!!! I’ve never rendered fatback into lard before, but after learning more about how healthy lard actually is for you, I thought it would be nice to learn how to use it better. (After the big push for using vegetable oils and fat-phobia, lard use has seriously decreased. But, did you know that lard is actually better for you than vege oils which are often hydrogenated (much worse for the body) and extracted with nasty chemicals! lard raises HDL (‘good cholesterol’), lowers LDL (‘bad cholesterol’), is 60% unsaturated fat, and has Vitamin D, E, and antimicrobial properties.)
So, this morning, I began the rendering process. I got most of my directions from here (Jan 12th entry).
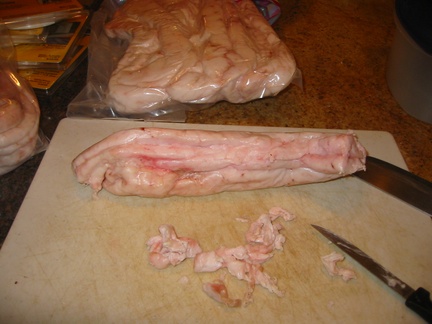
I started with 12.5 pounds of fatback, but put 2 pounds aside to make Lardo (see below). I cut the remaining 10.5 pounds into little chunks, as small as I could without agonizing over it. (The more surface area you have, the faster it renders).
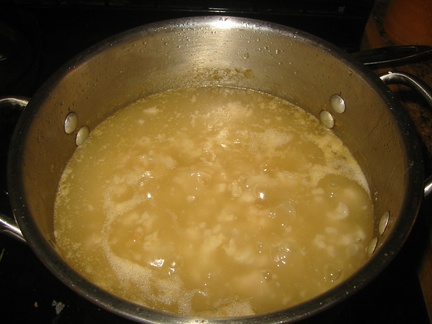
Then I put the chunks into a pot with ~2-3 inches of water on the bottom (this helps keep the fat from burning on the bottom, and boils off before you are done). I was worried about the pot overflowing, so I got a second pot going. (In the picture, the larger pot has been cooking for a while and looks more gray.) But once they cooked a while, I ended up combining the two.
The fatback should boil over low/med heat to melt the fat. Stir it very frequently to keep it from sticking or burning on the bottom.
When I was reading about it online, people complained about the smell and recommended doing it out doors. But, I liked it…. the smell was like cooking ground beef or hamburgers and wasn’t overwhelming.
I spent most of the day in the kitchen, stirring the lard and making other food. By 4pm the fat was getting close. There was a little scum on the top, so I kept skimming that off.
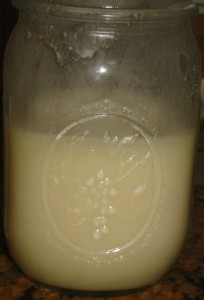
About 5pm, the oil seemed to change… the boiling bubbles were smaller and the oil looked more golden. It didn’t seem like I was getting any more out of the little pieces that were left in the pot. So, I poured the oil through a cheese cloth and strainer into a large pot, then poured the oil/lard from the pot into pint canning jars. It made ~8.5 pints. What was left in the strainer and in the bottom of the pot is called ‘cracklins’. They were mostly crispy and are supposed to be great on salads or spread on bread. I tried them and they were ok, but a little too heavy for me. So, I put them in a tupperwear and will give them to the dog with her meals. Lucky dog!
The jar that wasn’t completely full, I put in the fridge, and the rest I canned. I followed my canning books recipe for canning pork. I filled the jars full and put them in a pressure canner at 12 pounds for 90 minutes.
The lard turned out white and tasty! I plan to use it when cooking eggs, frying, with pastries… when ever I can! I have to say, I’m proud of myself. I said prayers of thanks for these animals who gave their fat and feel good that I’m using all of the animal and not being wasteful…. Meat for eating, lard for cooking, bones for broth… If I’m going to be a part of this omnivore cycle, then I want to thankful to those plants and animals who nourish my body and eat as sustainably as possible.
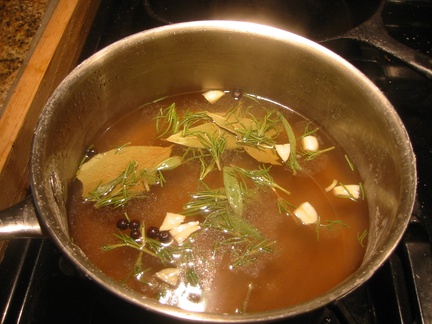
While I was making the lard, I also decided to try my hand at an Italian delicacy, Lardo. It’s the italian way of preserving fatback. Instead of just salting it, they also add spices. I got my recipe from here. I made a salt water brine and then added garlic, rosemary, sage, bay, and juniper.
I put 2 pounds of fatback in a glass container and, once the brine tea cooled, poured the tea over the fatback. The fatback wanted to float, so I used a half-pint canning jar to hold it down and then put the top on. Into the fridge it went, where it will stay for at least three months (though some italian recipes call for 6-10 months!) Every 30 days I’ll flip it over. Once it’s done, you take it out and dry it off. Then you slice it very thin and eat it over toast or polenta.


Thank you so much for posting this! I have some beef fat we got with a quarter of cow we bought from a local rancher recently and I’ve been wanting to render it… this gives me motivation and confidence.
Stop. You’re making me cry. I WISH I had lard. (besides my butt)
Please run a contest (where I win) for some lard.
My heart thanks you. My arteries, maybe not so much. But all good things in moderation. 🙂
HHHAAAAAA ha haaa!!! OOOh, that I could slice the lard from my butt!!
OK, maybe I’ll think about a contest 🙂
Oh, and lard is actually good for your arteries and heart!!! The scientific info and studies are finally coming out in the open. It’s the hydrogenated vegetable oils that cause the clogging… not lard! So eat up!!!
1.00 a pound? I am seriously jealous. I just found and ordered lard for 7.00 a quart. Thanks for the tutorial. I look forward to seeing how the Lardo comes out.
What timing! I’ve got my copy of Animal, Vegetable, Miracle sitting next to me. I was hardly 2 chapters in and I was taking a mental inventory of my cupboards… whats local, whats not. We stick to mostly local, but I decided we need to give up our bananas and exotic fruits for the most part, and try to eat more seasonally. I actually just picked up some chicken lard from a local organic farm and have been using that for cooking, so good! I’m completely motivated and ready to try my hand at lard rendering now! Thanks for the update and pictures. I love knowing there are other like minded souls out there, even if we’re on the otherside of the continent from each other!
Fantastic post and well documented process. I’m bookmarking this for when I get the chance to do it on a cooker that’ll be on all winter.
Crackling is great with plenty of salt. But I think giving the dog a treat is what I’ll do too.
Awsome!! Lard is so delicious when cooked with eggs, or on greens. Greens cooked in lard just take the cake!
Have fun with all that lard! I still have some fat back in the freezer I need to render! Motivation is good!
peanut butter cut with lard is REALLY good. I was doing this for a while for my daughter who has celiacs and needed all of the good fats she could get while healing. One could debate the healthiness of peanut butter but…natural pb, lard, honey and chopped raisins. holy smokes that is GOOD stuff.