I’m starting to plan out my garden for next year and trying to figure out how to get seedlings grown. It seems like we will need to buy warming mats (to keep the temp. constant) and maybe even grow lights (since we are on the north side of a mountain and may not get enough daylight in Feb. and March). But, I don’t want to spend more money or use the energy to power this stuff. Once it gets warm enough outside, we can use our cold frame for starting the seedlings. But, to get the greens, broccoli, kale, and such started in early March, it will be too cold outside, even in the cold frame. What do you all do?
Author Archives: Maria
Big Crafty
I’ve been feeling really crafty lately! It all started this past Wed. when Kaia and I went to a kids knitting circle. She’s been wanting to learn how to knit, but isn’t really ready to use knitting needles, so we went to the circle to see if we could get some tips for her. She ended up learning how to finger knit and loves it! She started at the circle and knit the whole way home, through the evening and until bed. Then she woke up and knit some more… and then all the way to school, and all the way home. And it stayed like this until she had over 30 feet of finger knitted yarn. She finally finished it up so she could wrap it around our solstice/christmas/yule/festive evergreen tree. Right now she’s only knitting on one finger but this shows the basic idea.
Kaia wrapped herself up in her knitting before wrapping the tree:
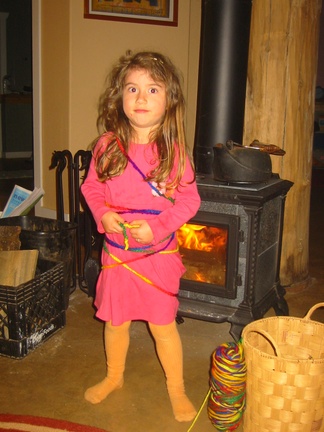
After Kaia’s knitting class, I just happened to be headed to a ladies night with some friends and learned how to knit hats. All I’ve ever done up until now was simple stitch scarves and blankets, but I love knitting. I stopped doing it when I tried to read patterns and couldn’t figure out what I was doing. I think I’ve got the hang of it now! Now I just need a high paying job to afford all the awesome yarn that I want to get!! Here’s my first attempt. It was supposed to be a newborn hat, but it turned out a bit wide, though not deep enough for Kaia (but she was gracious enough to model it for me).

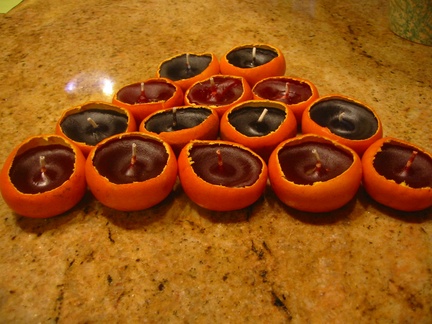
Well, then I got inspired to make something with all the tangerine peels we have right now (I ordered one of those citrus fruit boxes!) It wasn’t as easy to do this with thin tangerine peels as I imagine it would be with oranges or lemons, but they still turned out cute!
First, lightly score around the skin. I took off the top 1/3 of the tangerine.

Next peel off the top 1/3 (with the tangerines, I really wasn’t able to save this or make a candle top out of it because it was too small).
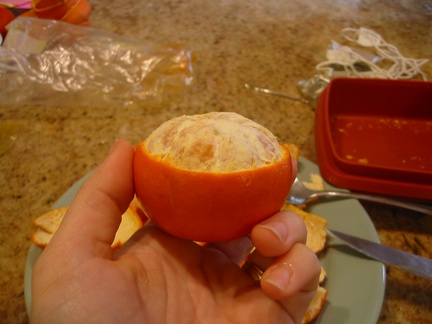
Then, slide a spoon under the remaining skin and loosen as much of it as you can, working your way around.
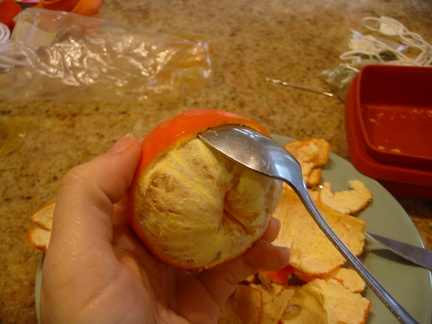
Once it is fairly loose, slide the peel back and work your thumb in to peel the remaining skin off of the bottom. This is tricky as it may want to break at the end, so go slowly.

Once I had a bunch of bottom peels ready, I put some candle wax in a double boiler to melt. Then I got the wicks ready. I used some putty and stuck the wick to a metal candle thingy (don’t know what it’s called) to get it to stay in place better.
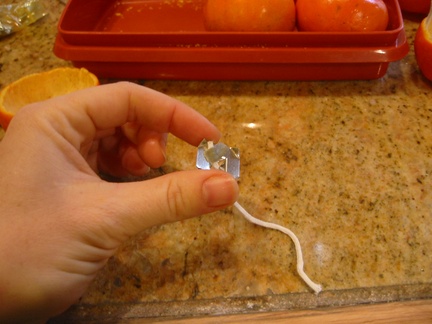
Then I pressed this into the bottom of the peel.
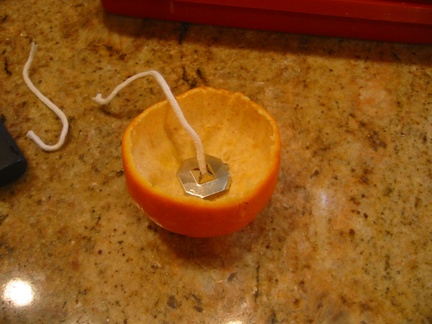
Then I poured the melted wax into the peel. After it cooled just a touch, I stood the wick up in the center (if it wasn’t already there).
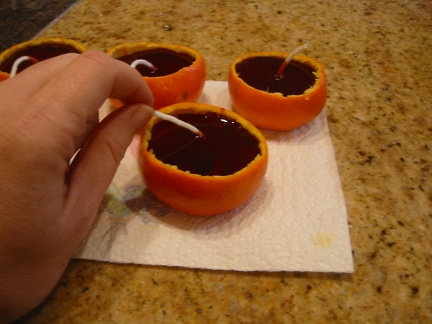
And here they are… wick trimmed and all. We used red, orange, purple, and blue colors in our wax (though it’s hard to tell from the picture)
Hey, You Out There!
Is there anyone on the other side of this thing??
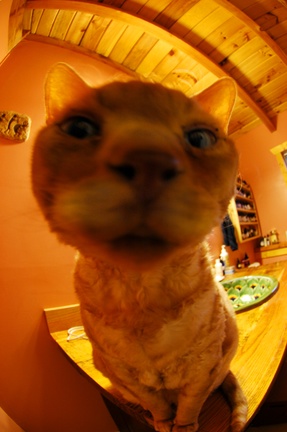
Meow!! I mean ROAR!!!
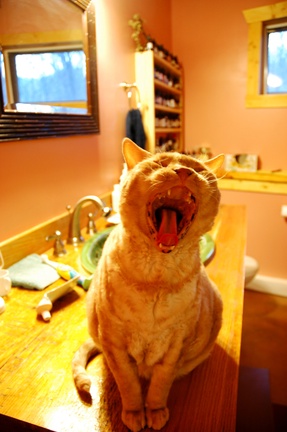
Oh, please don’t let my mighty fangs scare you! I’m really a very gentle cat!
(Pictures taken by John Narrin, the photographer for the New Life Journal. Their building experts came over on Friday to check out our place. They are doing a review/feature on our place in their April, 2009 edition!!)
The Best Garlic Chowder Ever!!!
Ok, so it’s the only garlic chowder I’ve ever tried, but it is fantastic! I got the recipe from a restaurant in San Francisco called ‘The Stinking Rose’, where every dish is full of garlic. (I found the recipe on-line, so I imagine it’s ok to pass it on.) This recipe made almost 4 quarts, so I think I might double or triple it and can some up (I’ll leave the cream and parsley until I heat it up to eat it)
Garlic Chowder
1/4 cup olive oil
4 ounces bacon, diced (optional)
2 medium onions, diced
1/2 bunch celery, diced
1-2 fresh leeks, cleaned and chopped
5 heads roasted garlic (see recipe below)
2 tablespoons chopped fresh thyme
3 medium potatoes, peeled and diced
6 cups chicken stock
Salt and white pepper to taste
1 cup whipping cream (optional)
1/2 cup chopped fresh parsley
In large pot, heat olive oil. Add bacon, if using, saute briefly, and then add onions, celery and leeks. Saute until onions are translucent.
Remove roasted garlic cloves from head by squeezing the roasted head. Add the soft cloves to pot.
Add thyme, potatoes and chicken stock. Bring to simmer and cook until potatoes are tender, about 30 minutes. Season with salt and pepper. Add cream and parsley. Remove from heat and serve. Makes 6 to 8 servings.
To make Roasted Garlic:
Preheat oven to 375
Cut off the tips of the cloves (while the garlic is still part of a head) and place whole garlic head on a baking sheet.
Bake for 30 minute.
Cool and pop/peel the garlic cloves out of their skins.
Crowey passed on
Our rooster died. We nursed him for 2 days but he just never got better. The last day he was having breathing difficulty, too. So, we’ve buried him and put the 6 hens on garlic and other herbs to be sure they don’t catch anything if it was contagious. If all seems well in 3-4 weeks, I may get another ameraucana rooster…. or I may get some hatching eggs this spring and try my hand at it. I’d love to have Marans (that lay chocolate brown eggs) and another Speckled Sussex and Buff Orpington (we had some of these breeds initially and they were killed. But, they were really sweet and good layers!)….
After losing two chickens, I’m wondering how strict you all are about cleanliness of your coops…. do you change shoes when ever you go in? Do you let other people, who have chickens. visit with your chickens? Etc…
Dinner was wonderful
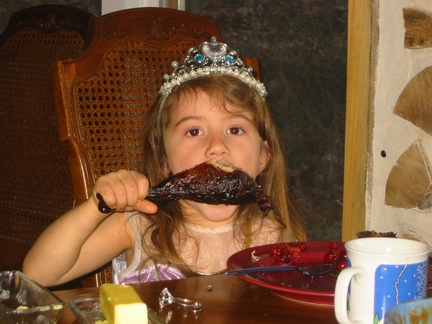
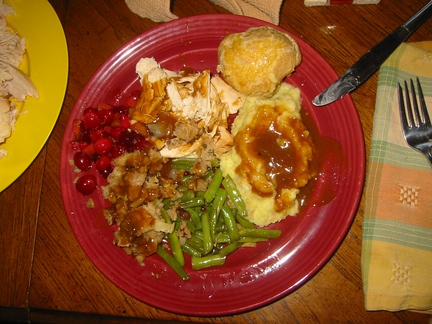
Our first Thanksgiving in the new home was fabulous! I cooked my first turkey, too. In fact, we noticed once we sat down to eat that not a single thing being served was from a can or box… it was all made from scratch! How wonderful! Kaia requested that we all dress up fancy so that we could celebrate in style. She wore a princess outfit, Toby put on a suit and I wore a sparkly opera dress. We had turkey, stuffing, gravy, garlic mashed potatoes, green beans, cranberries, cheesy-herb biscuits, and for dessert apple crisp with home made cinnamon whipped cream! Mmmmmmmmmm!
I hope you all had a wonderful and amazing holiday!
Birthing Art
In preparation for my labor (some time in Feb.), I have an idea. I thought it would be nice to have some visual things to focus on during contractions, so here’s the project… In whatever media you chose (paint, crayon, photo, pencil, etc…) capture any or all of these words through art: “Spiral”, “open”, “release”, “relax” , and also the visual of water rippling out from a center (like when you drop a pebble in water). This can be as small as a 3×5 card or as big as a poster board, or anything in between. Then, when I’m in labor, I can pull out one of these and be reminded to move my hips in spiral, or let myself open up to birth, release, and relax… and feel the love of my friends around me.
If this sounds fun and exciting and you feel inclined to make something, let me know and I’ll send my address along.
Thank you!
Sick Rooster
I don’t know what’s wrong with him…. he has the same symptoms as the chicken who died a month ago: lethargy and clear/white diarrhea… but otherwise nothing notable, no discharge, no smells, nothing. So, I brought him inside and made him a warm nest. Every hour I’ve been giving him a little bit of garlic, molasses, cream and water mixed. I also put a few drops of an herbal tincture on his skin. Each time I go in he seems a little more alert and lively, but still sitting down and resting mostly, with his eyes closed. Just now I rubbed an oil similar to this one on his head, nose, and under his wings. We’ll let him sleep for the night and hope things are looking up in the morning.
Grandmother bread
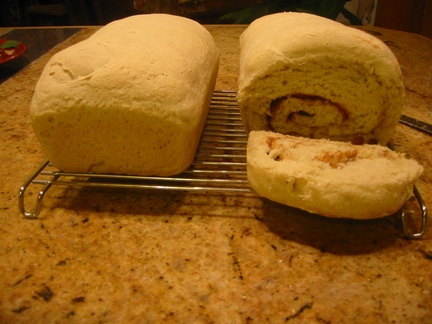
I’ve been doing lots of baking lately, and am really enjoying our new kitchen! I never have made much bread… maybe a little here and there in my bread maker. I have a vague memory of making bread with my mother when I was young and thinking how hard it was to get it kneaded and how much time it took to make. But, now that I’ve gotten into making my own bread, by hand, I’m really enjoying it. I love the kneading part! Plus, the smell of fresh baked goods is just so homey and comforting! I found this recipe for Grandmother Bread and love how simple it is. It comes out great every time. I’ve tried the white bread version, the whole grain bread, herbed cheesy bread, and cinnamon swirl. MMmmmm!!
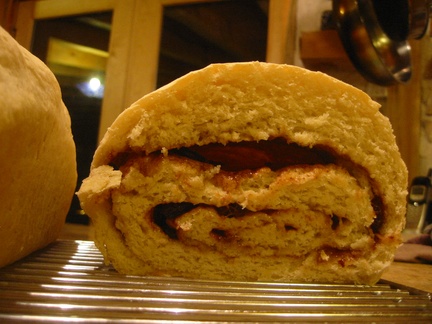
Tonight’s mix was a white bread loaf that I will use in the thanksgiving stuffing, and a cinnamon swirl (It would be really easy to adapt this recipe to stuff it with pesto, or ham and cheese, etc. instead of cinnamon sugar)
What? You can’t really see the sweet, gooey goodness well enough? Here, have a close up!
Max In Repose
Check out what I picked off of the roof yesterday! There are lots of calendula flowering, too… if they don’t freeze tonight, I may harvest them and make a nice oil or something.

And, since I begin my third trimester tomorrow (Oh My God!! Where did time go??!!) I thought I’d post a belly picture. I really feel very large! I’m still not 100% convinced that there aren’t two in there 🙂 And we already know that this child will not sleep all the time like Kaia did, ’cause he never stops moving!

Disney
We all had an amazing time at Disney World! (I never thought I’d hear myself say that!) Kaia and I met Toby down in Orlando last Sat. (He was already there finishing up a conference). When we got off the plane we were welcomed by sunny 70 degree weather with a gentle breeze, and it stayed that way the whole time we were there! Absolutely beautiful! My Uncle works at Disney part time, so he got us all the discounts he could (included free tickets to the theme parks!) and booked us into one of the Resorts. We stayed at the Disney Carribean Resort where there was a lake surrounded by tropical plants, and many pools for Kaia to chose from. (I grew up in Miami and didn’t realized how much I missed the tropical plant life. The ferns and palms are so prehistoric looking… ) Everyday the housekeeper made animals out of towels to keep Kaia’s stuffed doggie company while we were at the parks 🙂
On Sunday, we went to the Magic Kindom. We got there before the gates opened so we wouldn’t have to wait in too many ride lines. But, the crowds weren’t bad at all. We had no wait at all for many of the rides… Dumbo, It’s A Small World, Peter Pan’s Flight…. Kaia had her picture taken with Ariel, which she loved! We went back to the hotel for an afternoon break and planned on going out to the fireworks that night, but I was a little dehydrated from all the travel and walking around, so I decided to stay in and put my feet up.
Monday, Toby and Kaia went back to the Magic Kingdom and hit more rides, had pictures taken with Jasmine, did some shopping… I stayed at the resort and relaxed on the ‘beach’.
Tuesday we spent the day at Epcot. There were few people there and we didn’t wait at all in lines.
I really can’t remember the last time we truly went on a vacation… I mean, we’ve enjoyed family reunions and trips to the beach, but I don’t think we’ve ever had a vacation like this. All the while, we tried our best to eat well (locally and sustainably) and not contribute to non-sustainable consumerism. I was happy to see that some of the restaurants at Epcot are supported by food grown in their own research nursery (that you can ride through)… they are working on organically and intensively grown crops.
Now, if you ask Kaia what her favorite part of it all was, she won’t say meeting Ariel or Jasmine, she won’t mention the three times she rode the carosel, she’ll forget about all the times she begged to go back to the swimming pool… She’ll say “Shopping!!” Who raised this child??? When did she become a shopper?? But she absolutely loved walking around the shops and looking at all the disney stuff. Ugh!
Simple Soap Recipe
I’ve been making my own soap for about 10 years now. It started out as glycerine soaps, but they melted away so quickly. One of my first dates with Toby was making lye soaps, so it’s been lye every since. I love making a big batch of yummy smelling soap, having enough to last us for a long while, and being able to give some as gifts. It’s so nice to pull one of my own soaps from the closet when I need more.
So, here is my quick and easy soap recipe. I almost always start with this and add to it whatever I’m in the mood for. (I promise to post pictures of these steps the next time I make more soap!)
You will need:
-200 grams of lye (it’s not so easy to find this any more. Recently, I was able to get some at the ACE Hardware store. It may be called ‘Red Devil Lye’)
-19 ounces water
-21 ounces Olive Oil
-14 ounces Palm Oil
-16 ounces Coconut Oil
-cooking thermometer
-rubber gloves, old clothes, glasses
-old rubber mixing spatula
-electric beater/mixer
(this will make ~20 3-ounce or 15 4-ounce soap bars)
The first thing I do is line my soap mould. You can use a bread loaf pan, a rectangular tupperware, anything that is around 6×14 inches, or so… not an exact science (it’s also nice if your mould has a cover or something that will work as a cover). You will want to line this with wax paper, making nice crisp corners and taping everything together. This keeps the soap from coming into contact with the actual mould. (If you are using a flexible tupperware, this isn’t necessary since you can pop the soap out, but I still find it easier to line it.)
Next, measure out the lye into a large glass bowl.
Measure the water into a separate container (I use a quart jar).
Take both of these things outside, wearing your rubber gloves and other protective gear. Slowly pour the lye into the bowl of water and mix with the spatula. It will get hot very fast (up to 200 degrees) and put off nasty fumes. At this stage, it is also caustic and can easily burn the skin. So stay up wind of the bowl and mix carefully until the lye is dissolved in the water. Then wait for the lye/water mix to cool to 80-100 degrees.
While waiting, measure all the oils and warm them in a large ceramic or stainless steel pot until the oils are at 80-100 degrees.
When both the lye solution and the oils are 80-100 degrees, carefully pour the lye mix into the oils. With protective gear on, use the mixer/beater to mix it all together. This is called saponification (when the oils and lye come together and neutralize the lye) . It may take 5 minutes, it may take 20, but at some point you will notice that the mixture gets a little thicker. You will see the mix ‘trace’ or leave a mark of where you have just mixed… Kind of like cake batter, but not that thick.
At this point, you are ready to add any extras. I usually use essential oils and will add 2 Tbsp. of what ever smell or mix of smells I chose. I might also add ground herbs or flower petals, ground oats, clays or poppy seeds (for a good scrub). I haven’t tried it yet, but I’m thinking of adding colors, like a little poke berry juice or turmeric, to see what it looks like.
Blend these all in quickly.
Pour into your mould.
If you want to have swirls in the soap (like the pictures in the post below), you can add your powdered herbs or colorants at this stage and use the spatula or a butter knife to gently cut/mix them in.
Cover your mould and place it in a warm place to rest (I usually wrap mine in a towel to keep the heat in).
Check your soap every day. After one to three days, your soap will be firm enough to cut into soap slices. (I almost always cut it up after a day… this recipe seems to harden pretty quickly.) You can cut it into whatever shape you want. I usually cut them about 1-1.25 inches by 3 inches, or so… again, not an exact science.
Lay the soap out to finish curing for at least 3 weeks. Some people like to cut the tops and edges off to make them look more finished or take the ‘ashy’ look off of them. I leave it all on… it’s not harmful and I like the home made look.
There are so many different ways to make soaps and so many things that can be added… milk, honey, cocoa butter, other oils…. Start with a simple recipe and have fun experimenting. Get a good book, too, so you have good references.
Week in Picture Review
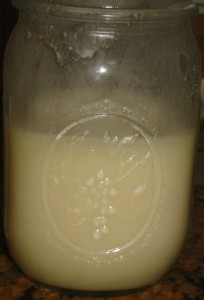
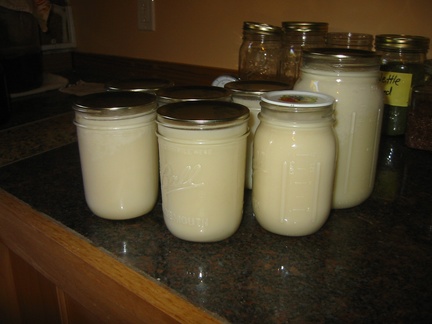
Here’s all the lard after it was canned. Looks like creamy milk, doesn’t it! I’m really enjoying using it to cook up eggs, veggies, etc…
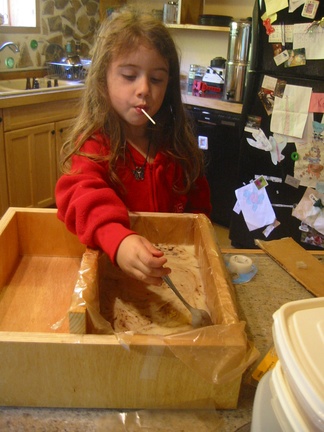
Kaia and I spent some time making some holiday soaps. This was a batch of Wintergreen/Sweet Orange soap, and she’s mixing in a little cinnamon powder ‘to make swirlies!’, while enjoying a piece of Halloween candy.
The next day, we cut it up into pieces and will let it sit 3 weeks before using it (so it cures and isn’t so caustic). The first batch made 20 pieces of soap (~3 oz each)

The second batch we doubled and ended up with another 44 bars! This one is Clarysage/Ylang Ylang with swirlies of cardamom.

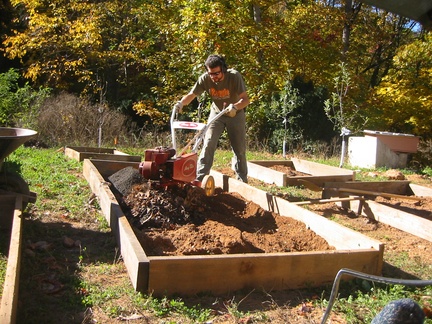
We’ve been getting the garden beds ready. Made 8 raised bed frames with scrap wood. Hopefully that will be enough to get us started this spring. Toby tilled the soil and mixed in lots of leaves and some roof dirt (which will help break up the clay and add some compost). I need to add more compost, manure and soil and will plant some rye for the winter.
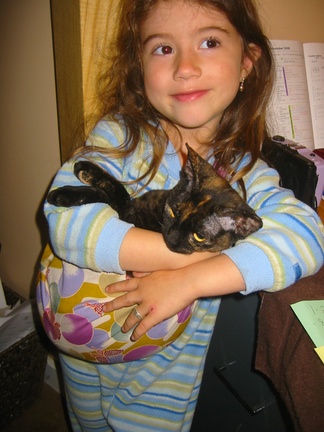
We gave Kaia a mini-sling to practice carrying doll babies… But she found a fuzzy, wiggly doll baby she likes better… Snuggle or torture? It depends on who you ask.
She’s also decided she wants to learn how to knit. So she plopped down in the rocker by the fire (an appropriate place for knitting, I think) and pretended for a while. We are going to start a kids knitting group with some other moms when we get back from Disney.

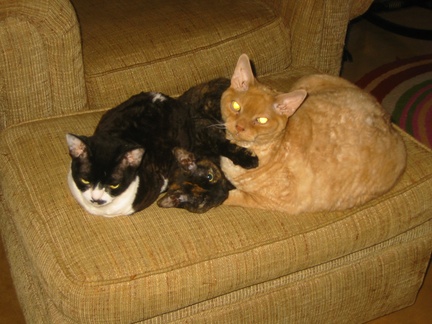
And, what post would be complete without snuggling kitties… Isabella, Daisy, and Chub Chub Max.
Happy Halloween
We headed into West Asheville where there is one street known for it’s trick-or-treating. We’ve never taken Kaia out on Halloween before, ’cause we didn’t want to have to deal with all the candy and scary costumes and stuff. But this year we talked and she decided that she would pick out her 10 favorite pieces of candy and give the rest to the candy fairy in trade for a game or something. We’ll give her some $ for spending at Disney when we go next week. So, anyway, the houses on this street were completely dressed up! And by the end of the street, it was so packed with kids and parents that there had to be many hundreds of kids that came through! She had a blast!
Rendering Lard & Italian Delicacies
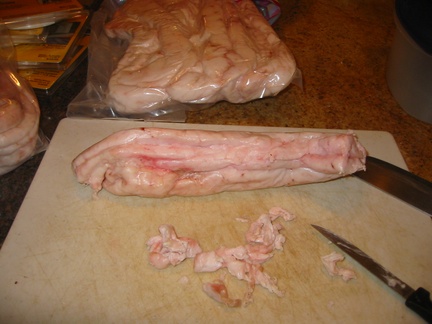
I’ve been reading a lot of books on food lately… Real Food by Nina Planck, Animal, Vegetable, Miracle by Barbara Kingsolver, Know your Fats by Mary Enig… All of them have got me thinking about my own use and consumption of fats. I primarily use Olive Oil (imported), Coconut Oil (imported), and Butter (haven’t found a local farm supply, yet) in my cooking. And though all of these oils are healthy fats (non -hydrogenated), none of them are local, and they can cost a pretty penny. So, I decided to head down the road to a sweet family run farm and get some fatback! Hickory Nut Gap Farm raises their animals organically, free range, grass fed, and with love. AND They sold me the fatback for $1/pound!!! I’ve never rendered fatback into lard before, but after learning more about how healthy lard actually is for you, I thought it would be nice to learn how to use it better. (After the big push for using vegetable oils and fat-phobia, lard use has seriously decreased. But, did you know that lard is actually better for you than vege oils which are often hydrogenated (much worse for the body) and extracted with nasty chemicals! lard raises HDL (‘good cholesterol’), lowers LDL (‘bad cholesterol’), is 60% unsaturated fat, and has Vitamin D, E, and antimicrobial properties.)
So, this morning, I began the rendering process. I got most of my directions from here (Jan 12th entry).
I started with 12.5 pounds of fatback, but put 2 pounds aside to make Lardo (see below). I cut the remaining 10.5 pounds into little chunks, as small as I could without agonizing over it. (The more surface area you have, the faster it renders).
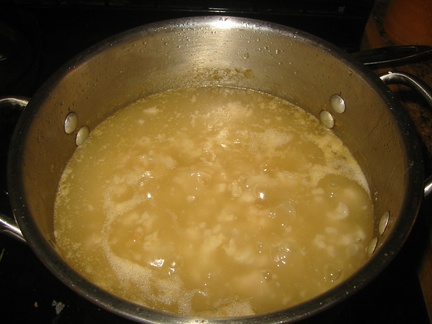
Then I put the chunks into a pot with ~2-3 inches of water on the bottom (this helps keep the fat from burning on the bottom, and boils off before you are done). I was worried about the pot overflowing, so I got a second pot going. (In the picture, the larger pot has been cooking for a while and looks more gray.) But once they cooked a while, I ended up combining the two.
The fatback should boil over low/med heat to melt the fat. Stir it very frequently to keep it from sticking or burning on the bottom.
When I was reading about it online, people complained about the smell and recommended doing it out doors. But, I liked it…. the smell was like cooking ground beef or hamburgers and wasn’t overwhelming.
I spent most of the day in the kitchen, stirring the lard and making other food. By 4pm the fat was getting close. There was a little scum on the top, so I kept skimming that off.
About 5pm, the oil seemed to change… the boiling bubbles were smaller and the oil looked more golden. It didn’t seem like I was getting any more out of the little pieces that were left in the pot. So, I poured the oil through a cheese cloth and strainer into a large pot, then poured the oil/lard from the pot into pint canning jars. It made ~8.5 pints. What was left in the strainer and in the bottom of the pot is called ‘cracklins’. They were mostly crispy and are supposed to be great on salads or spread on bread. I tried them and they were ok, but a little too heavy for me. So, I put them in a tupperwear and will give them to the dog with her meals. Lucky dog!
The jar that wasn’t completely full, I put in the fridge, and the rest I canned. I followed my canning books recipe for canning pork. I filled the jars full and put them in a pressure canner at 12 pounds for 90 minutes.
The lard turned out white and tasty! I plan to use it when cooking eggs, frying, with pastries… when ever I can! I have to say, I’m proud of myself. I said prayers of thanks for these animals who gave their fat and feel good that I’m using all of the animal and not being wasteful…. Meat for eating, lard for cooking, bones for broth… If I’m going to be a part of this omnivore cycle, then I want to thankful to those plants and animals who nourish my body and eat as sustainably as possible.
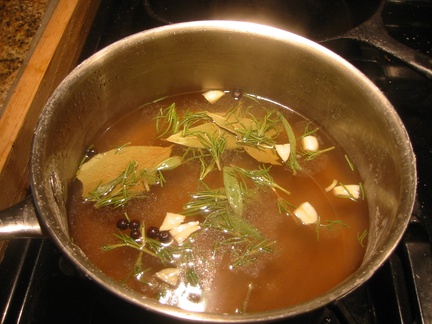
While I was making the lard, I also decided to try my hand at an Italian delicacy, Lardo. It’s the italian way of preserving fatback. Instead of just salting it, they also add spices. I got my recipe from here. I made a salt water brine and then added garlic, rosemary, sage, bay, and juniper.
I put 2 pounds of fatback in a glass container and, once the brine tea cooled, poured the tea over the fatback. The fatback wanted to float, so I used a half-pint canning jar to hold it down and then put the top on. Into the fridge it went, where it will stay for at least three months (though some italian recipes call for 6-10 months!) Every 30 days I’ll flip it over. Once it’s done, you take it out and dry it off. Then you slice it very thin and eat it over toast or polenta.
First Snow
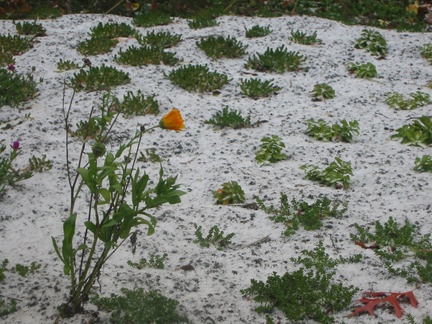
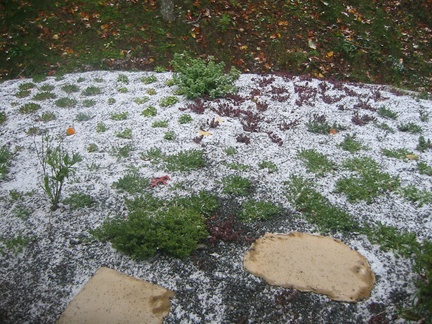
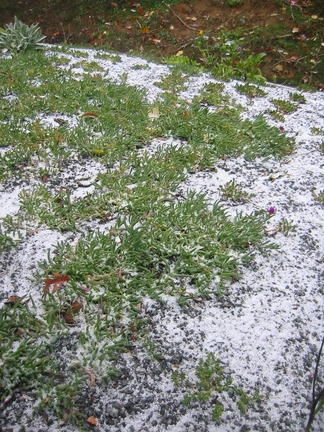
It snowed here today!! This is very early for our first snow! Usually it doesn’t happen until late November. But, we had a beautiful white day today. It probably snowed ~1 inch, but melted by the afternoon. Now that we have a cozy house and we are both working on the land (and don’t leave too much, except to drive Kaia to school), I’m kind of hoping for a nice cold snowy winter.
Does anyone know what the prediction is for the winter?
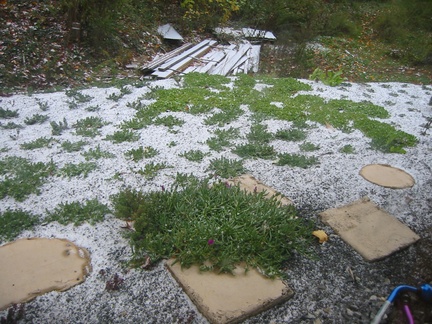
Here are some shots of the roof this morning as the snow started:
more carving
Tonight Toby and I got to carve our pumpkins. We picked some designs from a kit that Kaia has and tried our hands at them. It was so much easier to carve the details with the little carving tools that were a part of the kit!
I made a goblin… that’s a trick or treating bag he’s holding (I think I need a brighter candle):

Toby did a pirate ship… Arrrrr!

Too bad we live way out in the boonies and no one comes by for Halloween! 🙂
Pumpkins
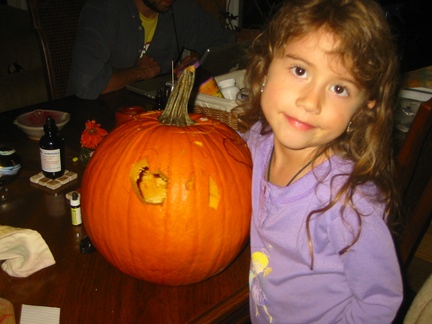
Kaia had a pumpkin carving party tonight with 3 of her girlfriends. It was a lot of fun and a little chaotic 🙂 Once they got all the goop out from inside, they drew all kinds on pictures on the pumpkins. It took a minute to realize that detailed pictures couldn’t be cut out like they wanted. So, Kaia settled on a heart and some random shapes. And she cut everything out herself!
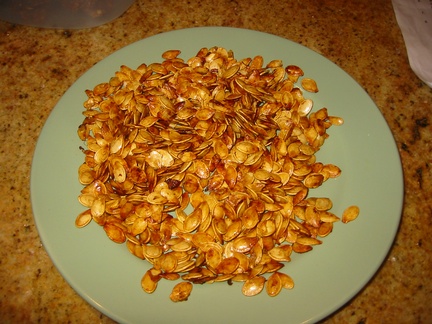
After the party, I cleaned up all the seeds and roasted them. I have always just added a little salt, but this year I decided to get a little decadent. I found a recipe on the web and tweaked it a bit:
Sweet and Salty Pumpkin Seeds:
–2 cups cleaned pumpkin seeds
–2 Tbsp. butter or coconut oil, melted
–2 Tbsp. Soy sauce/tamari
–1 Tbsp. sugar/sweetener
–1/2 tsp. Chinese 5-Spice powder
Preheat the oven to 300 degrees. Mix all ingredients in a bowl. Spread the seeds on a cookie sheet. Bake for 45 minutes, stirring every ten minutes. They turn out crispy and very yummy!
Hey Papa
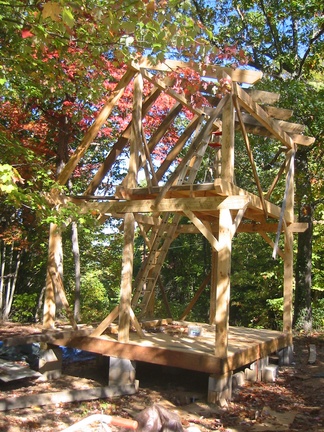
Progress on the guest house is slow going because Toby only has a day or two a week to work on it, but it’s looking really cute!
This is the view as you drive up:

This is the side view, where the front door will be:
The other speckeled sussex died this morning. We don’t know what happened to her. She was supposed to be a full sized bird, but didn’t really seem like she was growing normally. Her body stayed fairly small, so I thought maybe she was actually a bantam. But, her head just looked like it never got any bigger. Yesterday she was sluggish and the other chickens started picking on her. They didn’t cause any physical damage that we could see, but as the day wore on, she just sat down and stopped moving. She died over night. Any thoughts?

Kaia and I drove up to Banner Elk for the Woolly Worm Festival this past Sunday. It’s a big fall festival where people bring their woolly worms and race them up a string. The winners of the individual heats race each other until there is one final winner, who gets $1000 and their worms color pattern predicts the upcoming winter weather. They haven’t posted who won this past weekend or what the winter prediction is, but supposedly, over the past 20+ years, the worms have a 85% positive prediction rate :-)!
Kaia and I brought our two worms home and hope to keep them through the winter. In the spring they will turn into Tiger Moths. My worm is the one on top of the paper tube… his name is Arnold. Kaia’s is the one climbing in the tube opening and her name is Sunflower. They were both great racers when they were on our clothes, but once they got on the string they kept turning around and going backwards!

Try my recipes, please
I can’t remember if I’ve mentioned that I’m writing a book??? I can’t say exactly what it’s about yet, but I do need some guinea pigs, if you are interested? I have some recipes that I would like feedback on. If you want to try them and let me know what you think, leave a comment (and make sure I have your email address) and I’ll send you them (I’ve got 5 that need taste-testing, but I will have more shortly)
Thanks!
Crazy Lady!
You can call me that if you like!
This Sat. Toby helped me finish up a new little chicken hut that I’d started. It’s a 3’x4′ shed that sits at the edge of the fencing of their run. The back side opens so I can put their food and water in. That way, their food and water isn’t sitting out in the elements. It use to be in the coop, but kept getting pooped on when they roosted at night.
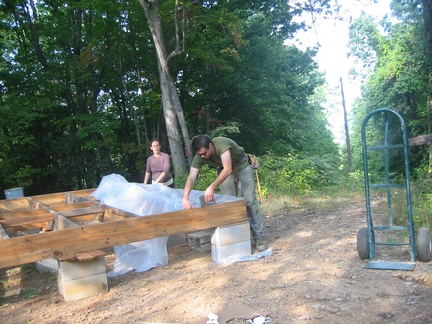
This Sunday Toby and I started on our Guest house. It will be a 12’x12′ room with a 6’x12′ loft… a cute little cottage for little retreats. (Our friend who is currently living in a tent will move in there once it’s done in exchange for some help with the land and when the little one is born.) And this one will be painted yellow!
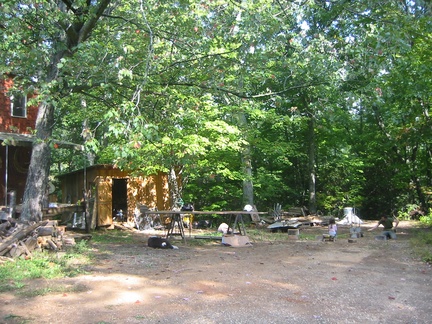
Here’s the location… to the far right of the cabin and storage building, where Toby and Kaia are (can you see them?)-
Kaia helped sketch things out for us on her drawing board-

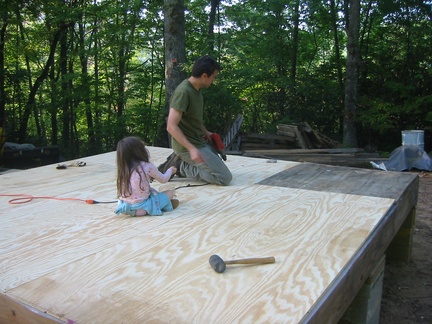
And just like the first time around, Kaia helped Toby put down the flooring-
On Monday, I got out and planted 6 fruit trees… 2 apples, 2 pears, 1 cherry and 1 plum. I wish I’d gotten a picture of me swinging the mattock 🙂 Don’t worry, I’m taking care not to over exert myself.
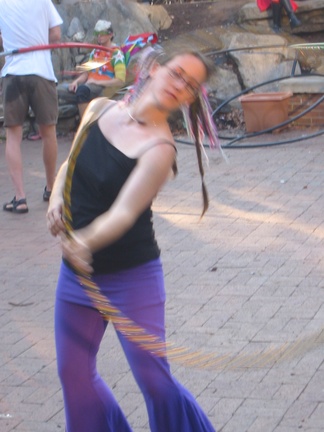
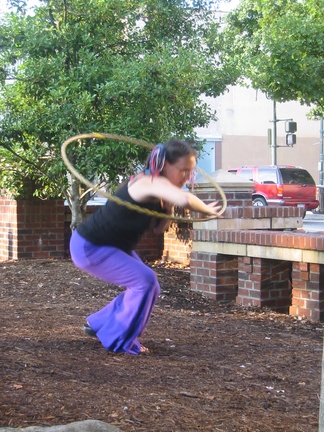
Yesterday, I went out to the last hoop jam of the season, and I dressed for the occasion. My hot pants got me asked out! I told him “thanks but I am happily married and expecting my second child”. He said “I don’t care” :-O

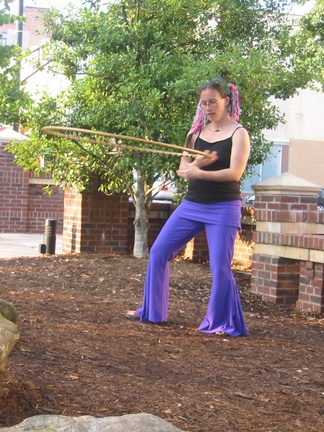

Today, I planted 5 more trees… 2 English Walnuts, 2 Persimmon, and one more apple! Wahoo!!! I can’t wait for harvest time!
This weekend, I get to take a wonderful break at the SE Women’s Herb Conference. It’s my ‘ME TIME’ of the year!
Please take a minute to vote
http://boost08.perfectprize.com/voting/
Some of my friends have an amazing opportunity to win a Forbes contest that would give $100,000 to their local, eco asheville business Honeywear. So far they are just make slings (produced locally), but they are releasing a line of organic clothes for babies this Fall. They have gone from 1500 people to top 20 (actually they are in third place right now)!! Will you take a sec and vote for them? Click on the link, vote for Honeywear, then confirm from your email. Make sure to do both steps!! Feel free to send this on! I would love to see them win!!
Thanks!
Here’s an article about the business
Hot Chili!
I canned up 10 pints of chili this morning. It was my first attempt at canning up meat, and it turned out really yummy!! Tomorrow I plan to make a very large batch of bone broth to can up. I’ll probably take some of the broth and add some chicken meat and veggies to it to make a chicken soup, and can that up too. It’s funny, I love looking at my filling pantry shelves, but I don’t want to open up any of it! I wonder when I’ll start eating from the supply 🙂

addendum: Here’s the recipe
With the night weather cooling, we’ve noticed a draft coming from under some of the doors. We haven’t done any winter insulating yet, and we need to get on that. But, in the mean time, Kaia and I sewed up some ‘door snakes’. We have a bunch of sand left over from building. So, we stuffed the snakes with sand. They are really heavy… I hope they hold up!!
Finally, truly settling in
We had our house party (/birthday party/Equinox celebration) this past weekend. Finally! The house is complete, the yard is tamed, the trash is gone… Whew!! So, this past Saturday, we invited our friends and family, and anyone who helped on the house, to come over and see the finished product. I think there were over 70 people who stopped by and everyone loved it. It was so nice to show it off (and to hear everyone ohhh and ahhh 🙂 The last guests left a little before 1am and Toby, Kaia, and I crashed hard! The next day we spent laying around and trying to recuperate. Toby and I both noted that yesterday was the first time that we really felt like we could step back and enjoy the house. I think part of it is because having the yard cleaned up makes it feel more like home, and partly also because we have been working towards this party for months (project after project to finish up before the showed off the house). We sat by the fire pit last night drinking apple cider and eating apple pie with the neighbors and it was just so blissful!
So, my next project 🙂 is working on the garden space. I’m hoping to get a bunch of raised beds built before the winter, so they will be ready in spring for lots of veggies! I also have 17(!!!) fruit trees to plant. I got a Celeste Fig as a house warming gift and we planted that on the south side of the house. We are zone 6b, so we wanted to protect it from the cold winter winds. I also have (either waiting to get planted, or on its way here) A HardiRed Nectarine, Sweetheart Apricot, Wilson Delicious Apricot, UltraMac Apple, Pink Lady Apple, Arkansas Black Apple, Grimes Golden Apple, Honey Crisp Apple, BlackGold Cherry, Santa Rosa Plum, Methley Plum, Maxine Pear, Moonglow Pear, Lake English Walnut, Champion English Walnut, Prok Persimmon, and a Yates Persimmon!!!! (Most of these are from Stark Brothers) I ordered dwarf varieties when they were available, but the persimmons and walnuts will get 30+ feet tall, so I need to do some good planning to be sure that they don’t block the garden sun when they are fully grown. I also have a ginkgo that I have babied along in a little pot for over 7 years that I can finally put in the ground. But, Ginkgo trees have been known to get up to 80 feet, so I really need to figure out a good space for this one!!
I also hope to put in some grapes, blackberries, raspberries (and many other berries), passion fruit, hardi kiwi, rose (rugosa… for the rose hips), chestnut, and what ever else will fit!! I can’t wait!!! Now, will someone please come dig some holes in this dang red clay for me! 🙂
Look at my find!

It’s an 1874 edition of John M. Scudder’s Specific Medication and Specific Medicines!!! This may not mean much to some of you, but for those of you who know herbal history, this is a very special find! John Scudder was an Eclectic herbalist who wrote fantastic herbal books, this being one of his better ones! His later (and maybe his best book) materia medica can be downloaded from here and printed out! It’s 770 pages long though… so get lots of printer ink!
Chickens
Things are going mostly well with the new chickens. The 3 older ladies are slowly adjusting to having new chickens in their space. They still don’t mingle at all, and the younger ones often get chased away from the food if the old ladies are eating. I found one of the sussex pullets dead 2 days ago. There was no sign of a fight or disease. We think she might have tried to get on the roost and been pushed off and broke her neck. Creepy thing is that she was the one chicken that hadn’t been named yet.
Anyone know how to get them to go in the chicken house at night? The one sussex left has started going in and roosting on the edge of the laying boxes, but the other 4 insist on sitting on a log outside, even if it’s pouring rain! I have to figure out a way to get them to go in at night before it gets too cold, and just for their safety. I may just put them in there 5 or 6 nights in a row and close the coop up so they can’t jump back out.
Some Body Stop Me!
I can’t stop canning things! Unfortunately, each recipe gets sweeter. I really need to work on adding some vegetables to the canning mix! Shesh!
This is the Apple Berry Syrup that I mentioned in the last post…

Yesterday, I canned up a 1/2 bushel of peaches!!

We made Spiced Peaches in a very light syrup, Peach Applesauce, and then dried some peaches.
Tonight, I made a peach pie with this recipe. We topped the pie with home made whipped cream and some home made chocolate rose syrup!!
The Chocolate Rose Syrup is something that I tried yesterday at a meeting (meetings with herbalists always entail great foods!) and I thought I’d try my hand at canning it too!!! It would make a great present.
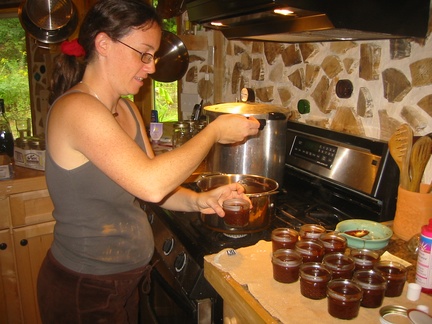
The recipe made 25 4 ounce jars!!!
Here’s how to make it:
3 cups cocoa powder
4 1/2 cups honey
2 1/2 cups rose water
2 cups water
1 Tbsp. vanilla extract
pinch of salt
Mix all in a pot and simmer 5 minutes, stirring constantly.
Pour into jars and process in a boiling hot water bath for 25 minutes.
Sit down and lick pot and all cooking utensils! Mmmmm!
OK, so next, I’ll work on green beans! 🙂
Yummmy, Yummy, and just plain yummy!
Kaia and I went apple picking yesterday at the Long Branch Environmental Education Center, about 30 minutes north of us. They have 57 varieties of heritage apples! But they also had a ton of blueberries ripe and ready for picking. So, we ended up getting ~a gallon of blueberries and ~35 pounds of apples! I have no idea what kind of apples. We just hopped from tree to tree picking the best looking ones. Then we came home and did some canning!!
We made Spiced Apple Rings, Spiced Apple Berry Syrup, and Caramel Apple Butter!!!! MMMmmmmmm
Here are the recipes:
Spiced Apple Rings
6 pounds of firm tart apples
2 cups of sugar
6 sups of water
1 1/4 cups vinegar (I used apple cider vinegar)
3 Tbsp. Whole Cloves
8 Cinnamon Sticks
Combine sugar, water, vinegar, cloves, and cinnamon in a large pan. Heat to a boil and simmer 3-5 minutes.
Core, peel, and slice apples (I use one of those apple slicer thingies that does it all at one time). Place apple rings into wide mouth pint jars and fill with hot syrup, leaving 1/2 inch head space. Tighten lids and process in a hot water bath for 25 minutes. Makes 8 pints.
Spiced Apple Berry Syrup
6-8 cups Berries
Apples, cored, peeled and in little chunks
8 Vanilla beans
Big pinch of Chinese Five Spice Powder (you don’t have to have this for the recipe, but I do, so I used it 🙂
pinch each of nutmeg and cardamom
2 cups honey
In a large pot, put 6-8 cups of berries (I used blueberries, hawthorne berries, and rose hips and cover with water 2 inches over the top of the berries. Add to this vanilla beans, Chinese 5 spice, nutmeg and cardamom. Simmer until berries are soft (about 30-40 minutes).
Strain out berries and vanilla, pressing out as much juice and pulp as possible (if your berries have no seeds, you can keep them in the syrup! Just remove the vanilla beans.)
Put the juice and pulp back in the pot and add honey, stirring well to mix.
In your 4 or 8 ounce jars, put cored, peeled apple chunks.
Cover apples with syrup, leaving 1/4″ head space, and seal the jars.
Process in a hot water bath for 25 minutes.
Makes 18 four ounce jelly jars!
Caramel Apple Butter
8 pounds Apples
1 cup water
3 cups sugar
2 cinnamon sticks, broken into pieces
8 whole cloves
2 Tbsp. peeled, minced ginger root
2 Tbsp. lemon juice
Core, peel, and chunk apples and put them in a large pot with the water. Simmer for 30 minutes, stirring often.
In another pan, heat 2 cups of the sugar over medium heat until it melts/caramelizes.
When apples are soft and mushy, pour the liquid sugar into the big pot of apples, as well as the last cup of sugar. Tie the spices in a muslin cloth and add to the mixture. Simmer for an hour, stirring often. Remove the spice bag, add lemon juice, and put into jars, leaving 1/4 inch head room. Process in a hot water bath for 10 minutes. Makes ~9 half-pint jars.
