Gardening 2009-7

With the moon in Virgo, an earth sign, the onions and leeks went in the ground today. It wasn’t so easy planting with Leif attached to me by sling, but we managed 🙂 I only put in 16 soil blocks of onion (with 3 or 4 seedlings in each block) and 12 soil blocks of leeks (with 3 or 4 seedlings in each). I just don’t have the garden space this year for more. Plus, they are so tiny and spindly, I may get some onion starts to plant elsewhere just to make sure we get some onions out of it all.

Oh, here is another great guide to planting by the signs. They have a weekly newsletter too with reminders of what to plant when.

Gardening 2009-6; Signs to garden by

Living in the Appalachian mountains, I’ve heard some of the older farmers say things like: “I won’t be planting corn today… moon’s in the heart” or “Best be planing your collards today… moon’s in the feet” I had no idea what they were talking about, but I really wanted to understand them!! It sounded so neat to be able to garden by the moon signs.

This is my first year gardening by the signs. I am mainly working with this book. It’s easy to use since it spells it all our for you; when to plant what and why. A very general overview of the signs if this:

Pisces, Cancer, and Scorpio are water signs (wet) and are generally good times to plant leafy things.
Aries, Leo, and Sagittarius are Fire signs (warm/hot) generally good for planting fruiting things.
Taurus, Virgo, and Capricorn are Earth signs (cool/cold) generally good for rooting things.
Gemini, Libra, and Aquarius are Air signs (light/bright) generally good for flowering things.

So according to the book, these signs, mixed with other aspects of the stars and moon, tell me when it is best to plant my garden.

This past fall, I attended a class on Healing by the Signs, given by Phyllis D. Light. Her family dates back many generations in Alabama, and she is lucky enough to have generations of relatives who have passed on their herbal and gardening knowledge. Though her class was primarily about healing according to your sign and what sign the moon is in, she also touched on gardening as her ancestors taught her. This is where I finally understood what it meant to “plant things when the sign is in the feet”. Here are some basic notes:

(notice as you go down the zodiac, you also go down the human body… The first sign starts at the head, the the last sign ends at the feet. A person born under a certain sign, if out of balance, may have afflictions related to the body parts that their sign rules. Also notice that the first sign is a fire sign, then there is earth, then air, then water, and it repeats down the zodiac.)

Aries (the first house) rules the head and sinuses. It is a fire sign good for pruning, turning soil and killing weeds. It is not a time for planting or starting new projects.

Taurus (the second house) rules the throat and thyroid. It is an earth sign good for sewing seeds and planting root crops. It is a good sign in which to start projects, and build.

Gemini (the 3rd house) rules the breath, lymph, and blood. It is an air sign good for weeding, cultivating and harvesting. A time for cleansing.

Cancer (4th house) rules the stomach, breasts, and upper liver. It is a water sign good for planting seeds or root crops, watering the plants, pruning/grafting.

Leo (5th house) rules the heart, spine, arteries, spleen, and lower liver. It is a fire sign good for pruning, killing weeds and cultivating.

Virgo (6th house) rules the intestines, solar plexus and carpal bones. It is an earth sign but is considered a barren earth sign because of the dry/hot Leo sign before it. It is good for killing pests and weeds.

Libra (7th house) rules the kidneys, skin, and lower back. It is an air sign for planting above ground crops (things without big roots)

Scorpio (8th house) rules the genitals and bladder. It is a water sign; prune for growth and plant seeds.

Sagittarius (9th house) rules the thighs, hips, glutials, sciatic and motor nerves. It is a fire sign good for tilling and cultivating. You can also plant some over-wintering foods such as garlic, onions, and greens.

Capricorn (10th house) rules the knees, joints, skeleton, and skin. An earth sign good for pruning for growth, planting seeds, bulbs, rhizomes, and greens.

Aquarius (11th house) rules the calves, ankles, blood, and circulation. An air sign for harvesting to store food, and weeding.

Pisces (12th house) rules the feet, lymph, synovial fluid, and glands. A water sign for sewing seeds, transplanting, grafting and fertilizing. Considered a very fertile sign.

So, I’m taking detailed notes as to what I’m planting when and will report back at the end of this gardening year to let you know how things went. If any of you out there are gardening by the signs, I’d love to hear your experiences.
Gardening 2009-5

Yesterday, The moon was in Cancer… a water sign, good for planting grafting and pruning. So, I went out and pruned the fruit trees that needed a little trim. And many of the trees that I planted last fall also needed to have their limbs weighed down. The limbs that are growing at too close of an angle to the main tree will not be strong enough to support a full load of fruit. So, the limbs are weighed down or pushed down to at least a 45 degree angle from the main trunk to encourage a stronger crotch angle/structure. I chose to weigh down the limbs since I have lots of twine and rocks; I don’t have any limb spreaders/spacers. So, for those limbs that were too close to the main trunk, I tied some twine to the limb and weighed it down with a rock. The sap is rising in the trees right now, so they are more pliable and hopefully, after a few weeks, I can remove the weights and the limbs will stay in their new positions.

I had also hoped to start more seedlings yesterday, but that didn’t happen. So, I starting them today. The moon is in Leo today, which is generally thought of as a very hot and dry fire sign, not good for doing anything but killing weeds and pruning, but, I’m hoping that if I plant the seedlings in the garden in a good fertile sign, that they will grow well. (According to my biodynamic planting book, today was still a good sign for planting fruiting things… must be because of other aspects of the stars and planets that I don’t understand). So, I made 4 more trays of soil blocks and started broccoli, kale, spring lettuces, greens mix, celery, and parsley.

The onions and leeks are doing great since I started watering them from below and added the peat. So, I think they will go out in the garden on Thursday… the moon will be in Virgo… an earth sign good for planting root crops.

Spring’s a comin’!!

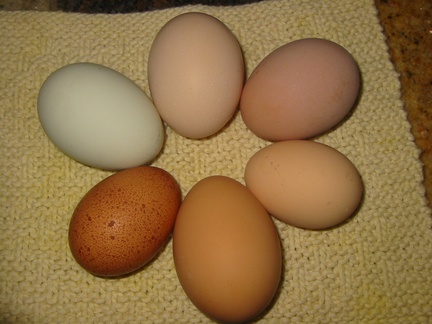
Though we had a big snow fall this past week, the chickens are telling me that spring is on its way! They have really picked up their laying and our little Welsummer, Rosie, laid her first egg today! It’s the dark speckled one… isn’t it pretty?

eggselection
The top pink egg is from our Easter Egger, Biscuit, (supposed to be an Ameraucana). Clockwise, the next egg is from Buttercup, our Buff Orpington. Next is the small pink egg from (I believe) Vera, our Salmon Faverolle. It’s a really small egg, but I don’t think our silkies are old enough to lay yet, and I saw Vera sitting on one of the small ones…
The fourth, and largest brown egg, is from Rudy, our 2 1/2 year old Black Australorps. The 5th egg is Rosie our Welsummer’s egg. And the Blue one is from our 2 1/2 year old Americauna, Sweetie.
We’re still waiting on the two silkies to start laying… probably in the next month or two.

wintersnow2009
These are from the last snow we had… aren’t the icicles lovely!
winterstalagtitesl

And Leif in his starring role as “the Littlest Gnome”
littlegnome

Gardening 2009-4

The leeks and onions aren’t doing so well. They started off great, sprouting in 2 days, but since then they haven’t done much. It’s been 2 weeks since they were planted… they should be about ready to go in the ground! Only one seed has grown to ~2 inches. The rest still look like sprouts. i may have let the soil get too dry and maybe then too hard for the roots to penetrate. The soil looked dark and moist, but it felt hard. So, instead of spritzing them from the top, I poured a bunch (probably a quart or so) of water into the bottom and they soaked it up! I also decided to put a pinch of peat on the seeds to give them a little cover… the sprouts looked too exposed… We’ll see how they do.

I know, I know…

You are probably thinking, “What are you doing on the computer, Lady??!! You have a new baby!! Go sleep or something!” But, the midwives have ordered me not to leave my room until tomorrow so that I have some time to heal (small tear). I’ve had all my food brought to me, I sleep, snuggle the baby, relax, visit with friends and family, and well… play on the computer when I get bored (which really isn’t too often, ’cause Leif is such a total cutie that I can’t stop kissing on him!!) But, while I have some time, I thought I’d post some pictures of my most recent knitting fun:

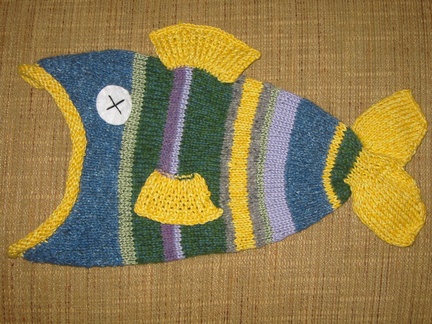
this is a hat that I gave to Toby just after Leif was born. His little Birth Day Present of sorts. I knitted it last month but had to keep it secret. Isn’t it awesome?! I may have to knit up more for each member of the family! Here’s the pattern.
fish1
fish2

And here’s a cowl I made for myself. I really like it, but I think I may do another one with a chunkier yarn so it stands up better.
cowl

And some little toys I’ve been working on. I really like the idea of having a basket of soft, hand made toys for Leif, so I’m working on filling the basket.
cupcakes

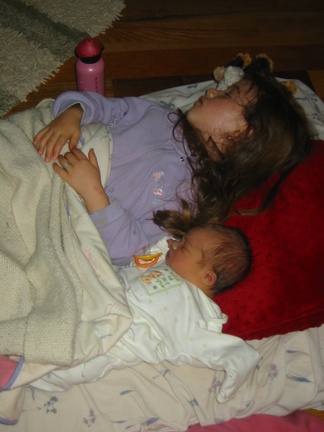
And of course, the snuggle pictures:
snuggletime

Home

Things are chugging along here.

On the gardening front, the leeks and onions started sprouting after only 2 days! It’s exciting to see our little window greenhouse working so well!

On the baby front, I’m still VERY pregnant, and really starting to get tired of it. It’s wouldn’t be so hard if I wasn’t so sore. But the baby is so low that any movement is, well, SORE! Even sleeping is hard.

Unfortunately, Kaia has had a high fever for the last 3 days. She usually runs a 3 day/3 night course with her fevers, so hopefully she will be feeling back to her old self tomorrow, but still, we are all exhausted! Herbs and home remedies don’t work on her fevers. Motrin is the only thing that will ease her when she’s aching, and sometimes that doesn’t even work.

Hope to report back with healthy child and baby news soon!

gardening 2009-3

I seeded the onions and leeks today. According to my calendar, yesterday afternoon through Saturday the moon is in Virgo and it is a good time for planting/seeding/transplanting rooting crops. I have two different kinds of onions: Copra and Red Bull. For each kind I planted 5 seeds in each 2″ soil block. I will thin them to 4 seedlings and then plant the blocks 12 inches apart in 12 inch rows in the garden. Onions and leeks grow well in bunches like this and take up the same amount of room in the garden as if you had planted them in individual block, but take less seedling block space (so instead of having 160 soil blocks with one seedling each, I only have 40 seedling blocks with 4 seedlings each, and will produce the same amount of onions.) The leeks (King Sieg) will be planted 4 seeds per 2″ soil block and planted in the garden 8″ apart in 16″ rows.

LizzyLaneFarm asked about watering the soil blocks…. they are made extremely moist and hold water very well. They also have a high peat percentage so they don’t fall apart easily. I will put the seeds in the indentation and the book recommends not even covering them. I’ll simply mist them occasionally to keep them moist. This is my first year using the block maker and soil recipe, so we’ll see how it goes. My brother-in-law has used this recipe before and said he doesn’t have to water them much because they hold so much moisture.

Gardening 2009-2

We made some soil blocks today in preparation for seeding our onions and leeks.
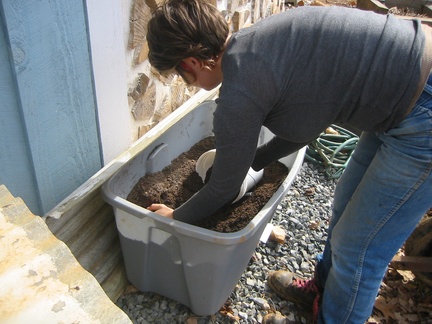
I used the soil block recipe from Eliot Coleman’s The New Organic Grower book, and did decide to buy a 2″ soil block maker from The Peddler’s Wagon. We mixed up the soil in a large rubbermade tub. I will have more than enough seedling mix, but we’ll only use what we need as we go along.
seedlingsoil

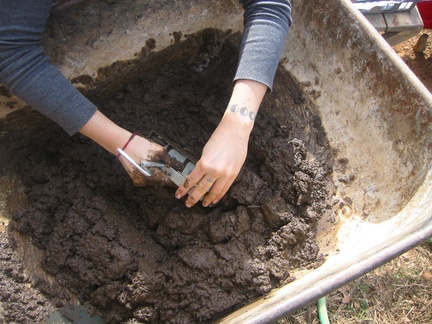
Today, my friend Heidi helped me with the blocks (my energy is running low and I’m not moving around too well so it is really nice to have the help!). We mixed about 2 1/2 parts soil with one part water and then pressed the block maker in nice and snug.

soilblocks1

Then we pushed the blocks out into little trays that we made. These trays were used to carry the plugs that went into the roof. We lined one with plastic then put another one on top to hold the plastic in and keep the seedlings from sitting in the water. (Does that make sense?)

soilblock2

soilblock3

I’ll seed these with Onion and leek seeds on Wed. afternoon or Thursday, when the moon is in Virgo, an earth sign, and good for starting root crops.

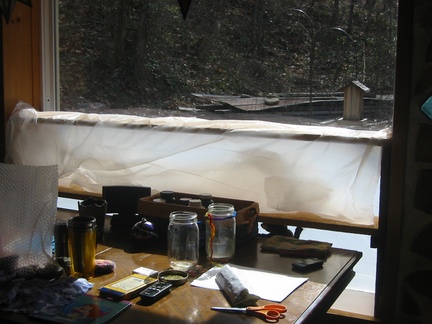
For now, the blocks are in their ‘green house’ that Toby made for me. He made a long shelf to fit in our biggest window and I’ve wrapped it in plastic to keep moisture and warmth in. I think it will work well. We’ll have to move the dining table somewhere so that I can get to the seedlings… but for now, here it is:
seedlingwindow

Crafting continues

I don’t know if you could really call it nesting, ’cause my house is in shambles and I’m not really ‘creating a nest’ for the baby, but all I want to do is sit on my butt and make things. Really, it’s been going on since last Fall. So, I think this baby has some serious crafty genes that are coming out through me!

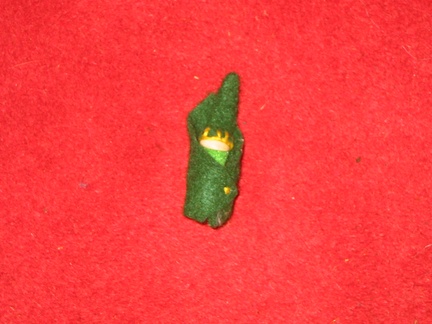
So, inspired by a little felted gnome that I got from Kristine
leafgnome

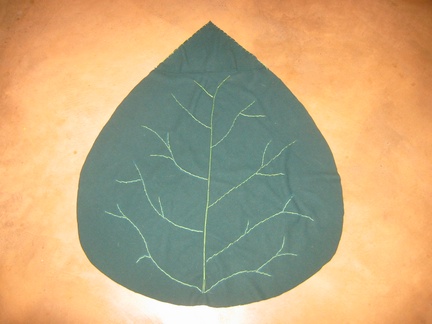
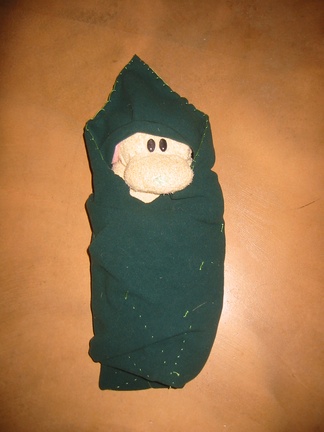
I decided to make a leaf blanket for the baby. I got some green fleece (on sale! Yahoo!) and made a pattern on large construction paper. Then, using some of Kaia’s washable markers, traced the pattern on the fleece and cut it out. I also cut out a triangle to go at the top of the leaf for a little hood. Then I marked a vein pattern on the leaf and sewed thread on top of that. Came out cute, eh? From tip to bottom, the leaf is a little over 3 feet, so it should fit for a while. I have a magnetic snap that I might put on after the baby comes and I see where it will fit best… or I may use something that is more adjustable for the baby to grow with.

leafblanket1

leafblanket21

Of course, now Kaia wants one, but I’m tired of the needle work, so, maybe I can just make her a hooded cape like thinging without a leaf pattern….

And once you open up the leaf blanket to reveal the baby, you might see these:
babylegs

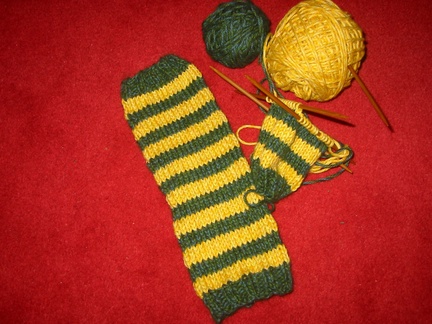
I knitted up some baby leg warmers for the little one…. They turned out really cute, but much too big for a newborn (maybe 6 months to a year). So, I plan to knit a much smaller pair once I find the right yarn (man I love yarn 🙂

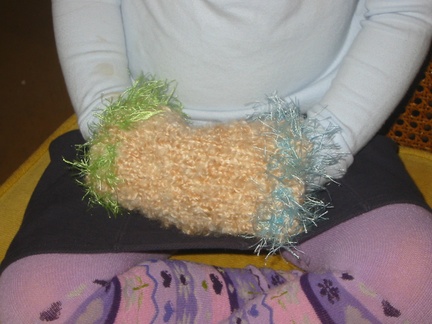
Kaia took the leg warmer and put it over her hands and said “Look mom! It’s a perfect hand warmer!” So, since I can’t stop, I knitted her a muff out of some fuzzy yarn from my stash. It turned out really cute, but man was that fuzzy stuff hard to knit with!

muff

All else is cruising along here at the homestead. The chickens are all laying again (except the younger ones), the guest house is livable though not complete (needs finish work and for the water to be run), and my belly is getting ever larger! Anytime in the next month we will finally get to meet this little one!

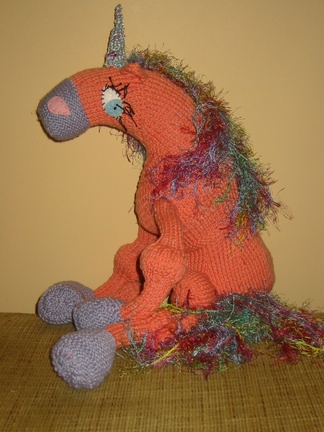
Kaia’s Unicorn

unicorn7
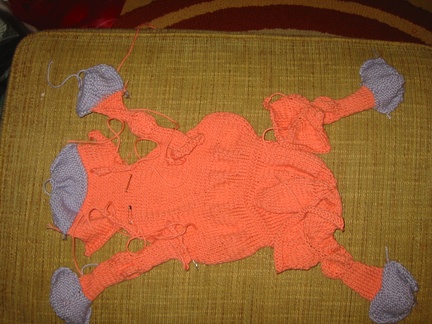
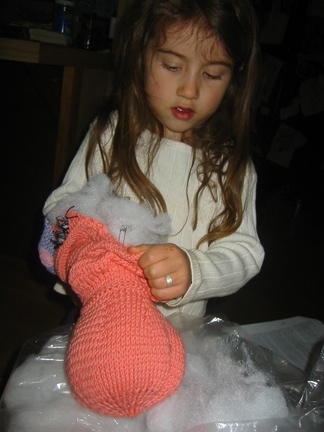
Here’s my latest knitting project. I started working on it a few weeks ago and it was amazingly easy (considering how hard it looked). There was an insane amount on increases and decreases in order to make the feet, knees, shoulders, hips, etc. So, I couldn’t do anything else when I was knitting or else I’d mess up. I learned how to do a mattress stitch to sew her up for stuffing, and the patternonly used 2.5 skeins or yarn (not six like it called for).
Kaia picked out the yarn colors and asked me to add a horn to make her a unicorn. She hasn’t seen the finished product yet, though. I’m going to slip it in her bed with her tonight…

ready to be sewn up
unicorn1

getting stuffed
unicorn2

Unicorn meditating
unicorn3

Unicorn wary of cameras
unicorn4

Unicorn at rest
unicorn5

Modeling headshot
unicorn6

Old World Booties

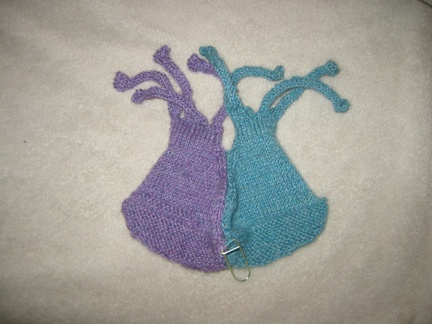
I found a fantastic baby bootie pattern from Knitting Daily and had to buy it. The info said it is ‘intermediate’ knitting level, and I’m definitely not there yet, but they were too cute to pass on.

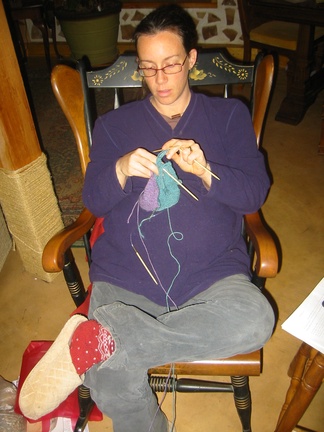
I’m very happy with how they turned out and proud of myself for making them 🙂 It was a great learning pattern for me. I went to knittinghelp and watched lots of videos to learn some of the stitches the pattern called for. I learned how to knit two colors with ‘intarsia’ method, learned the difference between stockinette stitch and seed stitch, learned how to kf&b, ssk, p2tog through back loop, and how to make an I-cord. They knitted up really fast considering all the new stuff I was doing. I basically worked on them two evenings and a day.

Here I am… large and in charge:
bootiesinprogress

This is what the pattern looked like before I sewed up the sole and back of the bootie:
bootiesinprogress2

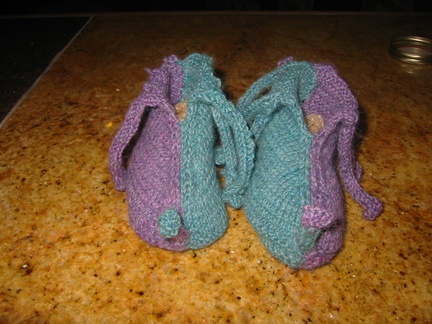
Here they are… the knitting is done and they are ready to be felted.
bootiesreadytofelt

I’d never felted anything before, but the ladies at the yarn shop told me you couldn’t do it easily in a front loading washer. I did a bit of research and found that, though it is possible to felt in a front loader, it takes 3-4 cycles in the wash…. seemed like a waste of water. So, I looked up how to felt by hand and that seemed pretty simple. We keep our water heater set on 120 degrees, and I wanted it hotter for the felting. So, I boiled water hot enough that my hands could still stand it, poured it into the sink (with the drain closed) added a tsp. or so of dish liquid, put on some rubber gloves and went at it. I kneaded and rubbed roughly for 5 minutes then took them out to see how they were doing. I also rubbed them up against an old cutting board that has lots of texture to it. Then I shocked them with cold water and put them back to the hot for about another 10 minutes of rough treatment, and they were done! They should fit the baby’s newborn feet.

bootiesfelted2

bootiesfelted

Gardening 2009 – 1

I’m very excited to get back into gardening, but I’m also very nervous. I really want to make my time and efforts count and be able to grow as much as possible to feed my family. Still, I feel like there is so much that I don’t know. Everyone seems to have their own ideas of the right kind of soil mixture, the right way to fertilize (or not), the proper way to get rid of or live with pests, etc…. So, this year, I’ve decided to document all of my gardening endeavors on my blog. Then, I can take a good look and what worked and what didn’t. I am planning on using organic and bio-intensive methods, including gardening by the signs, crop rotation, and companion planting. I’ll be following The North American Biodynamic Sowing and Planting Calendar .

So far, I have my garden space planned out. We have built some raised beds and have about 270 sq.ft of gardening space. It’s not much, but we have lots more rocks to build more beds in the spring if possible. Moving all the rocks and dirt has become impossible for me in my third trimester, and Toby is already working his butt off. So, once the weather warms up and I’m feeling up to it, I will try to double our gardening space.

By late winter, I need to:
-finish filling the raised beds with composted dirt
-clean up the established herb and strawberry beds
-transplant the hops (’cause I’ll be using that space for onions and lettuce now… we are going to plant the hops in front of the cabin so it can grow up the building)
-transplant the passion flower (I’m going to move it to the grape area so it can use the trellises)
-prune the fruit trees
-place and fill the 8th raised bed box

Garden needs/things to make (that I can think of);
rain gauge (I had one, but it’s been beat up and trampled to death)
bird flash tape (I found that this worked really well when I used it in my last garden in 2005)
labels for the seedlings/plants
mini greenhouse for starting seedlings (I’m planning on using plastic bread trays to hold the soil blocks. They stack easily with some head space and I can put them in front of my south facing glass doors. Then I’ll cover them with plastic to keep the warmth and moisture in)
soil block maker (my brother-in-law has one he said I could borrow, but I imagine we will both be needed it at the same time and often through out the year. So, I may try to order one, or make one)
Ingredients for my seedling soil mix (following Eliot Coleman’s spoil block mix, I will need: peat, lime, bloodmeal, phosphate, greensand, I already have sand, garden soil and compost)
trellising (I plan to grow ‘up’ as much as possible. All the vines will be trellised)
limb spreaders (I will need to work on opening up the limbs on all the fruit trees we just planted so that the sun and air can reach as much of the tree as possible. These can be expensive if you need a bunch, so I may try making some… in my spare time! Ha!)
Metal rods for floating row cover (I have a large amount of floating row cover, but no rods to support it over the plants. I’d like to use the cover for season extension as well as pest control)
fertilizers/pest control (I have none of this stuff… whether it’s fish emulsion or organic pest controls (like ‘surround’ or diatomacious earth), all of it got lost/tossed/destroyed over the past 3 years of moving and building. I also don’t know what I’ll do about the fertilizers… all of the natural and organic stuff has a strong smell to it and Suki digs up anything I put it on. Last time I used a seaweed spray, she dug to china trying to find the fish under the soil)

So, I’ll get started on as much of this as I can in the next month or so… seedlings (onions and leeks) get started indoors here in mid. Feb (right when I’m due!), so I want to be sure everything is in place and ready to go.

Knitting frenzy

Since Kaia and I took that knitting class at the beginning of the month I have been having so much fun knitting! I think I’ve really got it now! (And no, I don’t think I’m nesting yet :-))

knittingfrenzy

First I knitting Toby some wrist/hand warmers. I got the basic pattern from a youtube video and tweaked it so that they were larger and longer to cover more of the forearm.

Then, I started on a rainbow set for Kaia (I got the pattern from here and decreased the size to fit a child’s hands). Isn’t the wrist ruffle cute??? After knitting one, which I thought turned out adorable, she decided she didn’t want them and now one of her stuffed animals wears it as a sweater. I may knit myself a pair!

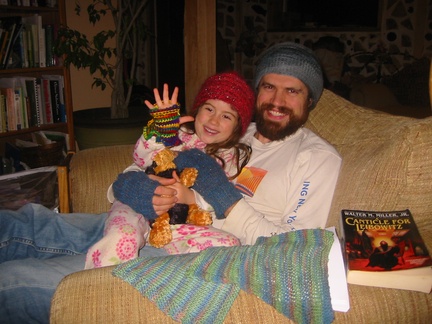
Then I went on to a hat pattern. I knitted myself the red hat (that Kaia is wearing) from this site (on the side bar under “for you”). Toby liked it so I altered the pattern so that it didn’t have holes in it and was larger to cover his ears.

Then, I decided we needed some new dish cloths and used this cute pattern (the yellow one) to knit up a couple.

This is fun!! Unfortunately, I’m spending too much money buying new needles and cool yarn!!

Seeds have been ordered…

…and when I look at what I’m wanting to grow next year, even though I’ve planned out the whole garden, I’m feeling a bit overwhelmed. 🙂 I like having things organized and it’s been a few years since I’ve gardened (since we’ve been building). Now, I don’t remember all the stuff I knew… like starting seedlings, floating row covers, companion planting, cover cropping, rotating crops, pests, etc. Oy! At least the baby is due before I will need to start the seedlings.

I got my seeds and tubers from FEDCO and Seeds of Change

Sugarsnap Snap Pea
BEAN, POLE, BLACK SEEDED BLUE LAKE
BEAN, POLE, KENTUCKY WONDER
Prescott Fond Blanc Cantaloupe
Sweet Dakota Rose Watermelon
Arava Cantaloupe
Calypso Pickling Cucumber
General Lee Slicing Cucumber
Raven Zucchini
Tromboncino Summer Squash
Saffron Summer Squash
Paydon Heirloom Acorn Winter Squash ECO
Uncle Davids Dakota Dessert Winter Squash
Zeppelin Delicata Winter Squash
Squisito Winter Squash ECO
Jarrahdale Pumpkin
Rouge Vif detampes Pumpkin
Red Ace Beet
Chioggia Beet
BEET, LUTZ SALAD LEAF
King Sieg Leek
Copra Onion
Red Bull Onion
Space Spinach
SPINACH, AMERICA
New Zealand Spinach
Summer Lettuce Mix
Winter Lettuce Mix
Greens Mix
Bright Lights Chard
Forest Green Parsley
Windsor Broccoli
Fiesta Broccoli
Winterbor Kale
Golden Self-Blanching Celery
Pingtung Long Eggplant
Rosa Bianca Eggplant
Cosmonaut Volkov Tomato
Cherokee Purple Tomato
Rose de Berne Tomato
Pineapple Tomato
WOW! Tomato ECO
Peacevine Cherry Tomato (I’m going to plant the cherry tomatoes on the outside of the chicken coop so that some of the plant can droop into the coop and the chickens can enjoy some of the harvest 🙂
Amish Paste Paste Tomato
Potatoes: Banana, Caribe, Sangre, All Blue, Elba, Red Cloud
ASPARAGUS, JERSEY GIANT
Bouquet Dill
Kablouna Calendula Mix
Resina Calendula
FENNEL, PERFECTION
CILANTRO, SLOW BOLT (SANTO CILANTRO)
There are lots more companion flowers and herbs that I want to get, but I may just buy those as seedlings later.

Manly Mitts

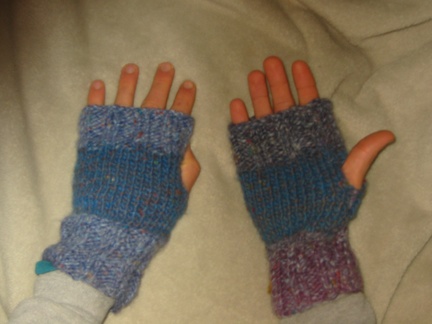
Toby heads out to the little cabin every morning to start a fire and begin working. It doesn’t warm up out there for a few hours, and it’s hard for him to keep his hands warm while he’s typing. So, I made him some fingerless gloves, AKA Manly Mitts. Aren’t they cute? It was a really easy project for a beginning knitter. I got the idea from here and then made them a little larger to fit his hands.

Growing seedlings without energy…

I’m starting to plan out my garden for next year and trying to figure out how to get seedlings grown. It seems like we will need to buy warming mats (to keep the temp. constant) and maybe even grow lights (since we are on the north side of a mountain and may not get enough daylight in Feb. and March). But, I don’t want to spend more money or use the energy to power this stuff. Once it gets warm enough outside, we can use our cold frame for starting the seedlings. But, to get the greens, broccoli, kale, and such started in early March, it will be too cold outside, even in the cold frame. What do you all do?

Big Crafty

I’ve been feeling really crafty lately! It all started this past Wed. when Kaia and I went to a kids knitting circle. She’s been wanting to learn how to knit, but isn’t really ready to use knitting needles, so we went to the circle to see if we could get some tips for her. She ended up learning how to finger knit and loves it! She started at the circle and knit the whole way home, through the evening and until bed. Then she woke up and knit some more… and then all the way to school, and all the way home. And it stayed like this until she had over 30 feet of finger knitted yarn. She finally finished it up so she could wrap it around our solstice/christmas/yule/festive evergreen tree. Right now she’s only knitting on one finger but this shows the basic idea.

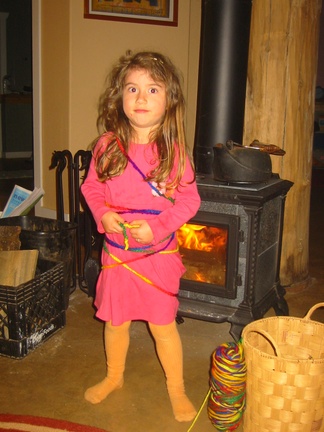
Kaia wrapped herself up in her knitting before wrapping the tree:

After Kaia’s knitting class, I just happened to be headed to a ladies night with some friends and learned how to knit hats. All I’ve ever done up until now was simple stitch scarves and blankets, but I love knitting. I stopped doing it when I tried to read patterns and couldn’t figure out what I was doing. I think I’ve got the hang of it now! Now I just need a high paying job to afford all the awesome yarn that I want to get!! Here’s my first attempt. It was supposed to be a newborn hat, but it turned out a bit wide, though not deep enough for Kaia (but she was gracious enough to model it for me).

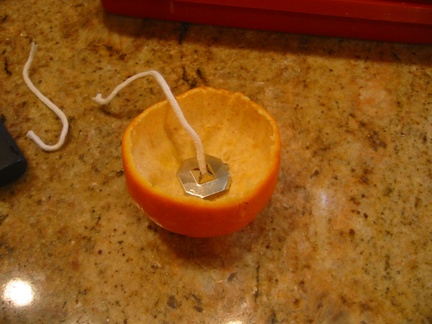
Well, then I got inspired to make something with all the tangerine peels we have right now (I ordered one of those citrus fruit boxes!) It wasn’t as easy to do this with thin tangerine peels as I imagine it would be with oranges or lemons, but they still turned out cute!
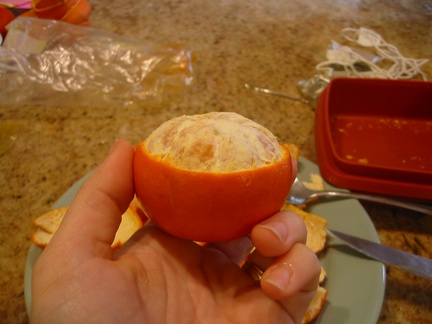
First, lightly score around the skin. I took off the top 1/3 of the tangerine.

Next peel off the top 1/3 (with the tangerines, I really wasn’t able to save this or make a candle top out of it because it was too small).

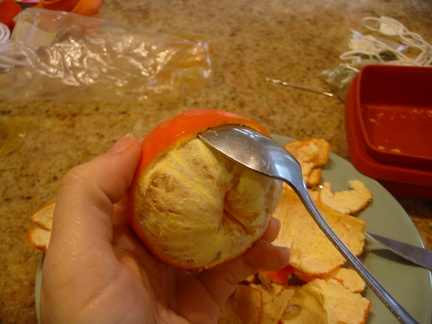
Then, slide a spoon under the remaining skin and loosen as much of it as you can, working your way around.

Once it is fairly loose, slide the peel back and work your thumb in to peel the remaining skin off of the bottom. This is tricky as it may want to break at the end, so go slowly.

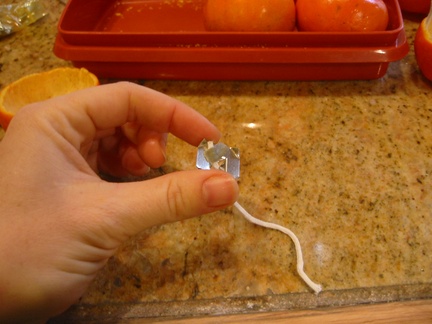
Once I had a bunch of bottom peels ready, I put some candle wax in a double boiler to melt. Then I got the wicks ready. I used some putty and stuck the wick to a metal candle thingy (don’t know what it’s called) to get it to stay in place better.

Then I pressed this into the bottom of the peel.

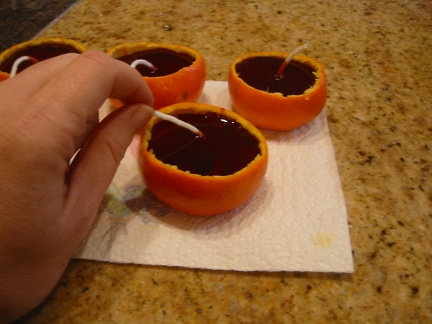
Then I poured the melted wax into the peel. After it cooled just a touch, I stood the wick up in the center (if it wasn’t already there).

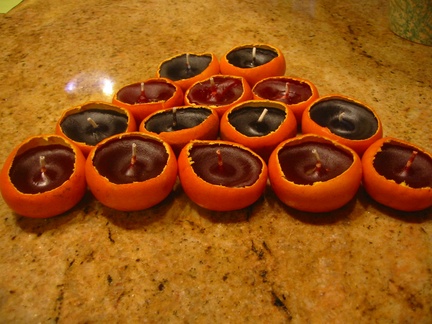
And here they are… wick trimmed and all. We used red, orange, purple, and blue colors in our wax (though it’s hard to tell from the picture)

The Best Garlic Chowder Ever!!!

Ok, so it’s the only garlic chowder I’ve ever tried, but it is fantastic! I got the recipe from a restaurant in San Francisco called ‘The Stinking Rose’, where every dish is full of garlic. (I found the recipe on-line, so I imagine it’s ok to pass it on.) This recipe made almost 4 quarts, so I think I might double or triple it and can some up (I’ll leave the cream and parsley until I heat it up to eat it)

Garlic Chowder

1/4 cup olive oil
4 ounces bacon, diced (optional)
2 medium onions, diced
1/2 bunch celery, diced
1-2 fresh leeks, cleaned and chopped
5 heads roasted garlic (see recipe below)
2 tablespoons chopped fresh thyme
3 medium potatoes, peeled and diced
6 cups chicken stock
Salt and white pepper to taste
1 cup whipping cream (optional)
1/2 cup chopped fresh parsley

In large pot, heat olive oil. Add bacon, if using, saute briefly, and then add onions, celery and leeks. Saute until onions are translucent.

Remove roasted garlic cloves from head by squeezing the roasted head. Add the soft cloves to pot.

Add thyme, potatoes and chicken stock. Bring to simmer and cook until potatoes are tender, about 30 minutes. Season with salt and pepper. Add cream and parsley. Remove from heat and serve. Makes 6 to 8 servings.

To make Roasted Garlic:
Preheat oven to 375
Cut off the tips of the cloves (while the garlic is still part of a head) and place whole garlic head on a baking sheet.
Bake for 30 minute.
Cool and pop/peel the garlic cloves out of their skins.

Grandmother bread

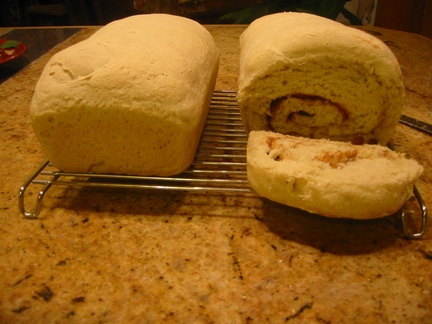
I’ve been doing lots of baking lately, and am really enjoying our new kitchen! I never have made much bread… maybe a little here and there in my bread maker. I have a vague memory of making bread with my mother when I was young and thinking how hard it was to get it kneaded and how much time it took to make. But, now that I’ve gotten into making my own bread, by hand, I’m really enjoying it. I love the kneading part! Plus, the smell of fresh baked goods is just so homey and comforting! I found this recipe for Grandmother Bread and love how simple it is. It comes out great every time. I’ve tried the white bread version, the whole grain bread, herbed cheesy bread, and cinnamon swirl. MMmmmm!!

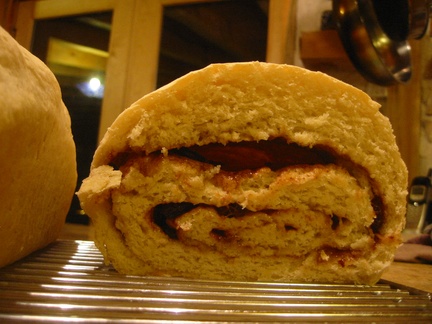
Tonight’s mix was a white bread loaf that I will use in the thanksgiving stuffing, and a cinnamon swirl (It would be really easy to adapt this recipe to stuff it with pesto, or ham and cheese, etc. instead of cinnamon sugar)

What? You can’t really see the sweet, gooey goodness well enough? Here, have a close up!

Check out what I picked off of the roof yesterday! There are lots of calendula flowering, too… if they don’t freeze tonight, I may harvest them and make a nice oil or something.

And, since I begin my third trimester tomorrow (Oh My God!! Where did time go??!!) I thought I’d post a belly picture. I really feel very large! I’m still not 100% convinced that there aren’t two in there 🙂 And we already know that this child will not sleep all the time like Kaia did, ’cause he never stops moving!

Simple Soap Recipe

I’ve been making my own soap for about 10 years now. It started out as glycerine soaps, but they melted away so quickly. One of my first dates with Toby was making lye soaps, so it’s been lye every since. I love making a big batch of yummy smelling soap, having enough to last us for a long while, and being able to give some as gifts. It’s so nice to pull one of my own soaps from the closet when I need more.

So, here is my quick and easy soap recipe. I almost always start with this and add to it whatever I’m in the mood for. (I promise to post pictures of these steps the next time I make more soap!)

You will need:
-200 grams of lye (it’s not so easy to find this any more. Recently, I was able to get some at the ACE Hardware store. It may be called ‘Red Devil Lye’)
-19 ounces water
-21 ounces Olive Oil
-14 ounces Palm Oil
-16 ounces Coconut Oil
-cooking thermometer
-rubber gloves, old clothes, glasses
-old rubber mixing spatula
-electric beater/mixer

(this will make ~20 3-ounce or 15 4-ounce soap bars)

The first thing I do is line my soap mould. You can use a bread loaf pan, a rectangular tupperware, anything that is around 6×14 inches, or so… not an exact science (it’s also nice if your mould has a cover or something that will work as a cover). You will want to line this with wax paper, making nice crisp corners and taping everything together. This keeps the soap from coming into contact with the actual mould. (If you are using a flexible tupperware, this isn’t necessary since you can pop the soap out, but I still find it easier to line it.)

Next, measure out the lye into a large glass bowl.

Measure the water into a separate container (I use a quart jar).

Take both of these things outside, wearing your rubber gloves and other protective gear. Slowly pour the lye into the bowl of water and mix with the spatula. It will get hot very fast (up to 200 degrees) and put off nasty fumes. At this stage, it is also caustic and can easily burn the skin. So stay up wind of the bowl and mix carefully until the lye is dissolved in the water. Then wait for the lye/water mix to cool to 80-100 degrees.

While waiting, measure all the oils and warm them in a large ceramic or stainless steel pot until the oils are at 80-100 degrees.

When both the lye solution and the oils are 80-100 degrees, carefully pour the lye mix into the oils. With protective gear on, use the mixer/beater to mix it all together. This is called saponification (when the oils and lye come together and neutralize the lye) . It may take 5 minutes, it may take 20, but at some point you will notice that the mixture gets a little thicker. You will see the mix ‘trace’ or leave a mark of where you have just mixed… Kind of like cake batter, but not that thick.

At this point, you are ready to add any extras. I usually use essential oils and will add 2 Tbsp. of what ever smell or mix of smells I chose. I might also add ground herbs or flower petals, ground oats, clays or poppy seeds (for a good scrub). I haven’t tried it yet, but I’m thinking of adding colors, like a little poke berry juice or turmeric, to see what it looks like.

Blend these all in quickly.

Pour into your mould.

If you want to have swirls in the soap (like the pictures in the post below), you can add your powdered herbs or colorants at this stage and use the spatula or a butter knife to gently cut/mix them in.

Cover your mould and place it in a warm place to rest (I usually wrap mine in a towel to keep the heat in).

Check your soap every day. After one to three days, your soap will be firm enough to cut into soap slices. (I almost always cut it up after a day… this recipe seems to harden pretty quickly.) You can cut it into whatever shape you want. I usually cut them about 1-1.25 inches by 3 inches, or so… again, not an exact science.

Lay the soap out to finish curing for at least 3 weeks. Some people like to cut the tops and edges off to make them look more finished or take the ‘ashy’ look off of them. I leave it all on… it’s not harmful and I like the home made look.

There are so many different ways to make soaps and so many things that can be added… milk, honey, cocoa butter, other oils…. Start with a simple recipe and have fun experimenting. Get a good book, too, so you have good references.
Week in Picture Review

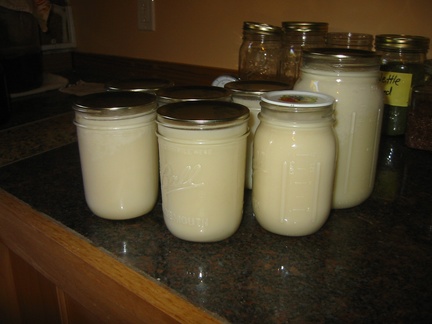
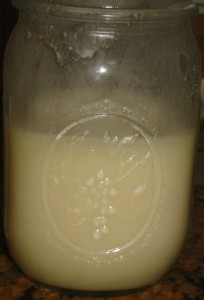
Here’s all the lard after it was canned. Looks like creamy milk, doesn’t it! I’m really enjoying using it to cook up eggs, veggies, etc…

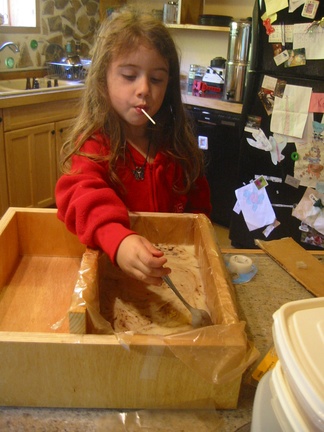
Kaia and I spent some time making some holiday soaps. This was a batch of Wintergreen/Sweet Orange soap, and she’s mixing in a little cinnamon powder ‘to make swirlies!’, while enjoying a piece of Halloween candy.

The next day, we cut it up into pieces and will let it sit 3 weeks before using it (so it cures and isn’t so caustic). The first batch made 20 pieces of soap (~3 oz each)

The second batch we doubled and ended up with another 44 bars! This one is Clarysage/Ylang Ylang with swirlies of cardamom.

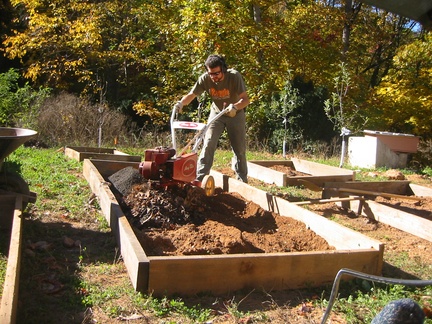
We’ve been getting the garden beds ready. Made 8 raised bed frames with scrap wood. Hopefully that will be enough to get us started this spring. Toby tilled the soil and mixed in lots of leaves and some roof dirt (which will help break up the clay and add some compost). I need to add more compost, manure and soil and will plant some rye for the winter.

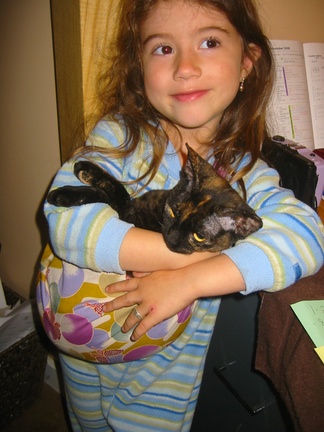
We gave Kaia a mini-sling to practice carrying doll babies… But she found a fuzzy, wiggly doll baby she likes better… Snuggle or torture? It depends on who you ask.

She’s also decided she wants to learn how to knit. So she plopped down in the rocker by the fire (an appropriate place for knitting, I think) and pretended for a while. We are going to start a kids knitting group with some other moms when we get back from Disney.

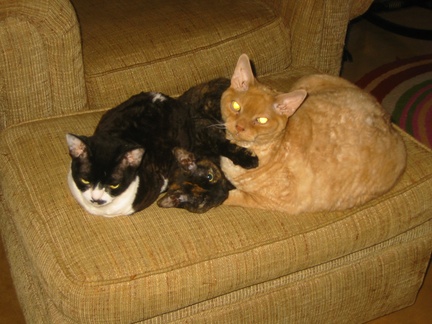
And, what post would be complete without snuggling kitties… Isabella, Daisy, and Chub Chub Max.

Rendering Lard & Italian Delicacies

I’ve been reading a lot of books on food lately… Real Food by Nina Planck, Animal, Vegetable, Miracle by Barbara Kingsolver, Know your Fats by Mary Enig… All of them have got me thinking about my own use and consumption of fats. I primarily use Olive Oil (imported), Coconut Oil (imported), and Butter (haven’t found a local farm supply, yet) in my cooking. And though all of these oils are healthy fats (non -hydrogenated), none of them are local, and they can cost a pretty penny. So, I decided to head down the road to a sweet family run farm and get some fatback! Hickory Nut Gap Farm raises their animals organically, free range, grass fed, and with love. AND They sold me the fatback for $1/pound!!! I’ve never rendered fatback into lard before, but after learning more about how healthy lard actually is for you, I thought it would be nice to learn how to use it better. (After the big push for using vegetable oils and fat-phobia, lard use has seriously decreased. But, did you know that lard is actually better for you than vege oils which are often hydrogenated (much worse for the body) and extracted with nasty chemicals! lard raises HDL (‘good cholesterol’), lowers LDL (‘bad cholesterol’), is 60% unsaturated fat, and has Vitamin D, E, and antimicrobial properties.)

So, this morning, I began the rendering process. I got most of my directions from here (Jan 12th entry).

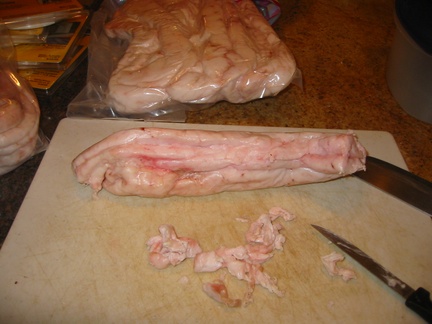
I started with 12.5 pounds of fatback, but put 2 pounds aside to make Lardo (see below). I cut the remaining 10.5 pounds into little chunks, as small as I could without agonizing over it. (The more surface area you have, the faster it renders).

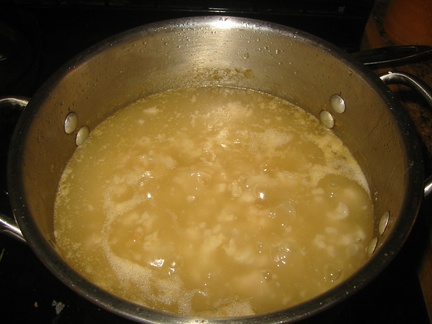
Then I put the chunks into a pot with ~2-3 inches of water on the bottom (this helps keep the fat from burning on the bottom, and boils off before you are done). I was worried about the pot overflowing, so I got a second pot going. (In the picture, the larger pot has been cooking for a while and looks more gray.) But once they cooked a while, I ended up combining the two.

The fatback should boil over low/med heat to melt the fat. Stir it very frequently to keep it from sticking or burning on the bottom.

When I was reading about it online, people complained about the smell and recommended doing it out doors. But, I liked it…. the smell was like cooking ground beef or hamburgers and wasn’t overwhelming.

I spent most of the day in the kitchen, stirring the lard and making other food. By 4pm the fat was getting close. There was a little scum on the top, so I kept skimming that off.

About 5pm, the oil seemed to change… the boiling bubbles were smaller and the oil looked more golden. It didn’t seem like I was getting any more out of the little pieces that were left in the pot. So, I poured the oil through a cheese cloth and strainer into a large pot, then poured the oil/lard from the pot into pint canning jars. It made ~8.5 pints. What was left in the strainer and in the bottom of the pot is called ‘cracklins’. They were mostly crispy and are supposed to be great on salads or spread on bread. I tried them and they were ok, but a little too heavy for me. So, I put them in a tupperwear and will give them to the dog with her meals. Lucky dog!

The jar that wasn’t completely full, I put in the fridge, and the rest I canned. I followed my canning books recipe for canning pork. I filled the jars full and put them in a pressure canner at 12 pounds for 90 minutes.

The lard turned out white and tasty! I plan to use it when cooking eggs, frying, with pastries… when ever I can! I have to say, I’m proud of myself. I said prayers of thanks for these animals who gave their fat and feel good that I’m using all of the animal and not being wasteful…. Meat for eating, lard for cooking, bones for broth… If I’m going to be a part of this omnivore cycle, then I want to thankful to those plants and animals who nourish my body and eat as sustainably as possible.

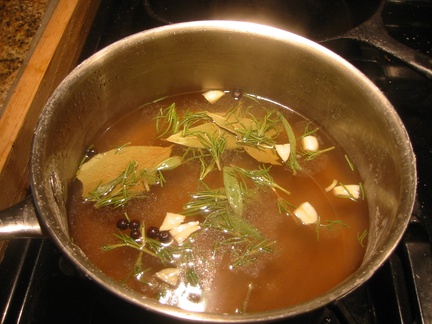
While I was making the lard, I also decided to try my hand at an Italian delicacy, Lardo. It’s the italian way of preserving fatback. Instead of just salting it, they also add spices. I got my recipe from here. I made a salt water brine and then added garlic, rosemary, sage, bay, and juniper.

I put 2 pounds of fatback in a glass container and, once the brine tea cooled, poured the tea over the fatback. The fatback wanted to float, so I used a half-pint canning jar to hold it down and then put the top on. Into the fridge it went, where it will stay for at least three months (though some italian recipes call for 6-10 months!) Every 30 days I’ll flip it over. Once it’s done, you take it out and dry it off. Then you slice it very thin and eat it over toast or polenta.

Crazy Lady!

You can call me that if you like!

This Sat. Toby helped me finish up a new little chicken hut that I’d started. It’s a 3’x4′ shed that sits at the edge of the fencing of their run. The back side opens so I can put their food and water in. That way, their food and water isn’t sitting out in the elements. It use to be in the coop, but kept getting pooped on when they roosted at night.

This Sunday Toby and I started on our Guest house. It will be a 12’x12′ room with a 6’x12′ loft… a cute little cottage for little retreats. (Our friend who is currently living in a tent will move in there once it’s done in exchange for some help with the land and when the little one is born.) And this one will be painted yellow!
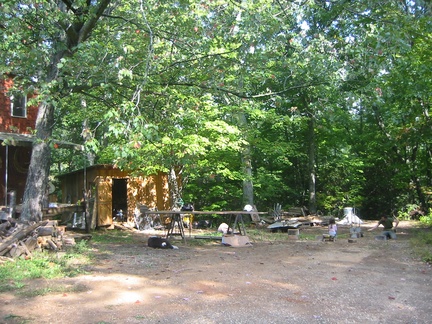
Here’s the location… to the far right of the cabin and storage building, where Toby and Kaia are (can you see them?)-

Kaia helped sketch things out for us on her drawing board-

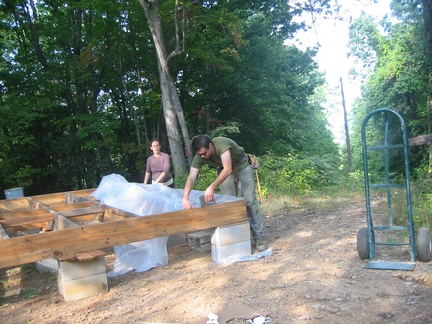
We built the foundation-

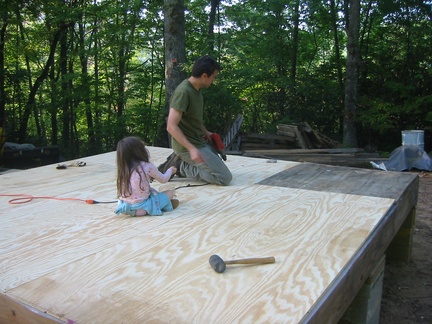
And just like the first time around, Kaia helped Toby put down the flooring-

On Monday, I got out and planted 6 fruit trees… 2 apples, 2 pears, 1 cherry and 1 plum. I wish I’d gotten a picture of me swinging the mattock 🙂 Don’t worry, I’m taking care not to over exert myself.

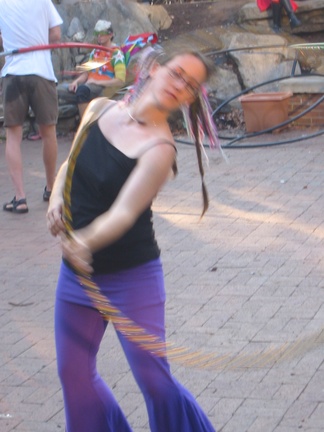
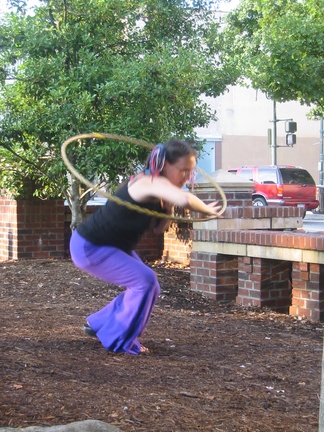
Yesterday, I went out to the last hoop jam of the season, and I dressed for the occasion. My hot pants got me asked out! I told him “thanks but I am happily married and expecting my second child”. He said “I don’t care” :-O


Today, I planted 5 more trees… 2 English Walnuts, 2 Persimmon, and one more apple! Wahoo!!! I can’t wait for harvest time!

This weekend, I get to take a wonderful break at the SE Women’s Herb Conference. It’s my ‘ME TIME’ of the year!

Hot Chili!

I canned up 10 pints of chili this morning. It was my first attempt at canning up meat, and it turned out really yummy!! Tomorrow I plan to make a very large batch of bone broth to can up. I’ll probably take some of the broth and add some chicken meat and veggies to it to make a chicken soup, and can that up too. It’s funny, I love looking at my filling pantry shelves, but I don’t want to open up any of it! I wonder when I’ll start eating from the supply 🙂


addendum: Here’s the recipe

With the night weather cooling, we’ve noticed a draft coming from under some of the doors. We haven’t done any winter insulating yet, and we need to get on that. But, in the mean time, Kaia and I sewed up some ‘door snakes’. We have a bunch of sand left over from building. So, we stuffed the snakes with sand. They are really heavy… I hope they hold up!!

Finally, truly settling in

We had our house party (/birthday party/Equinox celebration) this past weekend. Finally! The house is complete, the yard is tamed, the trash is gone… Whew!! So, this past Saturday, we invited our friends and family, and anyone who helped on the house, to come over and see the finished product. I think there were over 70 people who stopped by and everyone loved it. It was so nice to show it off (and to hear everyone ohhh and ahhh 🙂 The last guests left a little before 1am and Toby, Kaia, and I crashed hard! The next day we spent laying around and trying to recuperate. Toby and I both noted that yesterday was the first time that we really felt like we could step back and enjoy the house. I think part of it is because having the yard cleaned up makes it feel more like home, and partly also because we have been working towards this party for months (project after project to finish up before the showed off the house). We sat by the fire pit last night drinking apple cider and eating apple pie with the neighbors and it was just so blissful!

So, my next project 🙂 is working on the garden space. I’m hoping to get a bunch of raised beds built before the winter, so they will be ready in spring for lots of veggies! I also have 17(!!!) fruit trees to plant. I got a Celeste Fig as a house warming gift and we planted that on the south side of the house. We are zone 6b, so we wanted to protect it from the cold winter winds. I also have (either waiting to get planted, or on its way here) A HardiRed Nectarine, Sweetheart Apricot, Wilson Delicious Apricot, UltraMac Apple, Pink Lady Apple, Arkansas Black Apple, Grimes Golden Apple, Honey Crisp Apple, BlackGold Cherry, Santa Rosa Plum, Methley Plum, Maxine Pear, Moonglow Pear, Lake English Walnut, Champion English Walnut, Prok Persimmon, and a Yates Persimmon!!!! (Most of these are from Stark Brothers) I ordered dwarf varieties when they were available, but the persimmons and walnuts will get 30+ feet tall, so I need to do some good planning to be sure that they don’t block the garden sun when they are fully grown. I also have a ginkgo that I have babied along in a little pot for over 7 years that I can finally put in the ground. But, Ginkgo trees have been known to get up to 80 feet, so I really need to figure out a good space for this one!!

I also hope to put in some grapes, blackberries, raspberries (and many other berries), passion fruit, hardi kiwi, rose (rugosa… for the rose hips), chestnut, and what ever else will fit!! I can’t wait!!! Now, will someone please come dig some holes in this dang red clay for me! 🙂

Look at my find!


It’s an 1874 edition of John M. Scudder’s Specific Medication and Specific Medicines!!! This may not mean much to some of you, but for those of you who know herbal history, this is a very special find! John Scudder was an Eclectic herbalist who wrote fantastic herbal books, this being one of his better ones! His later (and maybe his best book) materia medica can be downloaded from here and printed out! It’s 770 pages long though… so get lots of printer ink!

Some Body Stop Me!

I can’t stop canning things! Unfortunately, each recipe gets sweeter. I really need to work on adding some vegetables to the canning mix! Shesh!

This is the Apple Berry Syrup that I mentioned in the last post…

Yesterday, I canned up a 1/2 bushel of peaches!!

We made Spiced Peaches in a very light syrup, Peach Applesauce, and then dried some peaches.
Tonight, I made a peach pie with this recipe. We topped the pie with home made whipped cream and some home made chocolate rose syrup!!

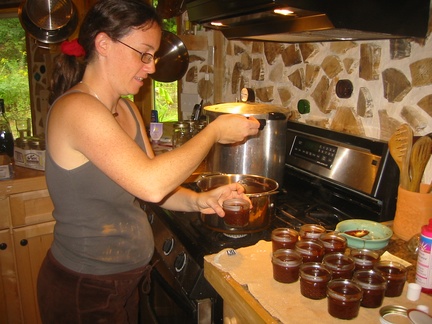
The Chocolate Rose Syrup is something that I tried yesterday at a meeting (meetings with herbalists always entail great foods!) and I thought I’d try my hand at canning it too!!! It would make a great present.


The recipe made 25 4 ounce jars!!!
Here’s how to make it:
3 cups cocoa powder
4 1/2 cups honey
2 1/2 cups rose water
2 cups water
1 Tbsp. vanilla extract
pinch of salt

Mix all in a pot and simmer 5 minutes, stirring constantly.
Pour into jars and process in a boiling hot water bath for 25 minutes.
Sit down and lick pot and all cooking utensils! Mmmmm!

OK, so next, I’ll work on green beans! 🙂