Yummmy, Yummy, and just plain yummy!

Kaia and I went apple picking yesterday at the Long Branch Environmental Education Center, about 30 minutes north of us. They have 57 varieties of heritage apples! But they also had a ton of blueberries ripe and ready for picking. So, we ended up getting ~a gallon of blueberries and ~35 pounds of apples! I have no idea what kind of apples. We just hopped from tree to tree picking the best looking ones. Then we came home and did some canning!!
We made Spiced Apple Rings, Spiced Apple Berry Syrup, and Caramel Apple Butter!!!! MMMmmmmmm
Here are the recipes:

Spiced Apple Rings
6 pounds of firm tart apples
2 cups of sugar
6 sups of water
1 1/4 cups vinegar (I used apple cider vinegar)
3 Tbsp. Whole Cloves
8 Cinnamon Sticks

Combine sugar, water, vinegar, cloves, and cinnamon in a large pan. Heat to a boil and simmer 3-5 minutes.
Core, peel, and slice apples (I use one of those apple slicer thingies that does it all at one time). Place apple rings into wide mouth pint jars and fill with hot syrup, leaving 1/2 inch head space. Tighten lids and process in a hot water bath for 25 minutes. Makes 8 pints.

Spiced Apple Berry Syrup
6-8 cups Berries
Apples, cored, peeled and in little chunks
8 Vanilla beans
Big pinch of Chinese Five Spice Powder (you don’t have to have this for the recipe, but I do, so I used it 🙂
pinch each of nutmeg and cardamom
2 cups honey

In a large pot, put 6-8 cups of berries (I used blueberries, hawthorne berries, and rose hips and cover with water 2 inches over the top of the berries. Add to this vanilla beans, Chinese 5 spice, nutmeg and cardamom. Simmer until berries are soft (about 30-40 minutes).
Strain out berries and vanilla, pressing out as much juice and pulp as possible (if your berries have no seeds, you can keep them in the syrup! Just remove the vanilla beans.)
Put the juice and pulp back in the pot and add honey, stirring well to mix.
In your 4 or 8 ounce jars, put cored, peeled apple chunks.
Cover apples with syrup, leaving 1/4″ head space, and seal the jars.
Process in a hot water bath for 25 minutes.
Makes 18 four ounce jelly jars!

Caramel Apple Butter
8 pounds Apples
1 cup water
3 cups sugar
2 cinnamon sticks, broken into pieces
8 whole cloves
2 Tbsp. peeled, minced ginger root
2 Tbsp. lemon juice

Core, peel, and chunk apples and put them in a large pot with the water. Simmer for 30 minutes, stirring often.
In another pan, heat 2 cups of the sugar over medium heat until it melts/caramelizes.
When apples are soft and mushy, pour the liquid sugar into the big pot of apples, as well as the last cup of sugar. Tie the spices in a muslin cloth and add to the mixture. Simmer for an hour, stirring often. Remove the spice bag, add lemon juice, and put into jars, leaving 1/4 inch head room. Process in a hot water bath for 10 minutes. Makes ~9 half-pint jars.
Herbed Figs

Man! I am on a canning roll! Look out, or I might just stuff you in a jar and plop you in the hot water bath!

Here’s the recipe I used for tonight’s extravaganza. It was given to me by a friend.

Herbed Figs

  • ~20 ripe figs, quartered
  • 1 Tbsp. water
  • 2 tsp. sugar (raw or brown)
  • pinch of Thyme (dry or fresh)
  • Juice of 1/4 lemon

Place all of the ingredients in a pan and simmer until juicy. Put figs and juices in a jelly jar leaving 1/2 inch of room at the top. Boil for 5 minutes in a water bath. Makes ~4 8-oz jars. Mmmmmmm!
Yummy Jam

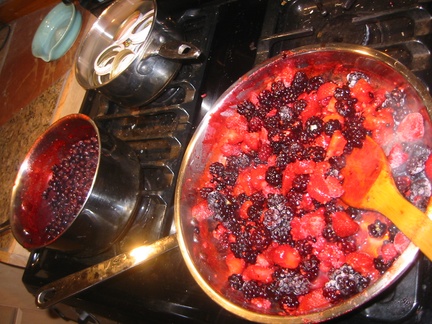
Kaia and I spent most of yesterday canning up Jams of every sort… there was Raspberry jam, Strawberry-Raspberry Jam, Blueberry-Blackberry-Raspberry-Strawberry Jam… and they all came out perfect and delicious! We found great, simple recipes in the Pomona Pectin Boxes, and they only used a little honey.

Here’s the “Everyberry Jam” on the stove:

Canning Frenzy!

We’ve been canning all day today! Woohooo!
Friday we canned up 8-8oz. jars of salsa. It’s a fantastic salsa fresh, but not as tasty cooked. Still, it’s pretty good. Today, we canned up 12 pints and 2 quarts of Basil Marinara sauce and 6 quarts of Roasted Tomato Garlic Soup. The marinara sauce turned out good, but could use more oomph, so we’ll have to add a little fresh spice to it when we use it. The Roasted Tomato soup turned out absolutely delicious!!! I’m excited to have all these yummy soups to look forward to this Fall and Winter! So, here’s the soup recipe (we doubled it):

Roasted Tomato Garlic Soup
8-12 tomatoes (depending on the size)
2 carrots — cut in 1″ pieces
1 large onion — quartered
2 large whole heads garlic — peeled
olive oil
2 1/2 cups chicken or Veggie. broth
1/2 cup chopped fresh basil — (or 1 Tbsp. dried)
1/2 pint cream

Core tomatoes and cut in half. Place, cut side up, on foil covered cookie sheet. Use enough tomatoes to cover the cookie sheet. Then add carrots, onion and garlic to the cookie sheet. Brush with olive oil. Bake at 400F for about an hour, or until veggies are roasted and a little blackened. Place in a large saucepan with the broth and basil and simmer for about 10 minutes. Blend with a stick blender (or in small batches in a blender) until almost smooth. Add cream. To can: Process in a pressure canner, pints for 60 min. and quarts for 70 min. For dial gauge canners use 11 pounds pressure at 0-2000 ft., 12 lbs. at 2001-4000 ft., 13 lbs. at 4001-6000 ft. and 14 lbs. above 6000 ft. For weighted gauge canners use 10 lbs. pressure at 0-1000 ft., and 15 lbs. over 1000 ft. This makes ~3 quarts of soup.

Anyone have a good low sugar raspberry or blackberry jelly recipe for canning?

Tomatoes and Berries galore!!

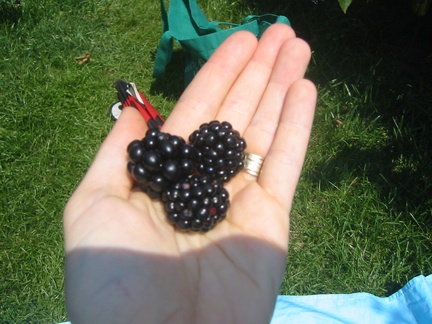
Kaia and I went Blackberry picking yesterday and got gallons of blackberries, and even a few raspberries. The vines were dripping with berries as big and juicy as I’ve ever seen. The raspberries weren’t ready just yet, but the farm owners had picked some of a different variety a few weeks ago and frozen them. So, I got a few gallons of raspberries too. So, we should have lots of yummy jam soon!!

Look at how huge these things are!

We’ve also been canning up some tomatoes. A local organic farm had some problems with their packing boxes and ended up with some bruised tomatoes that their buyers wouldn’t accept. So, they were trying to get rid of them and selling 20# boxes for $12!!! We got two boxes and I can’t find a bruise on them! They are perfect!!

So, tonight we canned some salsa, and on Sunday we are going to can some Pelati and some Roasted Tomato Garlic Soup. MMmmmmm…..

All is well on the baby front. I was showing so early and measuring ahead of dates, that we though we might have twins. So, we decided to go for an ultrasound just to be sure all was ok. Turns out there is one happy baby in there and one freakin huge placenta! From what I understand the main reasons for big placentas are moms with Syphilis (which I don’t have), diabetes (which I don’t have), Rh incompatibility (which we don’t have), and just because. I guess it’s just because. Big placentas often grow big babies… :-O

Isabella and Daisy went in to get spayed last week. Daisy came back her usual self and just bounced all over the place. We tried to keep her calm so that she wouldn’t break her sutures. She did fine, but for some reason Isabella’s wound opened a tiny bit, about the size of a pencil eraser, and she was having some swelling under one of her nipples. So, we took her back in and they put an adhesive on the skin to get the wound to close. But they also had to give her a cone to keep her from licking it.

She was not happy about it, walked around the house backwards, and somehow still got around it to lick the wound. Within a day it was opened up again, so I decided to do it my way. I cleaned the wound and put a sterile dressing with honey on it, then wrapped her belly in an ace bandage. So far so good. She’s able to move around and hasn’t tried to take it off. She’s eating well and I’m giving her some herbs in her food to keep down infection and to decrease the swelling (which is gone now).

Coconut Milk Ice Cream-Mint Chip

Here’s a little recipe I put together yesterday in an attempt to ease a craving for mint ice cream. It came out very good and has no dairy or soy in it, so everyone in the family can eat it.

In a blender blend:
2 cans (13.5oz) Full Fat Coconut Milk
2 heaping Tbsp. cocoa
1 tsp. Vanilla extract
2 tsp. Mint extract
3 Tbsp Agave syrup

Blend until fully mixed. Then stir in 1/3 cup of chocolate chips. Pour into a bowl/dish/tupperwear suitable for freezing and place in the freezer. I stirred it every hour for ~6 hours, until I went to bed and left it in the fridge over night. It may do fine if you just leave it in the freezer without stirring, but I don’t know. (I don’t have an ice cream machine, and the freezer method seemed to work just fine) In the morning, I had a delicious spoonful of mint ice cream and was even better than the store bought!!!

You could make all kinds of variations to this, as long as you have the basic coconut milk…. like vanilla and fresh fruit, or vanilla and cookie dough chunks… etc.

Let me know if you come up with any that you like!

Delicious day!

Kaia and I have had a great day so far. We spent the morning watching old Bugs Bunny cartoons, then she got completely pruned in the bath, and this afternoon we baked ourself a treat!


The recipe is from an old restaurant that use to be in downtown Asheville. When I was in high school, down town Asheville wasn’t really a place you would go to, unless you were headed to the 2 antique stores that were there. Most of the buildings were run down and uninhabited. At some point, The Stone Soup, opened with an amazing bakery and fun sandwiches. It started bringing more people down town and more people became interested in transforming the place. Now Asheville has a fantastic downtown with great restaurants, shops, buskers, music, etc. I don’t know what ever happened to the Stone Soup. But, here is the recipe for the cinnamon rolls.

Stone Soup Cinnamon Swirls

2 eggs beaten, room temp.
2 T. dry yeast
2 ¼ tsp. salt
¾ cup brown sugar
1 tsp. nutmeg
¼ tsp. Cloves
¼ tsp. Allspice
4 ½ unbleached flour (I didn’t have any, so I used Oat flour and it worked fine)
12 T Butter
½ cup water
1 2/3 cup milk (I used rice milk)
2 ½ whole wheat flour

Filling
3 T. butter
2 T. sugar
1 T. cinnamon

1) Combine dry ingredients, except whole wheat flour, in a bowl and set aside.

2) Combine and heat butter, water, and milk until lukewarm. Put this in your mixing bowl. Add the beaten, room temp. eggs and the dry mixture. Mix thoroughly.

3) Add the whole wheat flour slowly until the dough pulls away from the bowl. You might not use it all OR you might need a little more. Be sure you check the dough’s consistency while adding the WW flour. You don’t want the dough to get too heavy, which is easy to do. Knead the dough in the mixer for 7 minutes OR by hand until the dough is smooth and elastic. Cover in a bowl and let double in size. This will take AT LEAST 30 minutes. It will probably take longer. Be patient. You will be rewarded.

4) Make the filling in the mean time. Carefully melt butter and add sugar and cinnamon. Put aside.

5) When the dough has risen, roll it out into a rectangle about 14 inches by 9 inches. Paint the melted butter, cinnamon, and sugar mix on the dough leaving the ½ inch bare at the bottom.

6) Carefully roll it up starting from the top, moving toward you. Pinch the seam together.

7) Cut the rolls into 1 inch (or a little bigger : )) and place them on a baking sheet (lined with parchment) evenly, at least 2 inches apart.

8) Bake in a preheated 350* oven until they have a light crust all the way around, ~25 minutes. The sides should not be soft, but golden brown and delicious!

9) Glaze as desired. I used powdered sugar, rice milk and a few drops of orange essential oil.

Enjoy!!

Fungus amongus!

Guess what I got the other day? A huge Kombucha mother mushroom!! I’m really excited. I’ve been wanting to try it for a while, but just haven’t gotten to it. A friend was harvesting from hers yesterday and invited me over to get one. I made my own kefir for a while and we liked it, but paying $11 for a half gallon of raw goat milk just to make it in seemed a bit of a waste, and I never could get the flavor right. That’s why I love the kombucha. All you need is water, tea and a sweetener! We have Water, we have honey, and I’ve got lots of tea. So, right now, I’m making my first batch. I’m using 3 parts Rooibos and 1 part oolong tea, along with sugar and water. I thought I’d start with the sugar since that is what most sites recommend, and experiment with other sweeteners when I get more ‘baby’ mushrooms (a ‘baby’ grows each time you use the mushroom).

So, here’s what I did:
I boiled 3 quarts of water and then added a cup of sugar, and boiled for 5 more minutes. Then I turned off the heat and added my tea (~6 tsp Rooibos and 2 tsp. Oolong) and let that steep for 10 minutes. Then I took out the tea bags and let the tea cool to room temp. I poured the tea into a large glass bowl and placed ~ 1/2 cup of kombucha tea (that my friend had also given to me) into the mix as a starter. Then I placed the mushroom on top. I covered the bowl with a cloth and will let it sit for 7 days in a warm place. I’m excited to try it!! I’ve ordered some books to get more info. This one is specifically about what herbs you can use in making Kombucha.

This is the mushroom and a little of the tea. For scale, it’s in a gallon sized bag.

And here is the mix just before I covered it with a cloth. The Mushroom is floating on top:

The first time I ever tried Kombucha was way before it was an ‘in’ thing. It was in 1996 when I was studying Midwifery in Ireland. I was staying with a German midwife who practiced in Ireland and this ‘fizzy drink’ was about all they drank; and she talked about how healthy it was. I remember really enjoying the flavor until she showed me the actual mushroom and then I was kind of grossed out. (I believe she said it was a mushroom that her mother had given her, so who knows how long they had been making it in her family). But, since then, I’d always wanted to figure out how to make it.

Kombucha is supposed to have all kinds of benefits, but my feeling is if it does nothing by increase the absorb ability of the nutrients in food, that you will see a huge change in many areas of your body, because your whole body will be nourished more.

Do any of you make your own kombucha? What ingredients do you use?

What I won’t give up to be ‘green’

A few weeks back I was tagged by Two Frog Home to tell the truth about the 5 things I won’t give up for the environment. This was a really hard one! Every time Toby would mention something I would say, “well if I had to, I’d give it up” 🙂 But, here are 5 things that are not going green any time soon that I don’t want to get rid of:
1- my computer: There is a ton of waste produced every time one of these puppies is made and trashed, but I don’t see any green options on the horizon for this one!

2- my car: I’m still very reliant on my car and would have a hard time doing without. We have looked and looked for a more environmentally sound option, but they don’t (yet) make affordable family size electric cars that I could power off of a solar panel. Here’ hoping!

3- prepared cat and dog food: With all the food allergies we have in our pet family, I have no idea how I would be able to feed the pets without the already made foods I buy. I know that there is a lot of waste in the packaging and the shipping, but there ain’t no way I could make my own perfectly formulated rabbit and venison food! Believe me, I’ve tried!

4- Toilet paper: I’m with Two Frog Home on this one! It will be a while before I’m willing to give up the paper and use washable cloths. I know I used cloth wipes with Kaia when she was a baby, but I was glad when we ‘graduated’ to toilet paper.

5- I don’t know… I’ve been sitting here for 30 minutes trying to think of something else… What do you think? What should I give up??

Oat Medicine

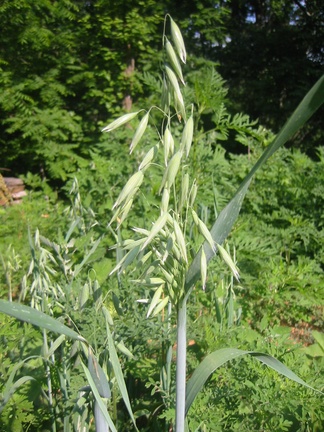
I harvested the rest of the milky oats today. Almost 3 pounds worth!!! I made a half gallon of milky oat tincture and laid the rest out to dry to use for tea later.

Milky oats (Avena sativa)are when the unripe seed heads can be squeezed and a milky juice comes out. At this stage, the oats are very high in minerals, particularly minerals that are good for relaxing the body and dealing with stress (like b vitamins and Magnesium). Taken as a tincture or tea, milky oats are wonderful for exhaustion and soothing frazzled nerves, moistening and nourishing the nervous system and brain, and helping get to sleep. I find I use it a lot in my practice. Good stuff!

Tending the bees

It’s been a long while since we’ve really gotten into the bee hives and taken a good look at what is going on in there. After the swarms, we have 4 hives, but we have no idea how they are doing. So, Tuesday, a friend and bee mentor came out and helped me go through them. It took us 3 hours! But, I’m happy to say they are all doing well. Both swarms (including the top bar swarm that I thought would die) are settling in well. When we put the first swarm into their hive box, we left 3 frames out and forgot to go back and put them in. So, the bees built comb off the roof and in every different direction. We had to cut some brood comb off the top of the hive and rubber band it into a frame. We also had to cut out a bunch of honey and pollen comb to try to straighten up the frames. I will need to go in at least once a week to be sure that they are building along the frames.

We found all four of the queens and all the hives seem to be building up stores and making lots of baby bees! Yay! One of the hives had a full honey super from the great poplar nectar flow. So, I will take that box off and extract some honey this weekend.

I also took the comb that we cut out of the swarm hives and squeezed the honey out. There was a good bit of pollen in there, so the honey it pretty cloudy and strong tasting. But, still good! We got about 1 1/2 quarts. I also took the comb and melted it down so I could use the beeswax. But, I think there was too much pollen in the comb, ’cause it’s not hardening up…

Here’s the honey. I didn’t heat it… I just put it on the stove to take the picture.

Here’s the comb melting in a double boiler.

Feeling Crafty

I’ve been feeling like making things lately. Kaia’s birthday is coming up and I have been wanting to make her a ‘princess canopy’ for her bed for years. So, I finally got around to it. It came out pretty well, but I have to secure the hoop on the inside better so that it hangs level:

I also promised her that I would make her a ‘hoop skirt’ for her birthday. We’d seen this design at a festival and she loved it, but they were $40. So, I decided to try my hand at it. The first one I made came out badly, so I planned harder for the second one…
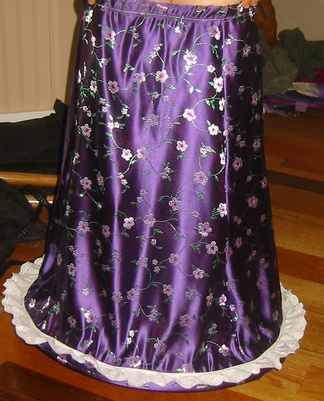
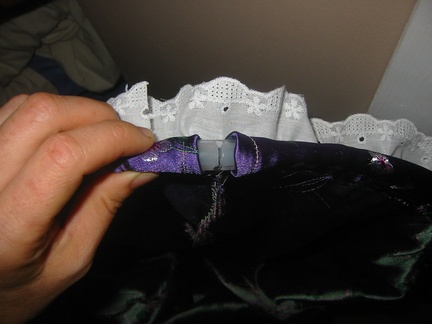
First I cut out three panels of fabric all the same size (9″ on top, 24″ sides, and 21″ on bottom). Then I hemmed the sides of each piece and sewed them together (leaving a strip ~2″ in between two of the strips that was not sewn together. I hemmed the top, leaving a small gap and enough space to thread an elastic in. I threaded 19.5″ of elastic (since Kaia’s waist is 20″) and sewed closed the little hole that I put the elastic in through. I then hemmed the bottom so that there was a 1/2″ gap to thread in 1/4″ flexible tubing (I used some plumbing tubing). Along the hem, I used some lace for decoration, and to conceal the hoop. (Remember that 2″ strip on the bottom where the sides weren’t sewn together? Once you hem it, it leaves a gap where you can thread in the tubing, and take it back out if you don’t want to use the hoop.) Thread the tubing in (~5 feet of tubing) and use another piece of tubing that has an inner diameter the same as the outer diameter of the hoop tubing to hold the hoop together.
OK, so if I haven’t totally confused you, here’s how it turned out:


When she walks the hoop holds the dress out away from her… and it has ‘great spin’, which is very important to an almost 5 year old! And the whole thing cost me ~$10.

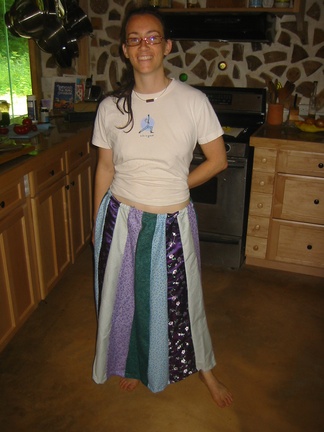
I also found a skirt in a magazine that I really loved, but it was way out of my price range. So, I tried my hand at making that too. First I needed 20 ‘strips’ of fabric. I used 4 strips each of 5 different fabrics. I cut out a piece of paper to trace my strips from.
Here you see the paper and the pieces traced, before I cut them up.

Once I cut all the fabric, Kaia helped me put it into a design. This is what one of the four panels will look like

Then I sewed all the edges together, sewed an elastic the size of my waist into the top, and hemmed the bottom…

I like it, but it’s not as ‘flowy’ as I had hoped it would be… then I realized that the skirt in the magazine is made of silk, and I used mostly cotton.

I’ve also been gathering some herbs on the land for medicine.
Here’s a giant mullein that I got some flowers from to make an oil:

I also harvested some oats in milky stage to make tincture out of. The tincture is SOOOO green!

And here, just because it’s so beautiful, is a clary sage flower:

I’ve got a moment of reprieve right now, but it’s been go, go, go! The first weekend in June I spent 4 days at the Medicines from the Earth conference taking classes and assisting Rosita Arvigo. She was the keynote speaker and gave some great classes on fertility enhancement, and spiritual bathing. Then I spent 6 days (ending tomorrow) with Rosita assisting with her Professional Maya Abdominal Massage training. It’s a very intense learning time, not to mention all the things that come up with the students after giving and getting so many abdominal massages. It’s pretty amazing! This morning I went in to class completely exhausted, so she told me to go home and take a nap. (I just got up from a 2 hour nap, so don’t give me crap about being on the computer :-)) Tomorrow is our last day.

So, you can imagine that things are still not unpacked or cleaned up around the house. And the cabin is just full of unpacked boxes. I’m hoping to get the office/cabin set up this week (it’s funny how much I dread going in there now that we have the house built). Maybe I’ll put up some pictures tonight… or maybe I’ll go see a movie and eat some chocolate… hmmmmm, which should I choose…?

Berries galore!

I was happily surprised that our little berry patch is doing well this year. After the chickens scratching all around and kicking up so many roots, I didn’t think it would survive. But last week, I saw some red coming from the weed surrounded strawberries and found ~1 1/2 quarts of ripe, red strawberries! I’ve since picked another quart or so.

I wanted to get lots more strawberries so we could freeze a bunch. So, Kaia and I went out for Flying Cloud Farm for a little berry picking yesterday, and got ~2 gallons! MMMMmmmmm!! Their berry patch is huge! The strawberries plants are all so big and healthy, and everything is organic!! (I need to give my berry patch a little time and attention so I can try to get them to grow as big as the ones at the farm!) the patch is surrounded by flowers that you can pick a bouquet of for just a couple of bucks! So, Kaia and I had a really nice afternoon!

Last night we has a pasta dish with a salad topped with strawberries and a strawberry vinaigrette for dinner, and for dessert – strawberries dipped in home made whipped cream.

How’s this for a yummy treat??

Now that we are living in the house, and the projects have slowed down (a little), I feel like Toby and I are taking on roles parents that we haven’t been able to yet. We are playing family games at night, taking outings without having to hurry back home to get some building time in, we are sitting down to healthy, home made meals. It’s been very, very nice!! Though there is still the stress of completing the home projects and paying off the bills, it has lessened.

Swarm season

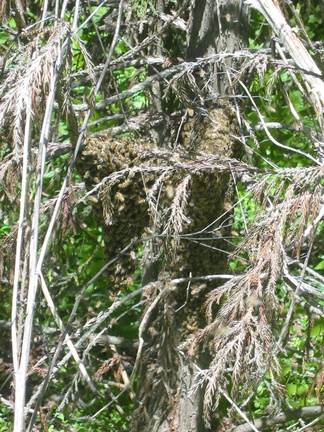
This year, for some reason, there seems to be a whole lot of swarming going on. Maybe it’s the bees way of trying to make a come back with all the hives that have been lost in the past few years. We started this year with 2 hives, and so far we have had 3 swarms! Toby caught the first one, but we missed the second one. We were actually outside talking about how it would be a perfect day for swarming when we saw them fly overhead, already having found their new home deep in the woods. Well Tuesday I caught my first swarm! All by myself! ME!! Who is just a little afraid of being stung because I tend to swell up like a tick, itch all over, get a little bit of a speeding heart rate thing going on. I was outside planting a few things on the roof when the air got louder. I looked over towards the hives and saw a swarm coming out and making a cloud over by the edge of the woods. They landed on a very low branch of a dead cypress tree.

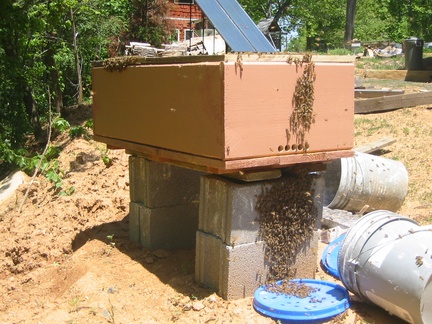
I called Toby and he suggested we just let them do their thing. He knows how I feel about handling the bees, and he wasn’t able to come home from work. But I didn’t want to lose them, so I went out and put some Lemongrass Essential Oil on the top bar hive to try to attract them. Then I went over to the swarm and had a talk with them to let them know where the new hive is. They didn’t seem to understand. So, I started moving around, wiggling my butt, and doing a little bee dance for them. But that just seemed to make them agitated. (Maybe I told them to ‘get stuffed’ or something??) So I went back to my roof and had some lunch while contemplating what to do. I decided that I could do it and I wouldn’t get stung. So, I put on my thickest jeans, two long sleeved shirts, wool socks and hiking boots, padded winter gloves, and a bee hat and headed for the swarm. I brushed them into a bucket and dumped them in the top bar hive. It took two trips to get most of the swarm and when I went back for the third time they were all so angry that I couldn’t catch any of them. No Stings! But when i went to close up the hive, they weren’t really staying inside…

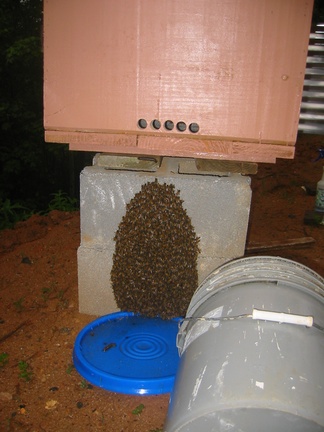
By that evening, they were all clustered outside on the front. Not a single bee inside. My happy high from catching the swarm started to plummet. I must have left the queen on the tree by mistake. Now I felt like a total heel! I’d doomed the bees!

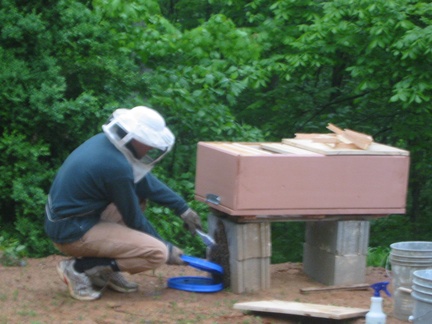
I’d hoped they would go inside the hive, or at least fly off to find their queen. but they stayed that way for two days. So I called our friend Carl, a local experienced beekeeper. He said that he felt like they wouldn’t remain clustered like that if their queen wasn’t with them and that for some reason, they must not like the top bar hive. He suggested that we spray them down (to make them heavy so they wouldn’t fly off), and put them back in the hive with some sugar water (for food since they hadn’t eaten in 2 days) and open brood (to keep the bees in the hive to nurse the babies) and close them in for a few days, in hopes that they would make a home. So we did just that. We used sugar water to spray them off, so they would have some food to clean off them selves, and put a bag of sugar water on the bottom of the hive (with a little slit in it for them to collect the food). Toby tried to get some open brood from another hive but it had been raining and they were not happy to have their hive opened. Once the bees were in the hive, we taped the opening shut so they couldn’t just climb back out. Since it had been raining, the tape came off by the next morning, but it seems like they might stay. The true test will be to see if there are eggs in the comb in a few weeks.

All is well

Sorry for the slack in posting. All is well here.. just busy. We are settling into the house and really enjoying the space and amenities! Kaia and I are especially having fun cooking together (something that was really hard to do in the little cabin). We ate so poorly the past two years. I had no desire to cook and PB&J was often a main meal. So now, I’m trying to get back on track with healthy, whole foods and lots of local fresh fruits and veggies. I’ve singed up for a weekly recipe mailer through Cooking Traditional Foods. Every week she sends 6 recipes and a dessert, shopping list for those recipes, and when to prepare stuff in advanced. Her site also has recipe and discussion forums, and the recipes are loosely based on Weston Price’s ideas. It’s been really helpful in getting back on track with cooking. I figure I’ll do this for a while until I get into a good rhythm. My only objection is that 5 of the 6 recipes include meat. That’s a lot of meat for me (and gets expensive), so we may use bean and other substitutes.

The animals are doing pretty well. Ralph has decided she has had enough of being a mom and got off the nest. So, no chicks from those eggs. (We can’t invest in an incubator right now.) The cats are all adjusting really well. They have already started snuggling up together, which is really cute. Suki went to the groomers last week and when I picked her up they said a lot of her hair was falling out and she had redness and bruising on her skin. She looked almost bald in patches. I took her to the vet the next day and the blood work showed that her clotting time was a little slow. They think that she either had a really bad allergic reaction to something or that she may have gotten into some rat poison. So, she is on some Vitamin K to get her to stop bruising and increase her clotting time (this is the antidote for Rat poison, too). Her skin is looking mostly better already.

Business is going well for me. I’ve got as many clients as I can handle right now, which is nice. I’m excited to have my office space set up in the cabin. It will be so nice to be able to hear the frogs and the birds during my consultations and not the 18 wheelers rolling by. I’ve had to cancel a few appointments this past week, cause my forearms and hands are covered in poison ivy. Because of the pattern on my arms, I think I might have gotten it off of Suki. I don’t think I’ve ever had it this bad (I usually only get a blister or two). Both arms look all bumpy and scaly. I’ve been using high dose licorice powder (as a paste on my arms, and as a tea) to decrease the swelling. It works well.

I’m giving an herb walk this weekend at the LEAF festival. I got a free ticket the the festival in exchange for the class. So, Kaia and I are going to spend the weekend playing, dancing, swimming, hooping, and having fun!!!

Delicious non-dairy ice cream

I tasted this at the local health food store and it was delicious!. So I fiddled with the listed ingredients and think I’ve got it pretty dang close. So here you go. A fantastic substitute for those who like mint chocolate chip ice cream, but don’t do dairy:

2 cups Raw Cashew butter
1/3 cup Coconut oil
1/2 cup agave syrup
1/2 tsp. Mint extract
handful of chocolate chips.

Gently melt the coconut oil on the stove. Turn off the heat and add the cashew butter and agave. Mix well until creamy. Add mint extract and chocolate chips, mix well. Cool it in the fridge and then eat up! Oh, and you don’t need much of it to get full satisfaction!

making nests of all kinds

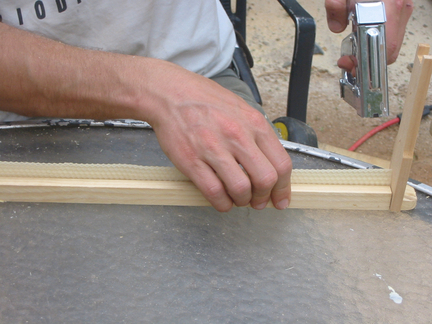
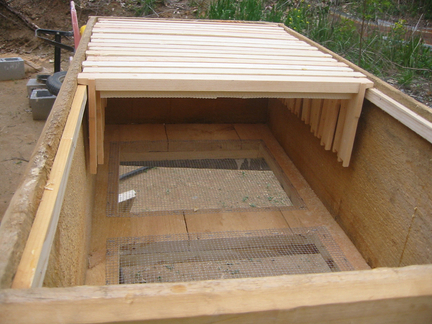
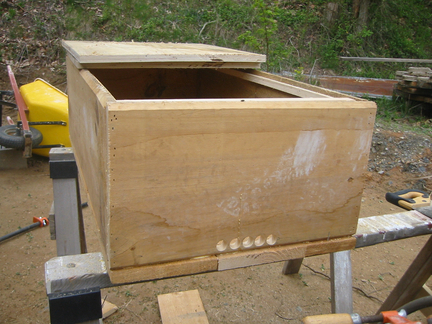
Toby built his first top bar hive today. It came out really nice! Robbyn, he didn’t really follow any design. He mainly talked with a few friends who have built them before and put together what he thought would work well for us. It’s 12 inches deep and long enough to fit 28 frames. It has a partially screened bottom for ventilation, and a tin top that you can lift off to check on them. We had some small cell beeswax, so we cut strips to put in the frames for the bees to build on them. The frames are 3 sided without a bottom, so the bees will probably make more of a rounded comb design.


He drilled some entrance holes for them, too.

I don’t know if we will collect honey from this hive or just let them be. Right now, it’s sitting on some concrete blocks and nicely viewable from our kitchen window. We expect we will have another swarm from our other hive, so we’ll put the swarm in here.

While he was doing that, I closed off a section of the chicken yard and built a little brooding box for Ralph. She wasn’t too happy about being moved at first, but she quickly found her eggs and went back to sitting on them.

And here is the house so far. They need to do all the trim work, but the main body color is done. We were supposed to have a creamy yellow, but the painter called me the night before starting and said he really didn’t think the yellow was a good idea. He said yellow is the quickest color to fade and doesn’t cover as well. He had mentioned this before, but I really wanted to have a yellow… but when he stressed this again I felt like we needed to go with something else. So, we picked out a grey/blue that looked really nice on paper. Unfortunately, I’m really not that happy with how it turned out on the house. I was wanting a cheery, light color that would stand out from the green around it, but still look like it belonged. What I got was a cold color that sticks out like a sore thumb. It’s not a bad color, I just don’t feel like it fits. I know it will look much better once the trim is done. When we get screens, I may paint the frames with a pale yellow or something to lighten up and warm the house color.

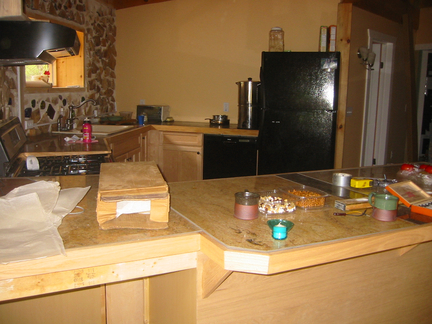
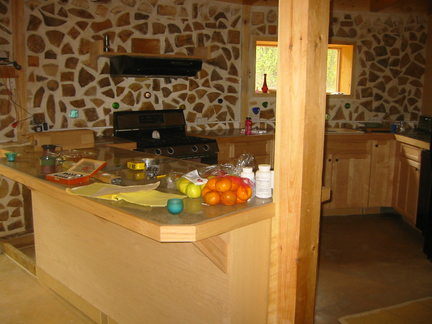
Inside, we are done with all the messy work, so we are trying to get things moved in. Then, we can take care of the other little details while we are living in and enjoying our house. Here’s how the kitchen counter tops turned out. We just need to put up a back splash. (I know, it’s hard to see ’cause of all the crap all over them… I’ll take more pictures soon)

Broody lady

Ralph, one of our Black Australorp hens, has gone broody. Since we don’t have any roosters, and thus no fertilized eggs, I got 7 fertilized eggs from my brother-in-law. We marked them with a big “F” (fertilized) and slipped them under Ralph. She settled back in and happily covered them all with her wings. She’s keeping them at a constant temperature and humidity, and turns them 3 times a day to make sure they develop correctly. From what I understand, broodiness has been breed out of chickens (’cause if they are sitting on eggs instead of laying them, they are not a financial benefit to big chicken corporations). Have any of you ever hatched chicks from a broody hen? Tomorrow, Toby is going to build a top bar hive for our bees and I think I’ll build a little nesting house for Ralph. That way, her nest can be on the ground, where the chicks won’t fall out, and we can separate her from the other chickens. In 3 weeks, we might have some little baby chicks!!

Swarm

The painters were out working on the house when one of them called me to tell me the bees had swarmed. Toby raced home to find this:


They had landed on our out house and were looking for a new home. So, Toby pulled out an extra hive box and put a little lemongrass essential oil (which attracts them) in it. Then he brushed them into a bucket and shook them into the box. They seem to be settling in well. Guess we’d better keep watch on the other hive in case they are gearing up to swarm too.

Care Package Give-Away

I was just the lucky recipient of a lovely care-package from Two Frog Home. It was full of love, attention, and friendship, and it felt so wonderful to open this gift from a far away friend that I’ve only met through the computer. So, I’d like to continue this expression of friendship by offering a home made care package give-away from Dirt Under My Nails! If you want to be in the running to receive it, just leave a comment by 5pm Friday, Feb 8th (and be sure your email address is included). I’m sure something herbal will be included, something edible (although if the winner is international, I will leave out the perishables) and more!

Good luck!

Mate Cocido

Last May, when I flew up to NH on a trip, I sat next to a really interesting woman from Paraguay.  She was probably in her 80’s, but she was a spry little lady!  We talked about family, raising kids, traveling… but mostly we talked herbs.  She talked a lot about Mate, which is a major drink in Paraguay.  She mentioned a couple of different recipes that her parents made with the Mate when she was a kid.  Mate terere was one, which is mate made with cold water and lemon, or cold juices.  But, the one I really wanted to try was Mate Cocido.  She gave a detailed description of how you take the mate leaves  and cook them with sugar on an open flame until it caramalizes.  But, once I left the plane, I couldn’t remember all the details.

Anyway, today, what do I get in the mail, but a package from this woman.  She bought me a pound of Mate when she got back to Paraguay and sent it to me with instructions on how to make Mate Cocido!  Isn’t she great!!  I can’t wait to try it!

In a pan put 6 tablespoons of yerba mate leaves and 3 tablespoons of sugar.  Cook gently while stirring and  brown the sugar. Be careful not to allow it to burn. Turn off the stove and pour 2 cups of water (or a mix of water and milk to make a total of 2 cups) over the mate and sugar.  Strain out the herbs and enjoy the drink! (If it’s too strong add more fluid)
I read a recipe on the internet that also suggested adding a little dried orange peel to the caramalizing process.  Mmmm, sounds good!

AHG Symposium

Things have been cruising along busily for the past few weeks.

I spent much of last week in Columbia, MD at the American Herbalist’s Guild Symposium, which was fantastic, as usual! I spent most of the time in Paul Bergner’s classes. He’s got a fantastic way of explaining things in a way I understand. First was a 6 hour intensive on Clinical Nutrition in the Herbal Paradigm. We talked about macro and micro nutrients in the prehistoric, agrarian, and modern diet, and how the deficiencies and imbalances that have come about since industrialization have led to modern diseases. After that we began to discuss patterns of imbalance that are seen in the modern day diet: 1) The SAD pattern
(Standard American Diet), 2) The Anorexia pattern, 3) The Junk-Food Vegetarian pattern, 4) The Stress-Carbohydrate pattern, 5) The Insulin Resistance pattern, and 6) the Food Allergy pattern. It was fantastic! I have such a hard time with my clients and being able to describe why food is so important to health. I think the research he presented will help me to educate my clients in a way they can understand.

The next day I went to a talk on HPV and the new Gardasil vaccine given by Mary Bove. I was enraged when I left the class! So far, here is what we know about the vaccine…
–In June of 2006 the FDA approved Gardasil to be used on females age 9 through 26.
–The vaccine trial for Gardasil was a 14 day trial on women averaging 23 years of age (there were no girls under 12 in the study, yet it is being recommended by the FDA for 9 year olds!). The 14 day trial showed protection against 4 types of HPV (Two of these types of HPV cause over 70% of the cervical cancers, but there are over 100 different types of HPV.) Gardasil was tested alone. It was not given with any other vaccinations (yet we often give vaccinations in groups, ex: MMR and DTaP)
–As of May, 2007 (one year after approval by the FDA) there have been 2227 adverse reactions reported to the CDC (and only ~10% of all adverse reactions are ever reported). The reactions included 13 cases of GBS (Group Beta Strep.), 239 cases of fainting with temporary loss of consciousness (some also with head injuries and fractures), and seven deaths reported after receiving Gardasil. There have also been respiratory and cardiac problems, neuromuscular and coordination problems, and convulsions.
–The vaccine does not contain mercury. As a substitute preservative, it has 225 mcg Aluminum. (so if girls get all three shots, they will be getting 675 mcg aluminum)
–The 3 series of shots cost $360 wholesale. So if states made it mandatory to get this vaccine, Merck (the only producer of Gardasil) stands to make $3 billion dollars a year!)
–There is no long term testing on this vaccination. We have no idea long term effect on women, fetuses, health… and how long it will remain effective.

So, what about education??? We will force our girls to get a vaccination against potential cervical cancer, but we won’t teach them safe sex practices?? And what about getting our girls to have PAP smears as a preventative for cervical cancer? Cervical cancer is a slow progressing cancer. If we get pap smears, we are much more likely to catch cervical changes before it progresses. And what about educating our girls about healthy nutrition and body care? With a strong immune system, about 80% of HPV infections will be cleared rapidly from the body.

There is so much we don’t know about this vaccine! I would encourage all of you to become educated so you can make the best decisions for your children!

Next I went to a class on Herbal Gastroenterology talk by David Winston. This was another fantastic talk on how the digestive system is key to good health!!

I spent the next day with Paul Bergner again hearing his talks on Patient Energetics. Herbalist and fellow blogger, Guido Mase, give a great description of the class on his blog.

Then, it was on to Tongue Diagnosis with Christopher Hobbs. Tongue diagnosis is something that has been skimmed over in all the herb schools I have been to. I realize that it is not really a diagnostic tool, but more of a way to confirm what you may be seeing in a client. I really enjoyed his class. He kept it pretty simple (what a hot or cold tongue looks like and where different regions of the body are reflected in the tongue). But, it definitely helped.

Next years symposium is supposed to be in Seattle!  I hope I can make it!  They can really add up in price, especially if you have to fly.  But, you really can’t put a price on knowledge, education, and feeling of community with fellow herbalists.

The Chemicals in our World

One of the things I see in almost all of my clients (and that I have been working with in my own self) is an endocrine system that has been over taxed.  Many of us live in a state of ‘fight or flight’… driving at high speeds to work, eating highly processed foods while on the run, taking on too many projects, fitting too many things into our days…  And even those of us who have managed to bring down the stress levels in our lives still have to deal with an environment full of stressful and illness causing chemicals.  My friend, Juliet Blankespoor, wrote a wonderful article about this that I think everyone should read.

Suki, totally raw!

sukiface.jpg

This is my sweet Suki. I got her from a dog rescue in 2001, and I realized the other day that she has been on the same brand of dog food since I got her 6 years ago! It’s supposed to be one of the healthiest dog foods, but still, to be on the same thing everyday for 6 years just seems unhealthy. (So, I’ve decided to start feeding her a raw diet. It just seems to make sense. This is what dogs would be eating in the wild. I use to have two cats that I fed a raw diet and they loved it! I don’t remember what made me switch back… convenience maybe.) Anyway, I spend ~$60 a month on dry dog food. I’ve calculated it out, and if I do some smart shopping, feeding her a meat and bones diet won’t cost any more… it may actually be cheaper. Once we are in our new house (and we have a little more kitchen room), I may contact some of our local organic/free range meat producers to see if I can get their scraps. So, for right now, I have started her on chicken necks (our local grocery stores will pack these up, along with organs, and mixed grounds, specifically for pet owners). After slowly adding other meats, I will try to (mostly) follow this menu, and spice it up as I get more use to it. So far she loves it!! Any raw feeders out there?

Happenings at the homestead

Animals

The chickens are doing well. Still laying a bunch. Since they got use to laying in their boxes, they still go back their to lay even though they are completely free range now. No problems with predators, but we’ll see how that goes once the cold weather comes along and food gets more scarce.

Our two new hives are doing well. They seem strong. We’ve started feeding them their winter sugar syrup. They had a huge field of ragweed and goldenrod to gather pollen from, so they should have enough protein to last them through the winter.

House

Things are moving along well at the house. We are working on getting the stairs in (with the funky angles in our house, this is a bit of a chore). They are made of Oak and Ash and I can’t wait to try them out. I know Suki (the dog) will be happy that she can finally explore the upstairs too. The plumbers are coming out tomorrow, and we hope to do the electrical at the end of the month!

stairs.jpg

stairs2.jpg

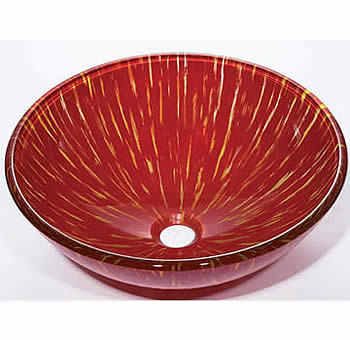
I’ve been having fun scrolling through Ebay finding lights, sinks, faucets, etc. Here is the sink I got for the master bath. It’s a glass vessel sink, so it sits above the counter. Cooooool, Eh???
sinkup.jpg

This is the sink for downstairs… it’s a hand painted mexican Talavera drop in sink!

sinkdown.JPG

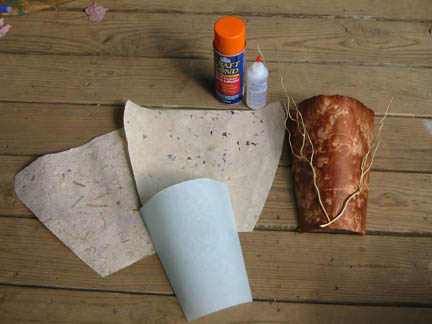
I’m also making some hand made paper sconces for a few of the rooms. I bought a pretty cheap glass sconce, traced it to make a pattern and added a few inches to each side to have room to fold the edges over. Then I used a spray adhesive and attached the paper, leaving the top rough and unfolded. Then, I used some dried curly willow branches and glued them (with a craft glue) onto the paper.
paperlight.jpg

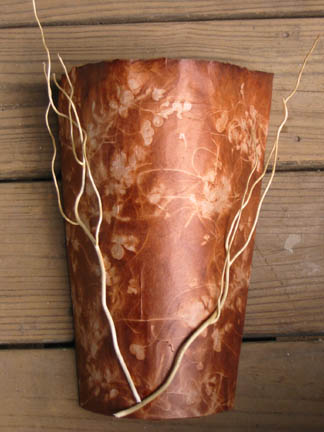
Here’s the final product… Cool eh? I thought these would look nice in our bedroom, and maybe in the from hall as you walk into the house.

paperlight2.jpg

shroom medicine

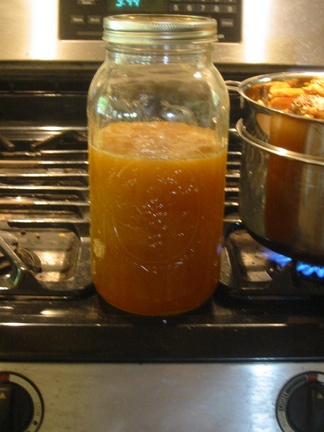
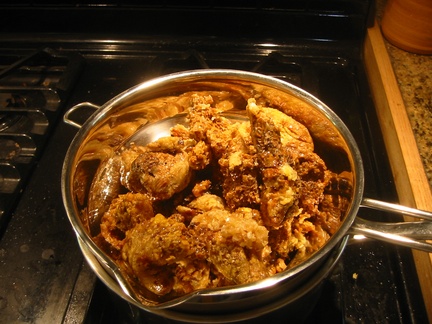
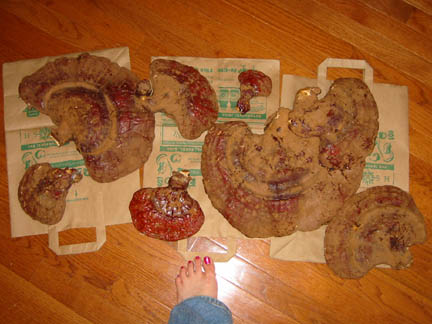
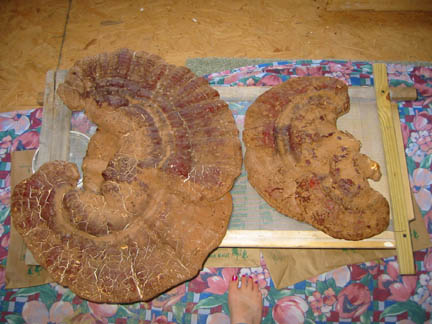
A good friend of mine called me this morning. She said she and her two boys were out mushroom hunting and found some Ganoderma tsugae (or Hemlock Varnish Shelf). It’s closely related to the Reishi mushrooms and is used in a similar way medicinally.  So, she asked if I would like it. I said of course, thinking I would make a little medicine for the winter. WELL, a little medicine would be the understatement of the year! They brought in 8 mushrooms ranging in size from 3 inches across to 2 feet!! Absolutely beautiful, stunning examples of Ganoderma tsugae!! So, right now, they are on the stove. I chopped them up (while they are fresh and I could still chop them, ’cause they get hard as a rock if you let them dry) and put them in a pot of water. They will simmer until the water is reduced to a thick, dark brown concentrated liquid. Then, I will measure out the liquid and add enough alcohol to make the final product 35% alcohol. Then I will put the mushrooms back in the liquid and let it sit for 4 weeks to macerate. After that, I’ll strain the mushrooms out and voila! This process helps to extract all the medicine available in the mushrooms.

ganodermatsugae1.jpg

Above are the smaller ones!!

The two largest mushrooms (below) I saved to dry and hang on the wall… one at my house, one at the clinic. If I need them later, I can process them, but I really like the idea of hanging them on my wall (a little energetic/home immune support :-))  Yes, that is my foot in the pictures for size comparison!  (I don’t have small feet, by the way!)
ganodermatsugae2.jpg