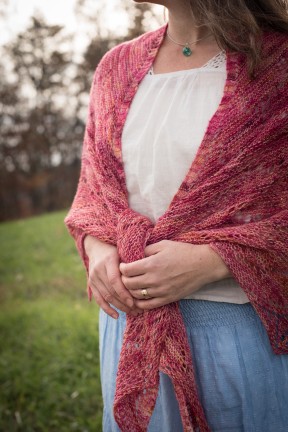
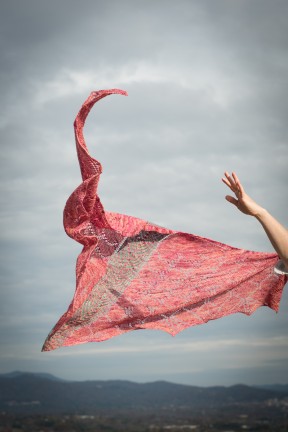
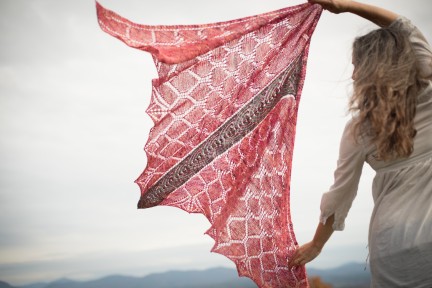
Hello there!  I realize that my posts here are coming very infrequently in the past few years.  It’s been almost 12 years (!!) since I began this little blog and life has become busy in many other ways and my energies are going elsewhere.  I’m using Instagram as one of my ‘blogging’ outlets more often now, and you can find me there as Ninja.Chickens as well as on my new website where I also podcast: Ninja Chickens. In the mean time, I wanted to leave you with a sneak peak at my new Shawl Design.  It is called Drekin and is a Faroese style shawl with lace and brioche.  I spent almost 4 months dreaming, designing, and editing.  I am so excited about this.  It will be coming out on January 1st on Ravelry and in my etsy store.
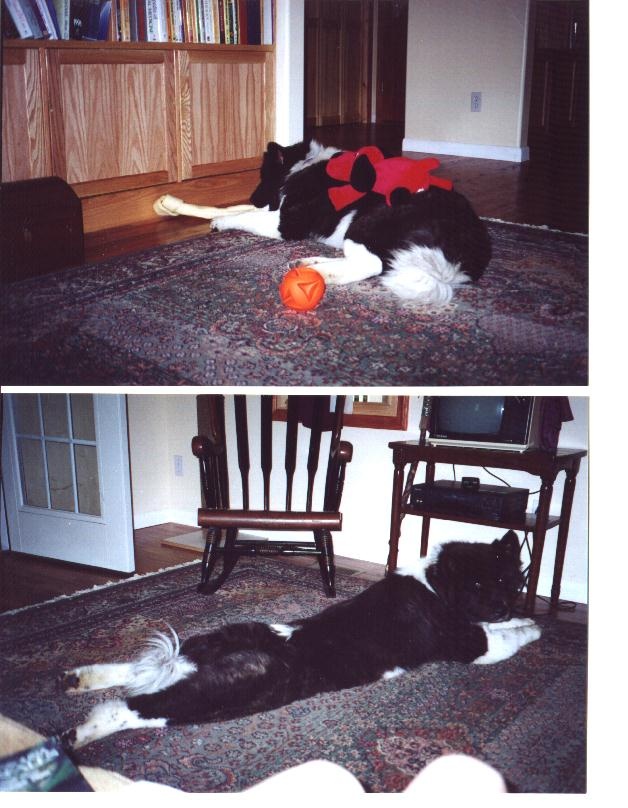
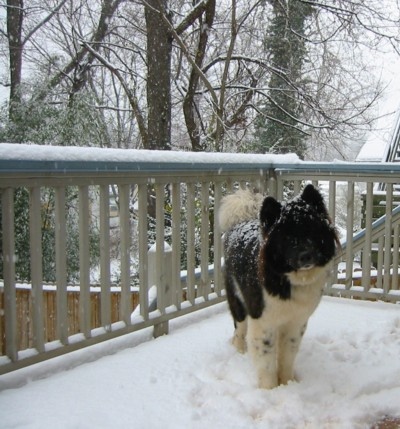
I got Suki from a rescue when she was about 1 1/2 years old. Â I didn’t know a lot about her back story except that she’d been turned into the rescue twice by families who said they just didn’t really want her anymore. Â I promised her that I’d stay with her to the end. Â My sweet Suki passed away this evening after 14+ great years. Â She was a fierce and loyal companion with a mind of her own.
I picked her up from a rescue 6 hours from my house. Â After the long drive home she bounded into the house, ran into each room, and then jumped on my bed and peed. Â I’m not sure if she was just super excited to finally be home or if she was getting me back for the long ride in the car.
Soon after I got her, a friend lent me his book on training Akitas. Â I’d skimmed it a bit and left it on the table so we could start our training soon. Â The next morning I woke up to find the book shredded on the floor…. Suki had never torn up anything before and never did again! Â She just wanted to make sure I understood that she didn’t need any training. Â She would walk to her own beat.
One of Suki’s favorite games when she was younger was to steal your socks or underwear as soon as you jumped in the shower and run off with them. Â She was a stealth little thief!
She also had this toy that was actually a stress doll… one of those things you beat on when you are stressed and it would scream (Weird, I know). Â Well, Suki took it from Toby and claimed it as hers. Â She loved to carry it into our room at night and chew on it so that it would scream “YOUR DRIVING ME CRAZY!!!” as we were sleeping.
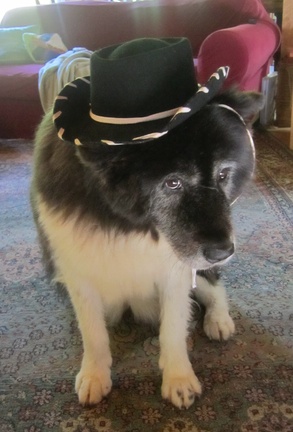
Suki was a bit of a puppy until she was probably  7 or 8 years old.  She finally started to mellow out a bit.  The kids took advantage of that and would dress her up.  Sometimes it was just to keep her warm in the winter.
Sometimes it was because she looked so cute in hats.
Dearest Suki, I hope you are now at peace. Â I hope your heaven is full of squirrels and chew treats, underwear and all of your favorite things. Â I love you and will miss you dearly!
Last night I fell asleep to the music of cicadas and crickets. Â I didn’t realize I missed it until I heard it coming though my window. Â Ahhhh!!! Â Home!
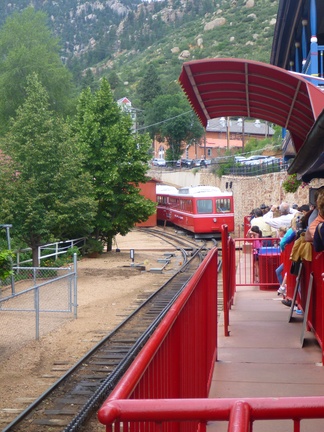
We had a wonderful final week of travels and rode TWO trains! Â We took the cog railway up to the top of Pikes Peak, one of Colorado’s 14,000 foot mountains (they have 53!) Â Cogs are used for steep terrain (generally over 7%, but some of the inclines on our ride were 25%!!!). Â It’s basically a gear on the bottom of the train that connects with the middle rail. Â This keeps the train from slipping on the tracks during a steep incline.
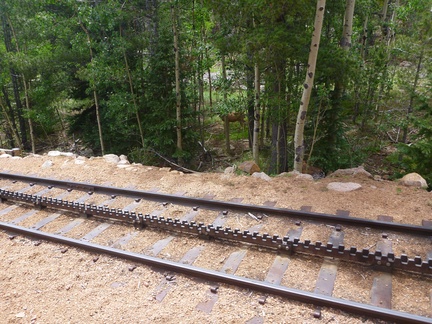
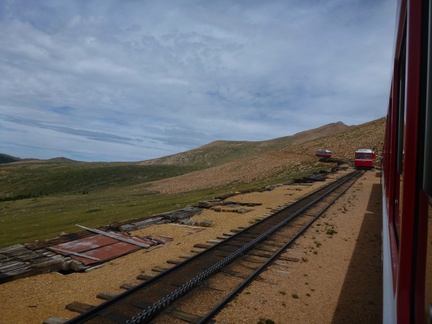
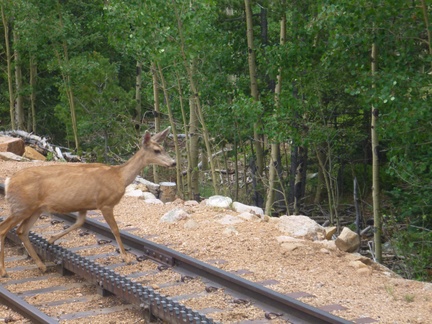
Here is what the railing looks like. Â Leif really enjoyed learning how this works. Â There are currently only 3 cog railways in use in the US: Pike’s Peak in Colorado, Mount Washington in NH, and Quincy and Torch Lake in MI. Â (See the deer in the woods?)
You can see the angle of the incline here. Â Looks more like we are in a plane!
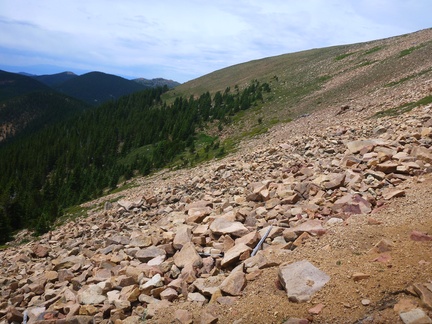
Above the tree line.
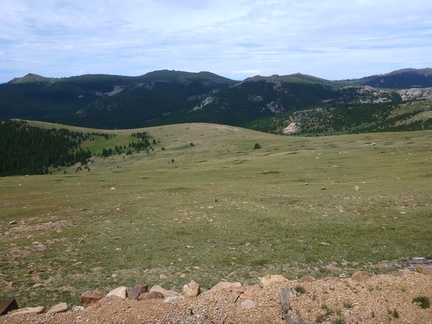
“The hills are alive….” Â I could just see Julie Andrews dancing in the fields. 🙂 Â The grass up here grows SOOOOOO slowly…. about an inch every hundred years. Â So, we cold still see the 100 year old wagon trail.
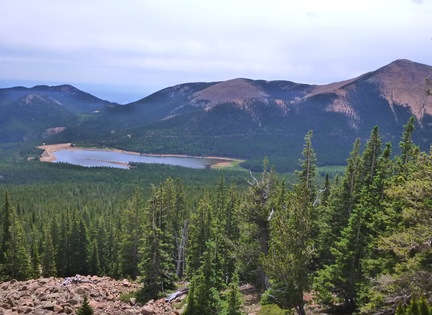
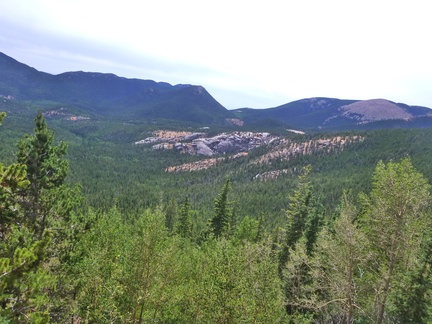
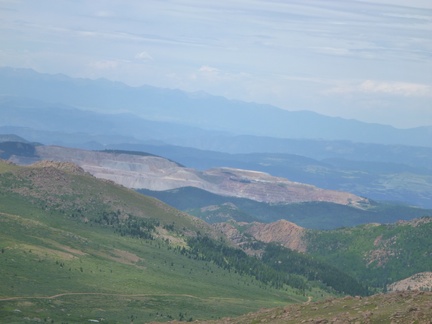
In the distance is a working gold mine!
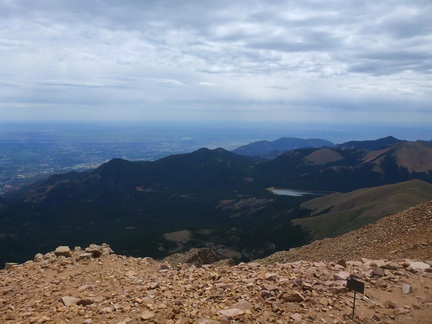
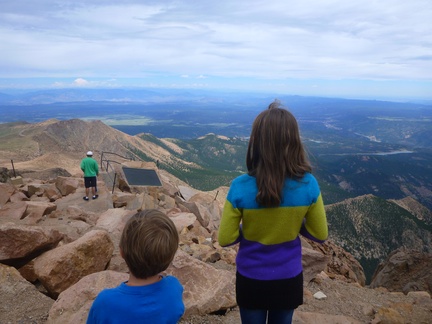
View from the top.
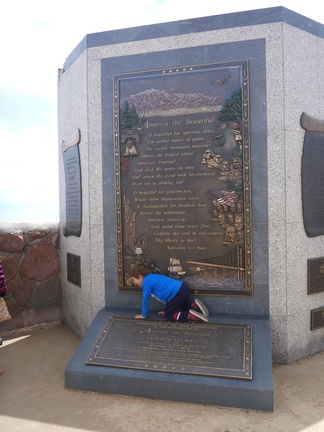
One thing that I learned on the trip was that Katherine Lee Bates wrote the poem  America the Beautiful after being inspired during the wagon trip she took up to the top of Pike’s Peak in 1893.  Isn’t that cool?Â
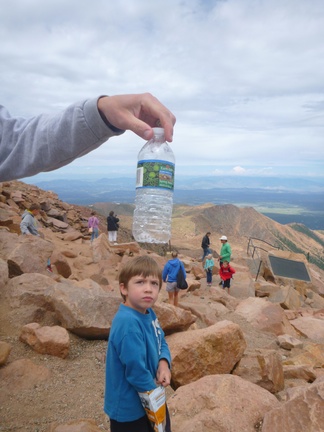
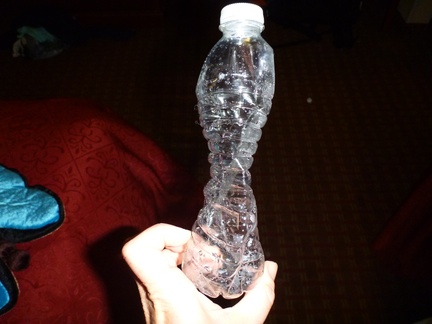
Since this was the highest point we would be at during our trip we emptied our water bottle of water and put the cap back on for the long trip back home. Â We talked to the kids about air pressure and how it would change the bottle as we traveled home.
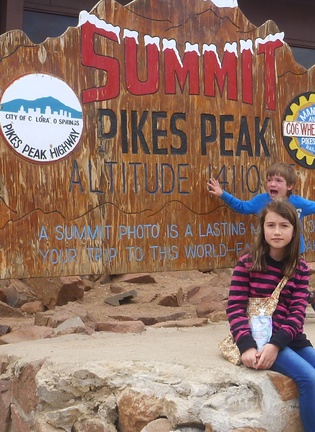
Leif loves his sister so much. Â But he DID NOT want her in this picture with him. Â There was a long line of people waiting to take pictures of the summit sign and the train was ready to leave. Â So, since Leif couldn’t have a picture by himself, he ran around screaming like a crazy man. Â Toby finally had to help him off of the rock and back into the train. Â Poor little man. Â The low oxygen must have been getting to him 🙂
The sweet deer came right up to the train on the way back down.
We had a book about the railway that described the language of the different horn blasts. Â So, we could tell when the engineer was signaling to his conductors, when he was warning about crossings up ahead, when he was about to stop…
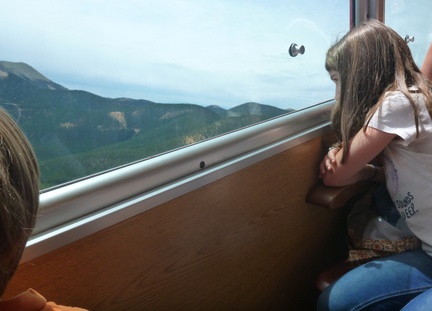
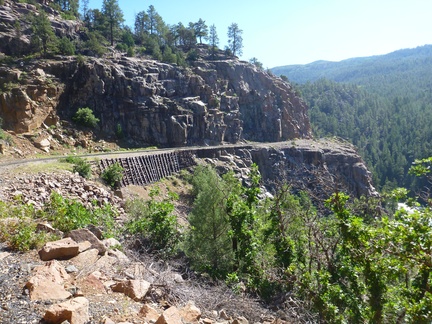
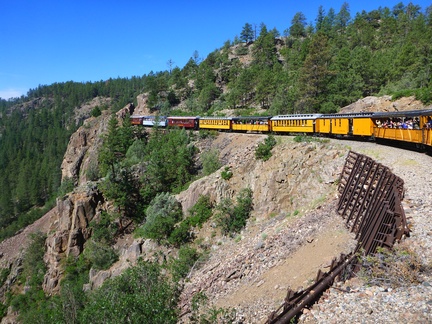
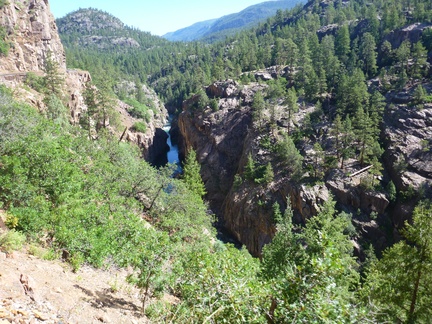
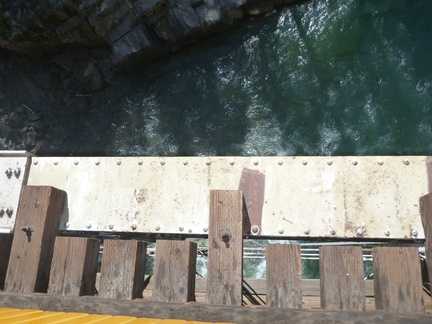
 Some parts of the rail line were over some pretty steep cliffs.  This is looking straight down from our window.
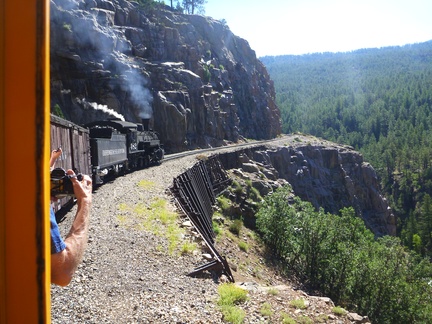
Sometimes, when going over bridges, the train would blow steam out of the side. Â This helped clean out a part of the engine (I don’t remember what part 🙂
Over the bridge.
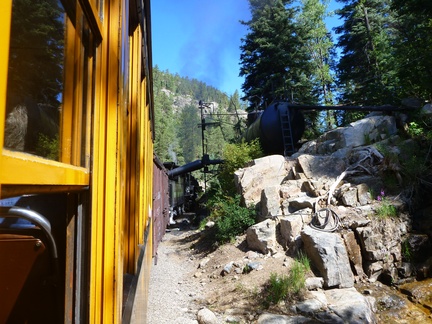
We stopped twice to take on more water. Â The water tanks were fed by streams above them. Â The tank fills up and overflows back into the stream.
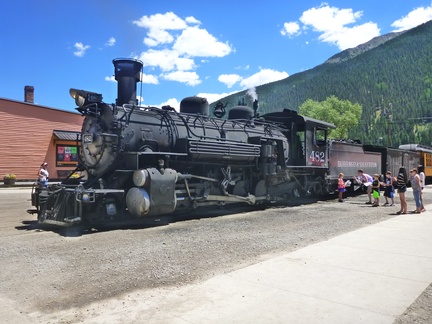
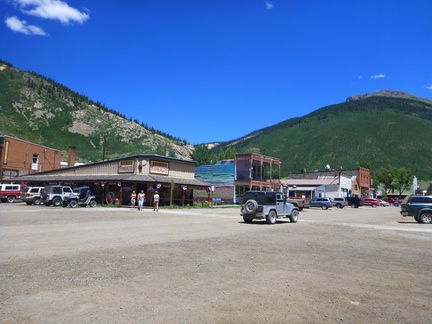
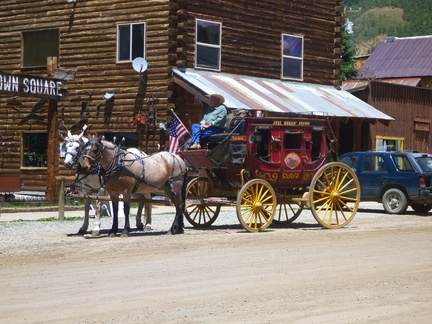
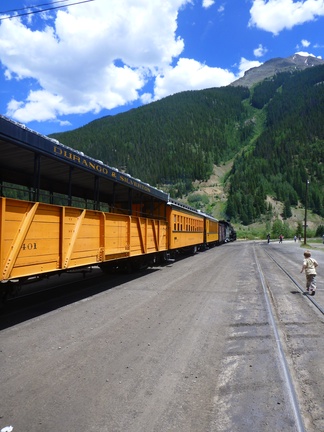
Our destination was Silverton. Â The town was named after the ton of silver that you could find there. Â (A little gold, too.) Â But it was known for being a bit of a lawless town. Â There were 40 bordellos on one street! Â There was so much trouble making in the town that Wyatt Earp and Bat Masterson were brought in to try to keep the peace. Â When they couldn’t, Masterson left and Earp began dealing cards for local saloons.
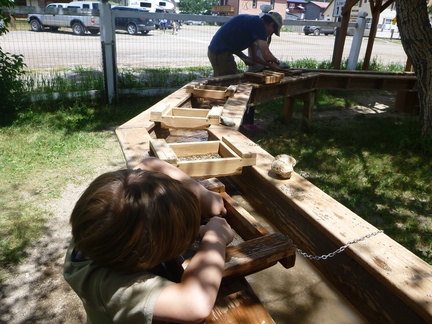
Of course, there is ‘mining’ for the kids in Silverton. Â
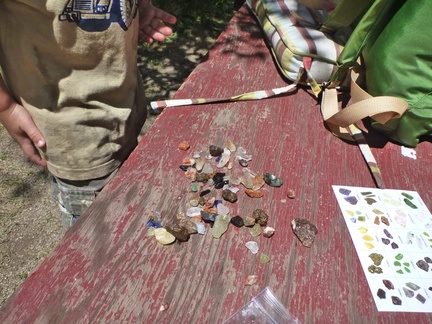
They were very happy with their haul.
After a couple of hours in town, we headed back to Durango. Â The train in front of us was having some troubles, so this trip took a bit longer.
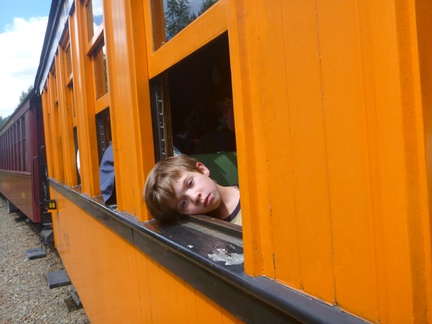
And some of us got tired 🙂
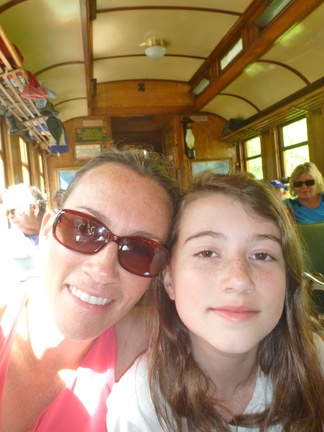
Selfie with the kid.
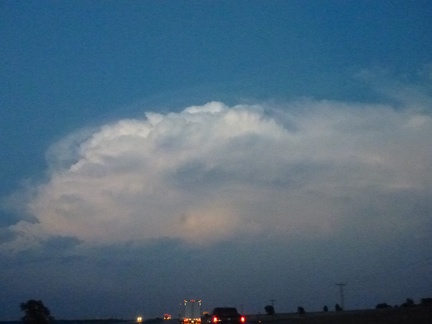
When we finally got back to the hotel, this is what the sky looked like.
We had thought about making a few other stops, but we all agreed that we had seen as many things as we could and it was time to make the 26 hour trip home. Â We passed a train carrying wind turbine blades. Â I had no idea they were so big!!! Â Each of these blades took up two train cars!!
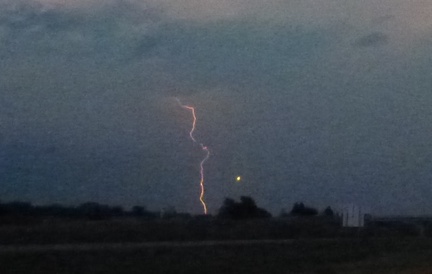
On our way through Oklahoma, the sky began to darken.
And lightning began to explode in the air!!! Â The sky was pitch black at this point, but the clouds look white because of the lightning inside.
We stopped in Memphis for a night and checked out our bottle, since this was the lowest point in our trip.
Yesterday, 4300 total miles later, we finally rolled into home! Â What a trip! Â It really couldn’t have worked out much better! Â But, man, is it great to be home!
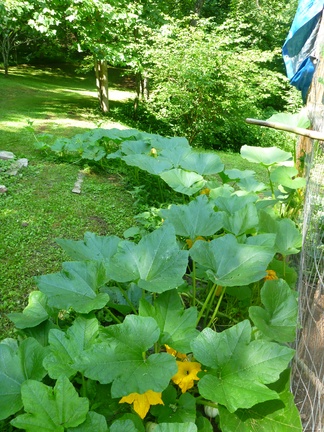
The pumpkin vines have to be 30 feet long!
The tomatoes are bigger than my hand!
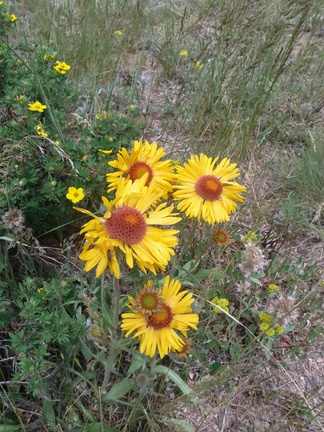
And the flowers are gorgeous!
So, now we go back to our normal routine. Â Time for me to start planning out the next school year for the kids, getting things canned up from the garden, and enjoying the last days of summer.
For the last few years, Toby and I have talked about how nice it would be to take a month out of each year to travel with the kids. Â It would be a fabulous way to introduce them to other cultures, people, languages, etc. Â We thought it might be best, though, to wait until Leif was 5 years old to do this, and to start in the States, just to see how we all did with being away from home for a month.
It just so happens that some good friends of ours just moved to Boulder, Colorado earlier this year and they invited us out for a visit in July. Â We also have a friend who needed a place to stay for the month of July and offered to take care of our homestead. Â BAM! Â Couldn’t have been more perfect.
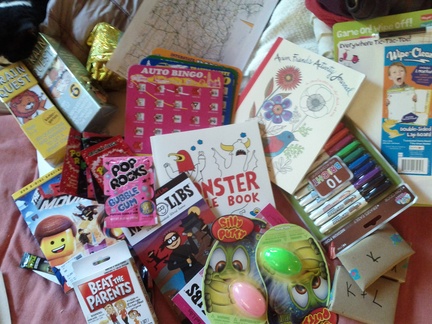
For a few months prior to our trip, I started collecting little entertainment goodies for the kids, and wrapped each one in brown paper. Â Every few hours of our trip (while we are in the car at least) if the kids are well behaved, they get to open another package. Â We also borrowed a DVD player from a friend, and laminated road maps so that the kids could mark off our travels on the maps. Â We left last Sunday with the kids in PJ’s surrounded by pillows and entertainment.
I will admit, I was very apprehensive about the drive. Â I thought that there might be a bit too much bickering going on in the back seat for my liking. Â But, things went amazingly smooth.
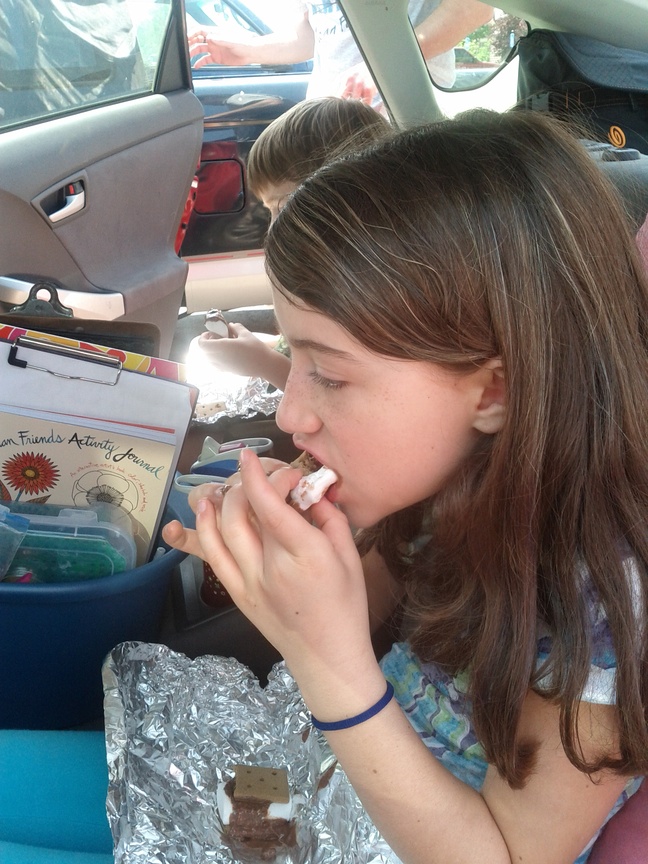
Our drive took us about 3 days (with stops here and there). Â Silly Putty and Mad Libs were a hit. Â And, of course, the DVD player got some use! Â We also tried our hands at making Car S’mores.
We wrapped the graham crackers, marshmallows, and chocolate in aluminum foil and put it on the dashboard in the bright sun. Â It didn’t take long before the chocolate had melted and the kids got a tasty treat.
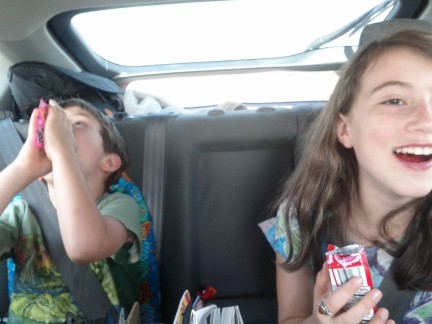
Oh, and the kids also got to experience PopRocks for the first time. Â (I know it sounds like all I did was give the kids sugar, but I promise I didn’t 🙂
Another way to keep the kids entertained was by rating all of the bathroom stops. Â In case you are wondering, the most pleasant/cleanest bathroom was a tie between the Breaktime at Booneville, MO and the 24/7 Travel Store west of Topeka, KS. Â The 24/7 may win out due to their used book store inside the rest area! Â (We even found a Reishi mushroom growing out of the lawn at the Kentucky Welcome Center rest stop!)
With the kids marking our progress on their maps, we noticed that most states most populated cities were not also the state capitals. Â In fact, in only 17 of our 50 states are the capital cities also the largest cities in that state. Â Can you name them?
On the way out to Boulder, we made a stop in Troy, IL to visit friends we hadn’t seen in almost 8 years. Â The kids wore themselves out playing while Kristine made wonderful meals and we had great conversation. Â Thank you Kristine, for having us out to your lovely farm!
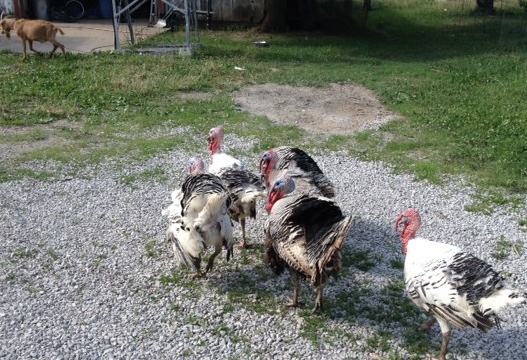
These silly turkeys loved to gobble. Â And when one gobbled, they all gobbled. Â Leif discovered that they would gobble every time he screamed. Â I wonder what the neighbors were thinking?
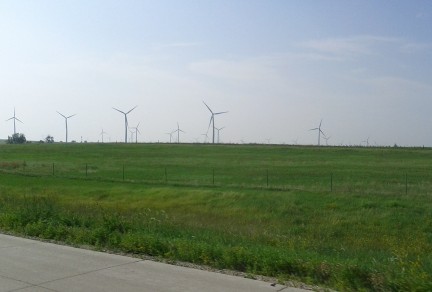
We all loved seeing the sea of windmills along the highway once we got into CO.  This happened to coincide with seeing a video about two Russian scientists who are attempting to build Tesla’s Wardenclyff tower. So, we learned a bit about energy and how it’s transmitted. Leif thought this was pretty dang cool!
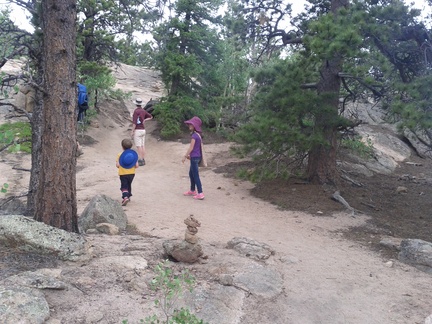
Now in Boulder, we are spending our time swimming at the most fabulous community pool, hiking up in the Rocky Mountains, visiting markets, and enjoying time with our friends.
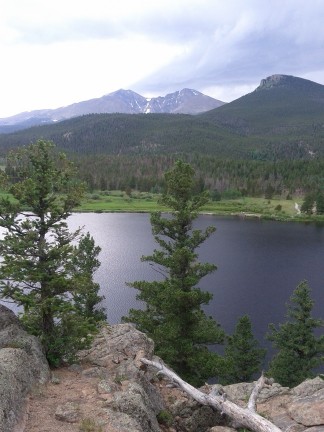
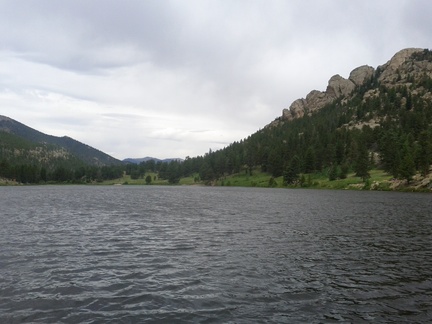
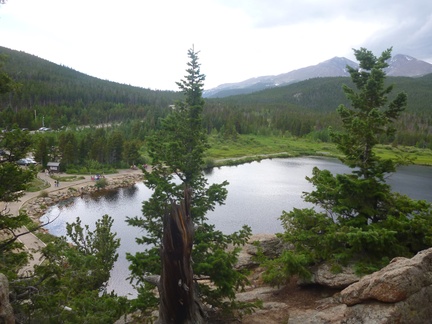
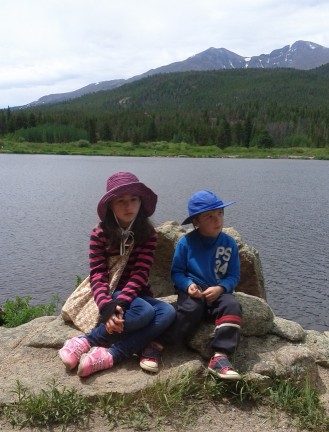
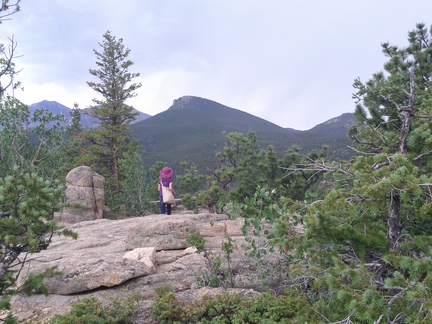
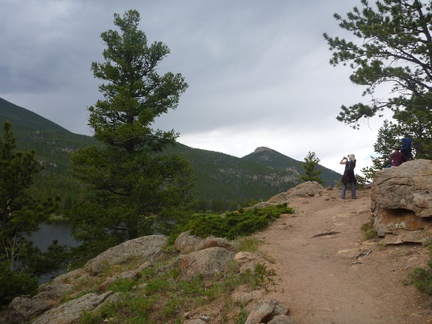
Lily Lake is in the shadow of Longs Peak (a 14,000 foot mountain).
We had a lovely hike around the lake and up into the mountains a bit.
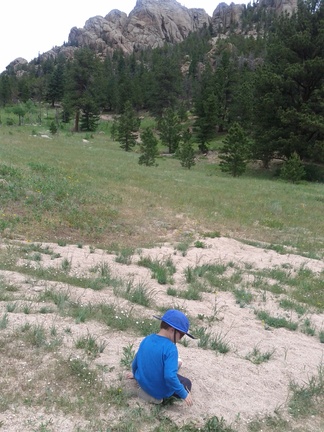
The mountains here are so amazing and stunningly beautiful, just like my mountains back home. Â Yet, they are extremely different. Â So stark and dry and sharp. Â The mountains I’ve grown up with are lush and green, softened and molded with age. Â I love the contrast between the two and learning about these new mountains.
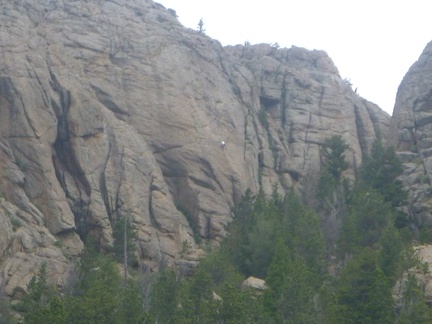
(See the rock climber?)
Kaia shot this picture of me photographing the storm rolling in.
The storm over Longs Peak
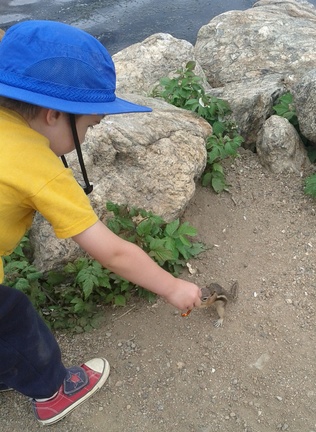
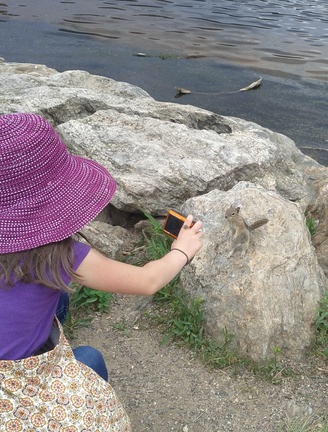
There were some VERY friendly chipmunks who may be getting fed a bit too much by the tourists 🙂
This one is trying to steal a compass from Leif’s hands.
And this one was a bit of a camera hog.
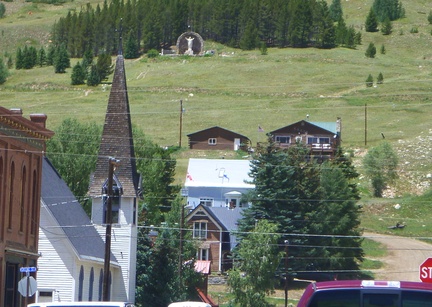
On the way to the mountain, we found this gorgeous church growing out of the stone.
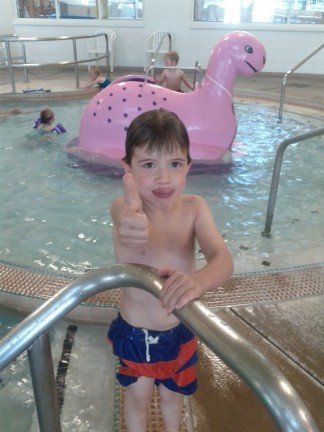
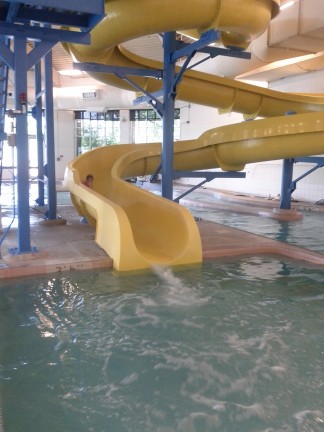
Back in Boulder, Leif had a big thumbs up for the big slide at the community pool!
All of us took turns on the big slide! Â There seriously needs to be one of these at our local pool in Asheville!
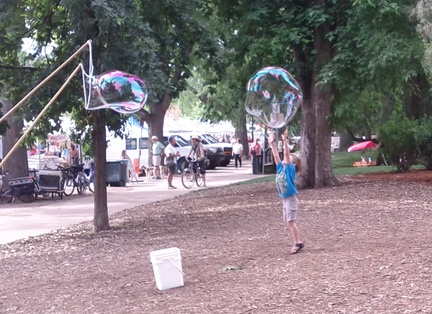
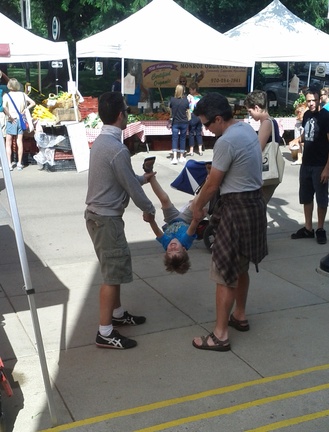
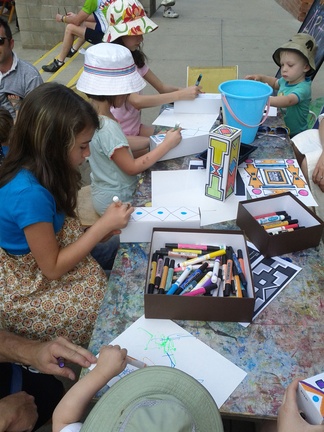
Today we explored the famous Boulder Farmers Market. Â Kaia said, “It’s more Gluten free than Asheville!!” Â And Leif ran around like a crazy boy (and then got swung around a bit)!
We stopped at an art booth and learned a bit about the Ndebele people of South Africa and their style of house painting.
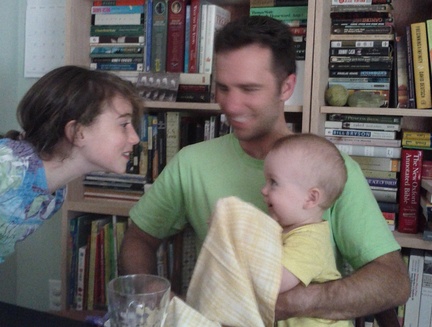
And of course, there has to be a cute picture of our friend’s little boy Isaac, who loves peek-a-boo.
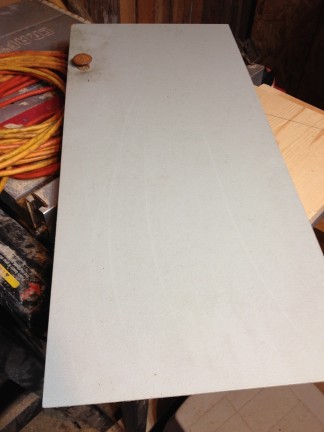
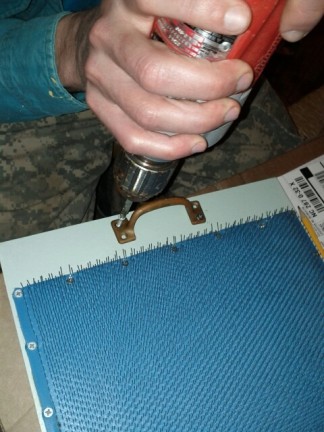
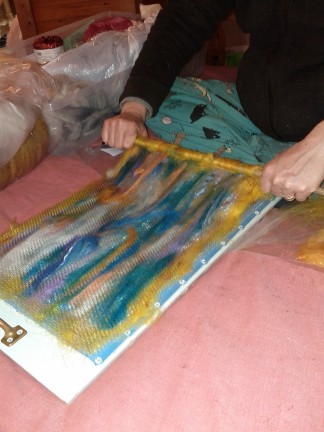
Thanks to Nikki and her birthday gift, I’ve been having a wonderful time spinning art yarn. Â But, to make art yarn, you need art batts. Â These can be on the pricey side when you are just learning how to spin. Â So, I thought I’d make them myself. Â Usually they are made using a drum carder. Â I don’t have one of these and they cost just as much as a new spinning wheel (expensive). Â But, last year, something new appeared on the market called a blending board. Â It’s less expensive than a drum carder, but still pricey. Â So, in an attempt to create my own batts to spin, I’ve made my own blending board for under $100.
I ordered a piece of blending cloth from Natural Fiber Yarns. Â While I waited for it to arrive, Toby found an old cabinet door that was the perfect size to attach the cloth to. Â He trimmed one end a bit and removed the knob.
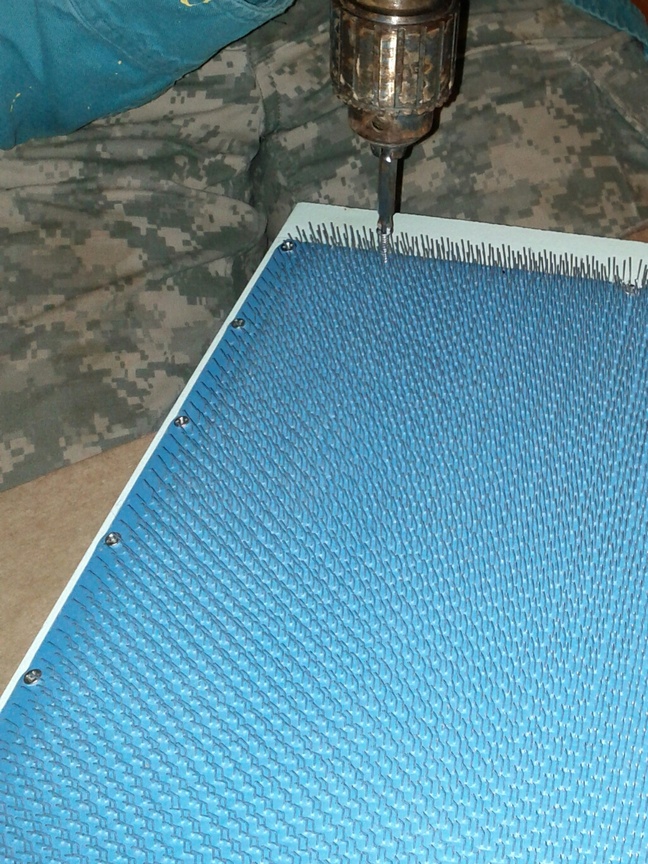
Once we had the cloth, we put some wood glue on the door and placed the cloth securely onto the glue.
After the glue dried, Toby used tiny screws to attach the cloth on all edges. Â You could also use a staple gun, but we had lots of little screws laying around.
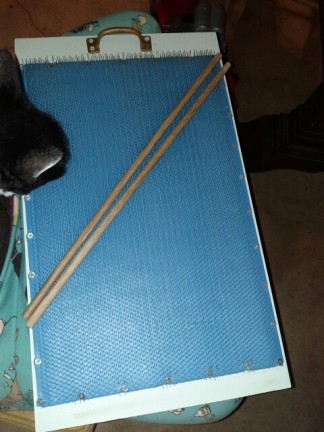
Then, he attached a cabinet handle to the top edge so that it will be easier for me to carry and hold on to when I’m blending fiber.
I found a 3 foot long 3/8″ dowel that I had laying around the house and cut it in half (photo bomb by the kitty!) Â These will be used to roll the fiber up into a batt.
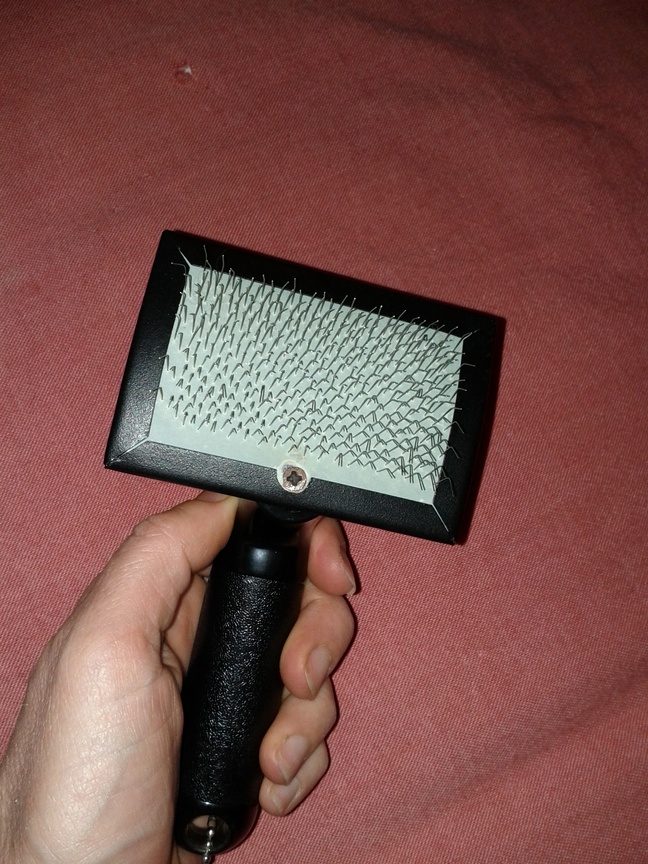
And I found a cat brush to help with pushing the fiber into the blending cloth.
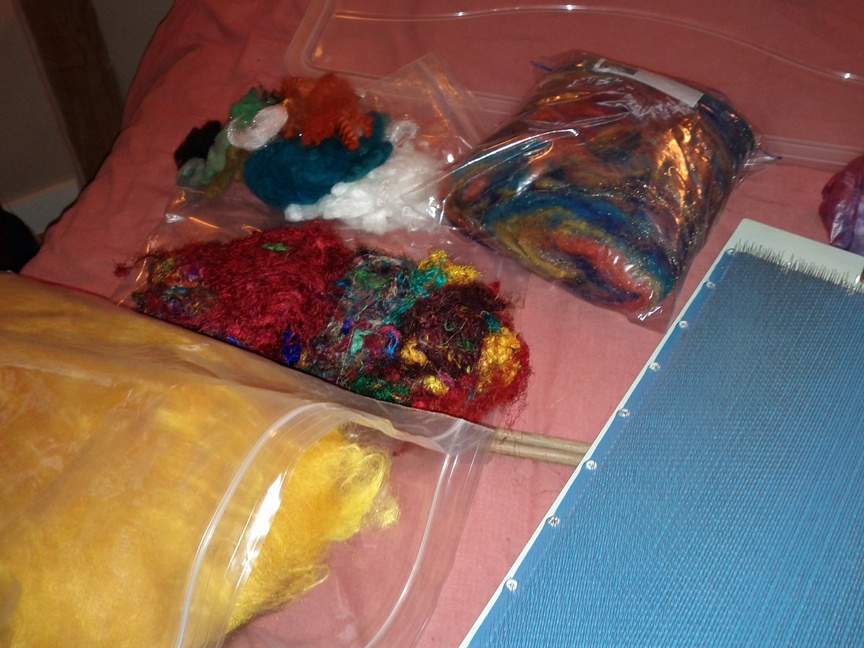
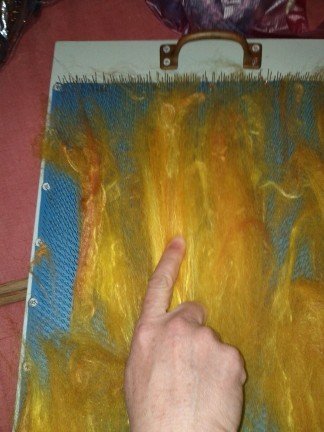
Then I got to blending. Â Here’s how the process looks. Â I gathered all my goodies and began ‘painting’ them onto the blending board.
First was a beautiful yellow that the kids and I had dyed with turmeric (wool and bamboo). Â You drag it along the pins so that it catches and stretches.
Then, you can use the cat brush (The pins are at an angle so you use the brush upside down so it doesn’t pull the fiber right back out) to push the fiber deeper into the pins.
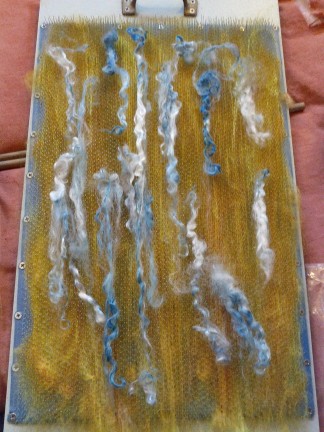
Keep adding stuff until it’s full. Â These are blue and white mohair locks.
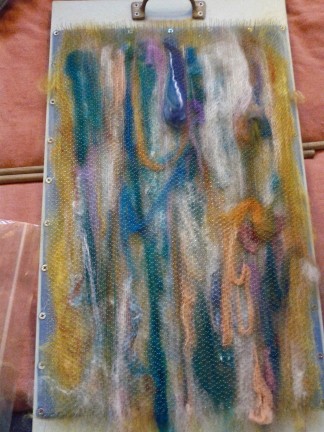
I added sari silk, silk cocoons, tinsel, more wool of different colors, and whatever else I could find.
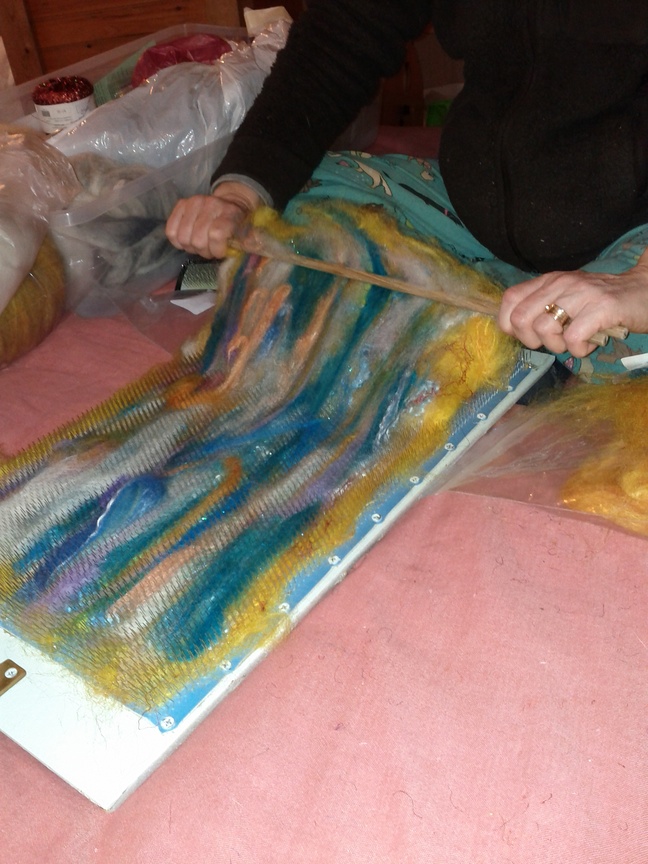
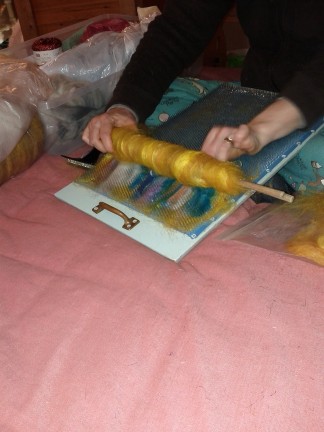
Once it is full, you pull up the end a bit to loosen the fiber. Â Then you place the dowels, one on each side of the fiber, and begin rolling it.
Some of the fiber may stay stuck in the blending board. Â You can pull those up with your fingers or the cat brush and wrap them into the rest of the fiber.
Once you are done, just slide the dowels out and you have yourself a mini batt. Â You pull from one end to start spinning your art yarn.
Trying to stay away from dairy and sugar wouldn’t be that hard at all if ice cream had never been invented! Â I think I get my ice cream gene from my dad, who use to sit down to a half gallon of ice cream after dinner….. a bowl for me, a bowl for my sister, and the rest for him! Â Needless to say, he wasn’t a small man.
Banana ice cream has become a simple and tasty substitute when I’m craving that sweet creaminess.
My most recent creation is Carrot Cake Banana Ice Cream!! Â So delicious! Â (Please excuse my photos. Â My good camera broke and I’m left with my phone camera, which is not the best)
Ingredients:
3 frozen bananas
1/2 cup carrot, finely shredded (~1 medium carrot)
2 Tbsp. coconut milk (full fat)
2 tsp. cinnamon
1/2 tsp. nutmeg
1/2 tsp. cardamom
1/2 tsp. vanilla extract.
1/3 cup raisins
1/3 cup walnuts, chopped
15 drops stevia extract (optional)
Place your bananas, carrot, coconut milk, and spices in a food processor and mix until smooth. Â Take a taste. Â It’s delicious the way it is, but if you have a serious sweet tooth, like I do, you can add up to 15 drops of stevia and mix again.
Pour your ice cream into a large bowl and hand mix in the nuts and raisins. Â Makes ~4-6 servings.
That’s it! Â As my little boy says, “Easy peasy lemon squeezy!” Â Enjoy!
I posted a picture of Kaia’s fabulous doll creation on Facebook and a FB friend, that I’ve never even met in person, was so impressed with Kaia’s ambitious sewing project that she sent Kaia a care package. Â The package had doll making books, supplies, and even a hand made bunny! Â Kaia was so excited that she got to making one of the dolls immediately.
The pink one she made for herself and the yellow one she gave to her dad for his birthday. Â The little bunny was given to her in the care package. Â Aren’t they cute?!?
So, then I was inspired. Â The patterns in the book are so cute that I wanted to try to make one of my own.
Please meet The Dimples
They are super easy and quick to make.
Here is the pattern (two pages) to download if you’d like to try one:Â dimple2Â Â Â dimple3
First cut the pattern and choose your fabrics. Â Pin your pattern and cut your pieces out. Â I used felt for the body and cut it with pinking shears. (Make sure to read through the instructions first. Â There are different ways to sew up the doll depending on if you are using felt or not.)
Be sure that you cut your legs and ears so that they match up. Â You don’t want two left legs…
Lay out your pieces to make sure you like the fabrics you chose.
Once all of your pieces are cut, you will start sewing by attaching the face to one of the body pieces with a very close zigag stitch on your machine, or you can do a satin embroidery stitch. Â You will do the same with the eye and the heart. Â Using contrasting thread colors to make them pop.
Next, embroider on the face and attach a button for an eye.  I used a basic back stitch for the mouth and blinking eye.
Next, pick a contracting color of embroidery thread or yarn and make a wide whip stitch around the face.
Next, you will sew up the legs and ears. Â Place the right sides together and stitch around, leaving 1/4 ” seam allowance. Â Make sure you don’t sew all the way around. Â Leave a space where they will be attached to the body to turn them right-side-out and stuff them.
It helped me to use a chopstick to turn them right side out.
Trim the corners of your ears before turning them out.
Then stuff them leaving the end open.
Pin your pieces together making sure the ears and legs are tucked nicely between the front and back body pieces.
Sew it all together using a straight stitch in the same color as the body, and leaving an opening at the top to stuff.
Stuff your doll and sew it up, either with a straight stitch on your machine or by hand.
Now, if you want to use cotton fabric (or a non felt) you follow the directions exactly the same until it comes to sewing the whole thing up. Â You will need to lay it out with the ears and legs on the inside with the edges lined up, like this:
The ears and legs are place up on the top body piece and then the back body piece is placed, right side down, on top. Â Pin it well and sew it up leaving a space for stuffing and pulling everything right-side-out. Â Does that make sense? Â Here it is, ready to sew, with legs and ears tucked inside.
Stuff, and hand stitch it up with a whip stitch.
The pink one was made as a birthday gift. Â Of course, Leif and Kaia wanted one, too. Â Leif’s has an X eye, instead of a blink.
Kaia has been asking to do this doll project for a few months now. Â I thought, instead of starting the new school year a little early, I’d put aside the last week of summer for her to make her doll. Â Often times, with sewing projects, she will start off with great gusto and then dump the project in my lap begging me to finish it. Â This time, she took off and ran with it. Â Not only completing the doll, but accessories, too.
Beginning the first arm
Voodoo doll!
Stuffing the legs
Button hips and brown boots
Sometimes others fall in love with our creations
And sometimes we get side tracked by cuteness
Pinning on the first layer of hair
Hair’s done (Crazy Happy!)
I did help Kaia by sewing on the face. Â But, while I did that, she made Caroline a dress and accessories.
Caroline now has a purse, book, pencil, and saddle bag with snack pack, apples, water, and a burlap bag of oats for her horse.
Stay tuned! Â Movie episodes of Caroline in “My life as a doll” are in the making!!
Sorry for the blogging hiatus. Â Things have been busy at the homestead, as usual. Â The garden is bursting, the school year has finished up, I’m continuing to move along with aerials… but what’s really taken up a lot of time and emotions is Kaia’s kitty, Oreo. Â Back in April, we noticed that Oreo was not his normal self. Â He seemed depressed and lethargic. Â We took him for a check up and discovered that he had FIP (Feline Infectious Peritonitis).
For those of you who have never heard of this awful virus, I hope you never have to get to know it personally. Â It is a 99% fatal virus that attacks the kitty’s immune system. Â For the last two months there have been special foods, syringe feedings, IV fluids, many medications, and lots of love. Â Oreo fought a hard fight, but he crossed the Rainbow Bridge last Friday. Â It was a sad time for all of us, but especially me. Â Oreo and I had bonded and I will miss his sweetness. Â I still tear up thinking of him. Â It’s so hard to feel so helpless when someone you love is sick.
And in the midst of all of this, my baby girl turned 10!
That’s double digits!!! That’s starting puberty!! Â That’s pre-teen! Â Holy cow, how time flies!! Â I asked my girl what she’d like for her birthday and she quickly replied, “A Treehouse!!!” Â Sweet! Â We can do that! Â So far, we’ve (Toby and his dad, really) gotten the platform done. Â It’s been raining cats and dogs here all spring. Â But the walls and roof will go up as soon as the sun starts shining again. Â Then, I may have to kick Kaia out of the tree house so I can play!! 🙂
Just a short walk around our home brings so much beauty to the eyes!! Â You feel yourself forced to take a deep breath, exhale, and allow your stress to just melt away…
Ok, you don’t even have to use Nettles! Â You could use spinach or any other leafy green. Â But, nettle was what I had on hand and boy was the result delicious!! Â (You see the big bottom lip in the picture above? Â I’d just told him I didn’t want him to pretend to be a track-hoe in the stream. Â Bad mommy trying to keep him clean for dinner:-)
I’ve tried out so many nettle soup recipes, only to be disappointed. Â They were either too bland or too watery or just didn’t leave me satisfied…. until this one! Â Not only did I like it, but the hubby and both kids did, too!! Â Win-Win!
1-2 pounds of breakfast sausage (if you use links, cut them up into small pieces once they are cooked… I use bulk sausage)
1/2 Tbsp coconut oil
1 onion, chopped (red or white works fine)
1/4 tsp. of salt
1 tsp. paprika
3 cups of Chicken stock
One can of full fat coconut milk
About 4-6 cups of nettles (strip the tender leaves from the tough stock and just use the leaves in the soup… and wear gloves when you touch them!) Â Kale, spinach, chard, and greens like these also work well.
Warm your coconut oil in a pan and add your sausage. Â Cook over medium heat until the sausage is nicely browned.
Add your chopped onions, salt, and paprika.
Stir to cook your onions and spices until the onions are softened.
Add coconut milk and chicken stock and bring it to a simmer.
Don your gloves and add your nettles stirring in well. Â The leaves will immediately start to wilt into the soup.
Simmer for 20 minutes, then eat up!!!
I think this is going to be one for canning up to have on hand year round!! Â Delicious!
One day, we’ll get to tapping our Birch trees. Â I’d love to try some birch syrup! Â Until then, we’ll harvest the bark and make Birch tincture, honey, and oil. Â Mmmmmm. Â Good stuff!
Every year, for my kids birthdays, I make their cake… whatever kind of cake they want. Â I’ve made unicorn heads, construction sites, Ariel the mermaid sitting on an island floating in the water, and more mermaids….. you name it. Â It’s always a fun challenge. Â But, this year when Leif requested a Perry the Platypus cake I was stumped. Â How was I to recreate a little platypus with aqua blue fur without using artificial food coloring? Â There is just no good natural blue. Â Cabbage can be boiled down, but that ends up being more pale blue/grey. Â Blueberries are actually purple. Â Then I found these: Â Butterfly Pea Flowers. Â They grow on vines native to Southeast Asia and are known for their vibrant blue color. Â When steeped in hot water, they color the water a beautiful blue… the perfect blue for Perry the Platypus.
My hope was that the flowers could be infused in oil, too. Â Then I could infuse some coconut oil and use the oil in the frosting. Â But, no such luck. Â The color didn’t transfer to the oil at all. Â I heated them in coconut milk and got a light blue, but not the striking blue I was looking for.
Butterfly Pea Flowers infused in coconut milk.
Butterfly Pea Flowers infused in Rum…. just for the hell of it!
Butterfly Pea Flowers infused in boiling water.
So, I decided to infuse them in water, making a very dark blue with lots of flowers. Â I put this blue water over about 6 cups of coconut. Â I used enough water to coat the coconut, but not drown it. Â Then dried the coconut in the oven at 130 degrees stirring it every 30 minutes. Â I think it took about 3 1/2 hours to dry out completely.
Blue coconut!
And while I was soaking things in this lovely blue water, I decided to throw some hard boiled eggs in there. Â I soaked these for 2 days before the birthday party so that I could make some blue deviled eggs!
Eggs in Butterfly Pea Flower water.
Here are a few other pictures of the process of creating Perry:
I smushed together some Sunbutter Crunch bars to form a bill.
I connected two Do More Bars with a tooth pick for the tail
Here’s the pre-frosting set up. The front limbs were also made from Sunbutter bars and the feet from peach gummy candies.
And here’s Perry. Â I put some of the coconut in the frosting as well as coating the whole cake with it after it was frosted. Â It’s certainly not as blue as the real Perry, but I think it turned out pretty dang good!
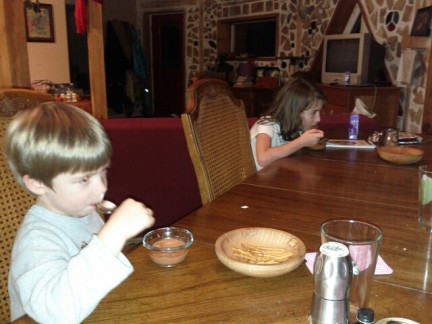
We seem to have no trouble filling our days with fun indoor activities while the weather is cold outside. Â I’m glad. Â I don’t care to hear the kids moan, “I’m bored!” (I’m sure my mother felt the same way about me 🙂
We’ve been writing letters and numbers in shaving cream on a cookie sheet….. and on his pants, and on his arms, and on his sweater, and on his socks…. (Kaia got into it, too, writing in cursive).
Right now, it’s actually easier for her to write in shaving cream than on paper. Â The kittens are a little too interested in her wiggling pencil.
Kaia and I took a spinning class a few weeks ago and I’m having a blast practicing. Â A friend let me borrow her wheel and this is what I made today. Â It’s my second skein. Â Next, Leif says I have to spin some bright blue yarn so I can knit him a Perry the Platypus hat.
Last year, I really slacked on the garden. Â I guess I was just tired of doing it all myself and wanted to focus on other things in the warm weather. Â I learned that having a not-so-great garden was just as much work as a full garden. Â So, this year, I’m picking up the pace and even growing some new things, too. Â I hope to encourage the kids to spend more time in the garden with me, and let them pick out some things they want to grow.
On the list to add to the garden this year is:
green beans
kale
cabbage
lettuce
arugula
spinach
malabar spinach
carrots
beets
burdock
tomatoes
broccoli
cucumbers
brussel sprouts
shelling peas
potatoes
butternut squash
crookneck squash
zucchini
garlic
popcorn
watermelon
jerusalem artichoke
herbs: basil, parsley, cilantro, dill, oregano, Â thyme, dandelion
and lots more flowers and medicinal herbs.
I’m hoping to build a small green house for starting all these plants as well as a nice deep raised bed for the root veggies.
Have you ordered your seeds or planned your garden yet? Â What are you going to be growing?
I’ve been so excited to share this with you, but I had to wait until my mother opened her Christmas gifts. Â My sister and I recreated a picture from ~30+ years ago with as many details as possible. Â We are very proud of it! 🙂 Â I still had the old desk. Â We borrowed the chair from a friend. Â I made a faux fireplace. Â My sister found the school girl outfit on ebay. Â And, of course, I had to get myself some new boots! Â What do you think?
For my mom’s birthday, she and I headed out to a local art studio, Canvas Paint & Mingle, to learn how to paint poppies!! Â I brought the hard cider and chocolate, and we joined five other ladies for a wonderful evening! Â Anna Blair, our teacher, took us step by step through the process of creating a master piece. 🙂 Â Since the kids have been born, my mom and I haven’t has as much time to hang out together by ourselves. Â So, it was really nice for the two of us to get out and enjoy some time together.
Here’s mom, being all artsy:
We had such a fabulous time! Â I can’t wait to try my hand at another design!!
A picture just doesn’t do justice. Â The eggs we are getting every day are so full of color. Â I go out to check the nesting boxes at least 3 times a day, just in case a new egg has been laid! Â I think we still have 4 or 5 that aren’t laying. Â So, we will soon have even more colors to add to the bunch! Â No more eggs from the grocery store!!!
I did it! Â I did my first official performance on silks!! Â I have to say, I am pretty proud of myself. Â I certainly wouldn’t call myself an extrovert. Â So, getting up infront of a crowd and performing was a tad bit nerve wracking. Â But, I did it! Â Heck, I might even do it again! Â I really am enjoying doing silks. Â I feel like it’s become a great way to express myself… like dancing in air!
When we first got chickens, over 6 years ago now, we began by using straw in their coop. They loved to kick it around and pick out any seeds. Â But I quickly learned that it got wet and soggy with their droppings. Â Once it was wet and soggy, it was also super stinky and much heavier, making it much more effort to clean out the coop (which happened every month or two). Â So,I moved on to pine shavings. Â I tried using the deep litter method, piling the shavings up over their poop and letting it compost. Â Then, I only needed to clean the coop 2 or 3 times a year. Â The pine shavings absorbed the moisture and smell of their droppings much better, but it was stil a stinky, time consuming mess to clean. Â (And I always ended up feeling pretty rough (respiratory) afterwards). Â I thought, “there has to be another way.”
When I saw this post on sand in the chicken coop, I thought I might have found my answer. Â I cleaned the pine shavings out of the coop, sprayed the roosts and corners with a dilute Neem oil spray (to kill any mites or pests), and replaced the pine shavings with sand! Â I got a truck load of river sand for $24 and used about 1/4 of it for my 108 square foot coop. Â This much sand will probably last me 2+ years! Â (so far, much cheaper than pine or straw!)
When I got up in the morning, all of the poop was piled on top of the sand and was easily removed with a scoop (I used a kitty litter scoop, but plan on making something a little bigger, with a longer handle, for ease of getting under the roosts).  The poop goes into a bucket that is then dumped into the compost pile.  I rake out the sand and it’s as good as new!  No smell, no mess, and very easy clean up!  Plus, the sand scrubs the chicken’s feet nice and clean, instead of sticking to them in a stinky clump.  This is even more important when you have feather footed ladies, like my Silkies and Marans.
Zinnea was happy to inspect her new digs. Â So happy, in fact, that she decided not to lay in her laying boxes, but waited until night time and plopped the egg down on the sand! 🙂
This time of year, as the garden settles down and the weather cools, I always start the soap makin’! Â Anyone who receives holiday gifts from me can pretty much expect a bar of soap. 🙂
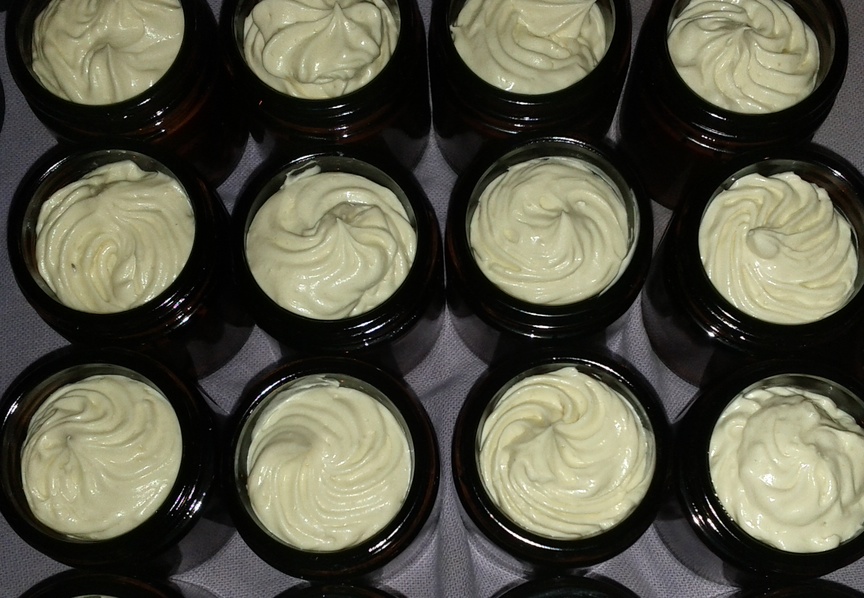
This year, I thought I’d deviate from my tried and true recipe and experiment with a new one I found. Â It sounded so delicious!! Â Pumpkin & Coconut Milk Salt Bar…. like the kind of soap you’d find at a high end spa, or something like that. Â Well, I don’t know what I did wrong with it, but it turned out a flop. Â When I tried to cut it, it just broke into crumbly pieces.
It still smells delicious. Â Kaia recommended we break it up and put it into little jars, with ribbons and little spoons, so that people could using it as a soapy salt scrub. Â She’s my resourceful little one!
So, feeling the need to redeem myself and went back to my favorite recipe. Â We whipped up a batch of Candy Cane soap (using peppermint and spearmint essential oils). But, this time, just before pouring it into the mold, I took out two cups of soap and colored it. Â Into one cup of soap, I added a tablespoon of madder root powder. Â In another cup I added 2 teaspoons of Spirulina powder. Â The result was red and green…
These were put into squirt bottles. Â Once I poured the main soap into the mold, we used the squirt bottles to make dots with the colors.
Then, we dragged a bamboo skewer through the dots to create hearts.
We made a double batch and poured the extra into a Tupperware.
Then, with the small amount of the colored soap we had left over, we poured it into silicone molds and swirled it up!
Usually, this recipe has cured enough in 24 hours that you can pop it out of its mold and cut it. Â Not this time. Â Even after 3 days it still felt like modeling clay. Â I ruined a few pieces just trying to get them out of the molds. Â I even stuck it in the freezer to try to harden it up. Â What is it with me and soap these days??!! Â So frustrating!
Anyhoo, Â I still ended up with some pretty nice soap. Â I love how the hearts turned out. Â If I try it again, I think I’ll make the circles smaller so that there are more hearts on each soap. Â I just hope it finishes hardening up fully!
We’ve had a wonderfully full summer with activities to keep us very busy.  But, with perfect  timing, the weather has started to turn a bit cooler just as we are beginning to settle in to our school year and we are feeling ourselves begin to calm down a bit.
Leif LOVES his ‘school’ time. Â He fusses when I put the books away. Â He and Kaia spent an hour playing with his new wooden letters yesterday. Â I sat and knit while she did the lesson for me 🙂
We’ve been putting up our harvests:
Raspberry/Elderberry Mead, Raspberry Jam with chocolate mint, Raspberries and Peaches in a light syrup, Peach/Apple Hard Cider, Cinnamon Peaches, Peach/Lavender Butter, Green Beans, Pickled Green Beans…
Peaches and Raspberries in a light syrup
And watching our little foster kitties grow big and strong (and very mischievous!)
Wilbur at maybe 3 weeks old
Little bellies getting bigger
Discovering new activities!
Kaia is finishing up a class on stage make up
Looking Older
Zombie Horror Makeup
on the left is 'plump', on the right is 'thin'
This was from Glamour day
We’ve been visiting farms and just enjoying each other’s company.
I have a general feeling of excitement about this Fall without any particular reason why. Â I love this time of year. 🙂
This is my new bow! Â I love it! Â If I could, I would marry it! Â I found it on Ebay and took a chance. Â Turns out it was a fabulous find. Â It’s a Hoyt Pro-Select 300 Rosewood bow, and I have become addicted to using it 🙂
This past week, Toby and I took our first big trip without the kids. Â We headed out west to Zion National Park, where I’ve been wanting to get back to for the past 10 years, when I first visited there.
Saturday
We flew into Vegas, on a nauseatingly bumpy plane ride, and hopped into our little rented Suzuki as fast as we could (we try not to spend too much time in Vegas). Â As we drove out towards Zion, I was quickly reminded of the vast differences between my home in the lush, green mountains of NC and the dry, brown, harsh lands out west. Â I feel so foreign here. Â I told Toby that if I had to I could survive in the wild at home. Â I know the wild foods, the predators to avoid, and where to find water. Â But here, in the desert, things are completely different. Â (I think Katniss would have had a hard time surviving in this Hunger Games).
The ride from Vegas to Zion is about 2 hours, so we stopped at the grocery store to pick up some food for the trip and drove on towards St. George to get a room for the night (it was ~8 pm by this time).
Sunday
We were up early so we could hit the Zion Park office to get our permits for hiking in the river on Monday. Â Then, we headed up the Angels Landing Trail. Â It’s a 5 mile round trip trail up to the tippy top of one of the peaks for a view of Zion Canyon.