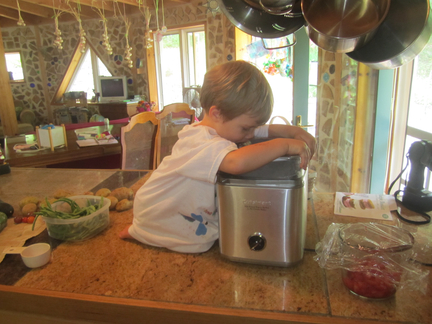
I brought in a little bit of money last month with some herb sales. So, I bought myself a fancy, new ice cream maker. I’ve never had one and boy, have I been missing out!!! So far, we’ve tried mint chip, peach yogurt, and strawberry. Leif waits patiently as the ice cream maker finishing churning…
Category Archives: Do It Yourself
Crafting flowers out of seeds
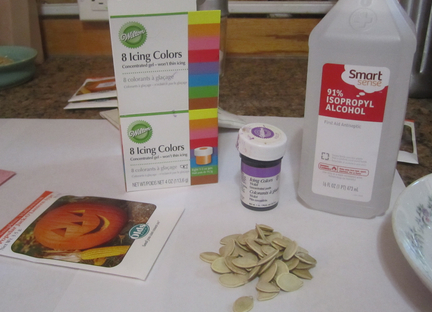
Somehow, I’ve ended up with a bag full of extra garden seeds. Many are years old and some are just varieties that I didn’t care for and don’t plan on using again. So, I thought I’d use some up in a craft. Here’s what you need:
- Seeds Pumpkin and squashes are best, but you can also use melon seeds and tiny seeds, like mustard
- food coloring
- rubbing alcohol
- colored felt or fleece (this will be the background color of our flowers)
- thin cardboard box, such as a cracker or cereal box
- buttons for flower centers
- hot glue gun
- Elmer’s type white school glue
- Optional: magnets, longer fleece strips for bracelets and headbands, velcro, sticks/floral wire…
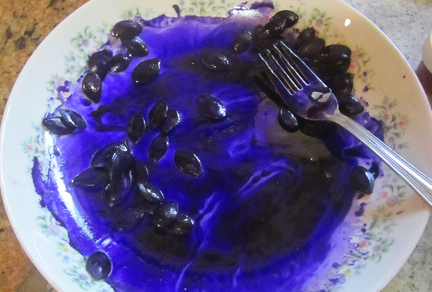
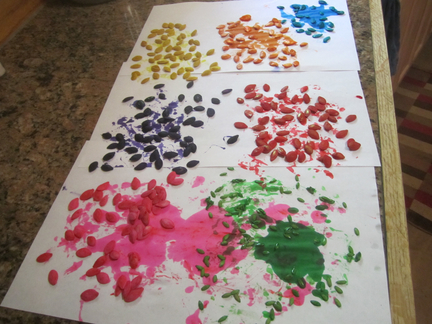
First, pour a tiny amount (1/2 tsp or so) of rubbing alcohol into a bowl and mix with another tiny amount of food coloring. I have the gel type of food coloring and I simply stuck a fork into the gel and pulled it out again. What was stuck to the fork is what I then mixed into the alcohol. (You could also use water, but I like how quickly the alcohol dries on the seeds.)
Pour some of your seeds into the mixture and coat them in coloring.
Doesn’t the purple look lovely?
I ended up using 6 colors for the squash seeds and put a few cantaloupe seeds in green. I thought these would make nice leaves if I decided to use them. Place your seeds on paper towels (or in my case, just plain paper) to dry. I gave them a little toss every so often just to make sure they weren’t sitting in a puddle of fluid.
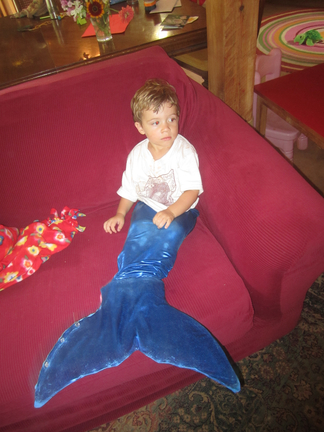
It takes a few hours for them to fully dry. So, while that happens you can take this opportunity to visit with the local merboys,
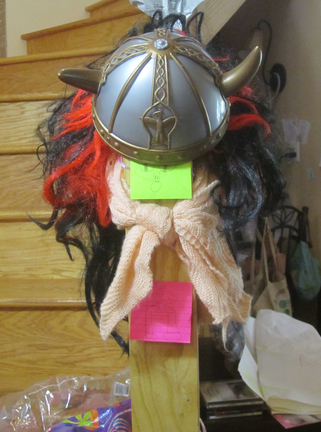
Or have a chat with the viking who lives at the bottom of your stairs.
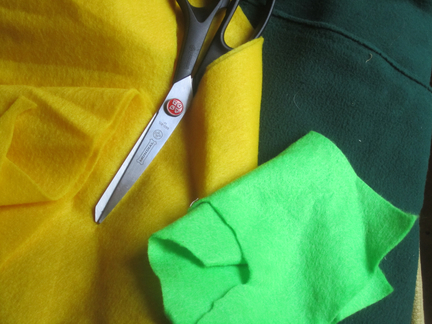
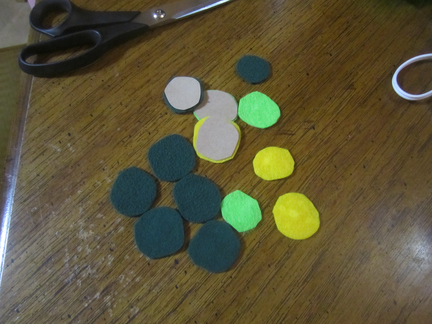
You can also take this time to get out your felting supplies and cut up some flower backgrounds
Cut 1-2 inch circles out of your felt and glue it (I used Elmer’s type glue, but the glue gun works also) onto circles of the same size that you cut out of the cardboard box. Let this dry.
Now, once everything has dried, you can start assembling your flowers.
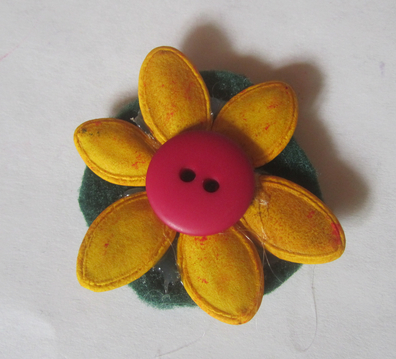
Pick out your petal colors and arrange them on your felt circle. Then decide what kind of center you would like. It helps to lay it out before gluing anything down so you can be sure you like the arrangement and that you have enough petals.
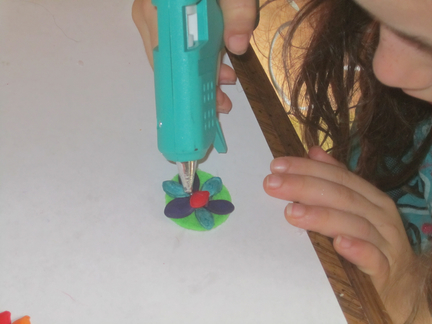
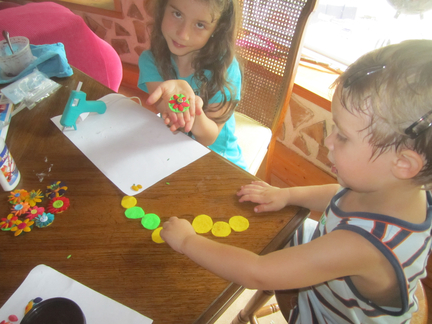
Then you begin gluing. We have a fairly ‘cool’ hot glue gun, but it can still give you a nasty burn. If you are working with younger kids, it’s best to let the adults use the glue guns.
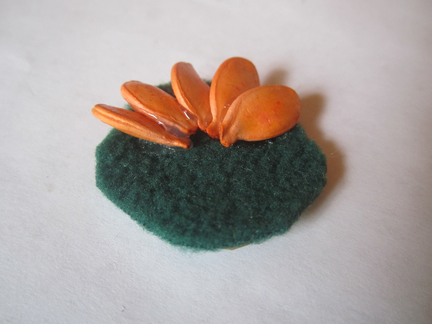
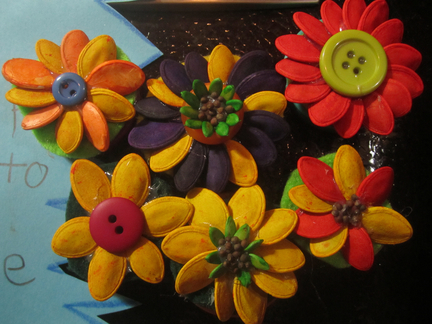
Kaia liked the look of laying the seeds flat in a circle. I went for the layered look. With the layering, be sure to angle your first seed up a bit so that there is room to slide the last seed underneath it.
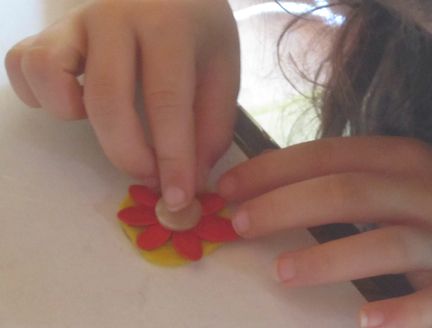
Once you have arranged your outer petals, you can do another layer of smaller petals, or use small seeds or a button for the center. (We really liked the buttons!)
And while the older kids are working with the glue gun, the little ones can make circle trains. 🙂
Kaia and I spent ALL afternoon with this craft. In fact, we were up until way past bedtime finishing off the last ones. It was so much fun! There are endless possibilities of what you can create with your flowers and they make fabulous gifts.
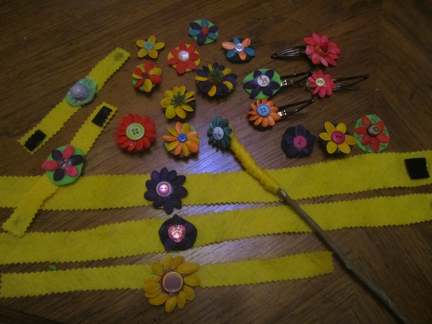
Use them as they are and tape them on presents. Glue magnets on the back to hang your favorite artwork or projects on the fridge.
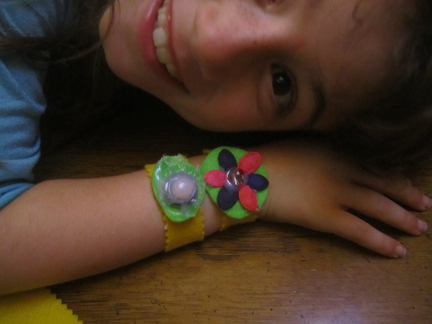
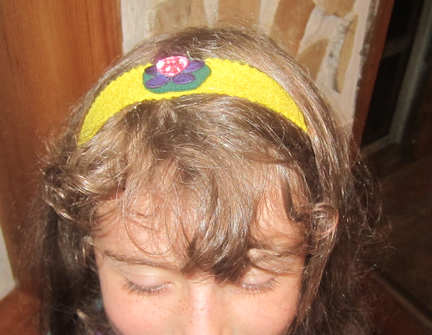
Glue them onto felt strips to make bracelets, chokers, or headbands. A little strip of velcro makes the perfect closure.
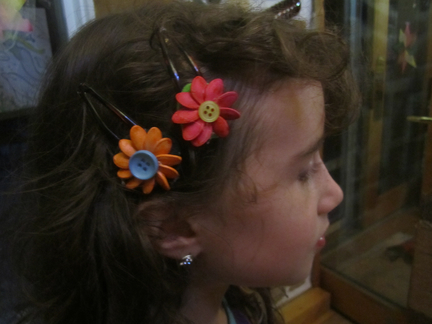
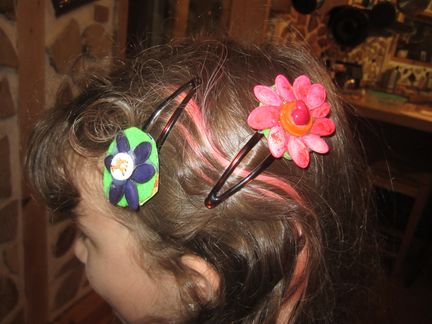
Glue them onto barrettes.
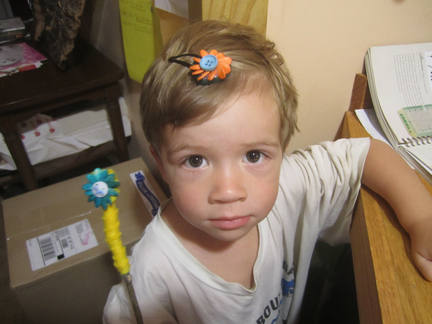
Glue them onto a stick and create magic with your new wand.
You could also glue it onto a pin and make a broach. What about attaching the flowers to green floral wire and making a bouquet for your table? What would you make??
Play Tents
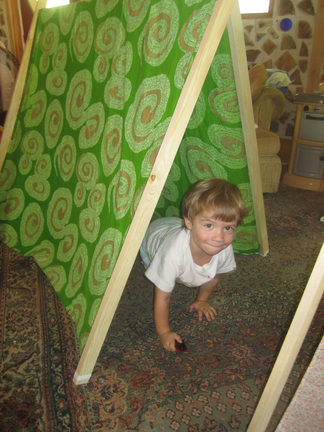
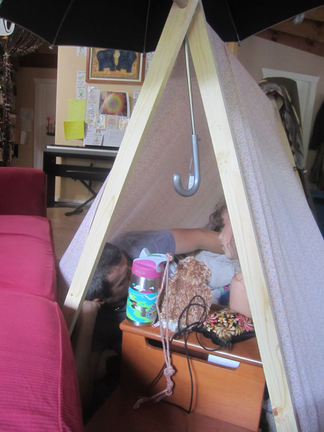
Kaia and Leif LOVE playing in tents, so when I saw this project, a little A-Frame play tent, I knew we had to do it!
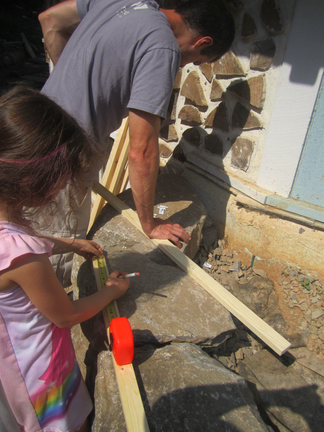
It was so simple, we were able to make both kids their own tent in less than an hour! Kaia made the measurements while Toby drilled the holes.
Then I sewed up a couple of tents and voila!
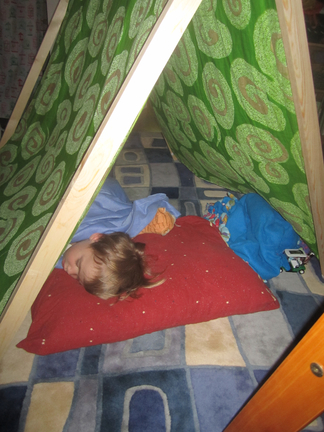
A place for playing, reading, eating, napping, and even traveling to the Amazon with your dad!
Winter Begins
We had a lovely first day of winter here. We celebrated by going to see a play, opening gifts, and having friends over for a feast. So glad the days are lengthening again!
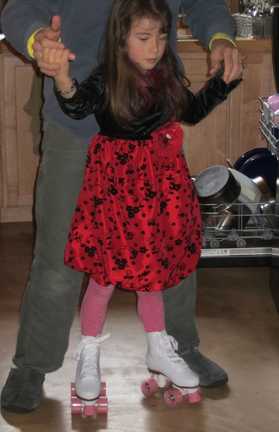
Kaia’s favorite gift this year has to be her skates. She can’t wait to get to the skating rink to give them a try.
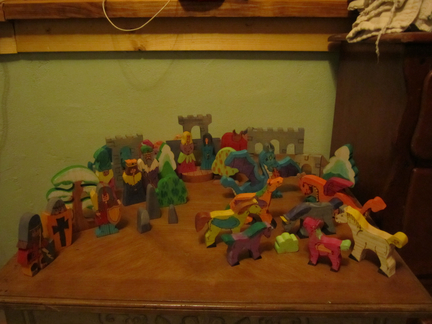
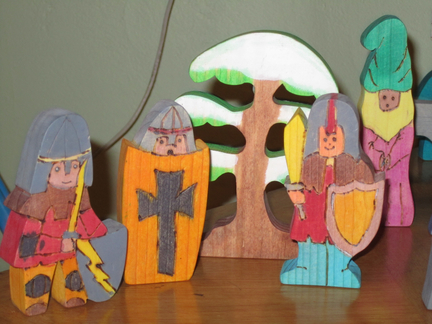
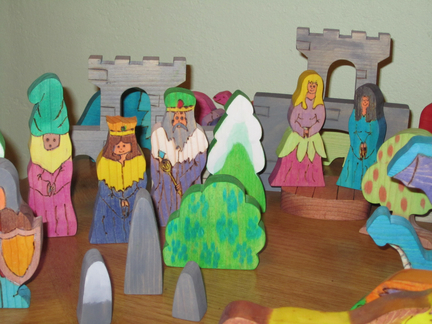
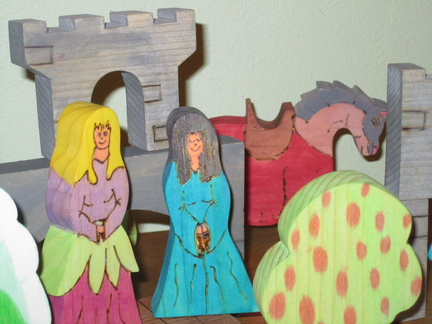
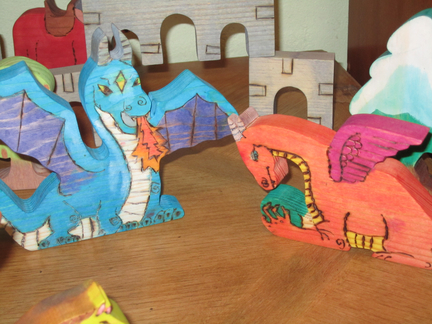
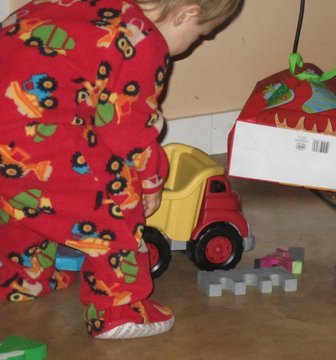
Leif finally got these wooden toys that I purchased over a year ago from Clickity Clack on Etsy. They were sanded, had patterns burned into then, painted with water colors, then sealed with a beeswax varnish (the trees have winter on one side and spring or fall on the other). His favorite thing to do with them is push them around in his new dump truck.
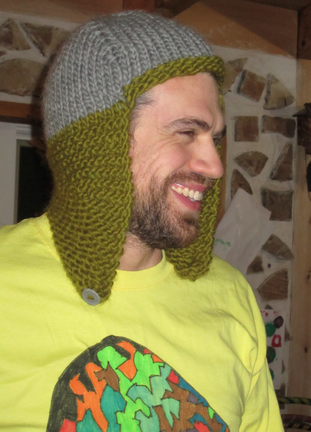
Toby got a new hat:
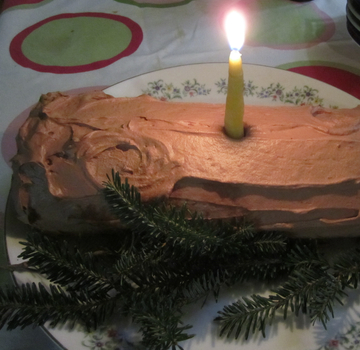
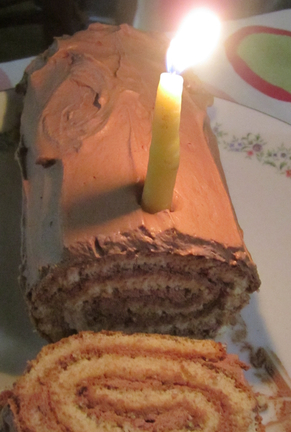
And we had a wonderful dinner (of which I forgot to take pictures) and fabulous yule log for dessert. (Recipe from Tenacious Lace).
Such a beautiful day!!
Squashes and Sweet Potatoes, Oh My!
Well, the harvest is complete and most of the veggies have been canned or frozen for the winter. The pantry looks pretty good and we have lots of soups to savor when it’s cold and bitter outside! But, we also have many pounds of winter squash and sweet potatoes strewn about on the floor (we don’t have a basement or root cellar to store them in). I’ve already canned up lots of squash soup and I have many gallons of puree in the freezer. Unfortunately, I really don’t know what else to do with these veggies other than pies. I’ve found a few yummy recipes on the internet that I’ve already tried, but I would love to hear some of your favorites! Can you help me build my file of recipes? Feel free to leave it in the comments, or if you post it on your blog, be sure to leave a link.
While the mice are away, the cat will do stuff!
Okay, well only one mouse was away … Kaia went to her Nana’s house for a few days. But even with the other little mousey around, this ended up being the weekend of getting stuff done! Maybe it’s the energy of fall making me want to put my house in order. Or maybe I’m just a glutton for punishment and try to do too much. (Probably more of the later.)
Friday morning Leif and I headed out to a local farm and picked up a few bushels of apples and 5 gallons of apple cider. The 5 gallons of cider went straight into the carboy (big glass jug) along with 2 pounds of honey and 2 packets of champagne yeast. It now sits on our counter while it ferments into a yummy and sweet hard apple cider. Mmmm! (Note: I let the cider come to room temperature before adding the yeast and honey.)
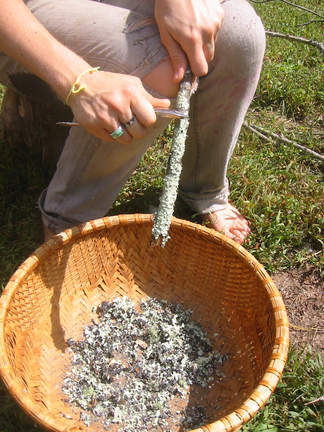
After that was taken care of, I went outside with Leif and Heidi and scraped a bunch of lichen off of branches that had fallen in the woods.
Why would I spend my time doing something so seemingly pointless, you ask? Well, because when you boil this funny little plant, it creates a wonderful rusty brown color to dye fiber with.
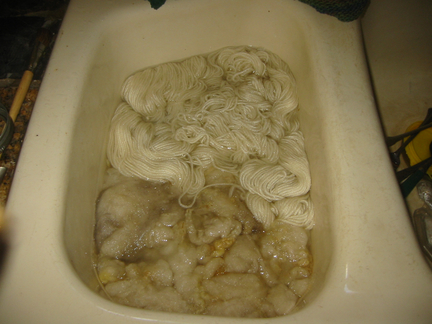
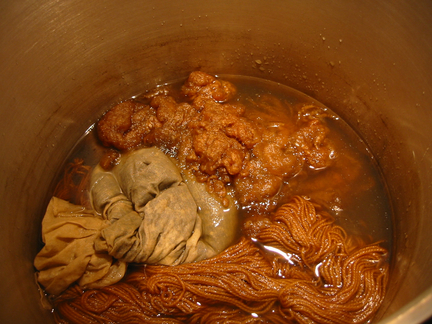
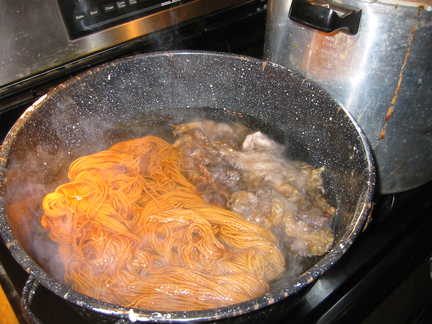
I have two skeins of white alpaca/wool mix that I want to use to make this vest for Leif. So, I thought I’d make it a more seasonal color first. We soaked our fiber in hot water while bringing the Lichen to a boil (we ended up having about 4 cups of lichen and wrapped this in muslin cloth before putting it in about 2 gallons of water).
I had 2 skeins weighing about 7 ounces and Heidi had about an ounce of unspun wool. The rule of thumb when using lichen is 2:1 lichen:wool. We ended up using 4 cups (I don’t know the weight) of lichen to 8 ounces of wool. If we had gone by weight I’m sure the color would have been stronger.
The lichen boiled for 30 minutes, then we turned it down to simmer for an hour and added 2 big pinches of salt (to help the dye set). Then we tosses the fiber into the pot and let it simmer for a few hours. Once the heat was turned off, it was left to sit overnight.
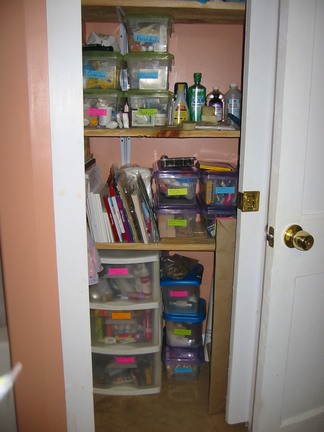
While all this stuff was boiling, I decided it was time to reorganize my art closet. It had become a huge clutter … and I don’t like clutter. So, once Leif was down for his nap, I dove in. I even had enough boxes to organize our medicine section of the closet. I know I didn’t include the before picture, but believe me, it looks much better!
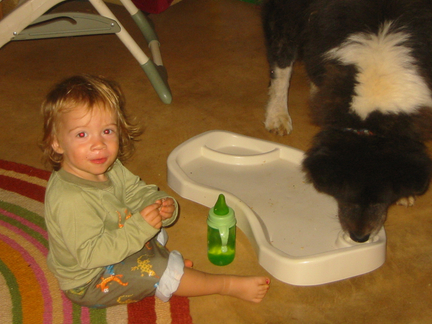
Leif was very helpful with my projects as long as I kept him supplied with crackers and apple cider (the non-alcoholic kind!)Â He even let Suki clean up after him.
Saturday, I drained the fiber and rinsed it in warm water. It came out a nice earthy brown color.
Heidi took her wool out, but I wanted a bit of yellow in there, too. So, we decided to do a second dye with marigolds. First we needed to boil the wool in Alum (Alum is used a lot in dying as a mordant, or a chemical that is added to the dye to make the color stay in the fiber).   We stirred 2 ounces of Alum into about 2 gallons of water. (We were using ~10 ounces of fiber, my two skeins of yarn and Heidi added more undyed wool. The general rule is 3 ounces of alum and 1 ounce of cream of tartar per one pound of wool, but Marigold doesn’t need cream of tartar.)  Then we tossed in the fiber and brought it to a simmer for one hour, stirring occasionally.
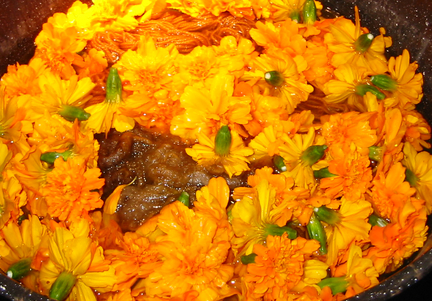
Once it had simmered, I tossed in a basket full of Marigolds
(yeah… so, I’m not so good a measuring out everything… but if you want to, the general rule when it’s not Lichen is 1 pound of plant/dye material per one pound of fiber) and let it simmer for a few hours, until I got the color I wanted.
Of course, doing all this wasn’t enough for me (I really do like projects!)… I had to cook and can 8 quarts of Emeril Lagasse’s Potato Leek soup, too! (Can you say YUMM?) (edited to add: the dairy was left out of this recipe for canning. I add it when it is being reheated for a meal.)
All the while, the fermenting cider bubbled along…
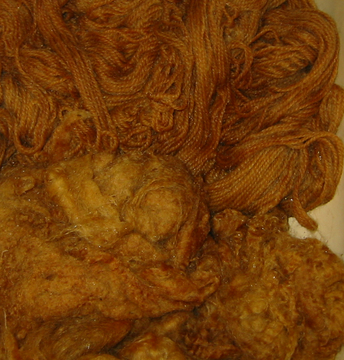
Sunday I rinsed and dried my yarn. It came out perfectly! Just the color I had envisioned in my mind. I think it looks like pumpkin pie. It will make a lovely ‘little man vest”!
With that out of the way, it was time to tackle some of those apples. So, I peeled and sliced up a bunch and tossed them in a pot to make cinnamon apple sauce (17 pints), apple pie filling (6 quarts) and dehydrated apples. And I still have about a bushel of apples left! Shesh! Got any good apple recipes?
I think I’m going to go put my feet up!
Fall Bonfire and Chocolate Awesomeness!
Every year around this time we have a bonfire to celebrate the coming of Fall and Toby’s B-day. But this year, we are also celebrating Kaia’s speedy recovery from the snake bite, and Toby’s new job! We have a lot to be thankful for.
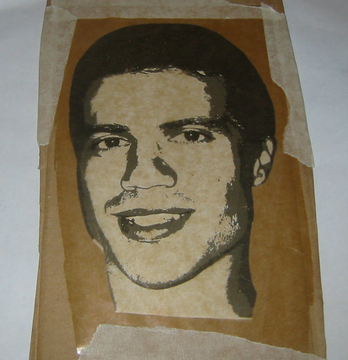
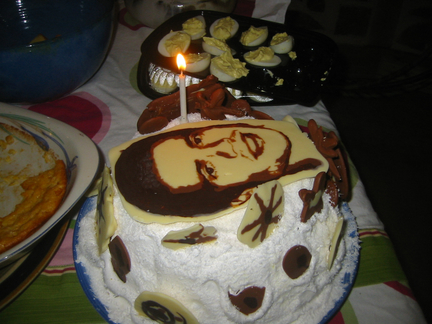
When I saw this post a few months ago on painting with chocolate, I knew I had to do it as a topper for Toby’s B-day cake!! I can’t believe how simple it was and how freaking awesome it turned out!!
I found a good picture and altered it according to the video in the post above. Then taped the picture to cardboard and covered it with wax paper and taped that down too.
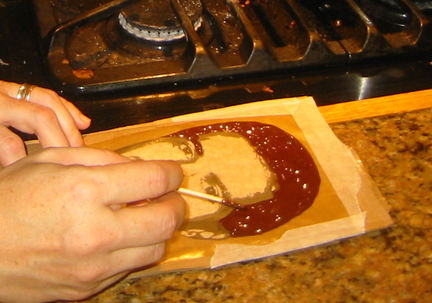
I put the dark chocolate in a plastic ziploc bag and melted it in hot water. Then I filled in the larger areas of the darkest parts of the picture. Here you see me using a tooth pick to add chocolate to the detailed areas.
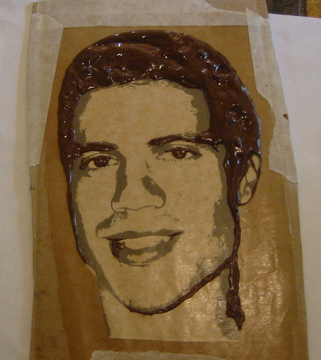
This is the final picture of the dark chocolate before I put it in the fridge to harden.
I mixed the dark chocolate with white (lots of white, only a little dark) to get a nice brown color and filled in the shadowed parts of the picture.
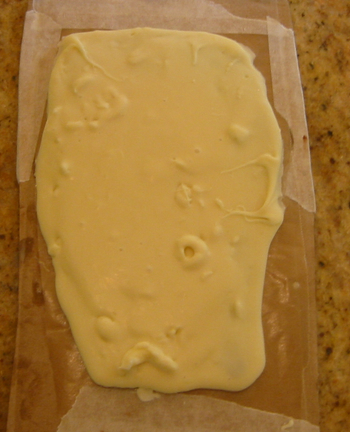
Then, after cooling it again, I used the white to cover everything with a nice thick layer, and returned it to the fridge.
Once it had time to harden I took it out and flipped it over to reveal his chocolate handsomeness!!
Kaia also took her turn making flowers and designs to decorate the cake.
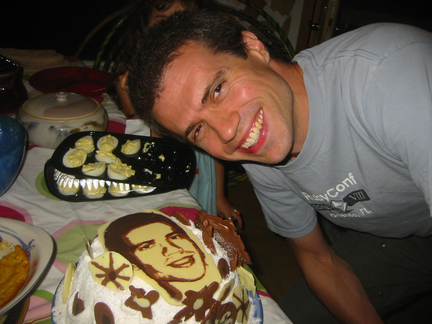
Toby loved it! It now sits in the freezer so that it’s staring at you when you open the freezer door! Don’t know if we will ever eat it. 🙂
This morning we celebrated his real birthday with breakfast in bed and a hike. Happy Birthday Sweet Stuff!
Sensory Doll
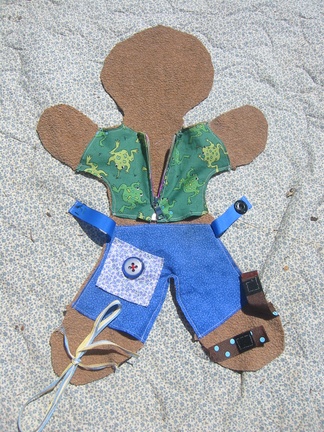
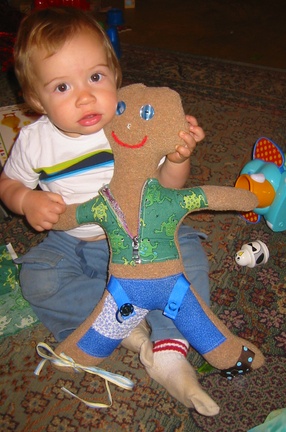
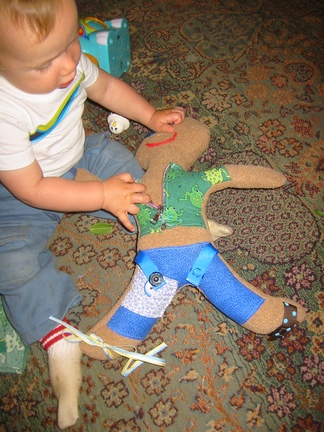
I’ve been wanting to make Leif this doll for a while now. He’s so into taking things apart, pushing buttons, pulling levers…. I thought he’d enjoy it. It was a lot of fun to make!
If you want to make one for your favorite little explorer you’ll need:
- fabric for the body (I used an old sweater that was given to me… it has a great texture and reminds me of a teddy bear)
- Contrasting fabric scraps for the shirt, shorts and pocket
- buttons, string, or whatever you would like to create the face
- 5″ zipper (with a large zip for little fingers)
- 10″ ribbon for the belt
- easy-open snap for belt
- large, bright button for the pocket
- 6″ ribbon for foot strap
- velcro for foot strap
- ~2 feet of string/shoelace for the other foot
- bells
- crinkly paper
- small beans (~1 cup)
- stuffing
(Here’s something major!! If your little one is still into putting things in his mouth, you may want to hold off on this doll since there are so many buttons and choking hazards!)
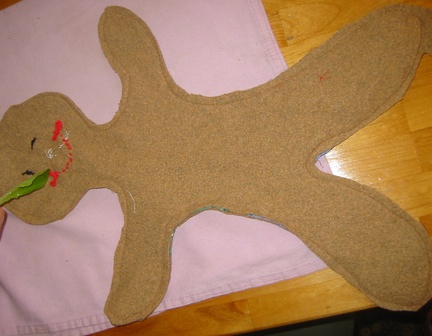
First cut out your pattern (download it here.… don’t let your printer ‘scale it to fit page’. You want it at 100%. And some of it is drawn really close to the edge of the page, so just be sure to compare what’s on your computer to what printed out… sorry about that! It’s very hand made!) You should have these pieces:
You will need to tape the four piece for the body together before cutting it out. Lay down #1 first, then #2 on top, and so on…
Iron your fabric. Then, using the pattern, cut out your fabric. You will need two body pieces. I only put clothes on the front, but you could cut a second set of clothes and dress the back if you want.
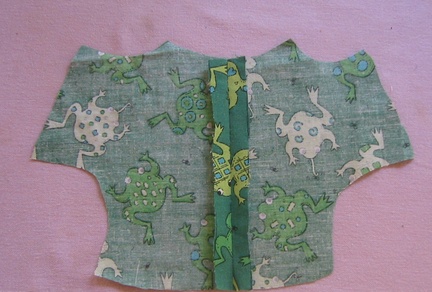
Put the right sides of the shirt pieces together and sew 1/2″ seam. I used a baste stitch for all but the last 1″ closest to the waist. That was a regular stitch. Then unfold the fabric and press the seam open.
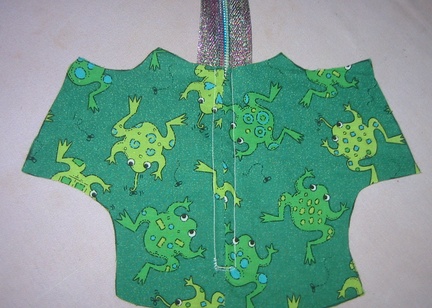
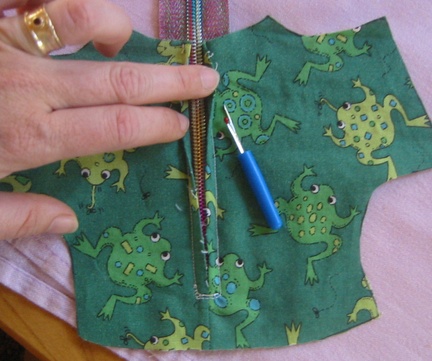
Sew the zipper to the wrong side
Then rip all but the last 1″ of seam.
Trim the excess zipper. Fold the zipper and neck seam and sew 1/4″ seam. Sew 1/4″ seams at the arm holes and waist. Then sew a 1/4″ seam at the pants waist and leg holes also. Sew 1/4″ seam all the way around the pocket, and measure and make your button hole. Measure out where you want the button to go so that it will match up to the button hole on the pocket, and sew the button to the pants. Then, sew the pocket to the pants so that the button matches up. (was that too much??? Does that all make sense?)
Pin the pants and belt straps to the body front (matching the waist and leg corners to the triangle tabs on the body). Sew 1/4″ seam on the sides of the legs, leaving the wast and leg holes open.
Measure out where you would like the snap to go on the belt. Trim the excess belt (leaving 1/2″ or so extra so you can sew a seam on each end)
Sew belt end seams and sew on snap.
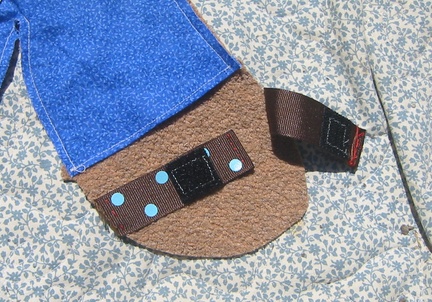
Place ribbon on foot (either one) and sew them onto the edge of the leg. Then attach and sew the velcro (making sure that the upper and lower pieces meet up then the strap closes).
On the other foot, sew a piece of shoe lace to the edge of each foot. Make sure the pieces are long enough to tie into a bow.
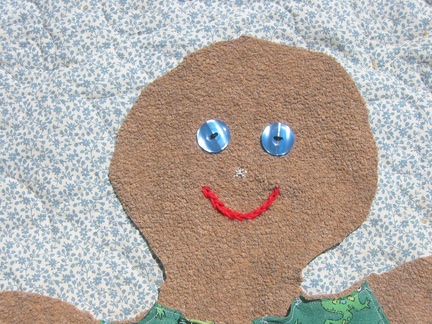
Sew on a face.
Place the right sides of the body together. Pin and sew the body front and back, (with a 1/2″ seam) leaving a large enough hole to turn the doll inside out. Trim off excess fabric.
Yes… Toby is feeding the doll some salad!
Turn it right side out. I put little beans (about 1/2 cup each) into the feet for texture, followed by stuffing. Then I placed ~4 bells into one arm, and crinkly paper into the other, followed again by stuffing, so that nothing moved around. Then stuff the rest of the body. The sweater material I used was nice and stretchy. I love the way the finished doll looks like he’s wearing clothes 3 sizes too small!
Hand stitch the hole closed and give him a proper name! You can certainly give him hair, or a hat… I like our man bald!
Then pass him on to your favorite little one!
Kaia said he looked like a hippie. I couldn’t really see what she meant. She said “you know… the tight clothes he’s wearing”. I said, “I don’t get it”. She said “you know… a Hippie... those people who walk like this… ” and she proceeds to saunter in a sultry way through the living room. This went on for most of the afternoon with me trying to figure out how this doll looks like a hippie. Then, as we were sitting outside playing, she said, “OH WAIT!! I MEAN A HOTTIE!“ I bust out laughing!! I have made Leif a pimped out Hottie doll for him to dress and undress! Great!!
Swimmable Mermaid Tail
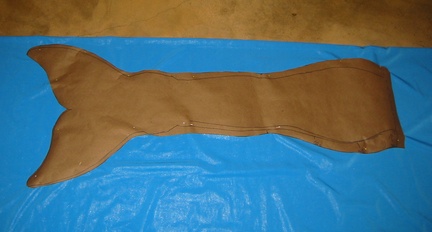
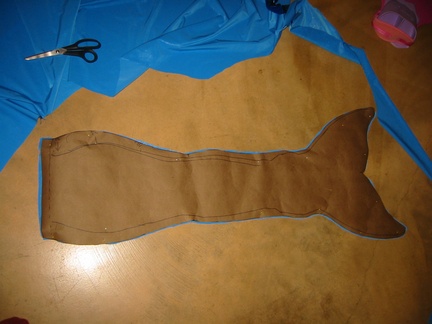
Kaia has been waiting, and waiting, for this project to happen. She picked out her fabric last month, but we had trouble getting the fins. They finally arrived today, so I had to get right on it!
Behold – Mermaid Kaia!
This was a fairly simple project to do. We got the swim fins from Metro Swim Shop (yes, you read correctly, I said ‘fins’. I got this fin for myself and will make my own tail as soon as I get the fabric. The description says it’s for kids, but it fits up to a women’s size 8 shoe)
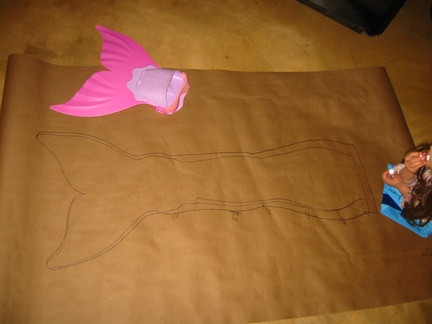
First, I had Kaia put on her fin and traced her lower half (from waist down) on a large piece of paper. This gave me the basic shape of her body. When I was tracing the fin part, I had her sit up for that the fin was flat on the floor. The tracing is not the proper measurement of the pattern, it simply give me a shape to go by as I mark in the proper measurements.
Then, I measured Kaia around her waist, hips, thighs, knees, shins, and ankles. I took each of these measurements and divided in two, since you will have 2 sides to your fin. Ex: her waist was 21 so half that is 10.5
On the paper, along the tracing of her body, I marked the measurements in the proper places. Ex: at the waist of the tracing, I measured out 10.5 inches, marking on either side of the tracing, so that the center of the tracing is also the center of the measurements. Do this with all your measurements and then connect the markings. The markings will probably be an inch or two out from the original tracing. Use the tracing as a guide of how to shape the pattern. Does this make sense??
Then, cut your pattern out.
Take your chosen fabric and fold it in half. This way you will cut out both sides at one time.
Lay the pattern on the fabric and pin it down well through both layers of fabric. Make sure there are no wrinkles.
Cut out your fabric.
Take the pattern off and, if they aren’t already, put the right sides together (meaning the sides that will be showing once you are done should now face each other). Pin the fabric together really well so that it doesn’t slip or bunch when you sew it up.
Then sew along the sides leaving the waist open, and one side of the fin open (see finished picture below) I left 1/4 inch seam allowance on the first run and had her try it on. Then Iwent back over the edge with a zig zag stitch to finish it off.
To get the mono fin into the tail, you will need a hole big enough to slip it through. The adult monofins are a little more flexible and might fit through the waist hole and be worked down to the tail. Kaia’s fin is pretty stiff, so we left a hole in the bottom of the tail for the monofin to slide into and then put 4 pearl snaps to close it off. I zigzagged the open edges to prevent any fraying.
At this point I checked to be sure the monofin fit into the opening and had Kaia try it on to be sure it fit well, and figured out where she wanted the waist level to be. It was a little loose in the waist, so I took it in a bit. You could make an elastic waist band, but the fabric Kaia chose hugged her body well once I took it in, and didn’t need any elastic.
With the right sides still facing, fold the waist band down (wrong sides together) to where you want it to be on your body (below the navel, at the navel… etc.) and finish the seam. I did two lines of a wavy stitch to make it look like scales.
Kaia’s really happy with how it turned out and wore it to bed the first night (fins and all). You can see in this picture on the bottom left of her tail, where there are snaps that open up the tail to let the monofin in. You can even see a little of the pink fin sticking out. I want to fix that but Kaia said “no”.
I’ll post pictures once mine is done!
Doughnut crazy
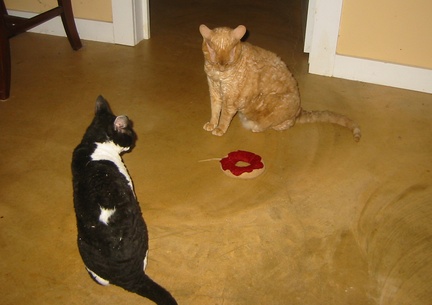
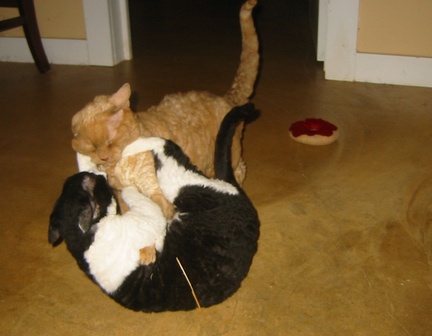
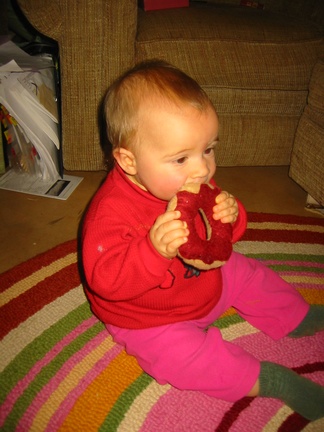
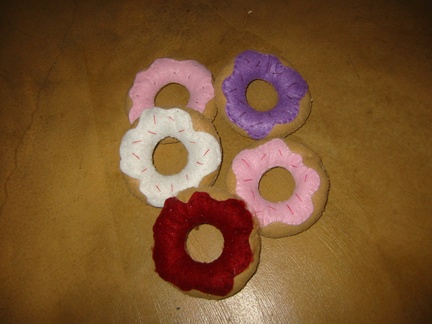
Kaia and I crafted felt doughnuts, stuffed with polyfill and catnip, for some of our favorite feline friends! There are all different icing and sprinkle types, for your cat’s specific tastes. We gave the first one, a raspberry icing with chocolate sprinkles, to our cats as an early gift. As you can see, they are definite doughnut fans!
“It’s MINE! All MINE!!”
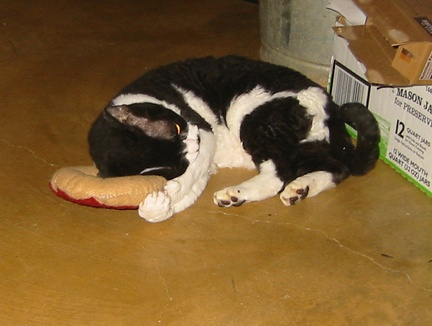
The Standoff!
The Smackdown!
The victor (note: Max, the tabby is at least 12 pounds… Isabella barely tips the scales at 6 pounds!)
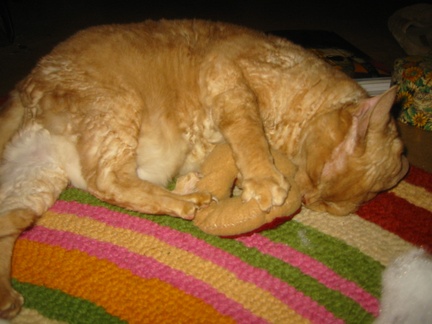
“It’s still mine and you can’t have it back!”
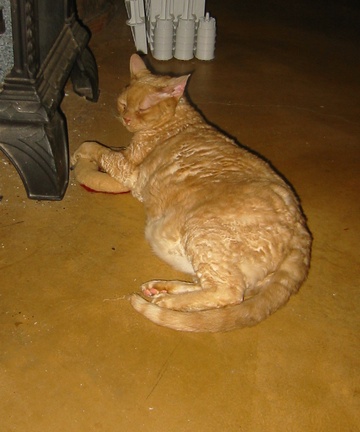
“Oh NO!! Look out for the Giant Doughnut Stealer!!”
What’s your favorite flavor??
Blessed Winter Solstice!

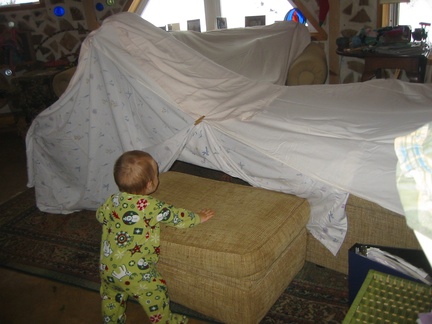
We have had such a wonderful last few days. Being snowed in has been a great adventure for all of us. The power was out for 24 hours, but we enjoyed the peace it brought and we kept ourselves fully entertained! There was tent building:
There was lots of snow play (sledding, snow men, snow ball fights)!

We’ve perfected our snow cream recipe and began experimenting with flavors!!

Snow Cream – basic recipe:
- 1 cup cream, milk, or other milk like substance (coconut milk, chocolate milk, rice milk…)
- 1/2 cup sugar (maple syrup would work nicely too)
- 1 tsp. vanilla extract
Mix well, and then add enough fresh snow to thicken like ice cream. Then enjoy!
Variations:
Mint-Chocolate Snow Cream:
To the above add:Â 2 Tbsp cocoa powder and 1/2 tsp. mint extract
Eggnog Snow Cream:
To the basic recipe add:Â 1 tsp. nutmeg and 1/2 tsp cinnamon
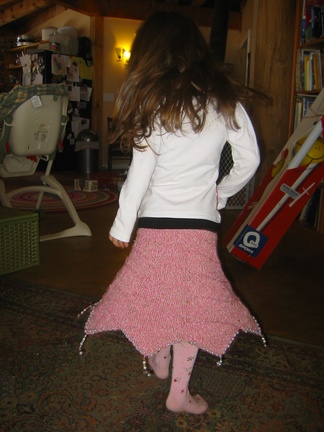
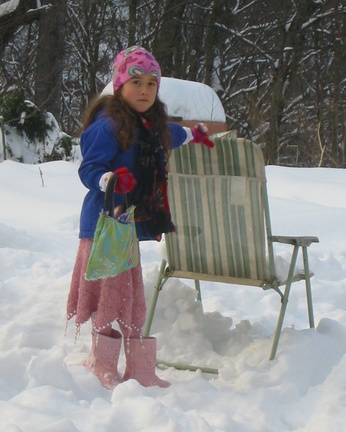
We all enjoyed opening our gifts this morning! I’m happy to say that Kaia considered her new skirt her best gift! (Take that Santa!) She’s worn it all day and we had to order her to take it off before she went to bed. When she loves something, she can wear it until it’s worn out very fast!
Toby’s gloves fit him perfectly and Leif likes his new stuffed, felt toys:
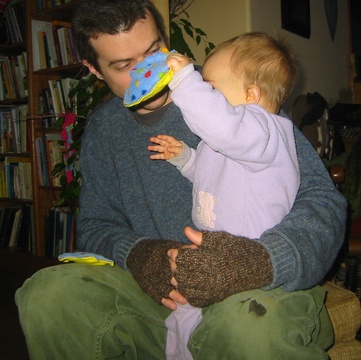
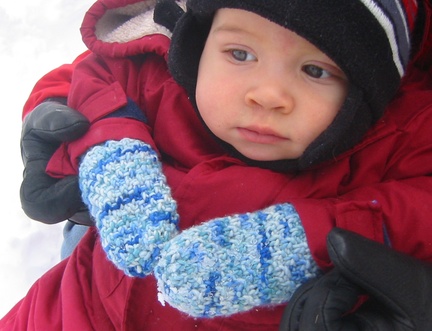
Leif also seems to like his new mittens (I’ll post the pattern soon. It’s really simple!)
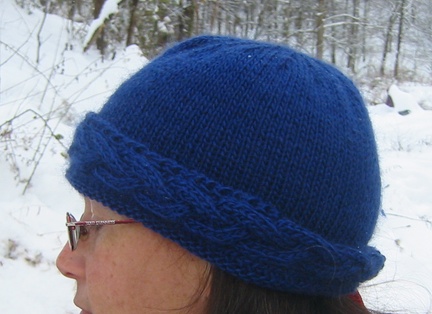
I knitted myself a new hat:
And Toby made me a oriental style shelf/unit to put above my computer!! (pictures to come once it’s installed)
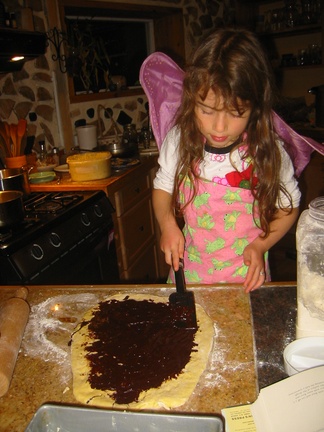
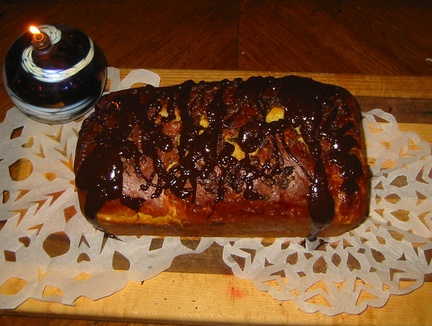
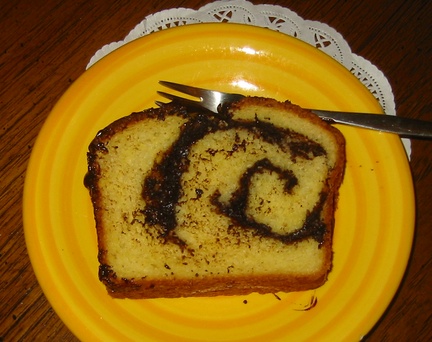
This evening, we ended with a lovely meal and a yule log bread (smothered and stuffed with chocolate!)
Have a beautiful winter!!! Hurray for the return of longer days!!

Ornament crafting
We’ve had the crafting spirit in our home lately! This weekend Kaia and I made some santa ornaments after seeing them at Write-It-Down. We just happened to have everything we needed and couldn’t resist the cute little guys.
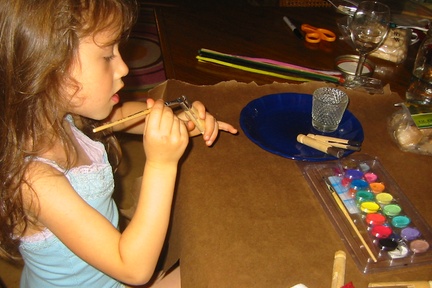
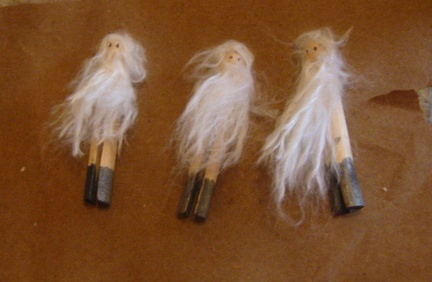
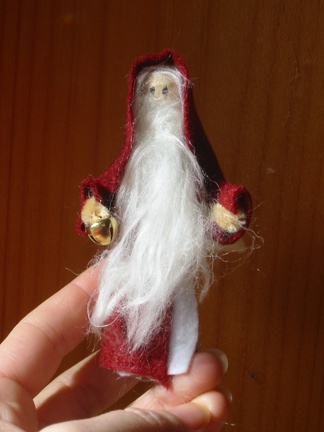
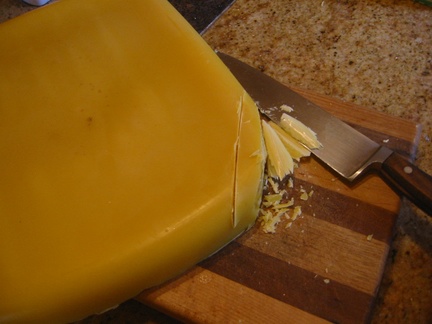
Then we had a few friends over for more crafting. We made beeswax ornaments with beeswax from a local beekeeper! I got 5 pounds of it!! Mmmmm, the kitchen smelled yummy!
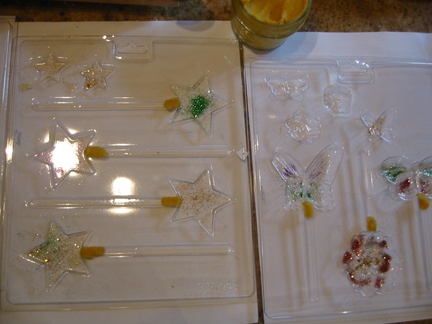
I had some lollipop molds, so I used a dab of play dough to block where the stick would go so that the beeswax didn’t flow into that part of the mold. I also put some sparkles in the bottom of the molds. (You could put some on top too, right after pouring the beeswax in, if you want sparkles on both sides.)
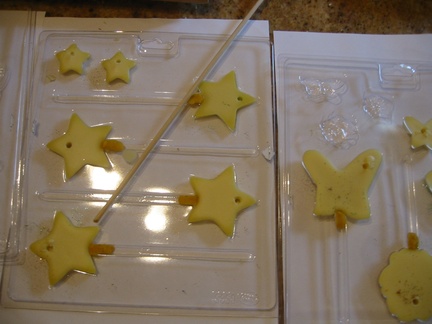
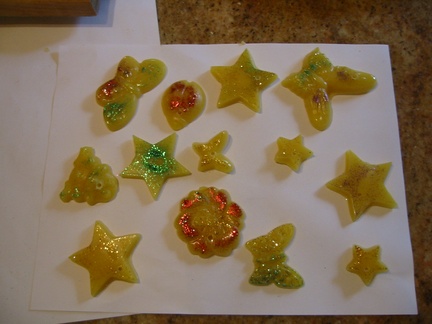
When the beeswax was cooling, but still soft, I poked holes for the ribbons.
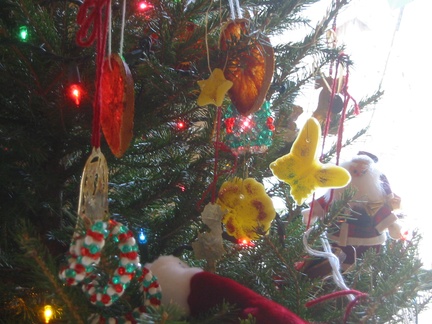
Then there were the glittered pine cones:

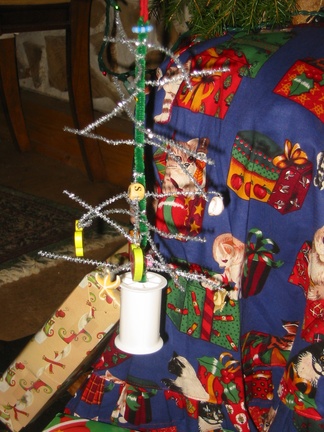
And the pipe cleaner trees (Kaia’s is looking a bit like Charlie Brown’s tree… she said she will be putting more ornaments on later 🙂
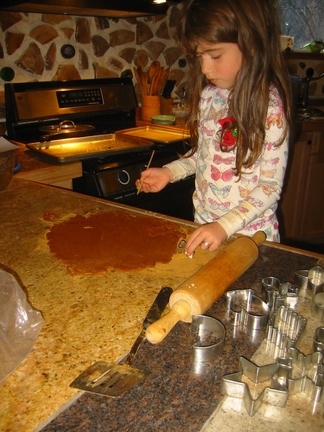
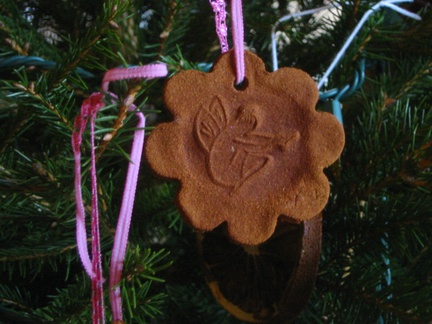
And once our friends went home, and Leif finally fell asleep, Kaia and I just kept going and made Cinnamon-Applesauce ornaments with the recipe that we found over at 5OrangePotatoes. I love these!! I will definitely be doing them again!! And the cool thing is that you can use any cookie cutters you want and hang them around your house all year long!! They don’t have to be holiday ornaments.
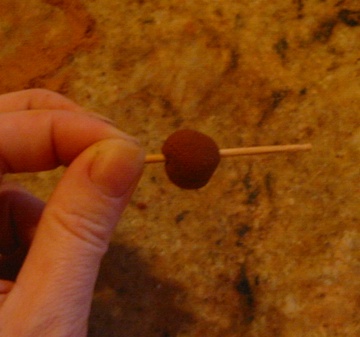
We used some of the dough that was left over and made them into beads!! Just roll them into a little ball and poke a tooth pick through it for the hole.
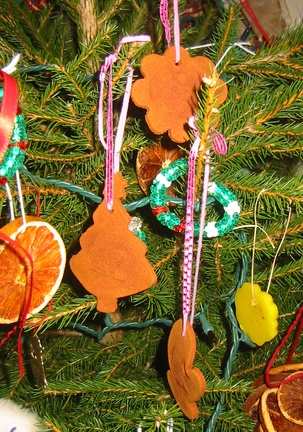
We stamped a sweet little fairy print into most of the ornaments.
The house smells delicious!!
Our Day
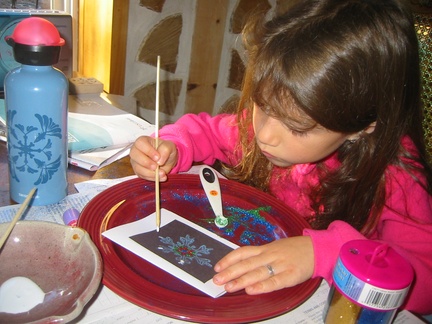
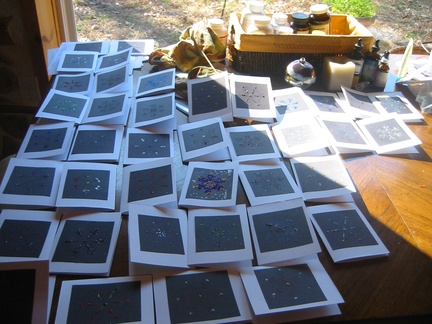
Creating our holiday cards…

My first knitting pattern
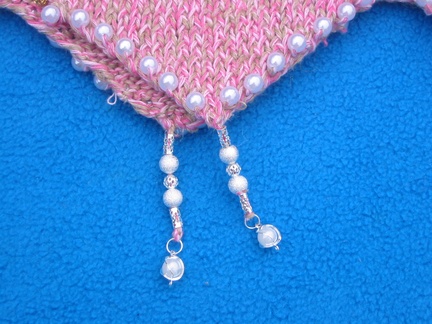
Here it is! Kaia’s Flower Fairy/Pearly Mermaid/ Blingy Princess skirt! It is a holiday gift for her and I can’t wait to give it to her!
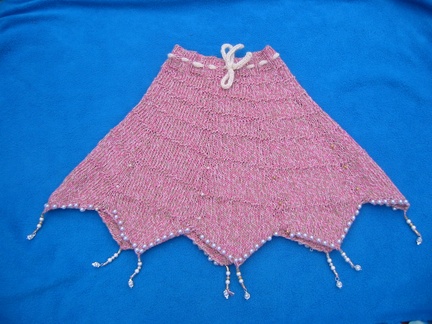
I’ve published the pattern, for free (yay!) in the links at the top of my blog! Enjoy!!
Stamp making
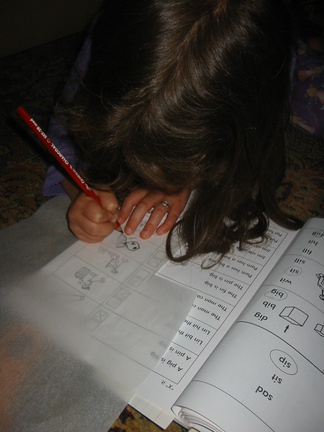
Tracing the image with a charcoal pencil
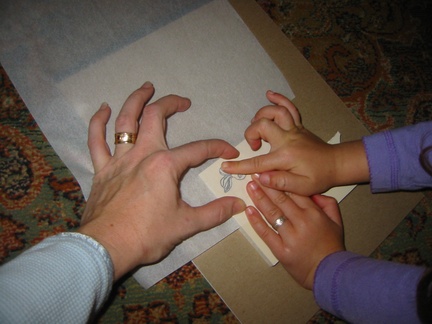
Pressing the image onto the rubber block
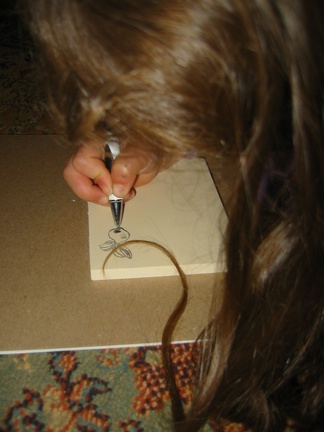
retracing the image with ink, in case the charcoal smears
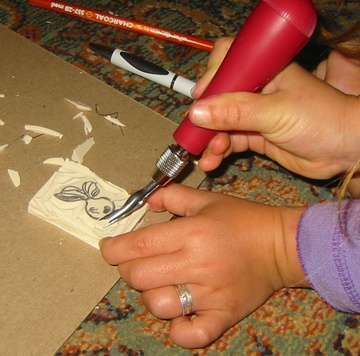
Cutting out the image
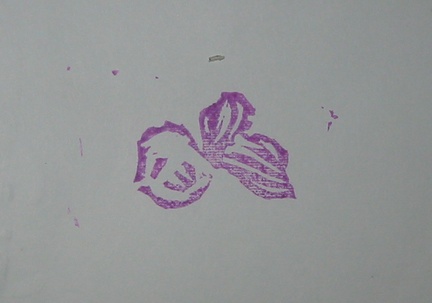
The final stamp.... isn't she cute!
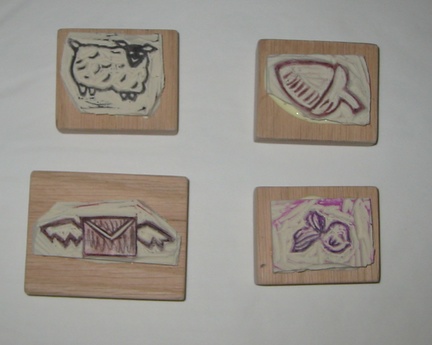
Some of our other creations
I have great memories of my elementary school art class. The room was dark and and crowded, but our teacher always had the greatest projects for us. One of my favorites was linoleum print making. You trace a picture onto a linoleum block, carve it out, roll paint onto it and press it onto paper, or a t-shirt…. I loved the detailed process and the “cooooool” moment when you get to see the final picture.
Stamp making is almost the exact same process. I’d not done it in a long, long time, but I was inspired when I visited winemakerssister’s fantastic etsy store and fell in love with her stamps!! I totally stole some of her ideas! But, I’m going to have to go back for this mug! (Hahah!! All you knitters out there get it!)
Kaia loves stamp making, too. Today she carved me an adorable flower!
I see some stamped holiday cards in the near future!!
Hand made toys and contest
When I found out I was pregnant with Leif, I had a blast creating a basket full of hand made toys for him.  They are so fun and squishy! And something he can pass on to his children if he wants!!
Garden Mama is interviewing Down in the Meadow about her hand made toys and having a contest to win some!! Check it out!
Contest!!
I have to admit, I wasn’t going to post this because I want to be the one to win that Peach Lavender Butter. But, these books look to good not to promote!!! So, check out Small Measure to find out more about her “Can-Do” contest.
Ashley English, the blog and book author, and I actually went to high school together and now live close to one another and are still good friends (yes, I’m bragging, ’cause she’s really cool :-). I always admired her for her snazzy taste in glasses.

She has been working on a series of books focused on homemade living… The first is Keeping Chickens with Ashley English:
All You Need to Know to Care for a Happy, Healthy Flock and the second is Canning & Preserving with Ashley English:
All You Need to Know to Make Jams, Jellies, Pickles, Chutneys & More… They are both coming out in April of 2010, and I plan to get them both! Check her out at http://small-measure.blogspot.com/
Kaia Camp Days 4 & 5
We started Kaia Camp Day 4 off with a little exercise! We headed to the Dojang when Kaia, Toby, and I take Tae Kwon Do and did a little hooping. It’s the first time I’ve hooped since last November when I was 32 weeks pregnant. I was worried that I wouldn’t be able to dance/hoop like I use to, but I fell right back into it and it felt great!
We went from there straight to the local library where the Balloon Fairy was teacing everyone how to make balloon hats.
Then it was back home to make some flower fireworks. We got the idea from 5OrangePotatoes (I love that blog:-) We went outside and picked all the white flowers we could find and put them in wine glasses of water with food coloring in them. We had Queen Anne’s Lace, Yarrow, Daisies, and Onion scapes. It took a full day before we really noticed any changes, but they came out pretty. The darker colors worked much better for us. (oh, and that’s a pink cosmos in there! Not a white daisy turned pink:-)
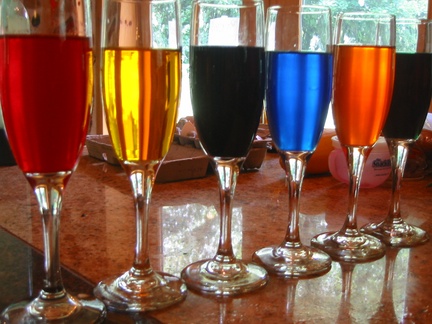
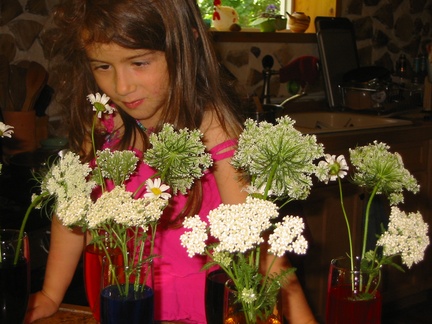
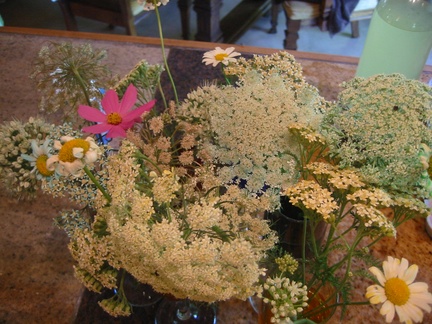
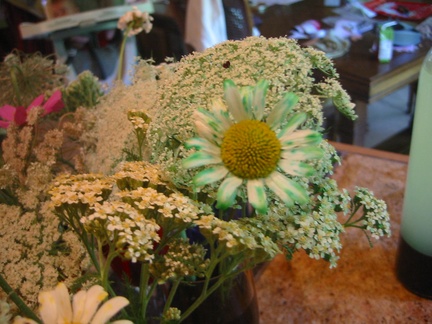
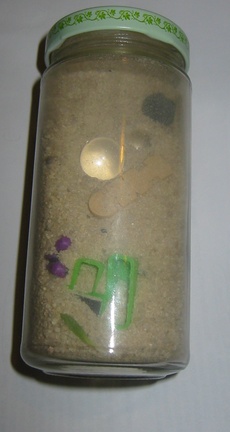
After a little lunch break, we made an “I Spy” jar (This idea from The Magic Onions, another blog I love). Kaia gathered lots of little trinkets and put them in a glass jar. Then she filled the jar with sand, and shook it up. (rice probably would have worked better, ’cause the sand ended up making the jar a little cloudy). I would say “I spy, with my little eye, something with a hole in it” and she would have to turn it around until she found the shell with a hole in it. It’s a fun game… maybe we’ll make another one with rice to keep in the car for road trips.
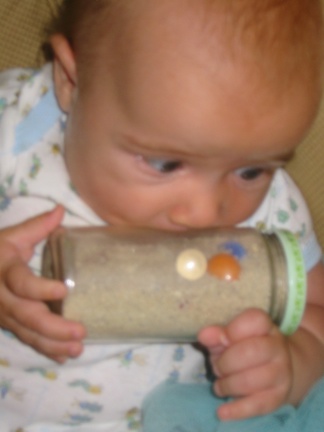
Leif enjoyed the jar too, but he was really only interested in the effects of cold on the gums 🙂
For the last day of Kaia Camp, we took it pretty easy. We started out with a little Tae Kwon Do. (Kaia took the adult class with me and did great!! I’m so proud of her… she’s really doing amazing! And the whole belt system works great for her because it gives her something to strive for and she feels like she’s really accomplished something when she gets a new belt)
After that, we had a lot of reading time, knitting time, garden time, and just relaxing fun!
By the end of the week, everyone was tuckered out!
Kaia Camp – Day 3
We started the day off with Zucchini Pancakes!! Yum yum!! Yep, gotta get the veggies in my girl any way I can. She said she really liked them. How do you make them? Glad you asked.
- 2 1/4 cups flour
- 2 1/2 tsp baking powder
- 1/2 tsp baking soda
- 2 tsp cinnamon
- 1/4 tsp nutmeg
- pinch of salt
- 1/3 cup sugar
Mix all of this in a large bowl. In a separate bowl mix:
- 2 cups coconut milk
- 2 tsp vanilla
- 1/4 oil (I used olive)
- 2 cups zucchini or squash (I julienned them, but puree works fine too)
Pour wet into dry and mix. Pour ~1/2 cup onto a med-high buttered pan and cook as you would any other pancake.
We enjoyed ours with a black raspberry drizzle!!
After breakfast, Kaia and I tried our hand at making our own lava lamp. Here’s what you do:
Gather an empty clear plastic bottle, cheap cooking oil, water, food coloring, and alka seltzer.
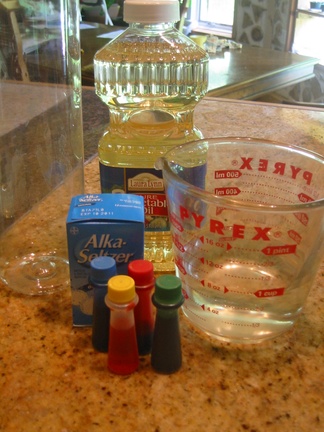
Pour the cooking oil into the plastic bottle until ~5/6 full. Then add water almost to the top.

Add your food coloring. You can do one color or a mix. After a while, the colors will mix up.
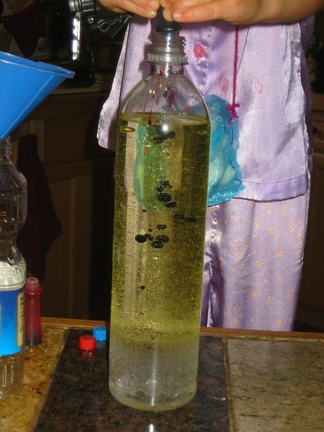
Break up a tablet of alka seltzer, put it in the bottle and close the top. Watch your lava lamp bubble! (the carbon dioxide created by the mix of alka seltzer and water carries the coloring in bubbles to the top. When the bubbles pop, the color falls back down.
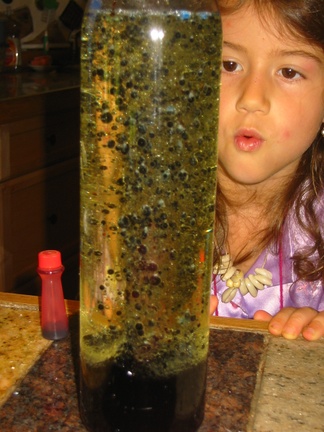
Try putting it over a flash light in a dark room!
After this, we thought we’d start our Rubber Egg experiment. We boiled an egg and put it in a jar of white vinegar. The vinegar reacts with the calcium in the shell and dissolves it. After 2 days, you change out the vinegar and let it sit for a week more. After this time, the egg should be so rubbery that we can bounce it. I’ll let you know how that goes :-) (oh, if you use an egg that isn’t boiled, you will be able to slosh the insides around, but don’t try to bounce it!!)
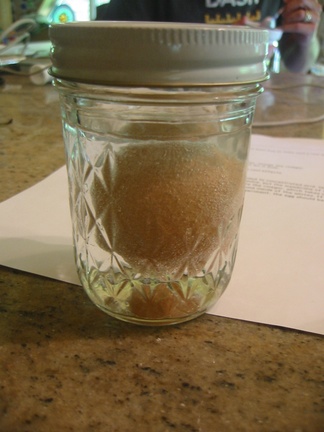
And the fun just kept on going!!
With our delicious ice cream from Monday, I really wanted a nice magic shell topping. So, I decided we should make it ourselves. So we mixed equal parts of cocoa powder, coconut oil, and agave syrup and heated it on the stove, just until melted. Simple!!! And it worked like a charm. Then I found this link for Home Made Magic Shell. I might try their recipes next time and jazz it up a bit.
To finish off a wonderful day of Kaia Camp, we sat down to watch a bit of Little House on the Praire.
Leif’s newest attire
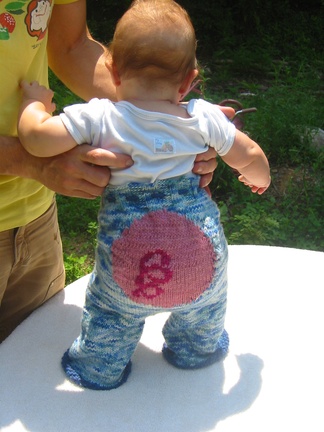
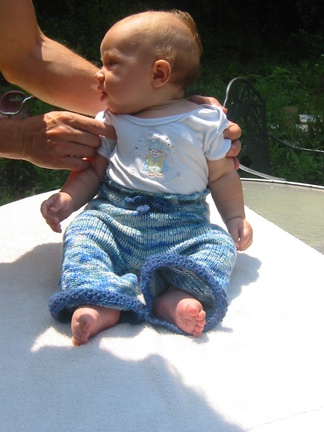
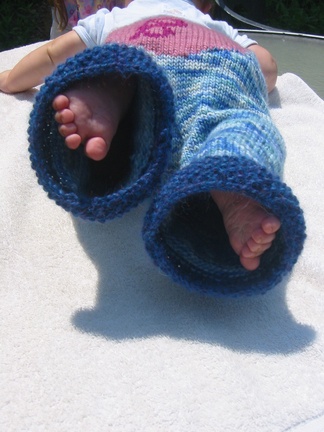
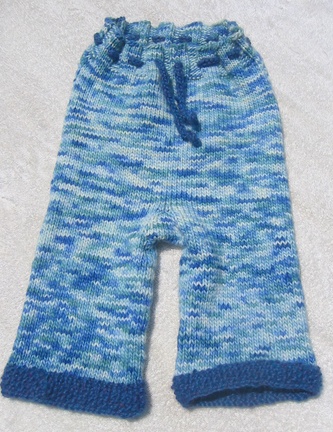
I finally finished his piggy pants!! I love how they came out. They should fit for a few winters. He’s already 20 pounds (and 4 months old!) so as he lengthens out, I imagine his belly won’t get much bigger for a few years :-) Kaia is 6 and fits the pants (though they come down to her knees).

Melons and cordials
I know… way to many posts today… I’m just trying to get caught up!
I planted 37 melon plants yesterday while the moon was in Leo… there was only room for 18 in the bed I’d made and I didn’t want to throw away the other seedlings, so I planted them in a big hill of dirt we have in the back yard. We should be flush in cantaloupe, watermelon and muskmelon come late summer!!
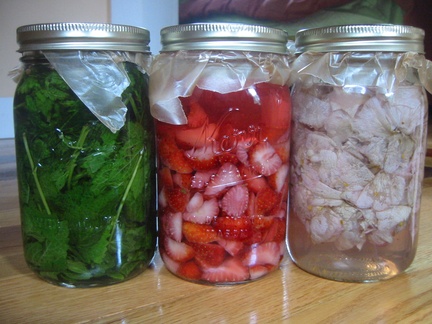
Oh, and right now we are overflowing in strawberries, roses, and lemon balm. No use in letting all this yummy goodness go to waste! So, I decided to make cordials out of all of them! I followed Kathie’s recipe and made a quart of each. Tomorrow I will strain them and add the sugar! Mmmm mmmmmm!
Monster Pudding
I’ve been experimenting today… thought you’d like the recipe. It’s really good! It even gets ‘Kaia’s Gold Star of Approval!” (I got the original recipe from Darcey)
Monster Pudding:
4 small avocados
1/2 cup coconut milk
1/4 cup coconut oil
1 Tbsp. Cardamom powder
1/3 cup (or less) honey or other sweetener
Put all in a blender and mix up.
You can eat it like this, or if you can’t stand looking at green pudding and would like a little ‘dirt pudding‘ instead, add 1/3 cup carob or cocoa powder…
If you want to get even more creative you can also 2 drops of orange or mint essential oil.
Mmmmmmm……!!!
It’s dairy free and full of lots of good fats and oils! And it’s really tasty!!
The most awesome home baked bread EVER!
I love home made bread; The aroma that fills the house, that first bite that permeates the senses, the crisp crust and soft, warm interior! Mmmmmm! I use to think that I couldn’t bake bread well, so I bought a bread maker in hopes that I would have more home baked bread. The results were mediocre and I stopped using it. Then I found a recipe for home baked bread that seemed pretty easy and realized that kneading the bread wasn’t really that bad. I made that recipe for a few months, but with the time it took to mix it, rise, knead, rise, bake…. I had to be home for most of the day to tend the bread. So, that recipe fell by the wayside. That’s why I was so excited to hear about this book. I can’t remember where I first learned about “Artisan Bread in 5 Minutes a Day” but I was really excited when it finally arrived in the mail the other day. Their website had a number of contests to win a free book, but I couldn’t leave it to chance and bought one instead 🙂 Today I tried my hand at their master recipe and was Very Happy with the results! At 2 pm, I mixed together the flour, yeast, water, and salt, and let it sit on the counter. Then I planted some onions and picked up Kaia from school. When I got home, the mix had risen over twice it’s size and pushed the top off the container it was in. I cut off about a pound of dough from the mix, shaped it and let it rest while I feed Leif. (The rest of the mix, enough for 3 more loaves, went in the fridge where it can stay for for days, until I’m ready to cut off another hunk of it to cook up!) Then I plopped the dough in the oven and went out to plant the leeks. When I got back inside, the house smelled fantastic and there was a perfect loaf of bread ready for the tasting. I let it cool a little while and heated up the soup and greens for dinner. Here’s what the bread looked like just out of the oven
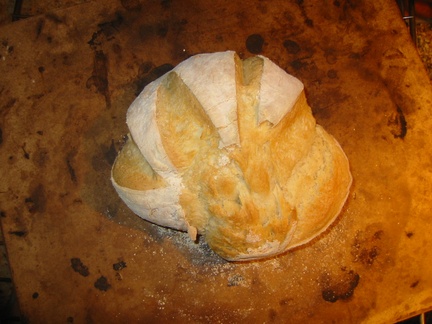 .
.
Thirty minutes later, there was still some soup and greens on the stove, but…
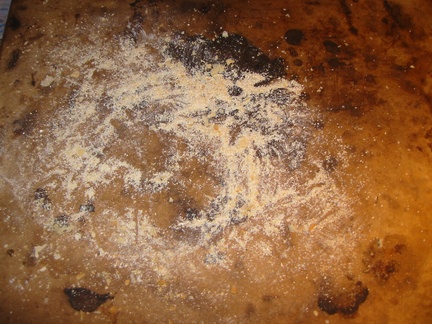
… the bread had disappeared! Kaia even ate her salad without a complaint because she knew she could have more bread once the salad was gone! She said “Mommy, this is just like store bought bread, and that’s a good thing!!” Ohhhh, it was so good! It had a great crispy crust and was soft and fluffy on the inside! The taste was almost sourdoughy!! I’m a little worried that I’m going to have to put limits on the amount of bread we eat in the house, ’cause at this rate, we could have a couple loaves of bread a day!! MMmmmmm
After the master recipe, the book give you lots more recipes that work off the main one… sweet breads, peasant loaves, flat breads, etc…
Now I have to decide which of the tons of recipes in the book I’m going to try next!!
Crafting continues
I don’t know if you could really call it nesting, ’cause my house is in shambles and I’m not really ‘creating a nest’ for the baby, but all I want to do is sit on my butt and make things. Really, it’s been going on since last Fall. So, I think this baby has some serious crafty genes that are coming out through me!
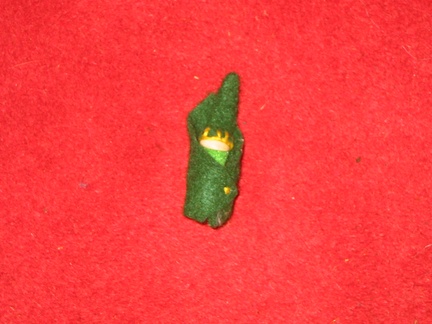
So, inspired by a little felted gnome that I got from Kristine
I decided to make a leaf blanket for the baby. I got some green fleece (on sale! Yahoo!) and made a pattern on large construction paper. Then, using some of Kaia’s washable markers, traced the pattern on the fleece and cut it out. I also cut out a triangle to go at the top of the leaf for a little hood. Then I marked a vein pattern on the leaf and sewed thread on top of that. Came out cute, eh? From tip to bottom, the leaf is a little over 3 feet, so it should fit for a while. I have a magnetic snap that I might put on after the baby comes and I see where it will fit best… or I may use something that is more adjustable for the baby to grow with.
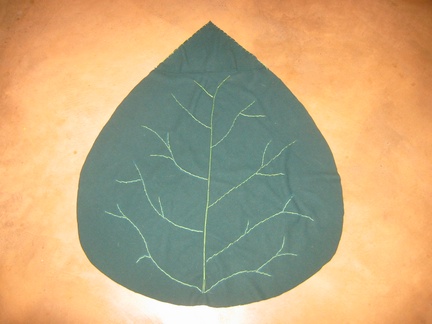
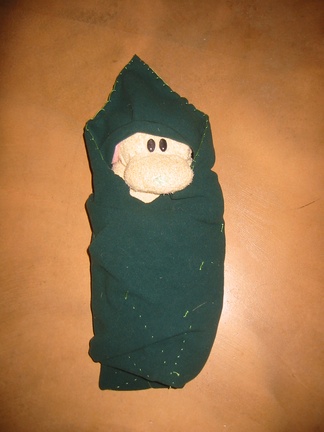
Of course, now Kaia wants one, but I’m tired of the needle work, so, maybe I can just make her a hooded cape like thinging without a leaf pattern….
And once you open up the leaf blanket to reveal the baby, you might see these:
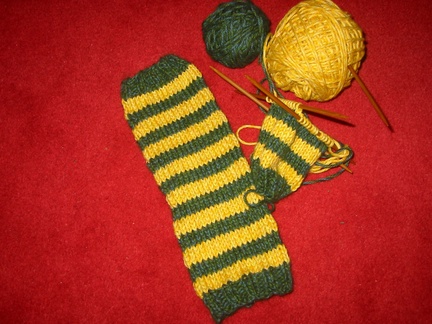
I knitted up some baby leg warmers for the little one…. They turned out really cute, but much too big for a newborn (maybe 6 months to a year). So, I plan to knit a much smaller pair once I find the right yarn (man I love yarn 🙂
Kaia took the leg warmer and put it over her hands and said “Look mom! It’s a perfect hand warmer!” So, since I can’t stop, I knitted her a muff out of some fuzzy yarn from my stash. It turned out really cute, but man was that fuzzy stuff hard to knit with!
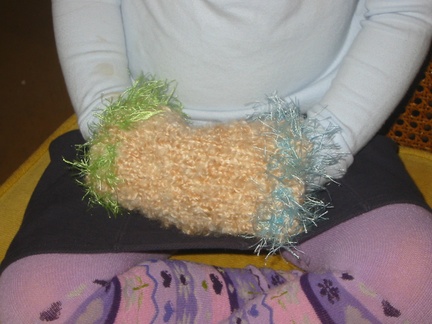
All else is cruising along here at the homestead. The chickens are all laying again (except the younger ones), the guest house is livable though not complete (needs finish work and for the water to be run), and my belly is getting ever larger! Anytime in the next month we will finally get to meet this little one!
Knitting frenzy
Since Kaia and I took that knitting class at the beginning of the month I have been having so much fun knitting! I think I’ve really got it now! (And no, I don’t think I’m nesting yet :-))
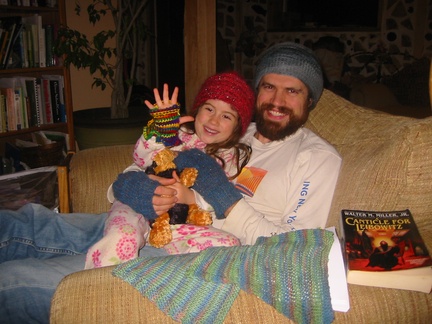
First I knitting Toby some wrist/hand warmers. I got the basic pattern from a youtube video and tweaked it so that they were larger and longer to cover more of the forearm.
Then, I started on a rainbow set for Kaia (I got the pattern from here and decreased the size to fit a child’s hands). Isn’t the wrist ruffle cute??? After knitting one, which I thought turned out adorable, she decided she didn’t want them and now one of her stuffed animals wears it as a sweater. I may knit myself a pair!
Then I went on to a hat pattern. I knitted myself the red hat (that Kaia is wearing) from this site (on the side bar under “for you”). Toby liked it so I altered the pattern so that it didn’t have holes in it and was larger to cover his ears.
Then, I decided we needed some new dish cloths and used this cute pattern (the yellow one) to knit up a couple.
This is fun!! Unfortunately, I’m spending too much money buying new needles and cool yarn!!
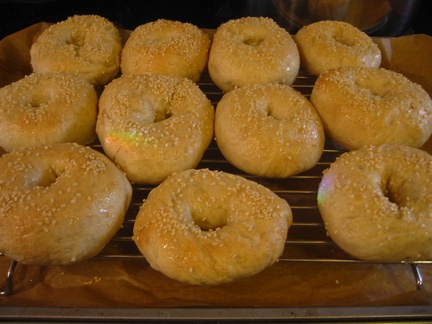
Fresh from the oven….
Manly Mitts
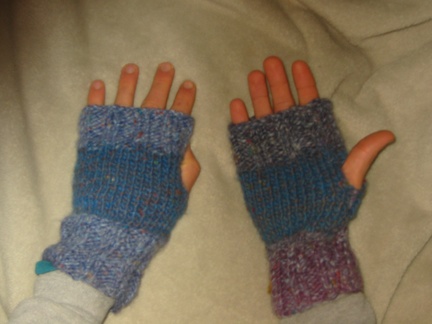
Toby heads out to the little cabin every morning to start a fire and begin working. It doesn’t warm up out there for a few hours, and it’s hard for him to keep his hands warm while he’s typing. So, I made him some fingerless gloves, AKA Manly Mitts. Aren’t they cute? It was a really easy project for a beginning knitter. I got the idea from here and then made them a little larger to fit his hands.
Big Crafty
I’ve been feeling really crafty lately! It all started this past Wed. when Kaia and I went to a kids knitting circle. She’s been wanting to learn how to knit, but isn’t really ready to use knitting needles, so we went to the circle to see if we could get some tips for her. She ended up learning how to finger knit and loves it! She started at the circle and knit the whole way home, through the evening and until bed. Then she woke up and knit some more… and then all the way to school, and all the way home. And it stayed like this until she had over 30 feet of finger knitted yarn. She finally finished it up so she could wrap it around our solstice/christmas/yule/festive evergreen tree. Right now she’s only knitting on one finger but this shows the basic idea.
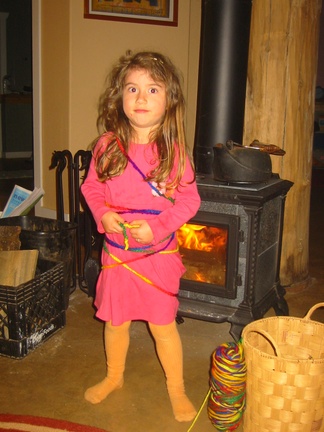
Kaia wrapped herself up in her knitting before wrapping the tree:
After Kaia’s knitting class, I just happened to be headed to a ladies night with some friends and learned how to knit hats. All I’ve ever done up until now was simple stitch scarves and blankets, but I love knitting. I stopped doing it when I tried to read patterns and couldn’t figure out what I was doing. I think I’ve got the hang of it now! Now I just need a high paying job to afford all the awesome yarn that I want to get!! Here’s my first attempt. It was supposed to be a newborn hat, but it turned out a bit wide, though not deep enough for Kaia (but she was gracious enough to model it for me).

Well, then I got inspired to make something with all the tangerine peels we have right now (I ordered one of those citrus fruit boxes!) It wasn’t as easy to do this with thin tangerine peels as I imagine it would be with oranges or lemons, but they still turned out cute!
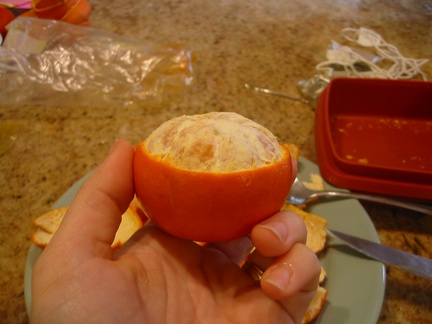
First, lightly score around the skin. I took off the top 1/3 of the tangerine.

Next peel off the top 1/3 (with the tangerines, I really wasn’t able to save this or make a candle top out of it because it was too small).
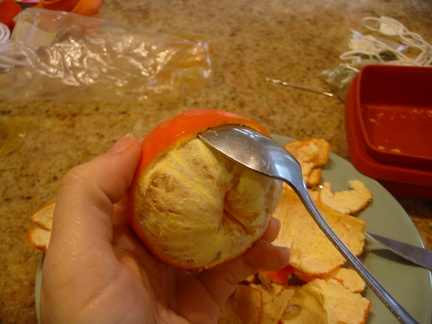
Then, slide a spoon under the remaining skin and loosen as much of it as you can, working your way around.
Once it is fairly loose, slide the peel back and work your thumb in to peel the remaining skin off of the bottom. This is tricky as it may want to break at the end, so go slowly.

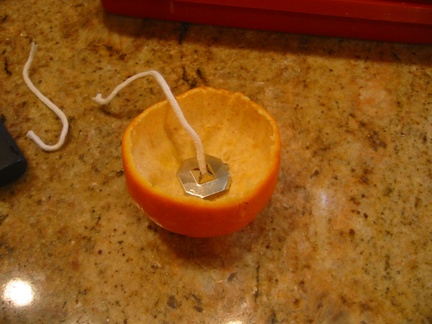
Once I had a bunch of bottom peels ready, I put some candle wax in a double boiler to melt. Then I got the wicks ready. I used some putty and stuck the wick to a metal candle thingy (don’t know what it’s called) to get it to stay in place better.
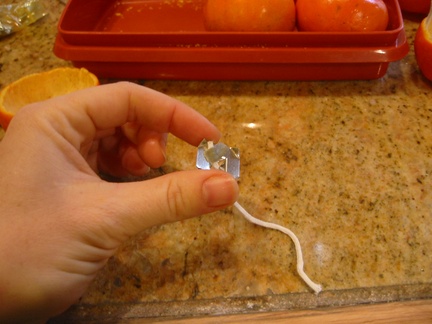
Then I pressed this into the bottom of the peel.
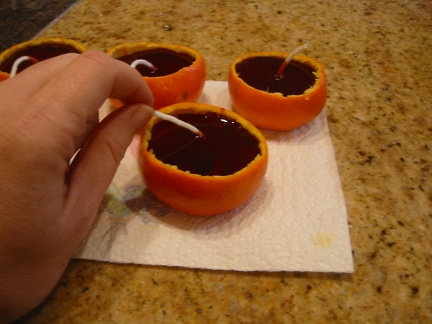
Then I poured the melted wax into the peel. After it cooled just a touch, I stood the wick up in the center (if it wasn’t already there).
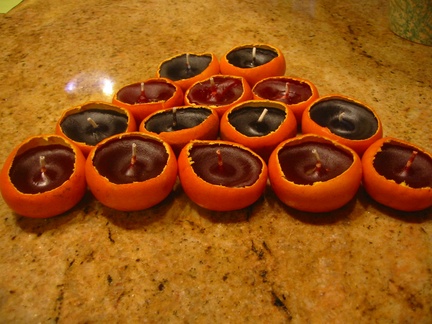
And here they are… wick trimmed and all. We used red, orange, purple, and blue colors in our wax (though it’s hard to tell from the picture)
The Best Garlic Chowder Ever!!!
Ok, so it’s the only garlic chowder I’ve ever tried, but it is fantastic! I got the recipe from a restaurant in San Francisco called ‘The Stinking Rose’, where every dish is full of garlic. (I found the recipe on-line, so I imagine it’s ok to pass it on.) This recipe made almost 4 quarts, so I think I might double or triple it and can some up (I’ll leave the cream and parsley until I heat it up to eat it)
Garlic Chowder
1/4 cup olive oil
4 ounces bacon, diced (optional)
2 medium onions, diced
1/2 bunch celery, diced
1-2 fresh leeks, cleaned and chopped
5 heads roasted garlic (see recipe below)
2 tablespoons chopped fresh thyme
3 medium potatoes, peeled and diced
6 cups chicken stock
Salt and white pepper to taste
1 cup whipping cream (optional)
1/2 cup chopped fresh parsley
In large pot, heat olive oil. Add bacon, if using, saute briefly, and then add onions, celery and leeks. Saute until onions are translucent.
Remove roasted garlic cloves from head by squeezing the roasted head. Add the soft cloves to pot.
Add thyme, potatoes and chicken stock. Bring to simmer and cook until potatoes are tender, about 30 minutes. Season with salt and pepper. Add cream and parsley. Remove from heat and serve. Makes 6 to 8 servings.
To make Roasted Garlic:
Preheat oven to 375
Cut off the tips of the cloves (while the garlic is still part of a head) and place whole garlic head on a baking sheet.
Bake for 30 minute.
Cool and pop/peel the garlic cloves out of their skins.
Grandmother bread
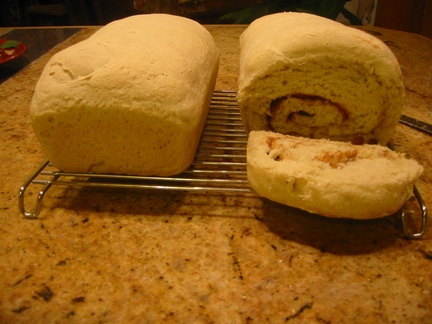
I’ve been doing lots of baking lately, and am really enjoying our new kitchen! I never have made much bread… maybe a little here and there in my bread maker. I have a vague memory of making bread with my mother when I was young and thinking how hard it was to get it kneaded and how much time it took to make. But, now that I’ve gotten into making my own bread, by hand, I’m really enjoying it. I love the kneading part! Plus, the smell of fresh baked goods is just so homey and comforting! I found this recipe for Grandmother Bread and love how simple it is. It comes out great every time. I’ve tried the white bread version, the whole grain bread, herbed cheesy bread, and cinnamon swirl. MMmmmm!!
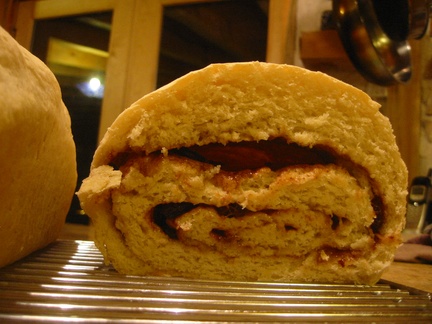
Tonight’s mix was a white bread loaf that I will use in the thanksgiving stuffing, and a cinnamon swirl (It would be really easy to adapt this recipe to stuff it with pesto, or ham and cheese, etc. instead of cinnamon sugar)
What? You can’t really see the sweet, gooey goodness well enough? Here, have a close up!
