Hello Friends

drekinprof2

Hello there!  I realize that my posts here are coming very infrequently in the past few years.  It’s been almost 12 years (!!) since I began this little blog and life has become busy in many other ways and my energies are going elsewhere.  I’m using Instagram as one of my ‘blogging’ outlets more often now, and you can find me there as Ninja.Chickens as well as on my new website where I also podcast: Ninja Chickens. In the mean time, I wanted to leave you with a sneak peak at my new Shawl Design.  It is called Drekin and is a Faroese style shawl with lace and brioche.  I spent almost 4 months dreaming, designing, and editing.  I am so excited about this.  It will be coming out on January 1st on Ravelry and in my etsy store.

drekinprof15 drekinprof14 drekinprof13 drekinprof12 drekinprof11 drekinprof10 drekinprof8 drekinprof3 Drekinprof

Dyeing with Fresh Indigo

Freshindigo18The dye garden is doing fabulously this year!  The Hopi sunflowers are over 10 feet tall, the madder is prolific, and the indigo is lush.  Our indigo (Dyer’s Knotweed or Polygonum tinctorium) grows very well in the North Carolina mountains and this week was indigo harvest time!Freshindigo5

Nikki (my Fern Fiber partner in crime), my kids, and I worked quickly to cut the stems above the 3rd or 4th node and strip the leaves off.  (Cutting the stem here lets the indigo grow back for a second harvest in the fall!)  The leaves were weighed and then added to some cold water.  We were hoping to get 4 pounds of leaves to dye 2 pounds of yarn.  But, we ended up with only 3 pounds.

Freshindigo6

We were joined by our friend, Sarah, as we began chopping up the leaves in the blender with more cold water and blending them to a pulp.

Freshindigo7

We stirred in 3/4 cup white vinegar.  This is supposed to help pull out the pigment and keep it from breaking down too quickly.  We let this sit for 30 minutes.

Freshindigo8

Then we strained it through muslin cloth and put the strained liquid to the side in my super large dye pot while we soaked the plant matter a second time in more cold water and let it sit for another 30 minutes.

Freshindigo9

Once the second batch was strained, all the liquid went into the big pot…

Freshindigo10

and the yarn was added.  (This is organic merino wool that we soaked overnight in water.)

Freshindigo11

After one hour of soaking, you can see the color of the bath and yarn had become more blue.

Freshindigo13

We gently squeezed the yarn out and hung it up to dry.  Within seconds, you could see the air oxidizing the pigment and changing it to blue!

Freshindigo14

The lighter blue on top was just out of the dye bath.  The darker had been out in the air for a few minutes.  Look at the difference from the picture above, too!

Freshindigo15

Drying in the shade, you can still see all of the color dripping onto the rock below!

Freshindigo16

We had been worried that we wouldn’t get enough color for the amount of yarn we wanted to dye.  I’d read that you should have 2 times the amount of plant material and we only had 1.5.  Despite this, there was still so much color left in the dye bath, we decided to add more yarn (another full pound that we’d had soaked and ready… just in case).  This sat in the dye for another hour.  The yarn on the left was from the second batch.  Only slightly lighter, but still super gorgeous!

Freshindigo17There was still so much color in the dye bath, but no more yarn to toss in there.  I decided to put the strained indigo plant material back in the bath to see if I could ferment it a bit to pull more color out.  I’ll let keep you posted on those results!

The yarns cure/dry for at least 2 days before they are washed.  Once the are dried again and reskeined, we’ll put them in our Fern Fiber naturally dyed yarn store (well, not all of them.  Sometimes us dyers take our payment in skeins of yarn!! 🙂 )

freshindigo19


PS. I know I haven’t been posting nearly as much on my blog, but I do have a pretty active Instagram account.  If you’d like to follow my homesteading, homeschooling, and fiber frenzy, you can also find me at @ninja.chickens  and our Fern Fiber naturally dyed yarns can be followed at @fernfiber.

freshindigo20


Natural Dyeing

rainbow1

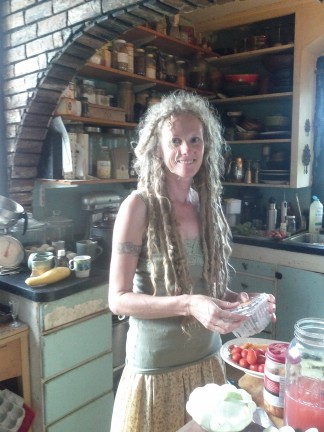
I am having so much fun experimenting with natural dyes these days.  Every time I see a bright flower, or a colorful tree, I think, “Oooooh, I wonder what color dye that would make?”  This weekend, I got together with Nikki of Woolen Violet, my fiber partner in crime, and we trashed the kitchen! 🙂

Let me back up a sec.  Before we could begin our dyeing, some prep needed to happen.  We planned to try out black beans, cocoa bean chaff, cochineal (actually a bug!), and two woods: Indian Rosewood and Purple Heartwood.  Some of these things needed time to soak, so I started the prep a few days ahead of time.

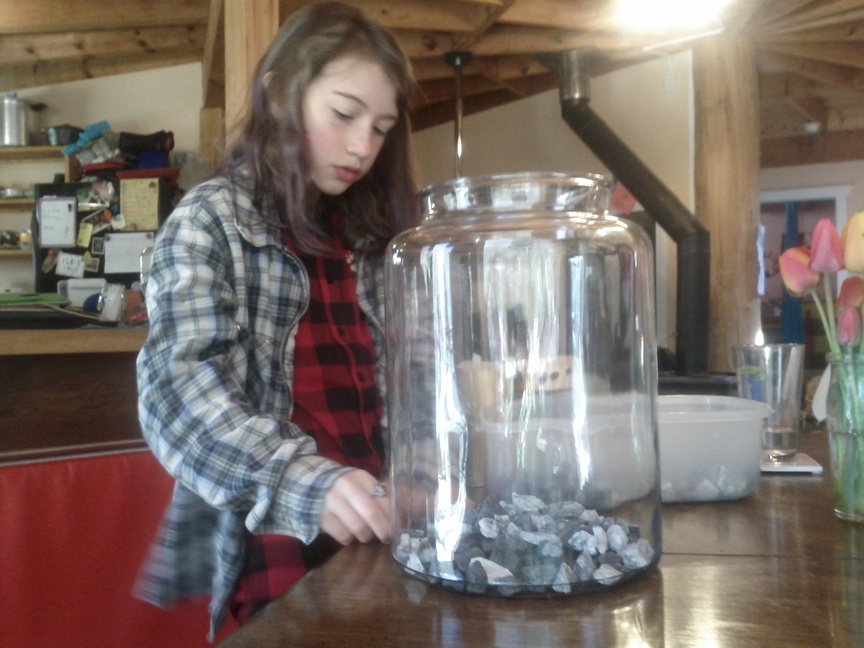
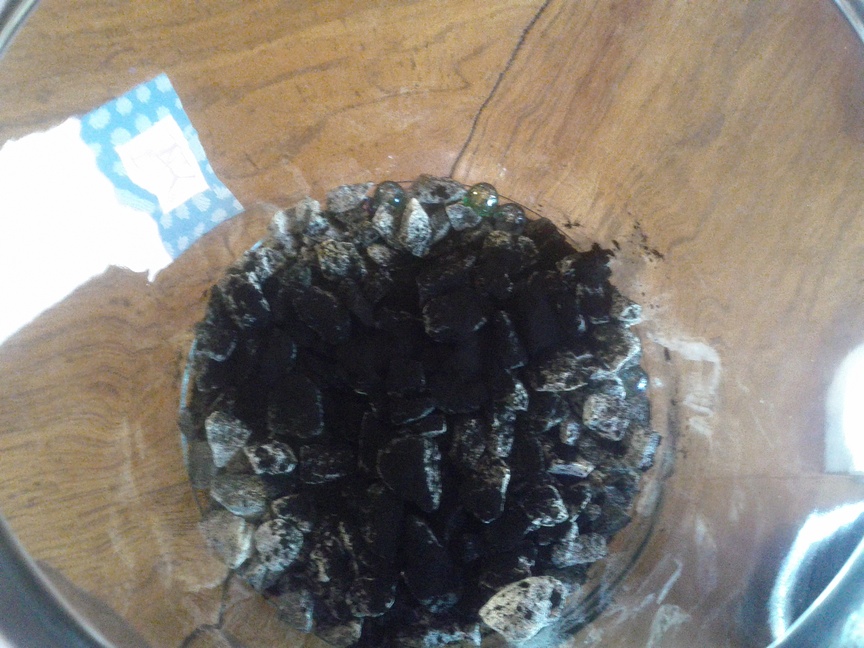
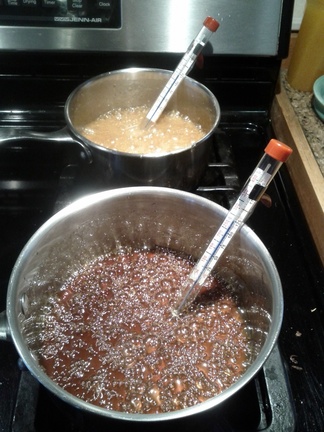
On Wednesday, I chipped up the wood into small pieces.  I’m very thankful for the help of my hubby as both Rosewood and Purple Heart are very hard!  I put the wood into separate pots and filled them about 3/4 full with water (I used our tap water, which is well water with a pH of about 7).  The water was simmered for 1 hour, then taken off the stove and left to sit until dye day.

naturaldyes
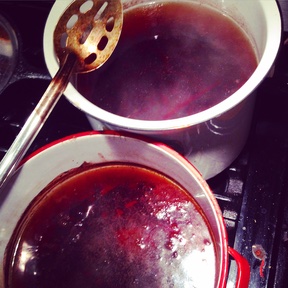
The top pot is the Purple Heartwood the bottom is Rosewood.  Both woods put out a good bit of oil, but once the dye bath cooled down it was easily skimmed off of the top.

On Thursday, I began my cochineal extract.  I put 1/2 oz. of cochineal in a sauce pan and covered it with 3 inches of water.  I brought this to a simmer and let it bubble lightly for 30 minutes.  Then, I strained the cochineal through a muslin cloth and put the dye water to the side.  I placed the cochineal back in the sauce pot, covered it with 3 inches of water and repeated this process a total of 4 times, always reserving the dye water.  This would be the dye bath.

naturaldyes2Fuchsia pink from a tiny bug!

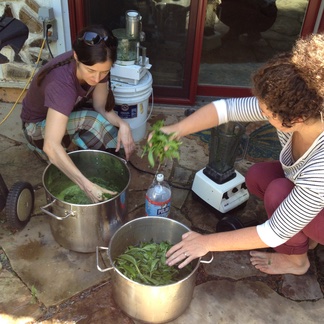
The morning before our crafty date, I put the black beans to soak in a large pot of water, stirring them often.  (Cover them with lots of water, because they expand!)  And I pre-mordanted my yarn.  Mordants are a very important step in dyeing as they help the dye bond to your fiber.  We used Alum (15% per weight of fiber) and Cream of Tartar (6% per weight of fiber).  The mordants were dissolved in water and simmered, along with our fiber, for 1 hour.  I left my yarn in the mordant bath overnight.

First thing on dye party morning, I gave the beans one last stir.  You want to let them sit for a few hours before you use the dye water so that all of the bean matter settles to the bottom.

When Nikki and family arrived, she and I bounced around like giddy little kids in a candy shop!!  There were ‘ooooooo’s and ‘aaahhhhhhh’s all day long as we watched colors change and chemical reactions happen.

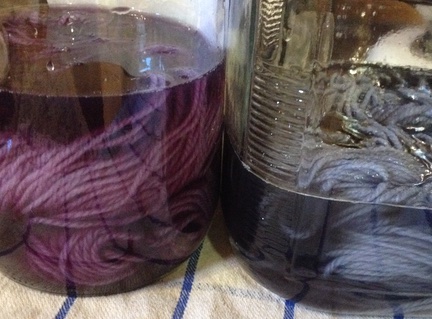
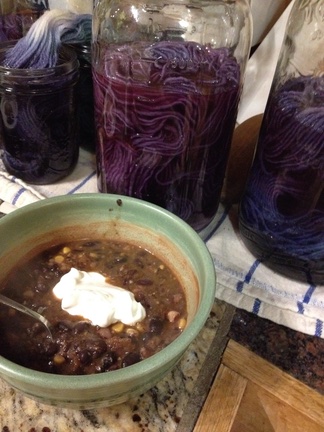
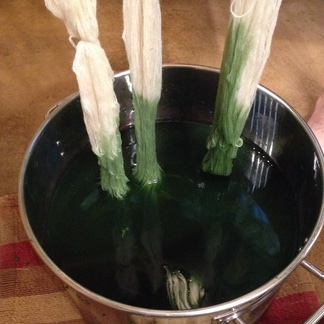
We started by scooping off some of the black bean dye and pouring it in mason jars along with our pre-mordanted yarn (Quick note: we used 100% wool for all of our dyeing).  The jar on the left is straight black bean.  The one on the right has a small amount of baking soda added (changing the pH).

blackbean1

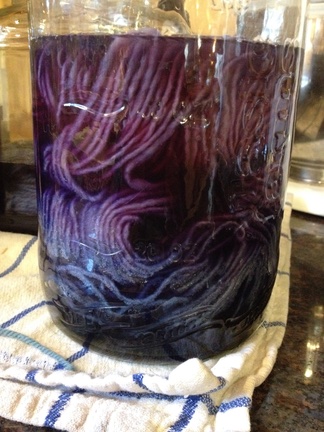
This one has more baking soda on the bottom and the plain bean dye bath gently poured on top…

blackbean2

This skein has black bean, vinegar, baking soda, and copper on the left and bean, baking soda and copper on the right (I meant to put just vinegar on the left but flubbed it up).

blackbean3

And what our sweet hubbies made for us while we were slaving away in the kitchen…. some delicious black bean soup from the beans we soaked for the dye bath.!!

blackbean4

Dyeing with black beans is a cold process.  Adding heat will change the color (to brown, I hear).  So, you put the fiber in your black bean dye and let it sit over night before rinsing and drying it.
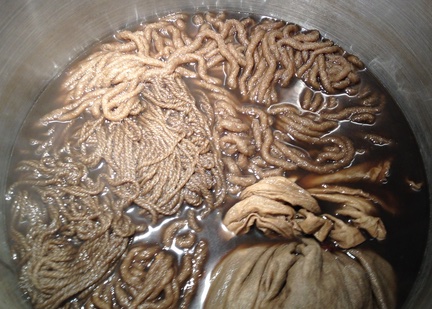
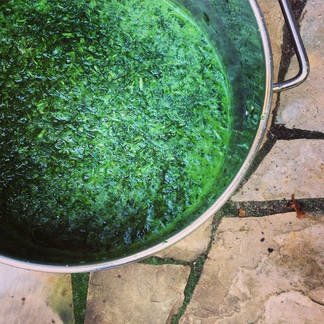
Next we moved on to our woods.  We were very surprised when we put the yarn in the pots that the vibrant colors produced pale brown yarn.  Both the rosewood and the purple heartwood.  So undramatic was the change that I didn’t even take a picture.  We were waiting for more color to come out as it simmered (for one hour).  Not much happened.  We decided to do some experimenting and pulled out some of the dye bath in small cups.  We added baking soda to one, vinegar to another and baking soda and copper to a third.  The Rosewood turned sky blue with baking soda and copper.  Crazy Blue!  So, we tossed some of this in our main dye bath to see what we could get with our yarns.  It ended up being kind of a weak coffee brown.  Not a bad color, but not the blue we had hoped for.

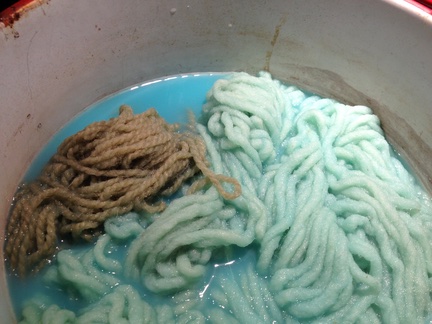
The skein on the left was the Rosewood.  The one on the right was a white skein that was tossed in to see if it would pick up some blue.  Once it was rinsed it was fairly pale in color.

rosewoodblue

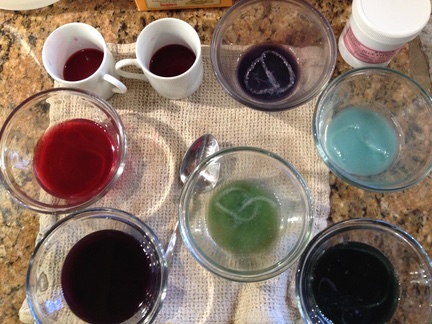
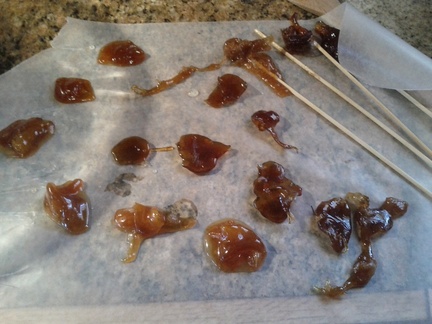
Here are some of our sample experiments.  We’d pull dye bath out and add things to them just to see what colors we might be able to get in the main bath.

fiberexperiments


I’ve read that the Purple Heartwood actually turns more purple when exposed to the sun’s UV rays.  So, maybe on a hot summer day I’ll stick the yarn outside and see if there is any color change.  From laying it out today in our cold winter sun, it did seem to get a bit of a purple tone to it, but definitely nothing dramatic.

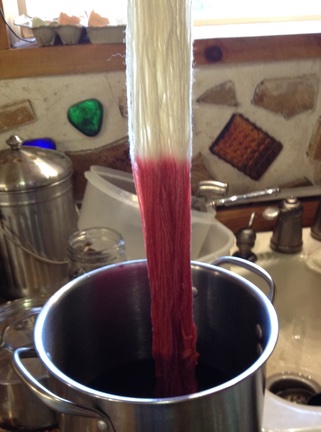
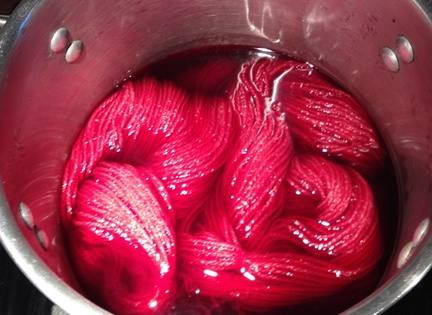
The “Instant Gratification Award” definitely went to the cochineal!!  The second the yarn hit the dye bath it became a vibrant pink!

cochineal

Cochineal simmered for one hour.

cochineal2

cochineal3

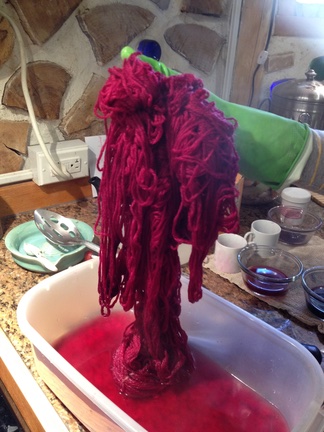
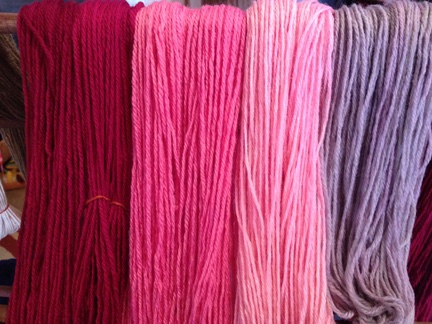
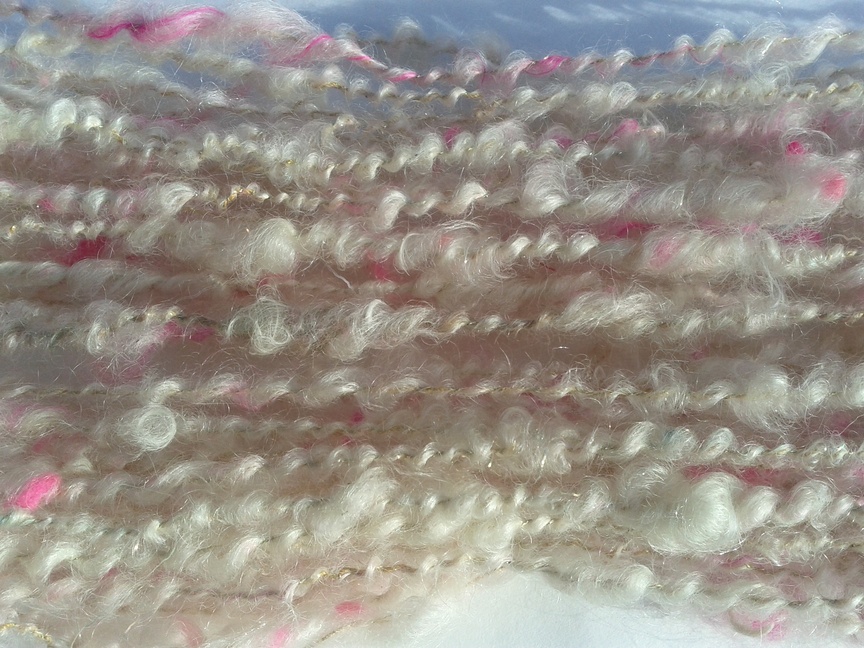
There was so much color left in the dye bath that we tossed in another skein and simmered it for 20 minutes.  Then we did it again!  Then we did it a 4th time with a little baking soda thrown in!  Isn’t it GORGEOUS!  (Yes, I’m shouting!)

cochineal4

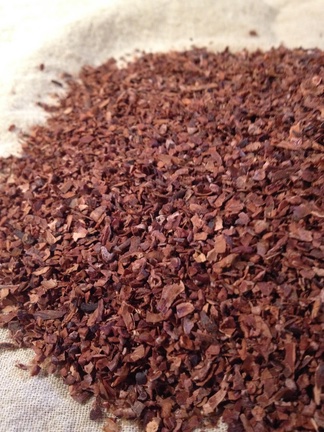
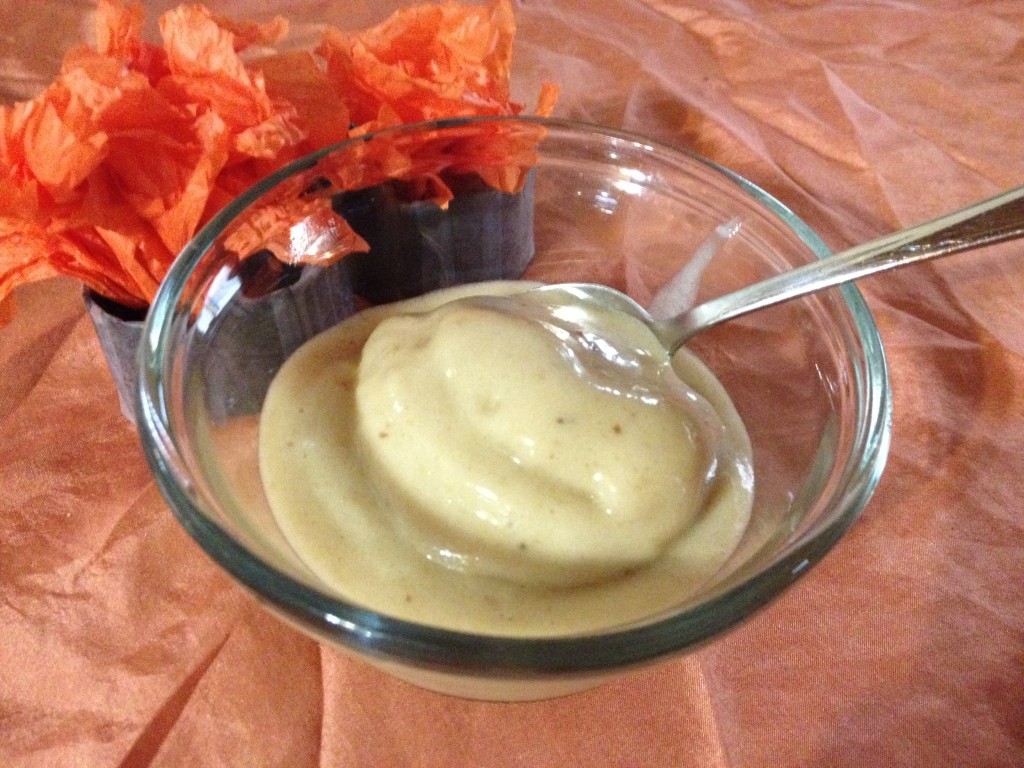
Finally, we set up the cocoa chaff (lovingly donated by the amazing French Broad Chocolate Factory).  As we  poured the chaff into a muslin bag, the smell of cocoa filled the air, and once the simmering began we were all craving chocolate!!

cocoa

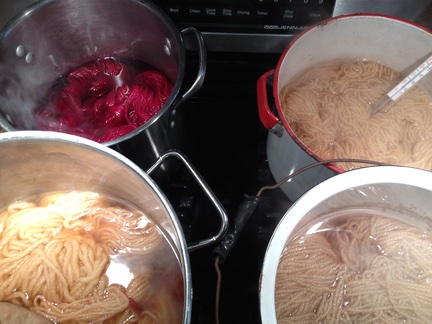
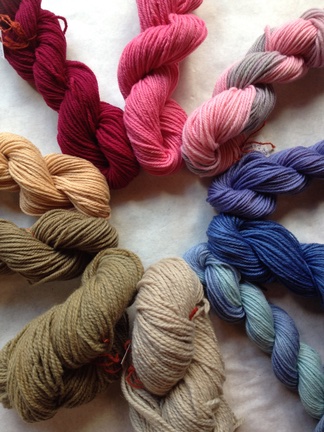
Top left – Cochineal, Top right – Rosewood, Bottom left – Cocoa, Bottom right – Purple Heartwood

cocoa2

Cocoa

cocoa3

Cocoa with some baking soda and copper added.

cocoa4

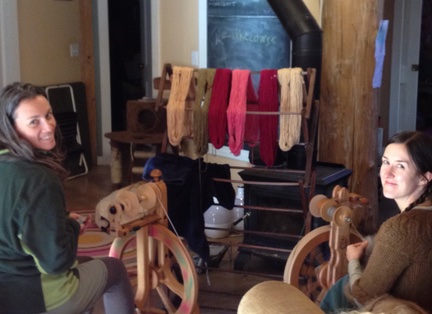
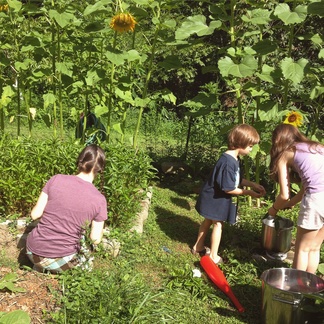
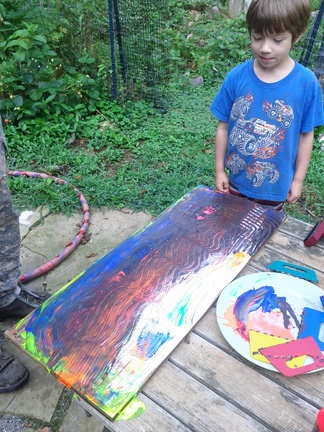
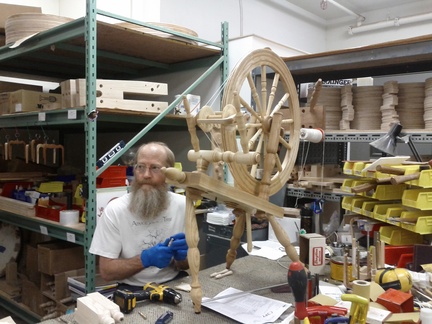
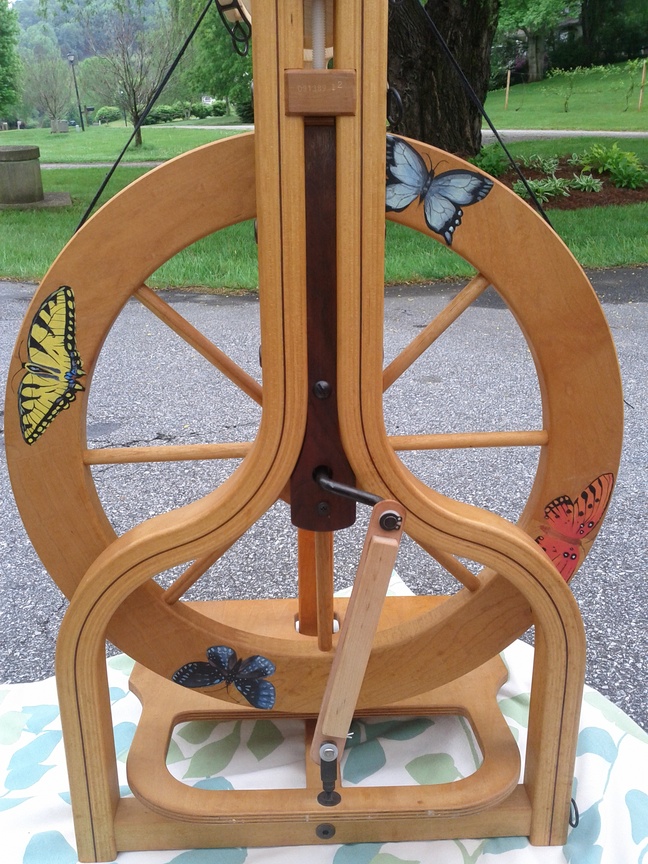
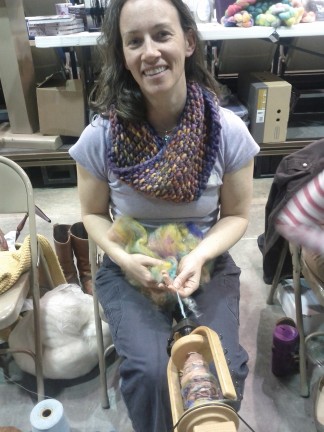
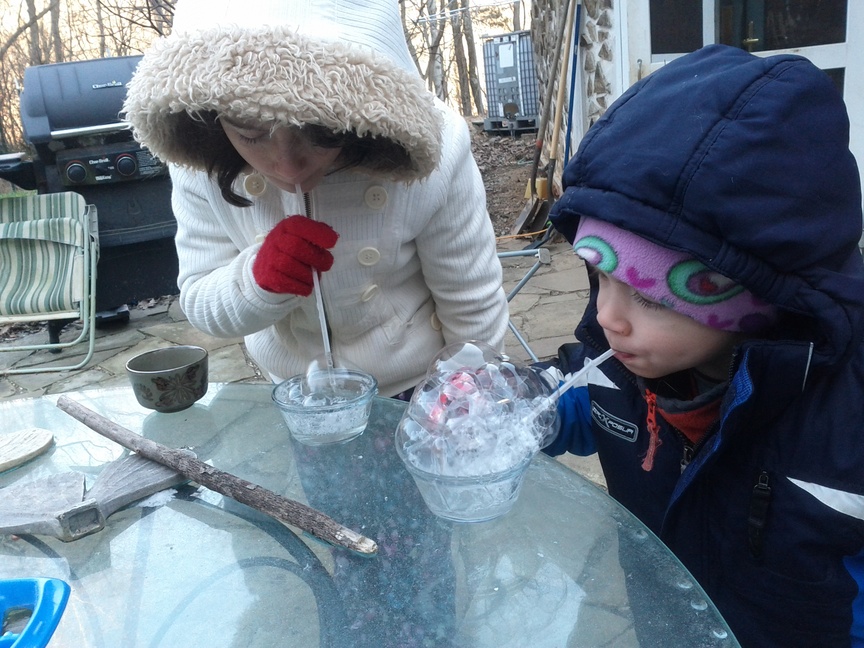
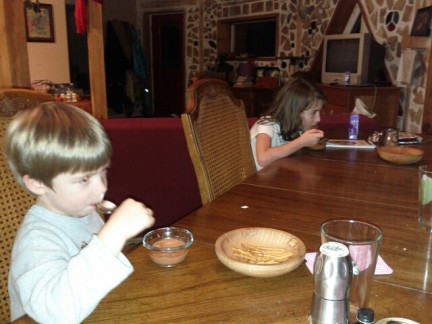
We got in a bit of spinning while things dried.  I have to admit, my feet were tired by this point.  We’d been standing ALL DAY watching the yarns simmer.

dyeingspinning

But we soon filled our bellies with a delicious black bean soup with a pear and blueberry crisp for dessert!

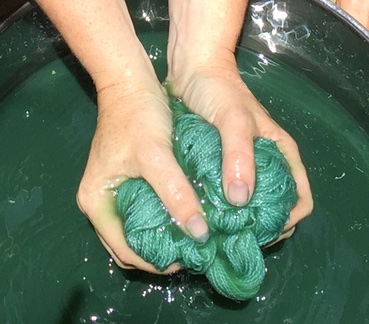
To be honest, I had a very hard time not pulling the black bean yarn out of it’s dye bath early.  But, I forced myself to go to bed and woke up bright and early (thanks to one 5 year old) the next morning, ready to wash up some lovely blues!

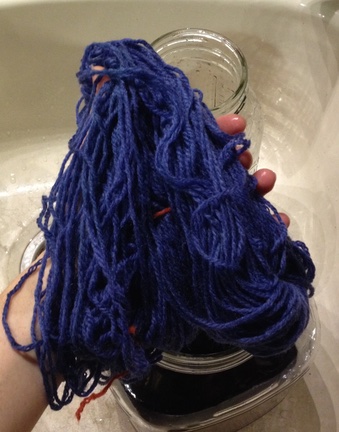
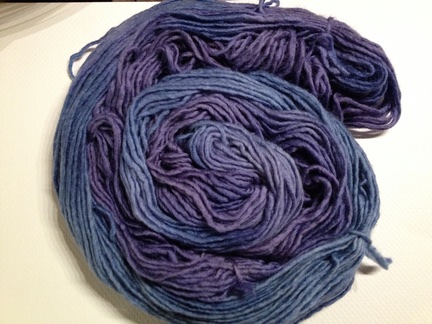
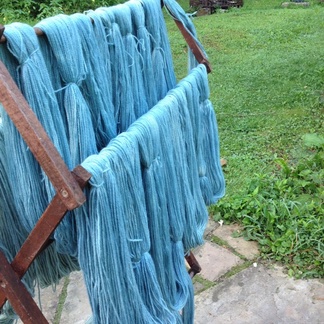
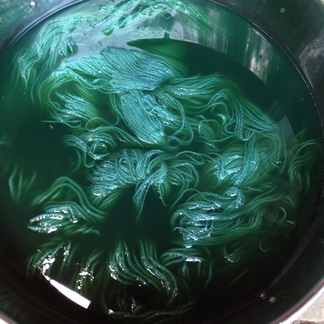
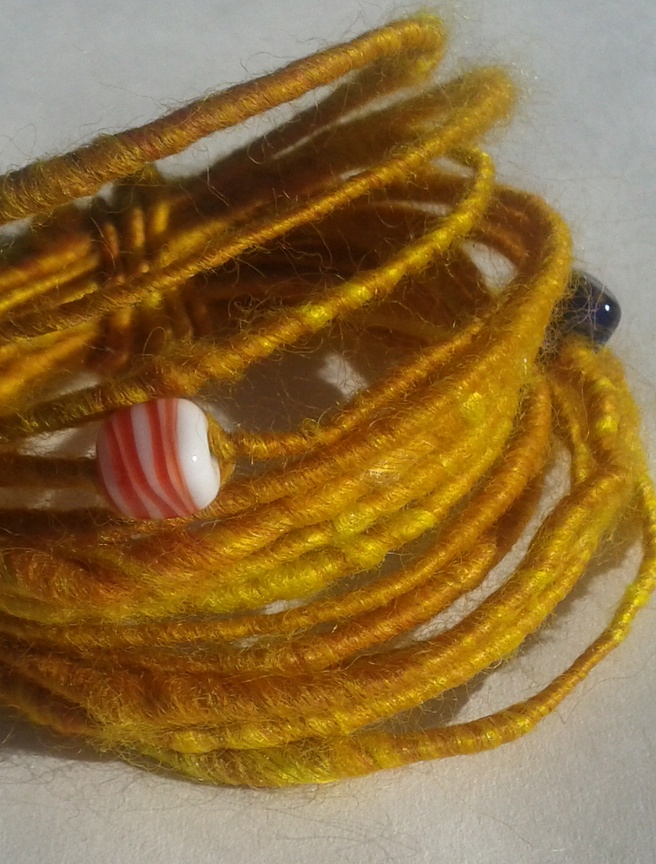
This is the yarn dyed with black bean and baking soda:

blackbeansolo

Nikki’s mix that had the baking soda on the bottom of the jar. The purple hues are black bean by itself with the blue coming out when the baking soda is added.

blackbeannikkis

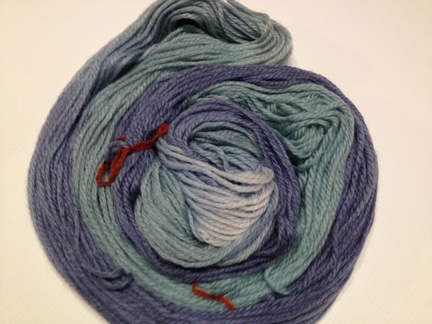
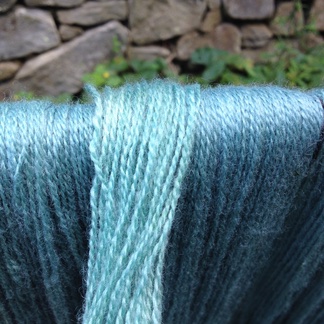
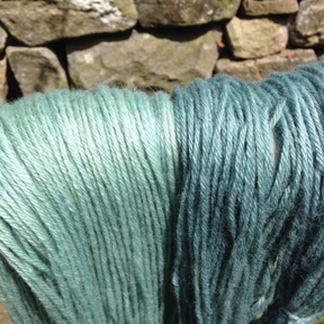
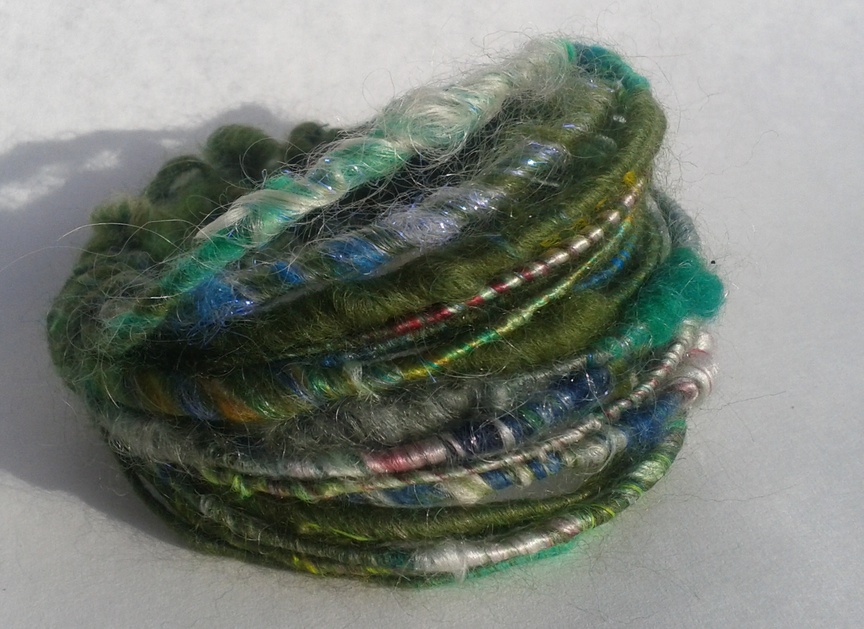
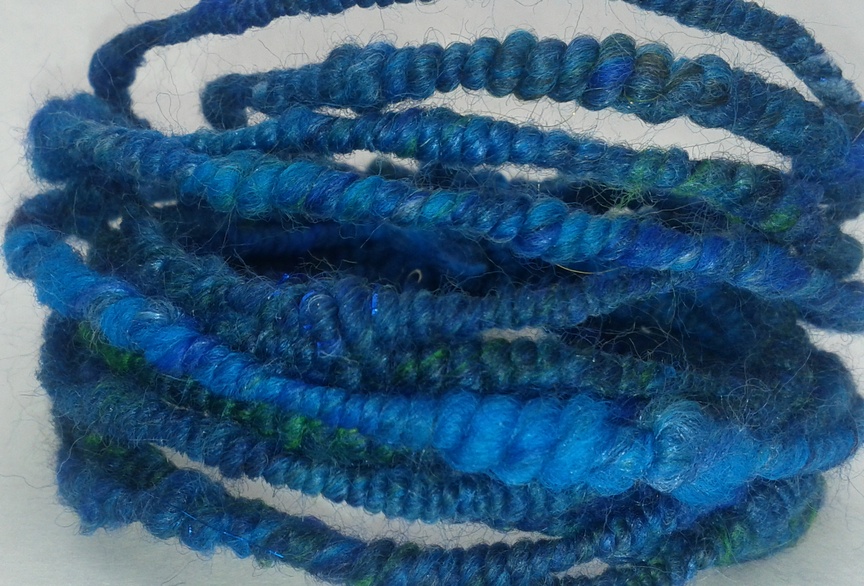
This is the skein that I had in black bean, vinegar, baking soda, and copper (blues) and black bean baking soda and copper (greens)
blackbeanvinsodacopper

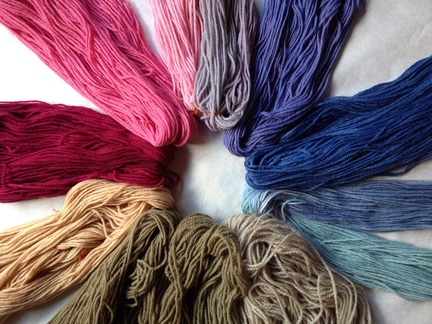
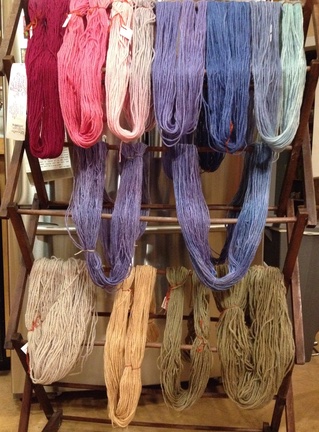
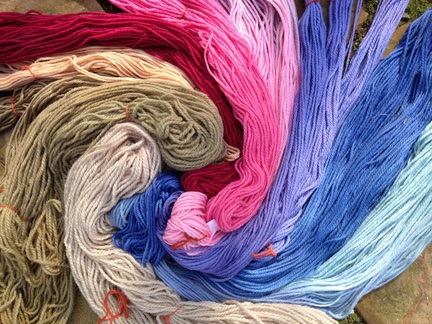
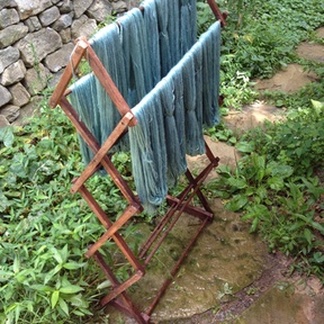
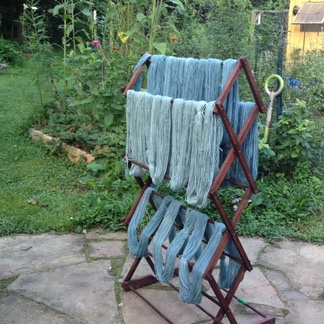
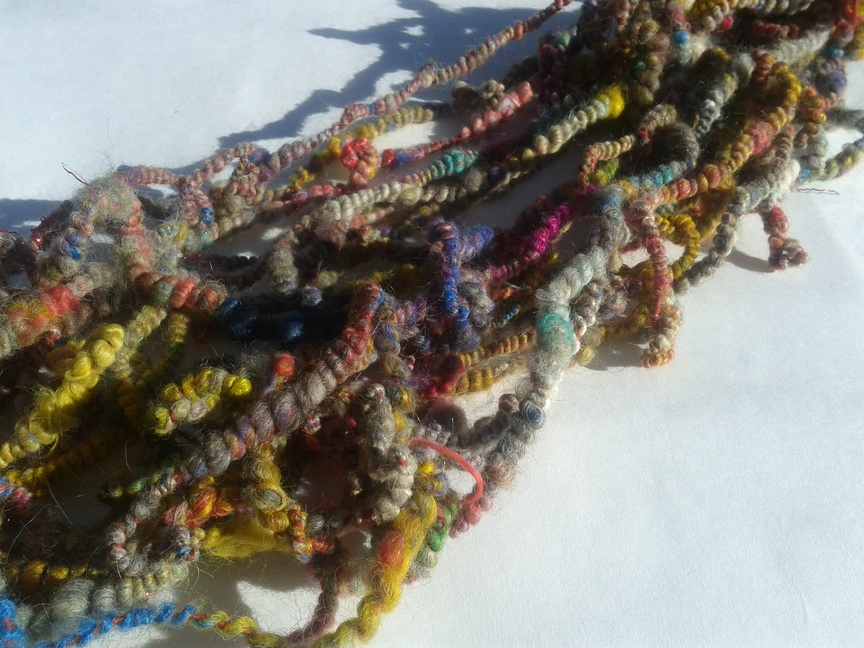
All of our lovelies hung up to dry.

blackbeanhanging

I think we are really hooked now!!!  Someone please send us a million white skeins to play with!!  We need more!  MORE!!  🙂

rainbowspiral

rainbow

Fixin’ my fiddle!!

A few months ago I picked up a fiddle from craigslist for $50.  I’ve wanted to learn to play fiddle for years, but a good fiddle generally starts at over $500.  So, I thought, why don’t I try to rehab this one and see what becomes of it.   It was made sometime around the civil war and came over from Austria. This fiddle was well loved by a sweet family.  But when they moved into the area it got bounced around a bit and parts fell loose and cracked.

fiddle1

The top was coming apart from the sides.fiddle4

The end button was missing and the bottom block had a crack.fiddle3

The back was coming apart at the seam.fiddle2

And worst of all of it, the peg box and scroll had little cracks all through it.  Some of it had been repaired in the past and was re-cracking, some of the cracks were new. (I only pointed out one large one here.)fiddle5

I took the fiddle to a local luthier (violin maker), Danny Bishop, and he walked me through all the steps to fixing it up. (I think he got sucked into my enthusiasm and wanted to hear this fiddle sing again.)

The first thing I did was place an order with internationalviolin.com.  I got some hide glue and a couple of different types of clamps.  I worked on the back first, re-glueing it.  Isn’t it lovely?fiddleclampedback

Then I worked on glueing a spot on the side where it had been poorly glued the last time it was fixed.fiddlesidesplit

fiddlesideclamp

I fully opened the top to check out the insides and all looked good.  fiddletopopen

Then I glued it back tightly.  I didn’t have enough clamps so we made some out of old wooden thread spools.fiddletopclamp2

Then it was on to the peg box.  This is a pretty delicate area, but it takes a whole lot of pressure with the strings pulling on it and the pegs pressing inward.  You can see where a repair had been done on an old crack.  pegbox2

We used a very sharp razor and took this piece off.  Then I used the razor and carved out part of the box on each side so that I could replace it with a large piece of maple.

pegbox3

We used card stock to make a template for the wood that would go into the peg box.pegbox4

Here are the two pieces of maple that we cut (with a very sharp knife) to fit the box.pegbox5

Then they were glued and clamped into place, one side at a time.pegbox6

Here’s how it looks all glued in.  I stained it later to look just like the rest of the box.pegbox7

Once all of this was done, I took it back to Danny for a bit of help getting it ready to string up.  We drilled and reamed out the new holes.

reamingholes

Then we fit the pegs to the holes.  The pegs have to be sharpened, like you would a pencil, to taper them to fit the peg holes perfectly.  Then we drilled tiny holes for the strings.drillingpegholes

When I was fitting the pegs for the last time, I heard a loud crack and my heart stopped. CRAP!!  Another crack in the peg box!  With nothing to lose, Danny drilled a small hole through the crack and superglued in a piece of paperclip.  This held the crack tightly!  Yay!!  He used a tiny jewelers file and cut off the top of the paper clip.  You could barely tell it is there.fixingcrack

The peg box, all fixed up.pinsset

Next came the new end button.  I filed that down just as I did the pegs and fit it nice and snug.endnut

Then it was time to set the sound post.  The sound post is a little piece of wood that fits between the top and bottom of the violin.  It’s very important in getting a full, strong sound.  Danny had made his own tools for this and made it look super easy.  He slid the post in through the sound hole and pushed it into place with the fork.

soundposttools

See it in there??soundpost

Then we took some time with the top nut or top block.  It was very tall, so he filed it down a bit and then made new notches for the strings to sit on.

filingtopnut

Finally, it was time for the bridge…. SO close to stringing it it up!  Danny took a brand new bridge and fit it perfectly to the top of the fiddle.  Then he carve it up a bit to enhance the sound.    (I made him initial it before we put it on the fiddle.)

bridge

FINALLY, the moment of truth!  I attached the fine tuners to the tail piece.

toners

And we began putting on the strings!!!stringingup

DONE!  Isn’t she a beauty??  It looks completely different than the first picture.

done

And the sound?  Well, Danny wanted to buy the fiddle from me.  When he was tuning it and testing it out, he couldn’t put it down.  The sound is rich and full and warm.  It’s just beautiful!!  I am SO glad I took on this project.  I now have a 150 year old Austrian violin that couldn’t be more lovely!!fiddling

Here’s a little video of Danny fiddling around 😉  I can’t express how thankful I am to him for taking the time to work with me.  He was a patient and knowledgable teacher.


A tour through OZ

This weekend, we hopped on the ski lift at Beech Mountain Ski Resort… our tornado ride into the wonderful land of OZ!

oz1

The theme park was started in 1970 by Grover Robbins (who started Tweetsie Railroad).  In its first year, it attracted over 20,000 visitors.oz2

Unfortunately, Grover died a few months before its opening and the enthusiasm for the park died with him.  It only stayed open for 10 years, but in 2009, it was reopened to the public for a weekend event once a year.  We were super excited to go this year!

After being airlifted in, we met up with Dorothy.oz4

(No, Dorothy isn’t that short… she’s squatting down for the kids 🙂
oz5

Once into the woods, we meet up with the Professor to have our fortunes told.oz6

oz7

The views from the top were stunning!
oz8

I had a run in with the mean neighbor who was trying to find Toto.  oz9

Then, we found Dorothy again (there were probably 10 dorothies spread throughout the park 🙂

oz10

Dorothy’s ruby slippers.  (Her dress from the movie use to be on site, but it burned in a fire in 1975.)

oz11

We got to listen to live music (including Over the rainbow) while we waited to enter Dorothy’s house.
oz12

Dorothy’s roomoz13

Aunt Em in the kitchenoz14

We headed into the basement where we experience the tornado in a dark room lit by black lights with a little swirling house and the tornado scene from the movie oz15

oz16

Then, we went through the house after it lands in Oz.oz17

oz18

And find that we’d landed on the witchoz19

And the Mayor of Munchkinland has proclaimed her dead.oz20

Soon, we met Glinda the Good Witch oz21

And begin to walk the yellow brick road!!oz22

oz23

Munchkinsoz24

The scarecrow was happy to see us, but we didn’t have any brains to spare 🙂
oz25

Leif said the Tinman is his favorite, because he has an ax.oz26

oz27

oz28

Sweet Cowardly Lionoz29

oz30

Once we met up with Dorothy and her traveling companions, we ran into some of the Wicked Witches guards.oz31

Cranky talking apple trees
oz32

And the Wicked Witch herself, who tried to turn the kids into flying monkeys.oz33

The witch’s castleoz34

oz35

Once we made it through the forest, we found everyone waiting for us in the poppy field.oz36

oz37

Once you make it to the Emerald City, you are almost home!oz38

You meet the Wizardoz39

oz40

Say hello to the horse of a different color.oz41

Watch the wizard’s balloon fly away without you!

oz42

Click your heels three times and you are home!oz43

Flying back to the car 🙂oz44

oz45

oz46


A wonderful family weekend!oz47

Sweet Suki 2000 – 2014

2dogsI got Suki from a rescue when she was about 1 1/2 years old.  I didn’t know a lot about her back story except that she’d been turned into the rescue twice by families who said they just didn’t really want her anymore.  I promised her that I’d stay with her to the end.  My sweet Suki passed away this evening after 14+ great years.  She was a fierce and loyal companion with a mind of her own.

OLYMPUS DIGITAL CAMERAI picked her up from a rescue 6 hours from my house.  After the long drive home she bounded into the house, ran into each room, and then jumped on my bed and peed.  I’m not sure if she was just super excited to finally be home or if she was getting me back for the long ride in the car.

suki attackSoon after I got her, a friend lent me his book on training Akitas.  I’d skimmed it a bit and left it on the table so we could start our training soon.  The next morning I woke up to find the book shredded on the floor…. Suki had never torn up anything before and never did again!  She just wanted to make sure I understood that she didn’t need any training.  She would walk to her own beat.

107-0721_IMGOne of Suki’s favorite games when she was younger was to steal your socks or underwear as soon as you jumped in the shower and run off with them.  She was a stealth little thief!

She also had this toy that was actually a stress doll… one of those things you beat on when you are stressed and it would scream (Weird, I know).  Well, Suki took it from Toby and claimed it as hers.  She loved to carry it into our room at night and chew on it so that it would scream “YOUR DRIVING ME CRAZY!!!” as we were sleeping.

snowgirlSuki was a bit of a puppy until she was probably  7 or 8 years old.  She finally started to mellow out a bit.  The kids took advantage of that and would dress her up.  Sometimes it was just to keep her warm in the winter.

wintersuki

suki11

suki1Sometimes it was because she looked so cute in hats.

cowgirl

suki6

Dearest Suki, I hope you are now at peace.  I hope your heaven is full of squirrels and chew treats, underwear and all of your favorite things.  I love you and will miss you dearly!suki9


The Artistic Process


The plan today was to freshen up the paint on the fruit tree trunks, which helps keep the borers away.  But, our paint had frozen over the winter and was no good so we had to put that off for another day.  Leif would have none of this and insisted that he paint SOMETHING this morning.  So, we set him up and let him go to it.
painting painting1 painting2 painting3 painting4painting5painting6

He’s very proud of his work and plans to display it on his wall once it’s dry.

Traveling with kids – Week 4 and Finally home!

Last night I fell asleep to the music of cicadas and crickets.  I didn’t realize I missed it until I heard it coming though my window.  Ahhhh!!!  Home!

We had a wonderful final week of travels and rode TWO trains!  We took the cog railway up to the top of Pikes Peak, one of Colorado’s 14,000 foot mountains (they have 53!)  Cogs are used for steep terrain (generally over 7%, but some of the inclines on our ride were 25%!!!).  It’s basically a gear on the bottom of the train that connects with the middle rail.  This keeps the train from slipping on the tracks during a steep incline.
pikespeak1

Here is what the railing looks like.  Leif really enjoyed learning how this works.  There are currently only 3 cog railways in use in the US: Pike’s Peak in Colorado, Mount Washington in NH, and Quincy and Torch Lake in MI.  (See the deer in the woods?)

pikespeak2

pikespeak5

pikespeak3You can see the angle of the incline here.  Looks more like we are in a plane!

pikespeak6

Above the tree line.

pikespeak7

“The hills are alive….”  I could just see Julie Andrews dancing in the fields. 🙂  The grass up here grows SOOOOOO slowly…. about an inch every hundred years.  So, we cold still see the 100 year old wagon trail.pikespeak8

pikespeak10

In the distance is a working gold mine!pikespeak11

View from the top.pikespeak12

One thing that I learned on the trip was that Katherine Lee Bates wrote the poem  America the Beautiful after being inspired during the wagon trip she took up to the top of Pike’s Peak in 1893.  Isn’t that cool? pikespeak13

pikespeak14

pikespeak15

Since this was the highest point we would be at during our trip we emptied our water bottle of water and put the cap back on for the long trip back home.  We talked to the kids about air pressure and how it would change the bottle as we traveled home.
pikespeak16

Leif loves his sister so much.  But he DID NOT want her in this picture with him.  There was a long line of people waiting to take pictures of the summit sign and the train was ready to leave.  So, since Leif couldn’t have a picture by himself, he ran around screaming like a crazy man.  Toby finally had to help him off of the rock and back into the train.  Poor little man.  The low oxygen must have been getting to him 🙂

pikespeak17

pikespeak18

The sweet deer came right up to the train on the way back down.

pikespeak19

The next day, we headed to Durango to get on the Durango Silverton Narrow Gauge Railroad.  This train ride was a full day adventure!  DSNGRR19

DSNGRR1

DSNGRR2We had a book about the railway that described the language of the different horn blasts.  So, we could tell when the engineer was signaling to his conductors, when he was warning about crossings up ahead, when he was about to stop…

DSNGRR3

DSNGRR4 Some parts of the rail line were over some pretty steep cliffs.  This is looking straight down from our window.

DSNGRR5

DSNGRR6

Sometimes, when going over bridges, the train would blow steam out of the side.  This helped clean out a part of the engine (I don’t remember what part 🙂

DSNGRR7

Over the bridge.DSNGRR8

DSNGRR9

We stopped twice to take on more water.  The water tanks were fed by streams above them.  The tank fills up and overflows back into the stream.DSNGRR10

Our destination was Silverton.  The town was named after the ton of silver that you could find there.  (A little gold, too.)  But it was known for being a bit of a lawless town.  There were 40 bordellos on one street!  There was so much trouble making in the town that Wyatt Earp and Bat Masterson were brought in to try to keep the peace.  When they couldn’t, Masterson left and Earp began dealing cards for local saloons.

DSNGRR12

DSNGRR13

DSNGRR14

DSNGRR15

Of course, there is ‘mining’ for the kids in Silverton.  DSNGRR16

They were very happy with their haul.

DSNGRR17

DSNGRR18

After a couple of hours in town, we headed back to Durango.  The train in front of us was having some troubles, so this trip took a bit longer.DSNGRR20

And some of us got tired 🙂DSNGRR21

Selfie with the kid.DSNGRR22

When we finally got back to the hotel, this is what the sky looked like.DSNGRR23

We had thought about making a few other stops, but we all agreed that we had seen as many things as we could and it was time to make the 26 hour trip home.  We passed a train carrying wind turbine blades.  I had no idea they were so big!!!  Each of these blades took up two train cars!!windturbine

On our way through Oklahoma, the sky began to darken.storm1

And lightning began to explode in the air!!!  The sky was pitch black at this point, but the clouds look white because of the lightning inside.storm2

storm3

storm4

We stopped in Memphis for a night and checked out our bottle, since this was the lowest point in our trip.

bottle2

Yesterday, 4300 total miles later, we finally rolled into home!  What a trip!  It really couldn’t have worked out much better!  But, man, is it great to be home!

The pumpkin vines have to be 30 feet long!home

The tomatoes are bigger than my hand!home2

And the flowers are gorgeous!home4

home3

So, now we go back to our normal routine.  Time for me to start planning out the next school year for the kids, getting things canned up from the garden, and enjoying the last days of summer.

Where should we go next year???


Week 3 – traveling with kids

Hello there!  And welcome to our third week of travels.  We continued to explore around the Boulder area, including the areas right outside our home.  Leif made fast friends with the neighbor’s little boy, and they played in the yard almost every morning.   They share a love of construction trucks and were wowed by the big compost truck that drove up one morning (Boulder picks up trash, recycling, and all of your compostables!!  Isn’t that awesome?!)

Ivan

We drove into Denver one rainy day to explore the Denver Museum of Nature and Science.  We spent many hours there and still couldn’t have seen half of it!  We started with a 3-D IMAX movie about Lemurs, which we all loved, then went on to the dinosaur exhibit…

museum
museum3

…the kids hands-on areas…
museum2

museum5

…learned about water and land formations…

museum4

…and saw a mummy exhibit, learned about Colorado wildlife, and more!

We took a day to drive out to Eldorado Springs to swim.  The pool there was part of a resort that opened almost 100 years ago and is fed by natural springs.  So, it’s very cold!!  Set up against the Eldorado State Park, the view from the pool is amazing.  The kids enjoyed the super long slide and floating around the pool for a bit, but it was a wee bit too cold for our southern blood (I admit it… I didn’t even get in).

eldorado

eldorado3

eldorado2

Our third week of travel has also been our most trying so far.The kids were getting a bit tired of exploring, so we spent some days just going to a park or watching a movie.  Also, when you spend 24/7 together you can easily get on each other’s nerves. I found myself a bit jealous of Toby, who got to go to work three days during the past week.  Yes, I know it’s work, but it’s still time to yourself  🙂  I thought it might help dynamics a bit to get the kids apart for a while.  So, Friday night, I took Kaia out for dinner, just to two of us.  We drove to the sweet town of Lyons and stopped in at the Lyons Fork restaurant.  It was nice to get out of the city and chill a bit by two aspen trees.  I don’t know if I’d ever seen an aspen before this trip.  I do love the way the leaves shake when the wind blows, and the trunks look so wise with the ‘eyes’ on their bark. (Kind of reminds me of the weirwood trees from Game of Thrones.)lyonsfork

Kaia and I had a decadent meal with truffle fries… (yes, she is really enjoying her root beer!)lyonsfork2

and grilled salmon over parsnips and asparagus, topped with a pesto sauce!  YUM!!   We finished it off with a white chocolate creme brule and drove home very happy.

lyonsfork3

This morning, we packed up and finally headed back out on the road.  Our friends were such amazing hosts.  I can only imagine what it’s like to have a whole family move in and take over your space for almost 3 weeks.  On top of that, they have a young baby and just moved to Boulder a few months ago!  Wonderful people!

Tonight, we are in the Sunflower Lodge.  I was lucky enough to stumble on this place through the grand ol’ internet.  The kids were so excited when the owner’s kitty came out for some loving (we miss our fur babies)!  She’s not spoiled, is she?

sunflower2

sunflower

We headed to the Cave of the Winds (ok, how many of you are thinking of farts right now??  Tell the truth!) for a little exploring.

You drive up a handful of switch backs to get to the main house where the view is gorgeous.

cave

Once inside the cave you’ll find an old rope ladder from the original explorers.cave2

cave3

Leif loved calling out the names of the formations when he saw stalactites or stalagmites, popcorn rocks, or crystals.cave4

cave5

cave6

After the tour, we headed to dinner at the Airplane Restaurant!  The restaurant is built around an old Boeing KC-97 tanker!  Though there is a restaurant attached we actually got to sit in the plane for dinner.

plane

plane2

plane3

And do a bit of flying. plane4

Tomorrow starts our final week of travels.  We have a lot of wonderful things planned (including two train rides!), but I think we are all a bit home sick.  It will be nice to sleep in our own beds and snuggle up the animals.


Week 2.1 – Isabelle Lake

Toby had such a wonderful time hiking towards Apache Peak that he had to take the kids and I back… and it was breathtaking!

The kids were most excited about the snow!  We saw a bit at the bottom of the trail and a bunch at Isabelle Lake!

apachekids1I took lots of wild flower pictures.  Many I’d never seen before and the colors were so rich!

apachekids2

apachekids18

apachekids5

apachekids3

apachekids4

apachekids6There was a little bit of complaining about going on a long hike, but attitudes changed pretty quickly once we got going.  It reminded Kaia and I of our time in the Ponderosa Pine forests last year.  The air was cool and crisp and smelled of conifers.  So refreshing. (This is the lower lake, Long Lake.)

apachekids7

apachekids8

apachekids9

apachekids10

apachekids11

apachekids15

apachekids12Can you see the slithering “S” back and forth on the snow?  Snow boarders have hiked into crazy areas to snowboard down!

apachekids13

I love the vibrant colors in this picture!

apachekids14

apachekids19

apachekids17

apachekids16

apachekids20

apachekids21

apachekids22

Isabelle Lake still had a good bit of snow around her.  On the left is what looks like a snow damn coming off of the lower side of the lake.apachekids23

apachekids24

(Yes, I am wearing my Chacos.  I wear them every where and didn’t even bring another pair of shoes on the trip 🙂 )apachekids25

The river on the right was flowing down from snow melt up above.  It punched a whole through the snow and fed into the lake.apachekids27

Don’t get too close.  It’s a steep drop and a very cold swim under the snow!apachekids28

This was the view from our lunch spot.  The water falls off the far side of the lake…apachekids30

…And DOWNNNNNN to the river below.apachekids29

apachekids32

apachekids33


Such a lovely day!!


Traveling with kids – Week 2

teatour3We had another wonderful week in Boulder, starting it off with the Celestial Seasonings factory tour.  The tea factory is only a couple of miles from where we are staying, so how could we pass it up?  Our tickets were sample baggies of tea which the kids thought were fabulous.  While we waited for the tour to begin we filled up on yummy sips of different teas, read a bit about the history of the tea company, and looked at gorgeous tea pots and a lovely dress made of tea bags.  The highlight of the tour for leif was definitely watching all of the conveyor belts move the tea along.

teatour2

teatour

We also hit the Butterfly Pavilion.  We loved hanging out in the butterfly room, but also learned a lot about other insects.

butterflypavillion

butterfly2

butterfly4

butterfly5

butterfly6

butterfly3

butterfly

This is where the chrysalis hung until they hatched and were released into the butterfly room.

butterfly7

Leif got to hold Rosie, the Salmon Pink Tarantula, and pet a hissing cockroach (Kaia left the room) 🙂

butterfyrosie

We went on another factory tour,this time at the Schacht Spindle factory .  This is where my spinning wheel was made 25 years ago.  We got to put on our ear and eye protection and head into the thick of things.  All the parts for their spinning wheels, looms, and drop spindles are milled on site and put together by hand.

schacthgettingready

schacthparts

This is Bree putting together one of the looms (the Wolf Pup, I believe).  She showed us how it all fits together and we learned a bit about how it works.schacthbree

For each spinning wheel there is only one crafter.  This man (Ben, I think) makes all of their Schacht-Reeves spinning wheels

schacthben

I love the way the drips look on the drip rack.  Each piece of wood is coated with Danish Oil.

schacthdriptable

And this gorgeous picture is a weaving!!!  A weaving!!  I can’t even begin to imagine the detail and planning that went into this!  Such talent!

schacthweaving

Of course, we also spent time at local pools.  We found one community pool that has 2 water slides, a lazy river, water play area for little kids, and a lap pool.  It was crazy!!  And it’s in the community center.  MAN!  Asheville seriously needs one of these.

pool

pool2Toby and his friend, Mark, headed up to Apache Peak for a hike.  Apache is over 13,000 feet tall!  They had such an amazing time that we are all going back next week.  We won’t go all the way to the top with the kids, but we’ll still get to enjoy some lovely views.

Apache peak

Apache peak2

Apache peak3With all the rains they had in Colorado last year, there was still a good bit of snow on the mountain, and the melting snow created some pretty fast flowing rivers.

Apache peak4

Apache peak5

The lakes still had a good bit of ice on them.
Apache peak6

Apache peak7

Apache peak8

The Marmots on the trail were super friendly.Apache peak9

Apache peak10

Apache peak11

Apache peak12

Apache peak13

Close to the top, there was so much snow that it covered the trail.  The guys tried to find a good way around, but the skies darkened and they decided to head back down before the storms rolled in.

Apache peak14

On they way out they saw moose!

arapahoe15

I’m super excited about going back!

We went on Banjo Billy’s Bus Tour of Boulder yesterday and learned a bit about the history of Boulder.

banjobilly

banjobilly2

Today, we took a shorter hike around Settler’s Park.  The trailhead is just on the edge of downtown, but the views are amazing!

settlerspoint4

settlerspoint

settlerspoint3

settlerspoint2

Yes, the kids have had some emotional times and some breakdowns, but all in all, at the end of each day we pretty much all look like this… happily exhausted.harddaysleep


Traveling with the kids – Week 1

For the last few years, Toby and I have talked about how nice it would be to take a month out of each year to travel with the kids.  It would be a fabulous way to introduce them to other cultures, people, languages, etc.  We thought it might be best, though, to wait until Leif was 5 years old to do this, and to start in the States, just to see how we all did with being away from home for a month.

It just so happens that some good friends of ours just moved to Boulder, Colorado earlier this year and they invited us out for a visit in July.  We also have a friend who needed a place to stay for the month of July and offered to take care of our homestead.  BAM!  Couldn’t have been more perfect.

For a few months prior to our trip, I started collecting little entertainment goodies for the kids, and wrapped each one in brown paper.  Every few hours of our trip (while we are in the car at least) if the kids are well behaved, they get to open another package.  We also borrowed a DVD player from a friend, and laminated road maps so that the kids could mark off our travels on the maps.  We left last Sunday with the kids in PJ’s surrounded by pillows and entertainment.

entertainmentI will admit, I was very apprehensive about the drive.  I thought that there might be a bit too much bickering going on in the back seat for my liking.  But, things went amazingly smooth.

Our drive took us about 3 days (with stops here and there).  Silly Putty and Mad Libs were a hit.  And, of course, the DVD player got some use!  We also tried our hands at making Car S’mores.

carsmores

We wrapped the graham crackers, marshmallows, and chocolate in aluminum foil and put it on the dashboard in the bright sun.  It didn’t take long before the chocolate had melted and the kids got a tasty treat.

carsmores2

Oh, and the kids also got to experience PopRocks for the first time.  (I know it sounds like all I did was give the kids sugar, but I promise I didn’t 🙂

poprocks

Another way to keep the kids entertained was by rating all of the bathroom stops.  In case you are wondering, the most pleasant/cleanest bathroom was a tie between the Breaktime at Booneville, MO and the 24/7 Travel Store west of Topeka, KS.  The 24/7 may win out due to their used book store inside the rest area!  (We even found a Reishi mushroom growing out of the lawn at the Kentucky Welcome Center rest stop!)

With the kids marking our progress on their maps, we noticed that most states most populated cities were not also the state capitals.  In fact, in only 17 of our 50 states are the capital cities also the largest cities in that state.  Can you name them?

On the way out to Boulder, we made a stop in Troy, IL to visit friends we hadn’t seen in almost 8 years.  The kids wore themselves out playing while Kristine made wonderful meals and we had great conversation.  Thank you Kristine, for having us out to your lovely farm!

kristine

kristineandme

turkeys

These silly turkeys loved to gobble.  And when one gobbled, they all gobbled.  Leif discovered that they would gobble every time he screamed.  I wonder what the neighbors were thinking?

We all loved seeing the sea of windmills along the highway once we got into CO.   This happened to coincide with seeing a video about two Russian scientists who are attempting to build Tesla’s Wardenclyff tower.  So, we learned a bit about energy and how it’s transmitted.  Leif thought this was pretty dang cool!

windfarm

Now in Boulder, we are spending our time swimming at the most fabulous community pool, hiking up in the Rocky Mountains, visiting markets, and enjoying time with our friends.

Lily Lake is in the shadow of Longs Peak (a 14,000 foot mountain).

Lilylake2

We had a lovely hike around the lake and up into the mountains a bit.

lilylake9

klilylake

Lilylake

lilylake3

lilylake4

The mountains here are so amazing and stunningly beautiful, just like my mountains back home.  Yet, they are extremely different.  So stark and dry and sharp.  The mountains I’ve grown up with are lush and green, softened and molded with age.  I love the contrast between the two and learning about these new mountains.

(See the rock climber?)

krockclimber

lilylake8

Kaia shot this picture of me photographing the storm rolling in.

kphoto

The storm over Longs Peak

bethlongs

lilylake7

There were some VERY friendly chipmunks who may be getting fed a bit too much by the tourists 🙂

This one is trying to steal a compass from Leif’s hands.

lilylake6

And this one was a bit of a camera hog.

lilylake5

On the way to the mountain, we found this gorgeous church growing out of the stone.lilylakechurch

Back in Boulder, Leif had a big thumbs up for the big slide at the community pool!communitypool

pool

All of us took turns on the big slide!  There seriously needs to be one of these at our local pool in Asheville!

Today we explored the famous Boulder Farmers Market.  Kaia said, “It’s more Gluten free than Asheville!!”  And Leif ran around like a crazy boy (and then got swung around a bit)!

marketbubbles

market2

We stopped at an art booth and learned a bit about the Ndebele people of South Africa and their style of house painting.market

And of course, there has to be a cute picture of our friend’s little boy Isaac, who loves peek-a-boo.

issac

Giveaway!! And my new baby!!

No, not a human baby, but a new spinning wheel!!!  Woohoo!  Isn’t she amazing?

matchless1

I’ve been borrowing a wheel from a very generous friend for the past year and a half.  I figured it was far past time that I get my own.    I began the hunt this winter and couldn’t pass up the opportunity to get this lovely wheel.  It was owned by an amazing artist who passed away 8 years ago and has been sitting unused ever since.  For the past couple of months I’ve been waiting on parts that I needed to make her work and then passed her on to a super talented friend who decorated her with poppies and butterflies.  I got her back this morning and finally had a chance to sit down and spin.  Wheeeeeeeee!

matchless2

The wheel is made by Schacht and is called a Matchless….. but that just won’t do.  She needs a proper name.  Here’s where you come in!  CONTEST! 🙂

matchless3

I’m having a naming contest on my FaceBook page.  What do you think I should name her?  Leave me a comment on my facebook page and, if I like your name best, you will win a hand spun, wire core bracelet from my etsy store (or I’ll spin you one in your favorite colors)!  If you share the contest on your page you get a second chance to win!!  Don’t have a FB page?  Just leave your comment here on my blog.  Easy Peasy.

matchless4

matchless5

matchless6

matchless7

matchless8

Sheep Shearing

I was super excited to get invited to sheep shearing day at a friends farm.  I’ve never had the opportunity to do this and, especially now, with my spinning habit growing, I wanted to learn.  When we pulled up, they were already in the middle of shearing Snow, a white cormo sheep, who had given birth to twins the day before.  Well, the babies needed snuggling while mom was getting her coat off, so Kaia and I set to work immediately!

This little girl fit perfectly in my coat!

shearing

shearing1

shearing2

shearing3
shearing5

There was a professional shearer there.  So, we didn’t actually do any of that part.
shearing4

But, I did get to help with the skirting (removing the plant matter and dirt) of the fleece.shearing6

And my friend sent me home with a bit to play with, too!  So gorgeous.  It’s like the sheep keep a crimper in the barn to use when no humans are looking!shearing7

Sustainable terrarium

Kaia and I came across this article about a man who started a terrarium in 1960.  He stopped watering it in 1973 and it has lived, sealed up, since then.  The plants, soil, and water have created a sustainable system. Kaia was intrigued by this idea and wanted to try to start her own.  Here’s what we did:

We found this jar at Target.  It’s probably about 2 or 2 1/2 gallons.  The top has a rubber seal to help keep the moisture in (and other stuff out).

terrarium1

Kaia used some gravel and marbles to fill the bottom 2 inches.  This will help with drainage so the soil doesn’t stay too wet.terrarium3

We then put a thin layer of charcoal.  This was recommended in a video we watched about starting terrariums to help keep the soil fresh.terrarium4

We then put in a layer of soil.  We used a mix of two different potting soils (one seemed too fluffy and one was too heavy, so we mixed them).  These three layers made up the lower 1/3 of the jar.terrarium2

Then it was time for the plants.  Kaia chose a creeping fig, blue star creeper, and two little ferns.  She picked off any dead material and spaced the plants out  in the jar.  The largest plant went in first.terrarium5

Once the plants were tucked in, we filled in any gaps with more soil.

terrarium6 She added about two ounces of water.  We’ll add more if needed.  Better to add too little than too much.  You can always add more, but it’s not easy to take out extra.terrarium7

Then, put the top on…terrarium8

And admire your work!

terrarium9We are excited to see how this grows!


Like a kid in a candy store!

Hello Friends!  Sorry for the hiatus.  Has it really been almost a month?  Well, I kind of dove head first into the fiber world and am having a blast.  Colorful batts, art yarns, funky fiber jewelry, squishy knits… So much fun!  The kids are also enjoying getting their hands on the fibers and spinning on my wheels.  I have to let go of my selfish urge to hog all of it for myself!  🙂  Oh, and did you notice I said wheels?  YES, I have two.  Well, there are two in my house, but I have neither, yet.  The first wheel is a Louet S-10 that was graciously loaned to me by a friend.  I’ve had it for over a year now and felt like it was time to return hers and get my own.  Then, along came another gracious woman who offered me a Schacht Matchless (‘the cadallac of wheels’) for an insanely inexpensive price and I couldn’t pass it up!  So, it’s at my house for a test drive and I hope to pay for it this week.  Such a beautiful machine!

Here are a few images of what I’ve been making lately.  I’ve got them for sale in my etsy store, but if there’s something you would like in a different shade or color, I’d love to make it for you!!

Fiber spun onto a wire core and wrapped into a bracelet!

braceletsun3

Fiber spun onto a wire, then knitted into a necklace!

knittednecklace7

Another lovely bracelet.

mossycreakbracelet

Art yarn twisted into a necklace.

nplynecklace4

Art Yarn

pinkmohairy2jpg

Another lovely bracelet.

wirebraceletcarribean2

More art yarn.

yarnspringsabustin2

Enjoying a fabulous day at a spinning weekend/camp with Pluckyfluff.

camppf2

Little man decided that this was his motorcycle and spun for most of the day.  He is on the Louet and my new Matchless is on the left.  I can’t keep calling her the Matchless, though…. she needs a name.  Any suggestions?

spinningboy

DIY Blending Board

Thanks to Nikki and her birthday gift, I’ve been having a wonderful time spinning art yarn.  But, to make art yarn, you need art batts.  These can be on the pricey side when you are just learning how to spin.  So, I thought I’d make them myself.  Usually they are made using a drum carder.  I don’t have one of these and they cost just as much as a new spinning wheel (expensive).  But, last year, something new appeared on the market called a blending board.  It’s less expensive than a drum carder, but still pricey.   So, in an attempt to create my own batts to spin, I’ve made my own blending board for under $100.

I ordered a piece of blending cloth from Natural Fiber Yarns.  While I waited for it to arrive, Toby found an old cabinet door that was the perfect size to attach the cloth to.  He trimmed one end a bit and removed the knob.

blendingboard1

Once we had the cloth, we put some wood glue on the door and placed the cloth securely onto the glue.

blendingboard2

After the glue dried, Toby used tiny screws to attach the cloth on all edges.  You could also use a staple gun, but we had lots of little screws laying around.
blendingboard3

Then, he attached a cabinet handle to the top edge so that it will be easier for me to carry and hold on to when I’m blending fiber.

blendingboard4

I found a 3 foot long 3/8″ dowel that I had laying around the house and cut it in half (photo bomb by the kitty!)  These will be used to roll the fiber up into a batt.

blendingboard5

And I found a cat brush to help with pushing the fiber into the blending cloth.

blendingboard6Then I got to blending.  Here’s how the process looks.  I gathered all my goodies and began ‘painting’ them onto the blending board.

blendingboard7

First was a beautiful yellow that the kids and I had dyed with turmeric (wool and bamboo).  You drag it along the pins so that it catches and stretches.blendingboard8

Then, you can use the cat brush (The pins are at an angle so you use the brush upside down so it doesn’t pull the fiber right back out) to push the fiber deeper into the pins.

blendingboard9

Keep adding stuff until it’s full.  These are blue and white mohair locks.blendingboard10

I added sari silk, silk cocoons, tinsel, more wool of different colors, and whatever else I could find.

blendingboard11

Once it is full, you pull up the end a bit to loosen the fiber.  Then you place the dowels, one on each side of the fiber, and begin rolling it.

blendingboard12

blendingboard13

Some of the fiber may stay stuck in the blending board.  You can pull those up with your fingers or the cat brush and wrap them into the rest of the fiber.

blendingboard14

Once you are done, just slide the dowels out and you have yourself a mini batt.  You pull from one end to start spinning your art yarn.

blendingboard15

That’s it!  Now, I must get to spinning!

blendingboard16


Maple Taffy

No, my kids don’t get snow days off.  We still plop ourselves in front of the wood stove and get our school work done.  But THEN, we get to make maple taffy!  It’s an experiment, right???

First you heat your maple syrup to 250 degrees (the “soft ball” stage – hehehe).  We also put a small pot of honey on the stove to make some honey taffy.

mapletaffy

When your syrup reaches 250, turn off the heat and have the kids head out in their long johns and fill up a bowl of snow…. pack it down firmly.

mapletaffy2

Drizzle the syrup into the snow.

mapletaffy3

Roll it up onto a skewer.

mapletaffy4

tap it in the snow a bit to be sure it’s cooled off and EAT IT!  YUM!

mpaletaffy5

We got tired of rolling them up and just made plops in the snow.  We all liked the maple syrup flavor better.

mapletaffy6


I know, I know!  You don’t have to tell me that making pure sugar candies when the kids are snowed in isn’t the smartest of ideas.  I just couldn’t help myself.  It looked like such a fun and yummy experiment.  Now, I just have to shove the kids into their winter clothes and toss them outside to play!!

When the temperature drops…

icebubbles4Like much of the rest of the country, we’ve been hit by an arctic blast today, so we thought we’d get outside (all bundled up, of course) and have a little fun with the cold.

First, we put some bubble fluid in small bowls and used straws to blow bubbles.  At first, they just froze and popped.  But as the bubbles tumbled out of the bowl we noticed that some of them were freezing to the side of the bowl or the table before they popped.  If you touched them, they would shatter like glass.  So very cool!

icebubbles2

icebubbles

The aftermath looks like broken glass, doesn’t it?

icebubbles3


Then we decided to fill up some balloons and ice cube trays with colored water and leave them outside to freeze.iceballoons

These turned out so lovely. (We popped the frozen ice cubes out of their trays and put them all in water to refreeze.)


iceballoons2 iceballoons3

iceballoons4After taking pictures we put the ice back outside.  Tomorrow we plan to bring them in and use them to make ice paintings on thick white paper.


Child guided learning or Going with the Sappy Flow

The other day, Leif and I picked up our camera from the repair shop and noticed a large pine tree just outside of the front door.  The tree was dripping with sap.  In fact, there was so much sap that it looked like the sidewalk next to the tree was covered in candle wax.  Leif began asking all kinds of questions about how the tree makes sap and what it does.  He stuck his fingers in it and got himself all gooey.  We talked about how the sap is part of the tree’s immune system and when there is an injury it makes a scab, just like our bodies do.  I told him that the sap helps fight infections and that you can make it into a salve and use it on wounds.

“I want to make a sap salve for my wounds, Mommy!”  Leif said as his eyes lit up with excitement.  And, of course, I thought, ‘Yay!  An herbal project!!’.

I happened to have a little stash of pine sap that Kaia and I collected when we were out in Arizona this summer.


pinesalve2


So, we grabbed the sap and pulled out our HerbalRootsZine about Pine (have I told you how much we LOVE this zine?!). We read all about Pine and it’s uses, and then headed to the kitchen for a little mixology 🙂

pinesalve1


We warmed the sap in Olive oil and added a bit of beeswax.  Kaia asked to add some Lavender Essential Oil for its healing properties.  So, we tossed that in, too.


pinesalve3

Once it was all mixed, we poured it into our jar and let it cool.

pinesalve4

Super simple, super fun, and lots learned.  Leif went around telling everyone that he has a pine sap salve for his cuts and boo boos, and though his chocolate-covered face looks sad, he was actually super excited about his accomplishment.  He said he’s looking forward to his first cut so that he can try it out. 🙂


pinesalve5


Defrosting

Winter is here.  The toys have been brought in to warm up by the fire 🙂

defrostingtoysLeif spent hours out in the snow this morning.  Now he’s defrosting on the couch.

The first snow always brings such a peaceful day with it!


Tingle Fingers

I’ve just added a new whipped body butter to my Etsy Store.   It’s silky smooth and smells like wintergreen lifesavers 🙂

tinglefingers3


The butter is fabulous for warming cold hands and feet, and soothing sore muscles.  But, it’s also great for the skin!

tinglefingers2


Leif let me know that he was trying very hard not to eat any because “it looks too much like icing mommy!”

tinglefingers

Winter Chicken Soup – Keeping the Immune System Strong

chickensoup I love to have a big stash of chicken soup in the pantry.  On those cold, blustery days of winter, nothing is more satisfying than a big bowl of hot soup (well, maybe chocolate, but that applies in any season).

A few years ago, I discovered this recipe and the whole family devoured it.  I’ve tweaked it a bit over time… adding my own arrangement of herbs and spices to increase the immune boosting properties of chicken soup even more.  I also leave out the noodles so that I can pressure can it and store it in the pantry.

chickensoup2


Here you go.  I hope you like it.  The elderberries and burdock grow in our yard, so I have easy access to these nourishing and immune-supportive herbs.  You can usually find them at the health food store or you can omit them.

Winter Chicken Soup

Ingredients

  • 1 whole chicken (3-4 pounds.  I keep the kidneys and liver in the chicken, but take the neck out and give it to our animals… they love it! You can also break the bones up a bit to let the marrow out)
  • 1 cup carrots, sliced
  • 1 cup celery, sliced
  • 1 cup onion, chopped
  • 1 cup burdock root chopped (if using dried, use 1/2 cup)
  • 6 shiitake mushrooms, chopped
  • 1 cup fresh (or frozen) elderberries (1/2 cup if using dried)
  • 3 cloves garlic, minced
  • 2 bay leaves
  • 1 Tbsp. apple cider vinegar
  • 1/2 tsp. dried thyme
  • 1 Tbsp. salt
  • 1/2 tsp. ground pepper
  • 8 cups of water or chicken broth

chickensoup4

Put all of the ingredients in a large stock pot.  Cover and simmer for 3-5 hours.  Once it is done, take the chicken out (be careful, it’s hot!) and remove the skin and bones.  Shred up the meat.  The chicken literally falls apart in the soup, so I usually strain what’s left in the pot and go through everything to be sure there are no bones left, removing the bay leaves when I do this.  It takes a little effort, but it’s very worth it!  Put all of the veggies, meat, and broth back in the pot.

Done!

If you want to make this in your crock pot, put everything in the crock, cover, and cook on low for 8-10 hours or high for 4-5 hours.

I usually make a double batch and can up the leftovers.  Ladle the soup into quart jars with 1″ head space.  Process in pressure canner for 1 hour 30 minutes at 10# pressure, sea level.  (We are 3000 feet above sea level, so I add one pound of pressure for every 1000 feet above sea level….. so where I live I process at 13# pressure for 1  1/2 hours.)

Enjoy a scrumptious bowl of nourishing soup!


Words

I don’t know why I love to see my kids writing so much.  Seeing their words on paper, that tangible, written expression of themselves, it really makes my heart feel warm and happy.

My first child can be a perfectionist.  She wants to know that what she does will come out perfectly before doing it.  This can be hard on her, since most things take a bit of practice.  Because of this she literally refused to read anything until she was 7, saying she “might pronounce the words wrong”.  I was worried about it at first, as many first time parents would be, thinking she might ‘fall behind’.  But, when she decided she was ready to read and write, she picked it up with such a vengeance that she now reads faster than I do.

With my second child, I am a bit more relaxed.  I know he will come to things in his own time, just as my first child has.  He, however, decided that he wanted to read and write from the moment he could understand the concepts.  When he was 2 1/2 years old he got angry with me for not ‘doing school’ with him, like I do with his older sister, and asked for his own “curriculum”.  I wasn’t planning on any formal schooling until he was 5 or 6 years old, but he was so motivated I decided to start him with All About Reading and Moebius Noodles.

He started reading simple words when he was three and now, at 4 1/2, is reading and writing simple sentences.  I’m so excited for him!  He’s launching into a new world of independence, exploration, and expression.   I LOVE seeing him plop himself down on the couch with a book, or write me a love note! (My ‘to do’ list last night was “Mom, Hug Leif!”)

welcomehomedadToday, his dad came home from a week long trip.  Leif wanted to welcome him home with a sign that said, “Welcome home dad.  When you come in and put your stuff away, come and see my new legos”  🙂  I talked him into a simpler version “Welcome home dad.  Play LEGOS with me.”


Maple Bacon Banana Ice Cream

Ok, here you go.

baconicecream

Maple Bacon Banana Ice Cream!!!!  

Yes, that deserves four exclamation marks because you can never get enough bacon!

Put the following ingredients in your food processor and blend until smooth:

3 frozen bananas
2 Tbsp canned Coconut Milk (the full fat kind)
1 tsp vanilla extract
1Tbsp Maple extract/flavor
8 drops of stevia extract (optional, use if you like it sweet!)

Add in 2 pieces of cooked, diced bacon and stir well. Eat up!  (There were large chunks of bacon in our ice cream, the picture just doesn’t show them….. don’t dice it up too small.)

Makes about 4 servings.

It came out really good….. I might add a couple of drops of liquid smoke next time to see if I can enhance that bacon-y flavor even more.

Vampire on the Trapeze

I was just playing around on the trapeze last night and had a friend take a picture of this crazy position that I just learned.

trappose2

When I looked closely at the picture I discovered something concerning about myself.  Looks like I turn into a crazed vampire when I hang like this.

trapposeIsn’t that crazy!?  I’ve never seen that kind of red eye in a photo before! 🙂


Carrot Cake Banana Ice Cream! Ohhh YEAH!

Trying to stay away from dairy and sugar wouldn’t be that hard at all if ice cream had never been invented!  I think I get my ice cream gene from my dad, who use to sit down to a half gallon of ice cream after dinner….. a bowl for me, a bowl for my sister, and the rest for him!  Needless to say, he wasn’t a small man.

Banana ice cream has become a simple and tasty substitute when I’m craving that sweet creaminess.

My most recent creation is Carrot Cake Banana Ice Cream!!  So delicious!  (Please excuse my photos.  My good camera broke and I’m left with my phone camera, which is not the best)

carrotcakeicecream2Ingredients:

  • 3 frozen bananas
  • 1/2 cup carrot, finely shredded (~1 medium carrot)
  • 2 Tbsp. coconut milk (full fat)
  • 2 tsp. cinnamon
  • 1/2 tsp. nutmeg
  • 1/2 tsp. cardamom
  • 1/2 tsp. vanilla extract.
  • 1/3 cup raisins
  • 1/3 cup walnuts, chopped
  • 15 drops stevia extract (optional)

Place your bananas, carrot, coconut milk, and spices in a food processor and mix until smooth.  Take a taste.  It’s delicious the way it is, but if you have a serious sweet tooth, like I do, you can add up to 15 drops of stevia and mix again.

Pour your ice cream into a large bowl and hand mix in the nuts and raisins.  Makes ~4-6 servings.

That’s it!  As my little boy says, “Easy peasy lemon squeezy!”  Enjoy!

carrotcakeicecream

Catschooling

In our home, even kitties do school… with their pj’s on…. in the cat tent 🙂

catschooling


School has been going fairly well this semester.  It’s been a little harder with 4 year old energy around the house while Kaia and I are working on more advanced subjects.  She has a hard time concentrating with Leif doing anything in her vicinity.  If I sent him up with something fun for him to do, she wants to play along.  If I’m not doing school with him, he often gets mad, “Why don’t I have more schoolwork?!?”  🙂  I can’t complain that he loves learning.  He’s reading simple sentences and started writing short words.  This morning, as I watched him write, my mind flashed forward to him writing me a little letter, “Dear mommy, I love you!” or something like that.  My whole body feel warm and fuzzy.

Kaia’s semester is falling into place in a way that I hadn’t planned, but am very thankful for.  We’ve begun studying Einstein and his though experiments using the book Albert Einstein and Relativity for Kids.  The experiments can be done with household objects and are fairly simple so Leif can enjoy them.  Kaia and I take them a bit deeper.

While we learn about the life of Einstein, we are also studying this same time period in history.  We’ve read Miss Spitfire, about Annie Sullivan and Hellen Keller, read a bit about Nikola Tesla and his inventions, and looked through If You Lived 100 Years Ago.  We just finished up a fabulous book about immigration in the early 1900’s called Shutting out the Sky.  Kaia has decided that she wants to take a trip to NY to visit Ellis Island and the NY Tenement Museum.  (She has come a long way from wanting to visit NY because of the American Girl Doll factory.)  We’ve just moved into The Unsinkable Molly Brown  (Titanic) and will go from here into discussing women’s suffrage and WWI (A Time for Courage) and WWII (Number the Stars).   I may be enjoying the history reading even more than she is!

research