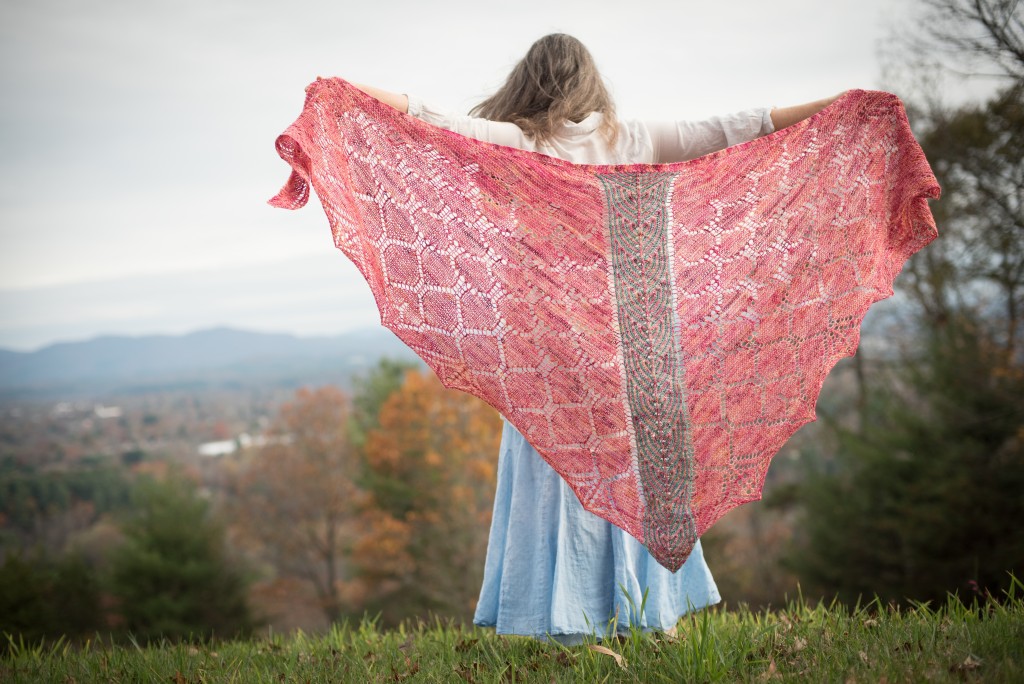
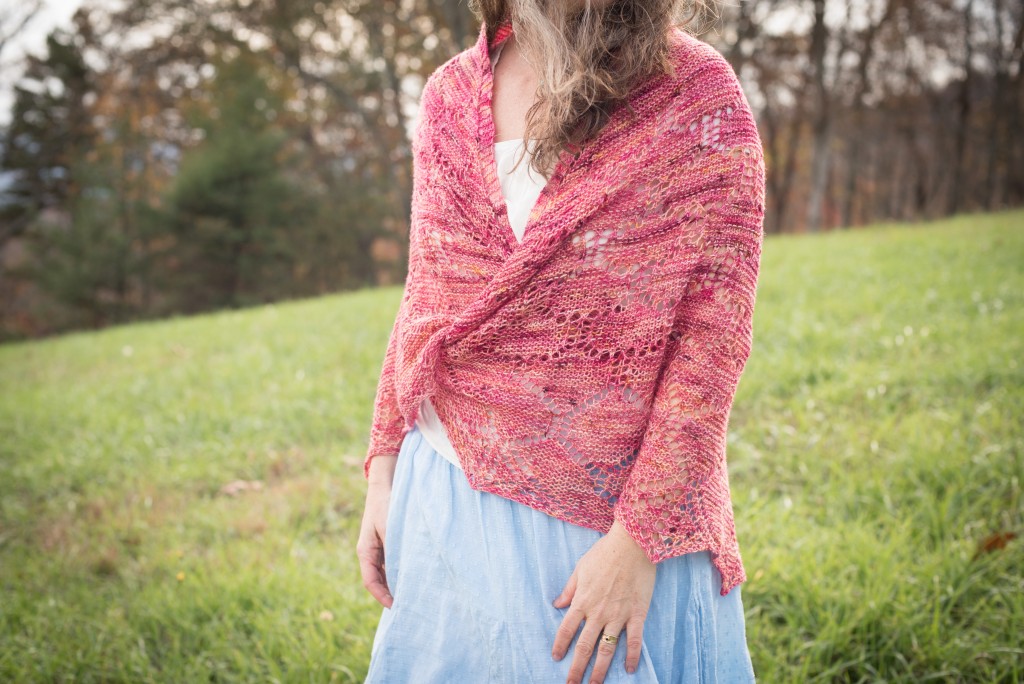
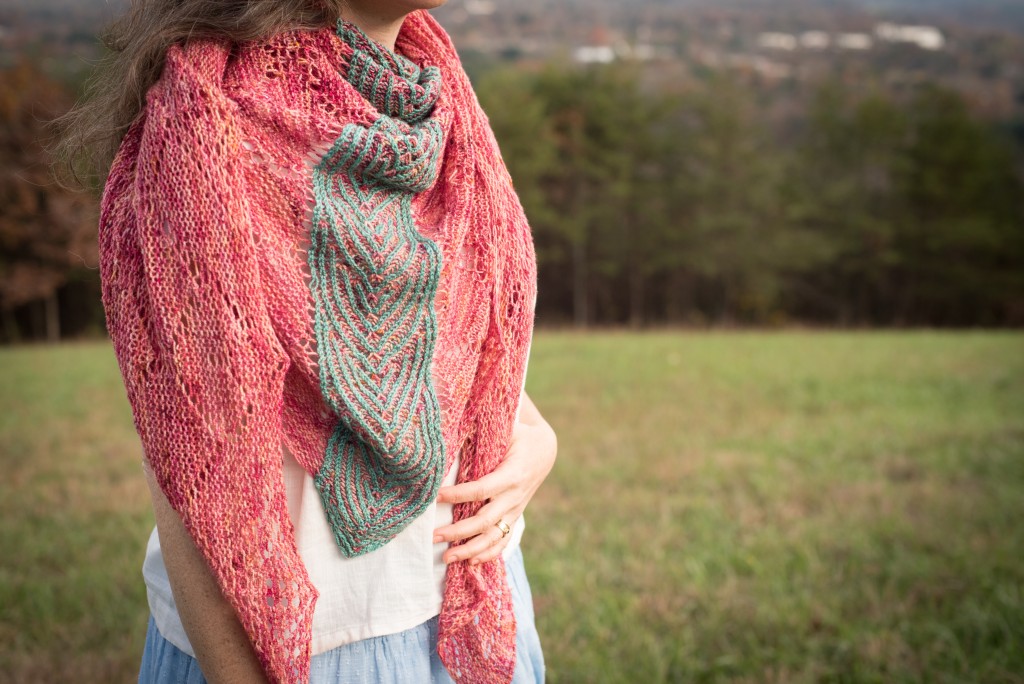
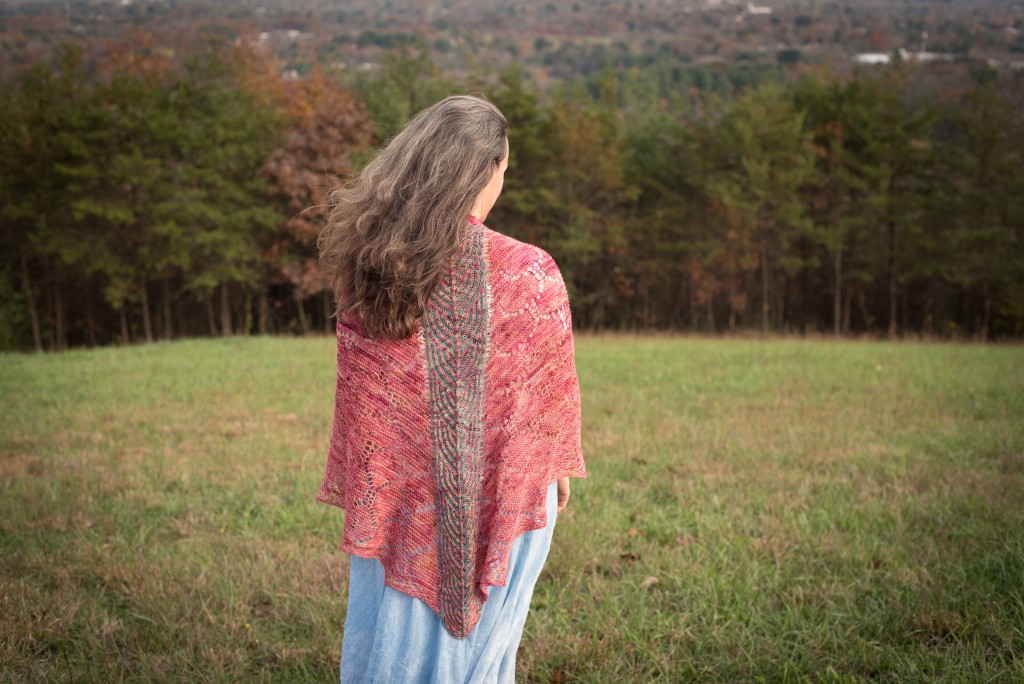
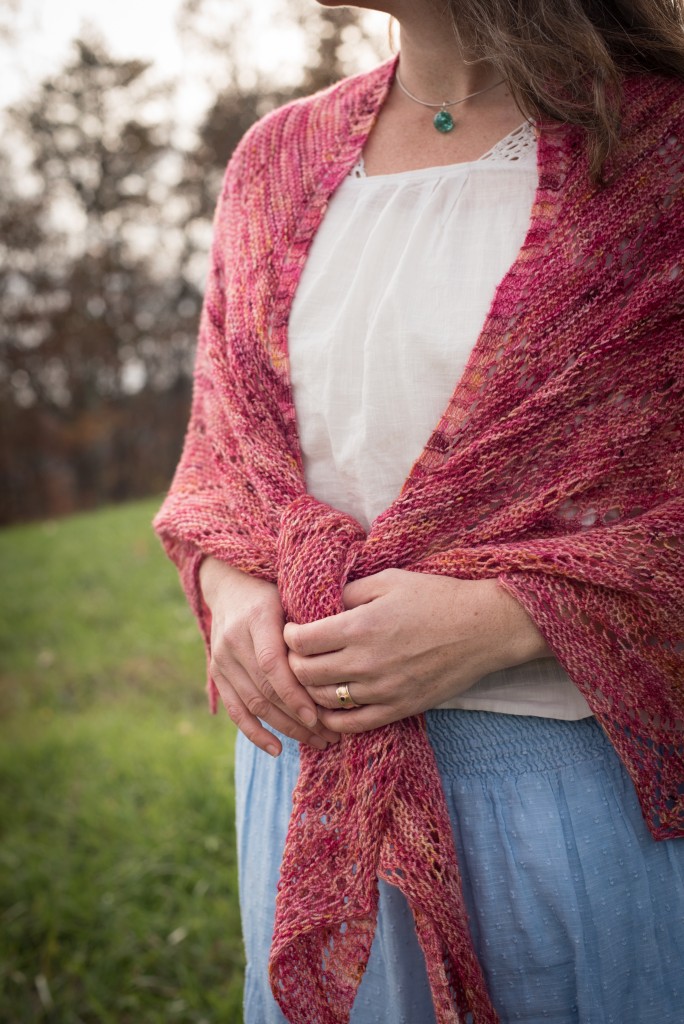
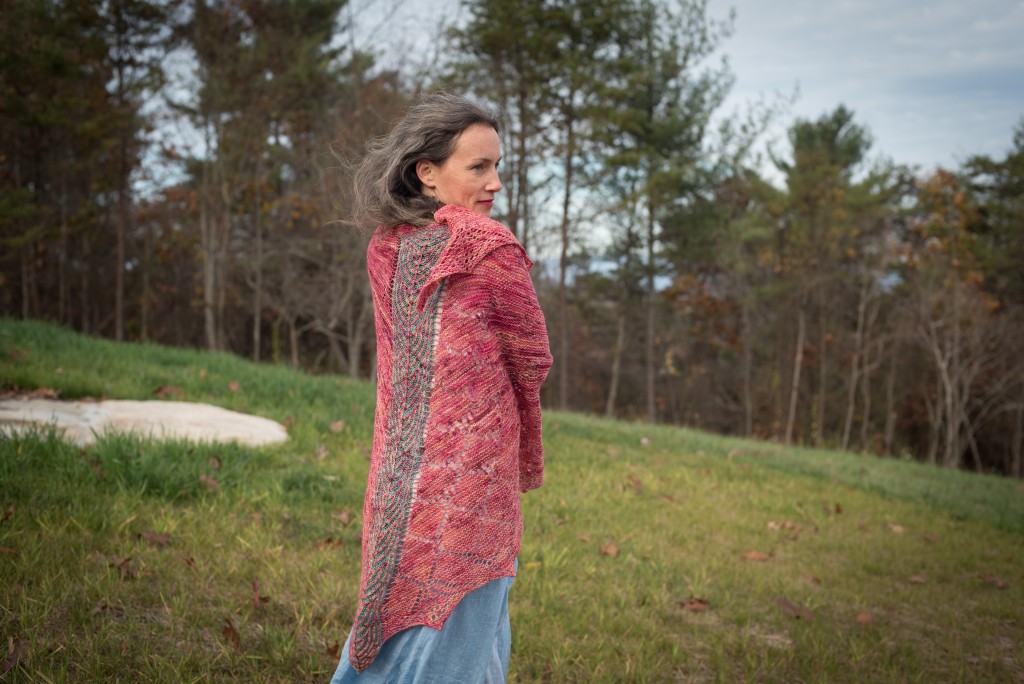
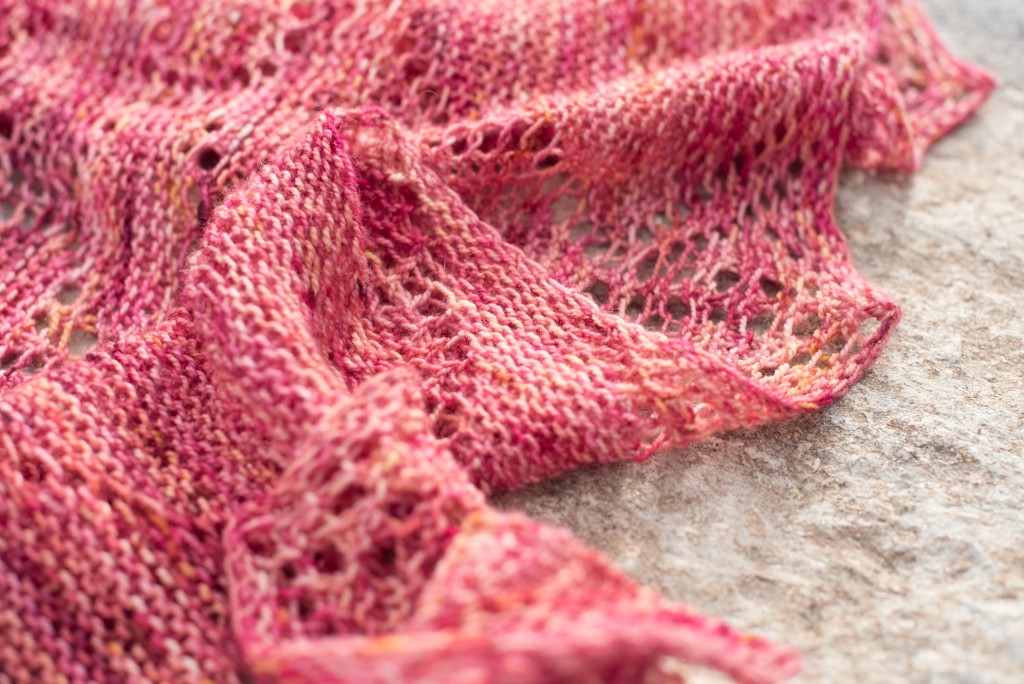
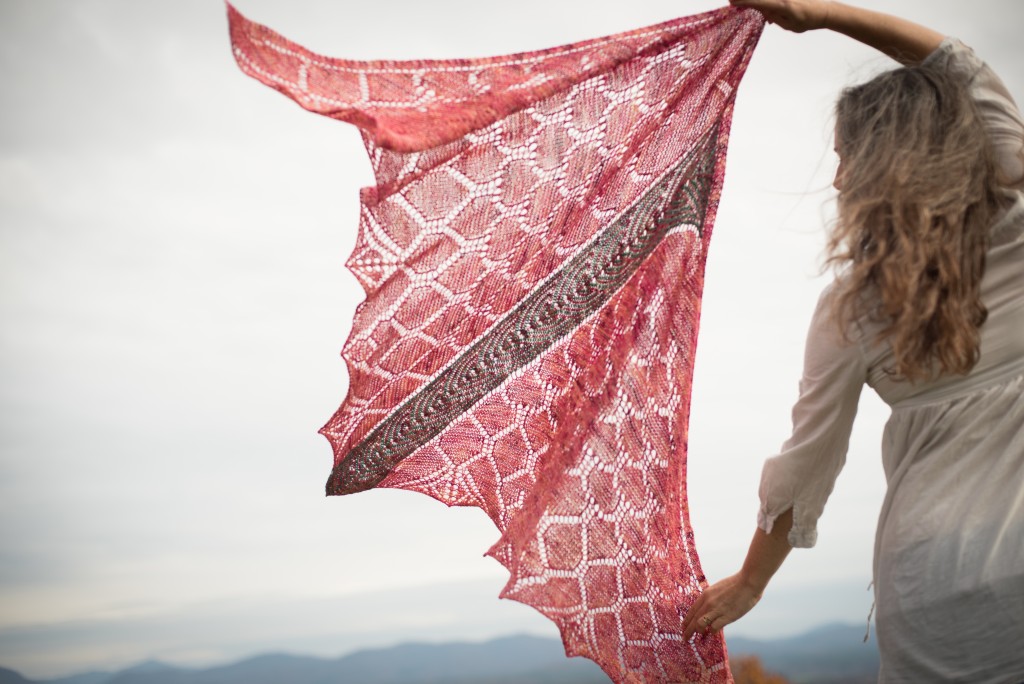
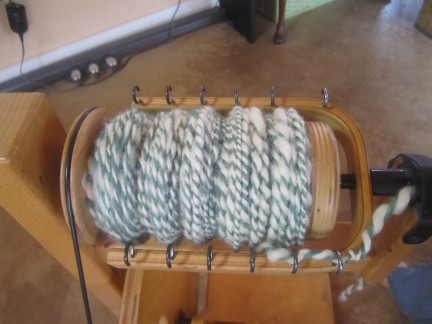
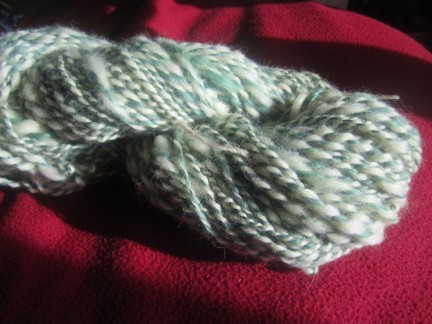
Hello there!  I realize that my posts here are coming very infrequently in the past few years.  It’s been almost 12 years (!!) since I began this little blog and life has become busy in many other ways and my energies are going elsewhere.  I’m using Instagram as one of my ‘blogging’ outlets more often now, and you can find me there as Ninja.Chickens as well as on my new website where I also podcast: Ninja Chickens. In the mean time, I wanted to leave you with a sneak peak at my new Shawl Design.  It is called Drekin and is a Faroese style shawl with lace and brioche.  I spent almost 4 months dreaming, designing, and editing.  I am so excited about this.  It will be coming out on January 1st on Ravelry and in my etsy store.
Category Archives: Sustainable Living
Dyeing with Fresh Indigo
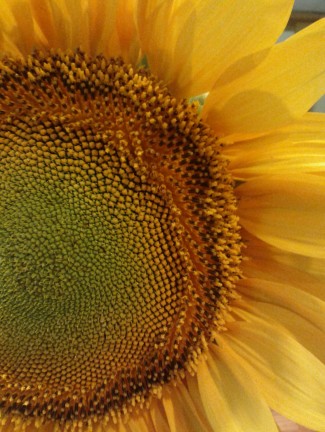
 The dye garden is doing fabulously this year!  The Hopi sunflowers are over 10 feet tall, the madder is prolific, and the indigo is lush.  Our indigo (Dyer’s Knotweed or Polygonum tinctorium) grows very well in the North Carolina mountains and this week was indigo harvest time!
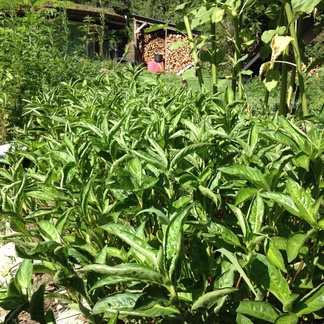
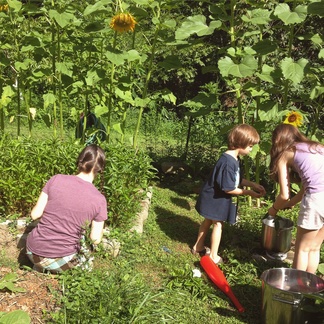
Nikki (my Fern Fiber partner in crime), my kids, and I worked quickly to cut the stems above the 3rd or 4th node and strip the leaves off.  (Cutting the stem here lets the indigo grow back for a second harvest in the fall!)  The leaves were weighed and then added to some cold water.  We were hoping to get 4 pounds of leaves to dye 2 pounds of yarn.  But, we ended up with only 3 pounds.
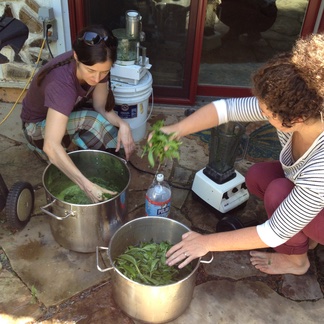
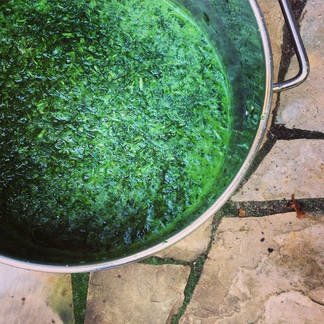
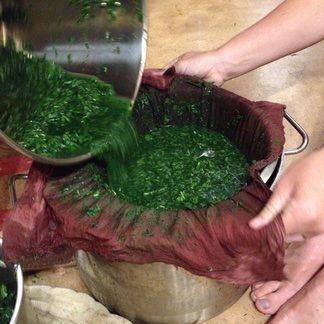
We were joined by our friend, Sarah, as we began chopping up the leaves in the blender with more cold water and blending them to a pulp.
We stirred in 3/4 cup white vinegar. Â This is supposed to help pull out the pigment and keep it from breaking down too quickly. Â We let this sit for 30 minutes.
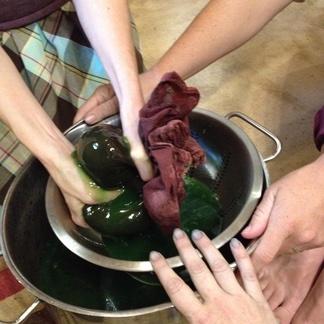
Then we strained it through muslin cloth and put the strained liquid to the side in my super large dye pot while we soaked the plant matter a second time in more cold water and let it sit for another 30 minutes.
Once the second batch was strained, all the liquid went into the big pot…
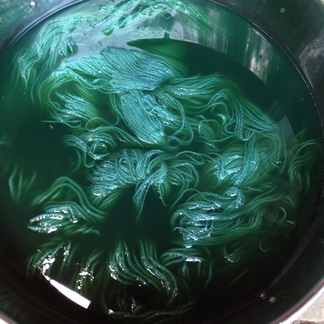
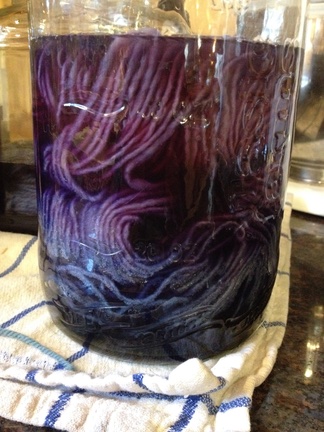
and the yarn was added. Â (This is organic merino wool that we soaked overnight in water.)
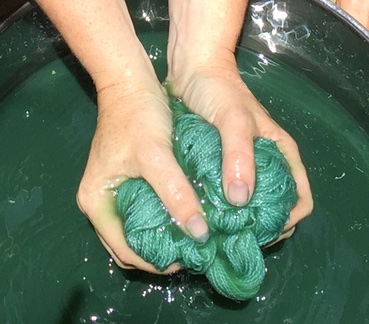
After one hour of soaking, you can see the color of the bath and yarn had become more blue.
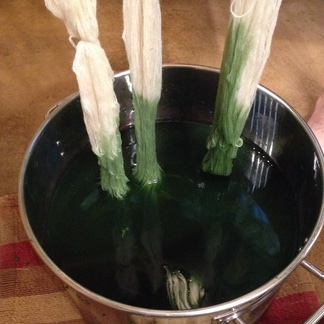
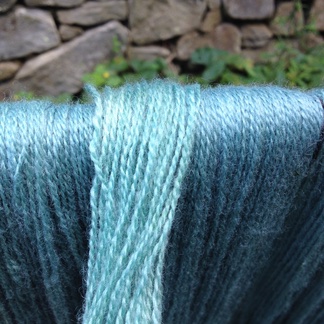
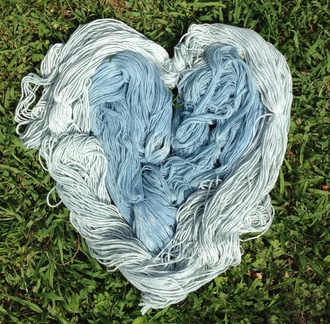
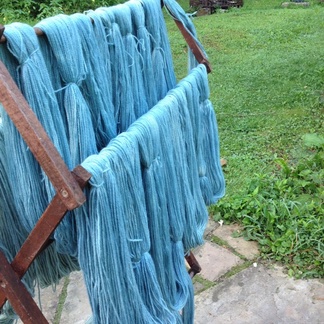
We gently squeezed the yarn out and hung it up to dry. Â Within seconds, you could see the air oxidizing the pigment and changing it to blue!
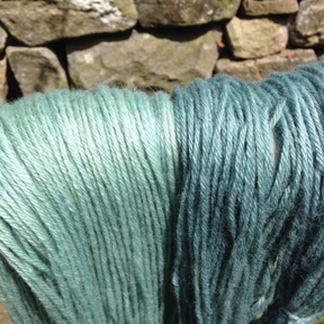
The lighter blue on top was just out of the dye bath. Â The darker had been out in the air for a few minutes. Â Look at the difference from the picture above, too!
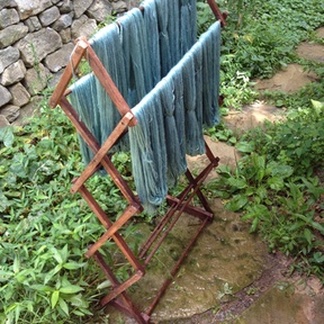
Drying in the shade, you can still see all of the color dripping onto the rock below!
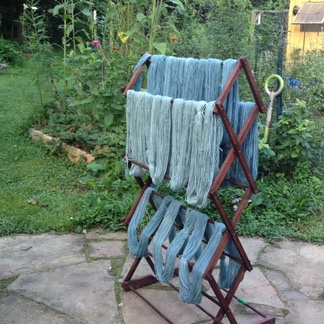
We had been worried that we wouldn’t get enough color for the amount of yarn we wanted to dye. Â I’d read that you should have 2 times the amount of plant material and we only had 1.5. Â Despite this, there was still so much color left in the dye bath, we decided to add more yarn (another full pound that we’d had soaked and ready… just in case). Â This sat in the dye for another hour. Â The yarn on the left was from the second batch. Â Only slightly lighter, but still super gorgeous!
 There was still so much color in the dye bath, but no more yarn to toss in there. Â I decided to put the strained indigo plant material back in the bath to see if I could ferment it a bit to pull more color out. Â I’ll let keep you posted on those results!
The yarns cure/dry for at least 2 days before they are washed.  Once the are dried again and reskeined, we’ll put them in our Fern Fiber naturally dyed yarn store (well, not all of them.  Sometimes us dyers take our payment in skeins of yarn!! 🙂 )
PS. I know I haven’t been posting nearly as much on my blog, but I do have a pretty active Instagram account.  If you’d like to follow my homesteading, homeschooling, and fiber frenzy, you can also find me at @ninja.chickens and our Fern Fiber naturally dyed yarns can be followed at @fernfiber.
Natural Dyeing
I am having so much fun experimenting with natural dyes these days.  Every time I see a bright flower, or a colorful tree, I think, “Oooooh, I wonder what color dye that would make?”  This weekend, I got together with Nikki of Woolen Violet, my fiber partner in crime, and we trashed the kitchen! 🙂
Let me back up a sec. Â Before we could begin our dyeing, some prep needed to happen. Â We planned to try out black beans, cocoa bean chaff, cochineal (actually a bug!), and two woods: Indian Rosewood and Purple Heartwood. Â Some of these things needed time to soak, so I started the prep a few days ahead of time.
On Wednesday, I chipped up the wood into small pieces. Â I’m very thankful for the help of my hubby as both Rosewood and Purple Heart are very hard! Â I put the wood into separate pots and filled them about 3/4 full with water (I used our tap water, which is well water with a pH of about 7). Â The water was simmered for 1 hour, then taken off the stove and left to sit until dye day.
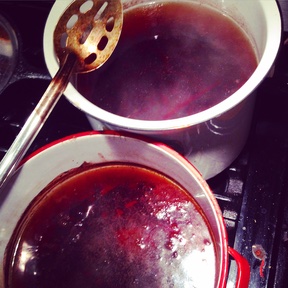 The top pot is the Purple Heartwood the bottom is Rosewood. Â Both woods put out a good bit of oil, but once the dye bath cooled down it was easily skimmed off of the top.
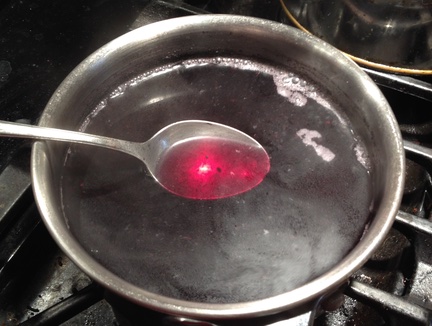
On Thursday, I began my cochineal extract. Â I put 1/2 oz. of cochineal in a sauce pan and covered it with 3 inches of water. Â I brought this to a simmer and let it bubble lightly for 30 minutes. Â Then, I strained the cochineal through a muslin cloth and put the dye water to the side. Â I placed the cochineal back in the sauce pot, covered it with 3 inches of water and repeated this process a total of 4 times, always reserving the dye water. Â This would be the dye bath.
The morning before our crafty date, I put the black beans to soak in a large pot of water, stirring them often. Â (Cover them with lots of water, because they expand!) Â And I pre-mordanted my yarn. Â Mordants are a very important step in dyeing as they help the dye bond to your fiber. Â We used Alum (15% per weight of fiber) and Cream of Tartar (6% per weight of fiber). Â The mordants were dissolved in water and simmered, along with our fiber, for 1 hour. Â I left my yarn in the mordant bath overnight.
First thing on dye party morning, I gave the beans one last stir. Â You want to let them sit for a few hours before you use the dye water so that all of the bean matter settles to the bottom.
When Nikki and family arrived, she and I bounced around like giddy little kids in a candy shop!! Â There were ‘ooooooo’s and ‘aaahhhhhhh’s all day long as we watched colors change and chemical reactions happen.
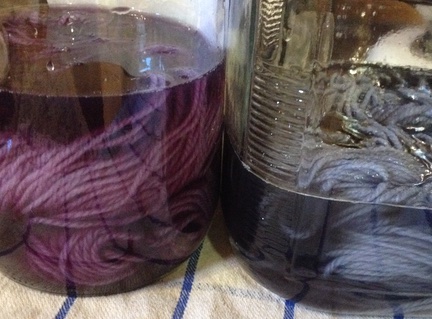
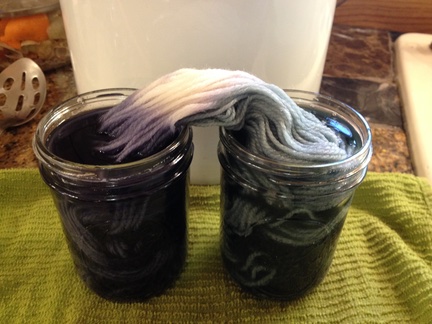
We started by scooping off some of the black bean dye and pouring it in mason jars along with our pre-mordanted yarn (Quick note: we used 100% wool for all of our dyeing). Â The jar on the left is straight black bean. Â The one on the right has a small amount of baking soda added (changing the pH).
This one has more baking soda on the bottom and the plain bean dye bath gently poured on top…
This skein has black bean, vinegar, baking soda, and copper on the left and bean, baking soda and copper on the right (I meant to put just vinegar on the left but flubbed it up).
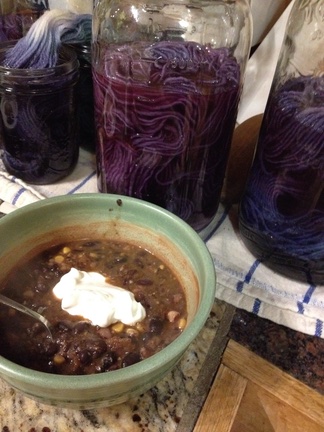
And what our sweet hubbies made for us while we were slaving away in the kitchen…. some delicious black bean soup from the beans we soaked for the dye bath.!!
Dyeing with black beans is a cold process. Â Adding heat will change the color (to brown, I hear). Â So, you put the fiber in your black bean dye and let it sit over night before rinsing and drying it.
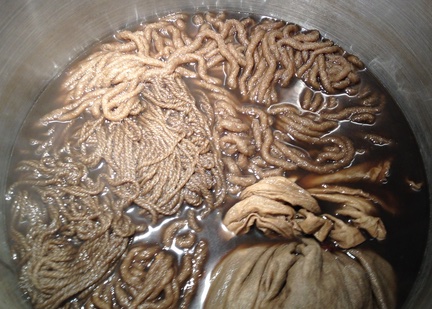
Next we moved on to our woods. Â We were very surprised when we put the yarn in the pots that the vibrant colors produced pale brown yarn. Â Both the rosewood and the purple heartwood. Â So undramatic was the change that I didn’t even take a picture. Â We were waiting for more color to come out as it simmered (for one hour). Â Not much happened. Â We decided to do some experimenting and pulled out some of the dye bath in small cups. Â We added baking soda to one, vinegar to another and baking soda and copper to a third. Â The Rosewood turned sky blue with baking soda and copper. Â Crazy Blue! Â So, we tossed some of this in our main dye bath to see what we could get with our yarns. Â It ended up being kind of a weak coffee brown. Â Not a bad color, but not the blue we had hoped for.
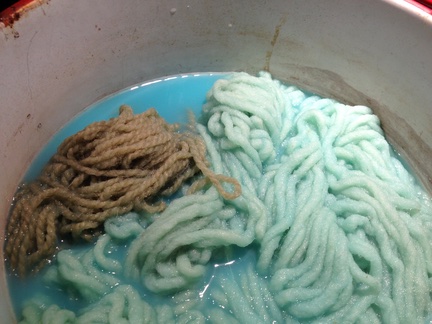
The skein on the left was the Rosewood. Â The one on the right was a white skein that was tossed in to see if it would pick up some blue. Â Once it was rinsed it was fairly pale in color.
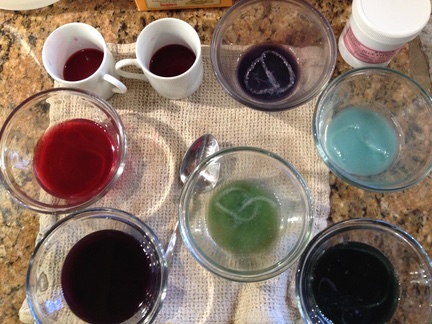
Here are some of our sample experiments. Â We’d pull dye bath out and add things to them just to see what colors we might be able to get in the main bath.
I’ve read that the Purple Heartwood actually turns more purple when exposed to the sun’s UV rays. Â So, maybe on a hot summer day I’ll stick the yarn outside and see if there is any color change. Â From laying it out today in our cold winter sun, it did seem to get a bit of a purple tone to it, but definitely nothing dramatic.
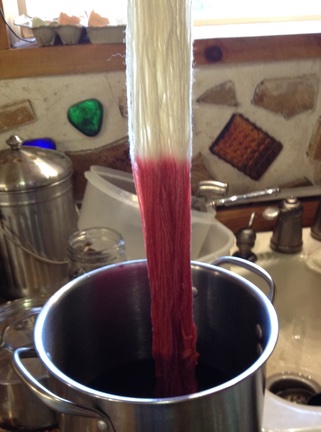
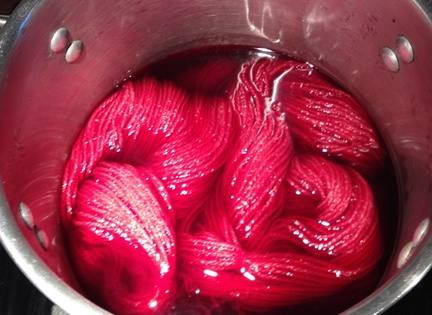
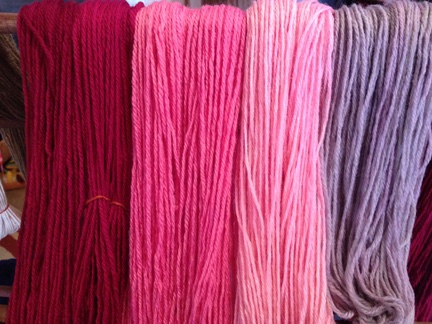
The “Instant Gratification Award” definitely went to the cochineal!! Â The second the yarn hit the dye bath it became a vibrant pink!
Cochineal simmered for one hour.
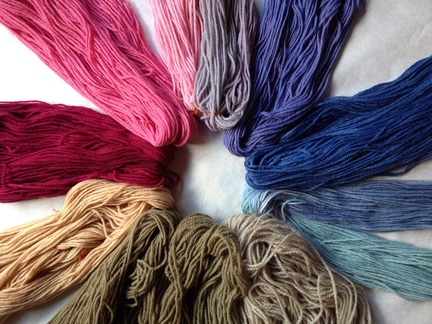
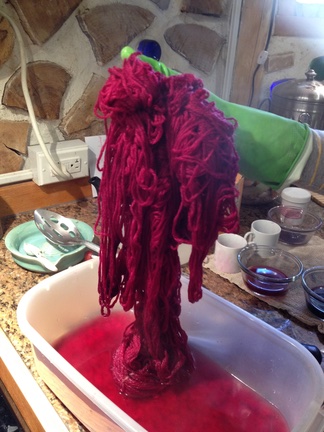
There was so much color left in the dye bath that we tossed in another skein and simmered it for 20 minutes. Â Then we did it again! Â Then we did it a 4th time with a little baking soda thrown in! Â Isn’t it GORGEOUS! Â (Yes, I’m shouting!)
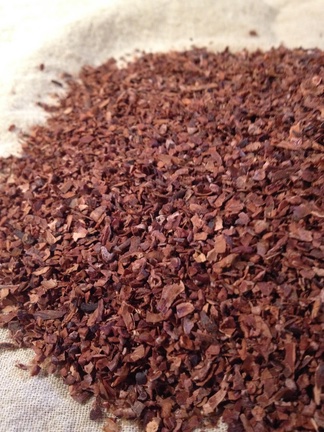
Finally, we set up the cocoa chaff (lovingly donated by the amazing French Broad Chocolate Factory).  As we  poured the chaff into a muslin bag, the smell of cocoa filled the air, and once the simmering began we were all craving chocolate!!
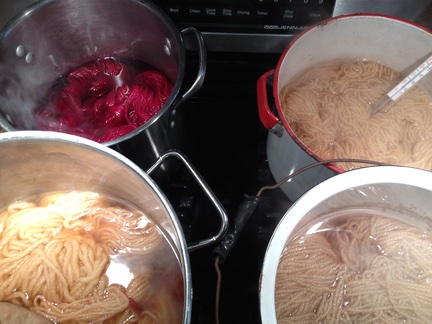
Top left – Cochineal, Top right – Rosewood, Bottom left – Cocoa, Bottom right – Purple Heartwood
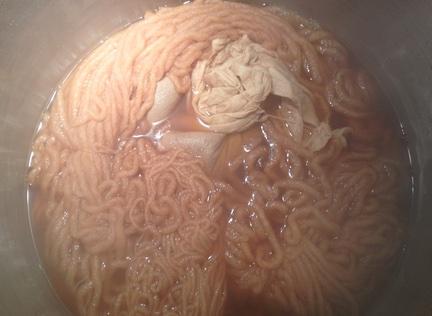
Cocoa
Cocoa with some baking soda and copper added.
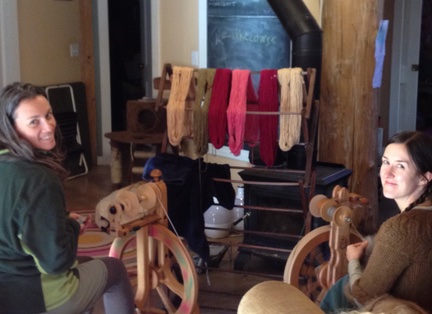
We got in a bit of spinning while things dried. Â I have to admit, my feet were tired by this point. Â We’d been standing ALL DAY watching the yarns simmer.
But we soon filled our bellies with a delicious black bean soup with a pear and blueberry crisp for dessert!
To be honest, I had a very hard time not pulling the black bean yarn out of it’s dye bath early. Â But, I forced myself to go to bed and woke up bright and early (thanks to one 5 year old) the next morning, ready to wash up some lovely blues!
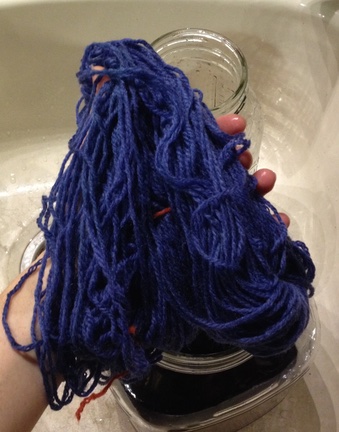
This is the yarn dyed with black bean and baking soda:
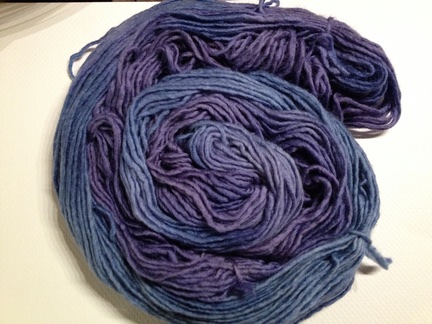
Nikki’s mix that had the baking soda on the bottom of the jar. The purple hues are black bean by itself with the blue coming out when the baking soda is added.
This is the skein that I had in black bean, vinegar, baking soda, and copper (blues) and black bean baking soda and copper (greens)
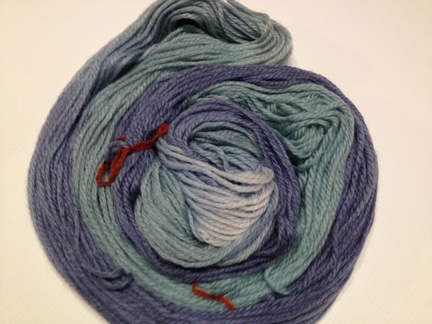
All of our lovelies hung up to dry.
I think we are really hooked now!!! Â Someone please send us a million white skeins to play with!! Â We need more! Â MORE!! Â 🙂
Fixin’ my fiddle!!
A few months ago I picked up a fiddle from craigslist for $50. Â I’ve wanted to learn to play fiddle for years, but a good fiddle generally starts at over $500. Â So, I thought, why don’t I try to rehab this one and see what becomes of it. Â It was made sometime around the civil war and came over from Austria. This fiddle was well loved by a sweet family. Â But when they moved into the area it got bounced around a bit and parts fell loose and cracked.
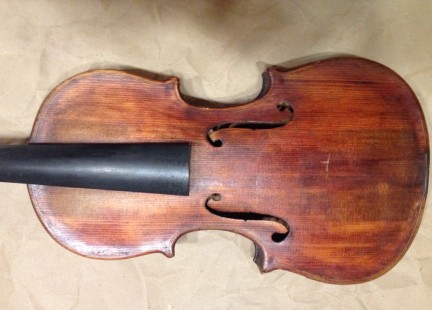
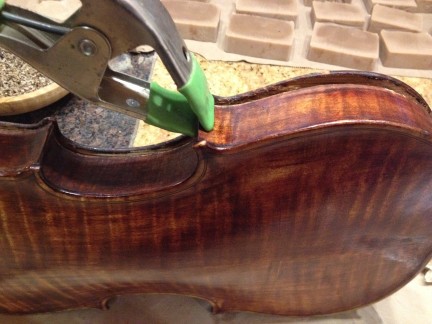
The top was coming apart from the sides.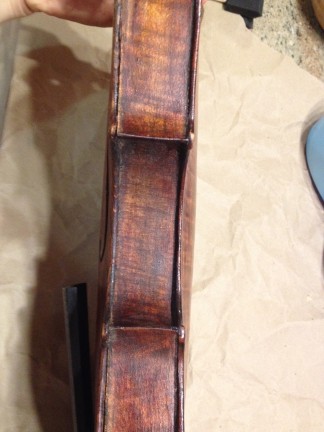
The end button was missing and the bottom block had a crack.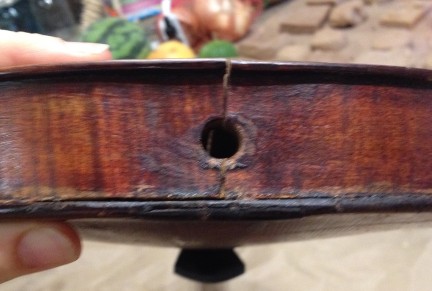
The back was coming apart at the seam.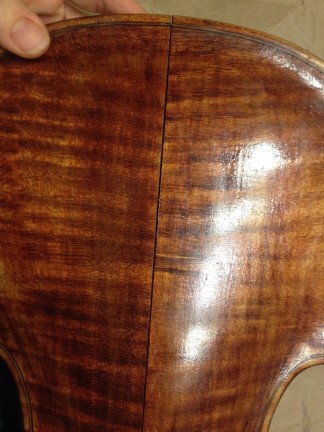
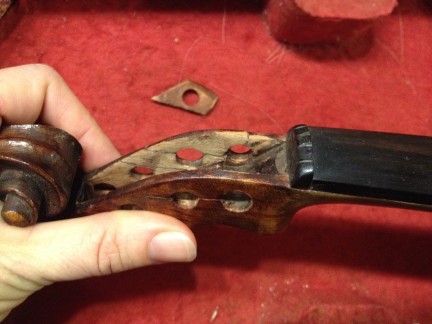
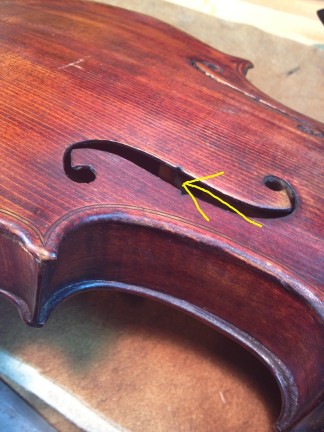
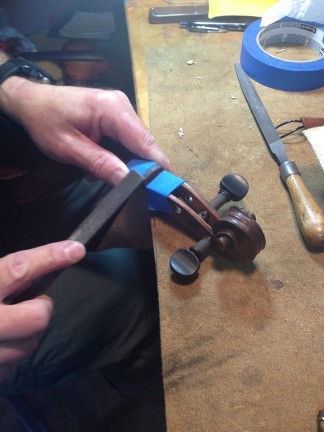
And worst of all of it, the peg box and scroll had little cracks all through it. Â Some of it had been repaired in the past and was re-cracking, some of the cracks were new. (I only pointed out one large one here.)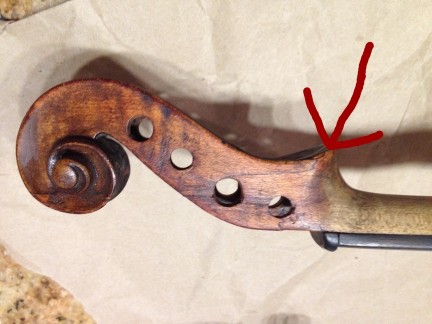
I took the fiddle to a local luthier (violin maker), Danny Bishop, and he walked me through all the steps to fixing it up. (I think he got sucked into my enthusiasm and wanted to hear this fiddle sing again.)
The first thing I did was place an order with internationalviolin.com.  I got some hide glue and a couple of different types of clamps.  I worked on the back first, re-glueing it.  Isn’t it lovely?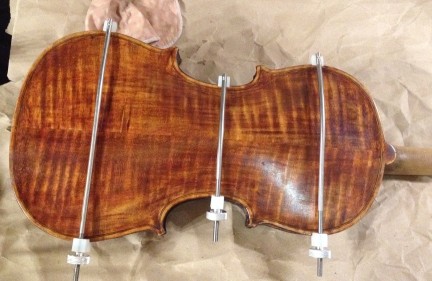
Then I worked on glueing a spot on the side where it had been poorly glued the last time it was fixed.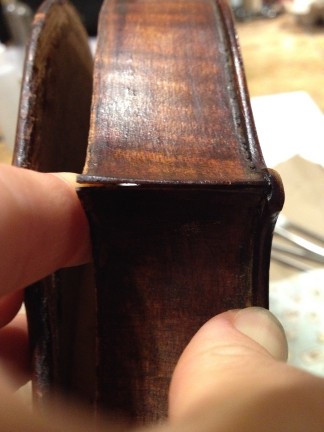
I fully opened the top to check out the insides and all looked good. Â 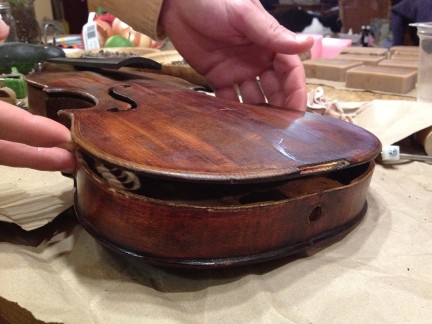
Then I glued it back tightly. Â I didn’t have enough clamps so we made some out of old wooden thread spools.
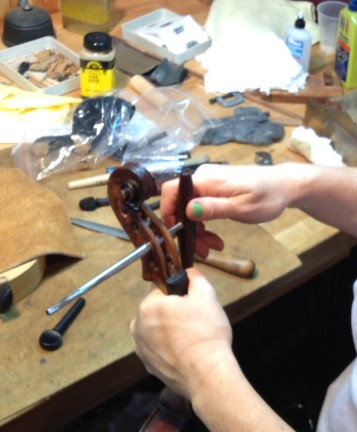
Then it was on to the peg box. Â This is a pretty delicate area, but it takes a whole lot of pressure with the strings pulling on it and the pegs pressing inward. Â You can see where a repair had been done on an old crack. Â 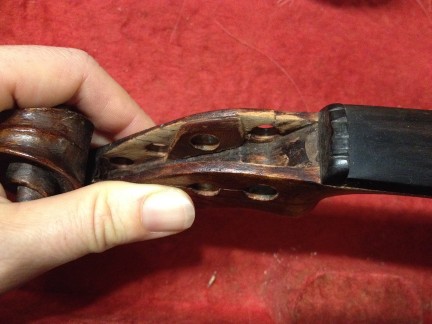
We used a very sharp razor and took this piece off. Â Then I used the razor and carved out part of the box on each side so that I could replace it with a large piece of maple.
We used card stock to make a template for the wood that would go into the peg box.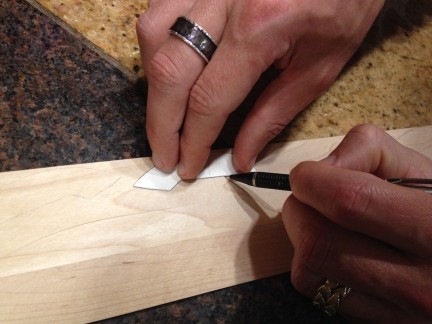
Here are the two pieces of maple that we cut (with a very sharp knife) to fit the box.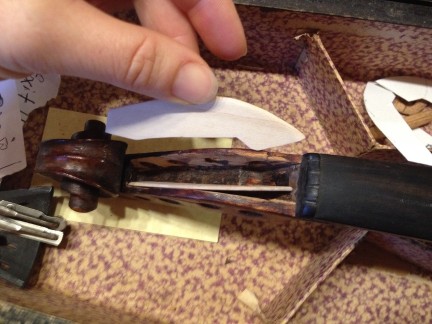
Then they were glued and clamped into place, one side at a time.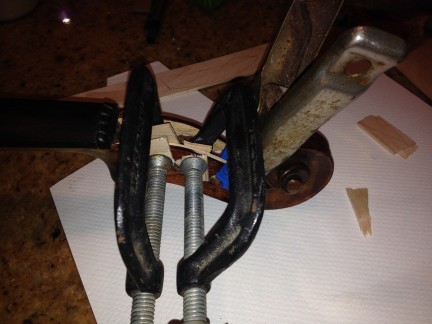
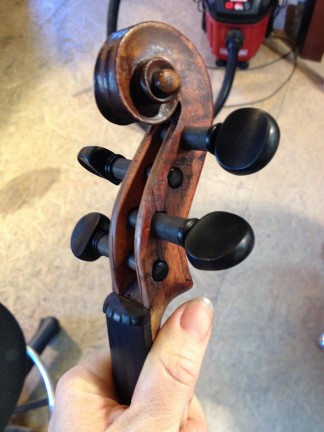
Here’s how it looks all glued in. Â I stained it later to look just like the rest of the box.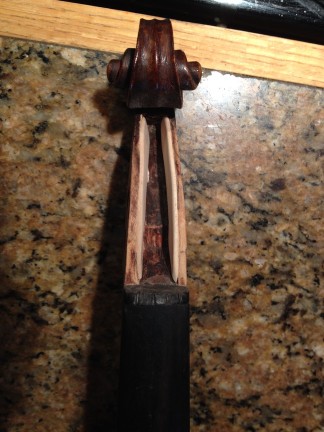
Once all of this was done, I took it back to Danny for a bit of help getting it ready to string up. Â We drilled and reamed out the new holes.
Then we fit the pegs to the holes. Â The pegs have to be sharpened, like you would a pencil, to taper them to fit the peg holes perfectly. Â Then we drilled tiny holes for the strings.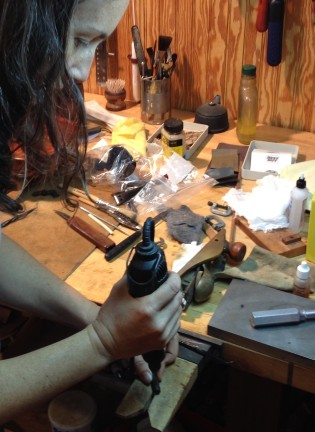
When I was fitting the pegs for the last time, I heard a loud crack and my heart stopped. CRAP!! Â Another crack in the peg box! Â With nothing to lose, Danny drilled a small hole through the crack and superglued in a piece of paperclip. Â This held the crack tightly! Â Yay!! Â He used a tiny jewelers file and cut off the top of the paper clip. Â You could barely tell it is there.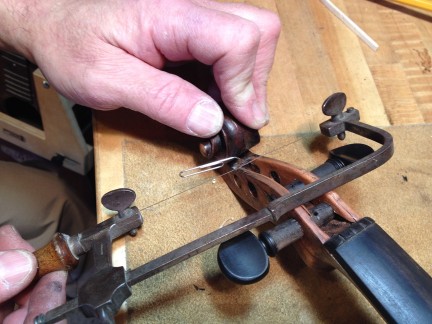
Next came the new end button. Â I filed that down just as I did the pegs and fit it nice and snug.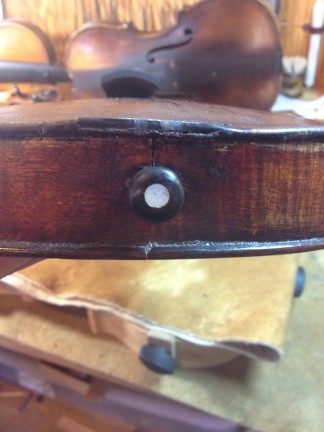
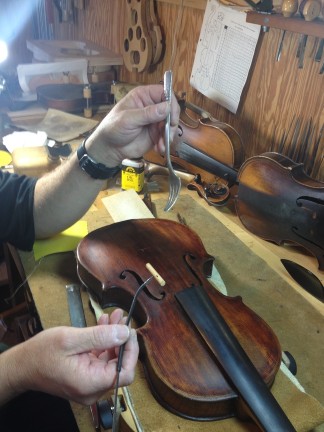
Then it was time to set the sound post. Â The sound post is a little piece of wood that fits between the top and bottom of the violin. Â It’s very important in getting a full, strong sound. Â Danny had made his own tools for this and made it look super easy. Â He slid the post in through the sound hole and pushed it into place with the fork.
Then we took some time with the top nut or top block. Â It was very tall, so he filed it down a bit and then made new notches for the strings to sit on.
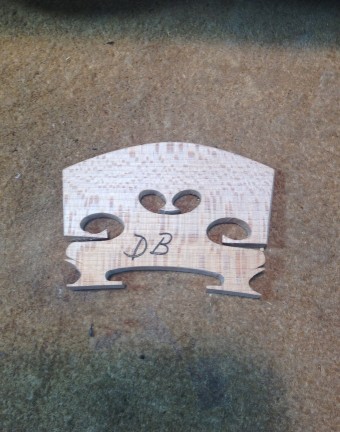
Finally, it was time for the bridge…. SO close to stringing it it up! Â Danny took a brand new bridge and fit it perfectly to the top of the fiddle. Â Then he carve it up a bit to enhance the sound. Â Â (I made him initial it before we put it on the fiddle.)
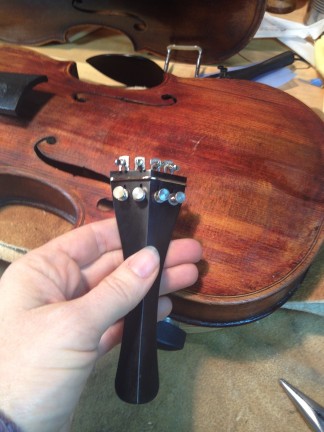
FINALLY, the moment of truth! Â I attached the fine tuners to the tail piece.
And we began putting on the strings!!!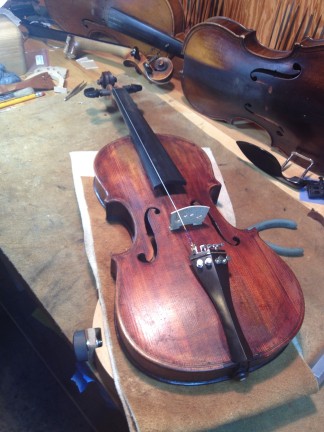
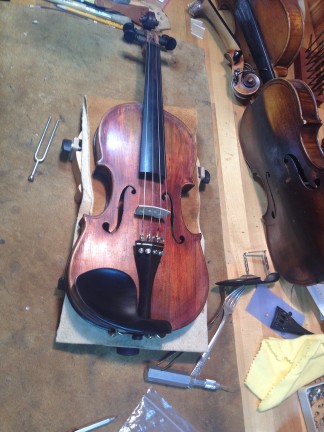
DONE! Â Isn’t she a beauty?? Â It looks completely different than the first picture.
And the sound? Â Well, Danny wanted to buy the fiddle from me. Â When he was tuning it and testing it out, he couldn’t put it down. Â The sound is rich and full and warm. Â It’s just beautiful!! Â I am SO glad I took on this project. Â I now have a 150 year old Austrian violin that couldn’t be more lovely!!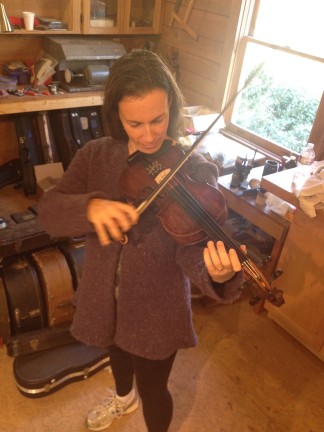
Here’s a little video of Danny fiddling around 😉 Â I can’t express how thankful I am to him for taking the time to work with me. Â He was a patient and knowledgable teacher.
Â
Giveaway!! And my new baby!!
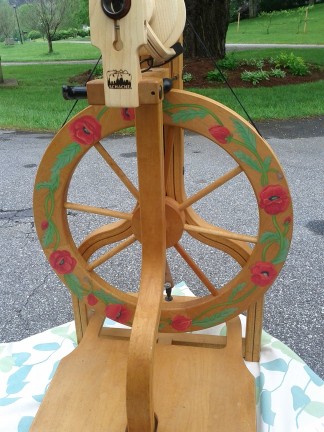
No, not a human baby, but a new spinning wheel!!! Â Woohoo! Â Isn’t she amazing?
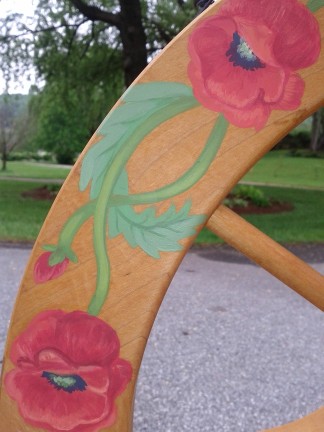
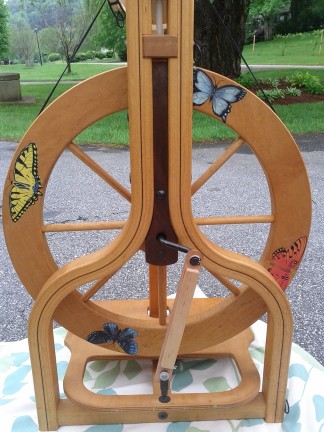
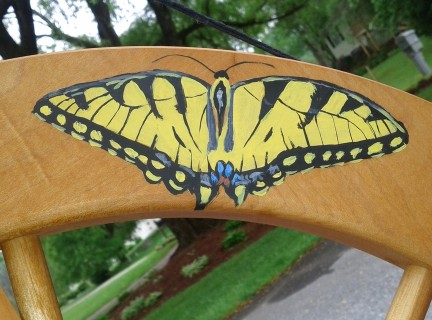
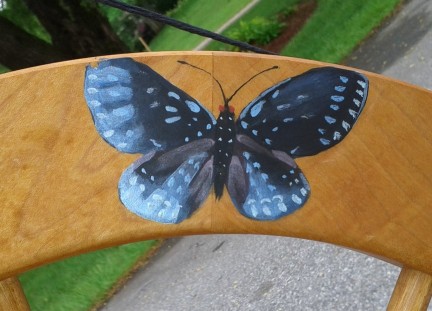
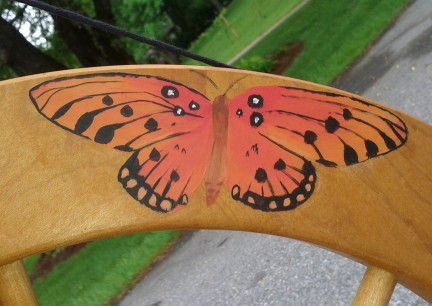
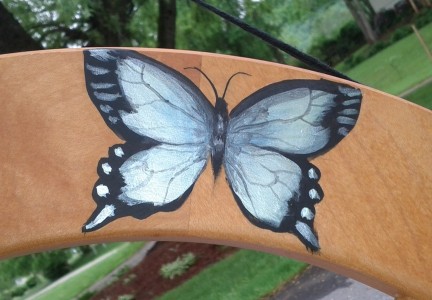
I’ve been borrowing a wheel from a very generous friend for the past year and a half.  I figured it was far past time that I get my own.   I began the hunt this winter and couldn’t pass up the opportunity to get this lovely wheel.  It was owned by an amazing artist who passed away 8 years ago and has been sitting unused ever since.  For the past couple of months I’ve been waiting on parts that I needed to make her work and then passed her on to a super talented friend who decorated her with poppies and butterflies.  I got her back this morning and finally had a chance to sit down and spin.  Wheeeeeeeee!
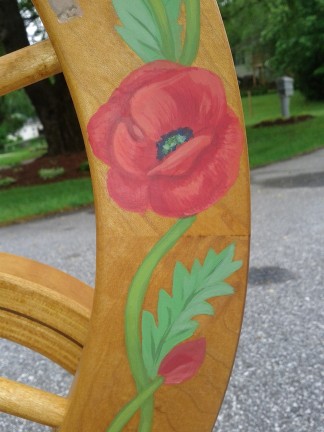
The wheel is made by Schacht and is called a Matchless….. but that just won’t do. Â She needs a proper name. Â Here’s where you come in! Â CONTEST! 🙂
I’m having a naming contest on my FaceBook page.  What do you think I should name her?  Leave me a comment on my facebook page and, if I like your name best, you will win a hand spun, wire core bracelet from my etsy store (or I’ll spin you one in your favorite colors)!  If you share the contest on your page you get a second chance to win!!  Don’t have a FB page?  Just leave your comment here on my blog.  Easy Peasy.
Sheep Shearing
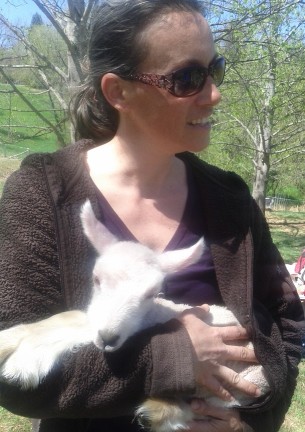
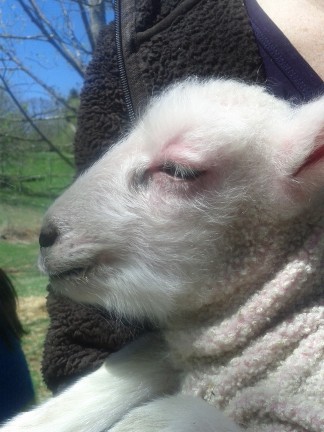
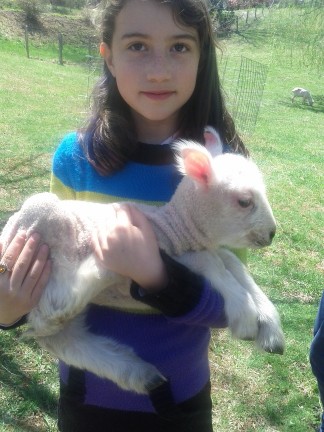
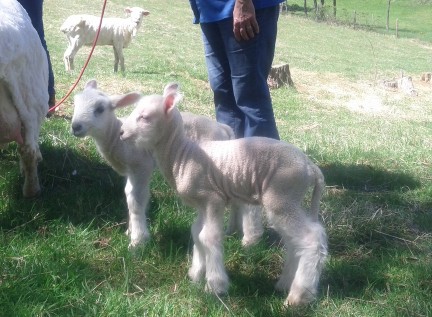
I was super excited to get invited to sheep shearing day at a friends farm. Â I’ve never had the opportunity to do this and, especially now, with my spinning habit growing, I wanted to learn. Â When we pulled up, they were already in the middle of shearing Snow, a white cormo sheep, who had given birth to twins the day before. Â Well, the babies needed snuggling while mom was getting her coat off, so Kaia and I set to work immediately!
This little girl fit perfectly in my coat!
There was a professional shearer there. Â So, we didn’t actually do any of that part.
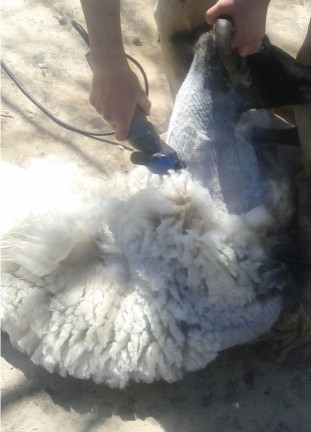
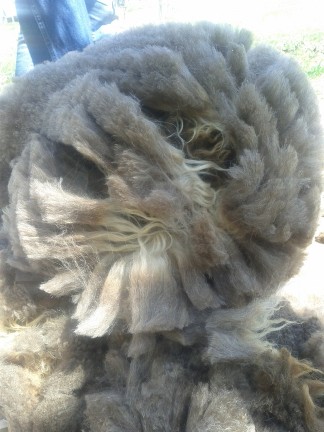
But, I did get to help with the skirting (removing the plant matter and dirt) of the fleece.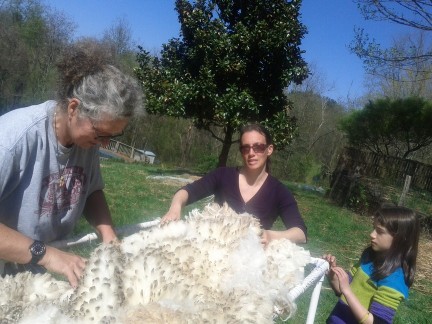
And my friend sent me home with a bit to play with, too! Â So gorgeous. Â It’s like the sheep keep a crimper in the barn to use when no humans are looking!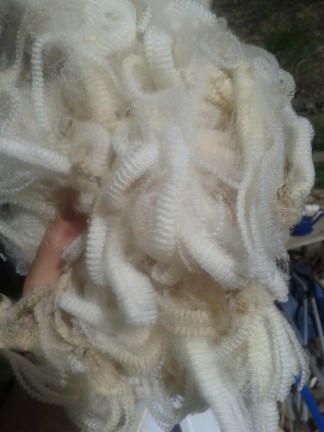
Sustainable terrarium
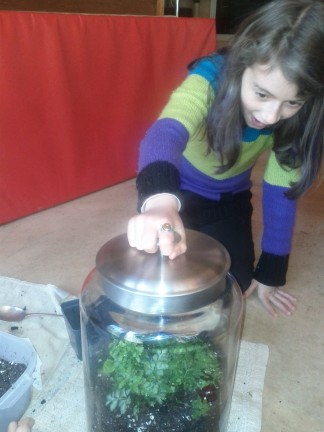
Kaia and I came across this article about a man who started a terrarium in 1960. Â He stopped watering it in 1973 and it has lived, sealed up, since then. Â The plants, soil, and water have created a sustainable system. Kaia was intrigued by this idea and wanted to try to start her own. Â Here’s what we did:
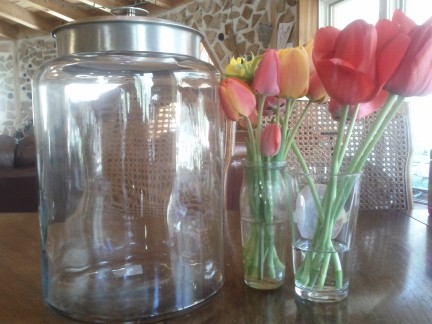
We found this jar at Target. Â It’s probably about 2 or 2 1/2 gallons. Â The top has a rubber seal to help keep the moisture in (and other stuff out).
Kaia used some gravel and marbles to fill the bottom 2 inches. Â This will help with drainage so the soil doesn’t stay too wet.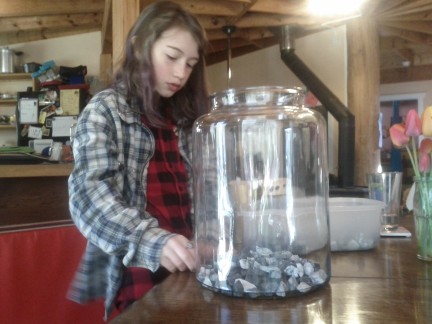
We then put a thin layer of charcoal. Â This was recommended in a video we watched about starting terrariums to help keep the soil fresh.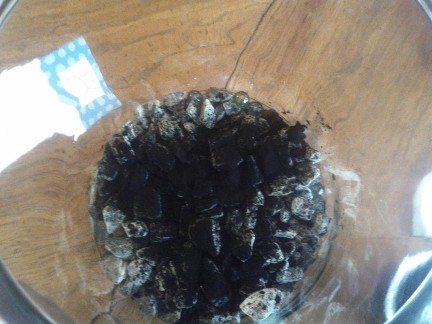
We then put in a layer of soil. Â We used a mix of two different potting soils (one seemed too fluffy and one was too heavy, so we mixed them). Â These three layers made up the lower 1/3 of the jar.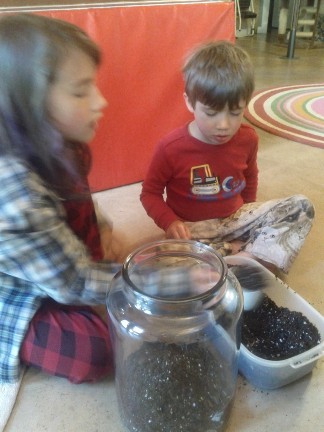
Then it was time for the plants.  Kaia chose a creeping fig, blue star creeper, and two little ferns.  She picked off any dead material and spaced the plants out  in the jar.  The largest plant went in first.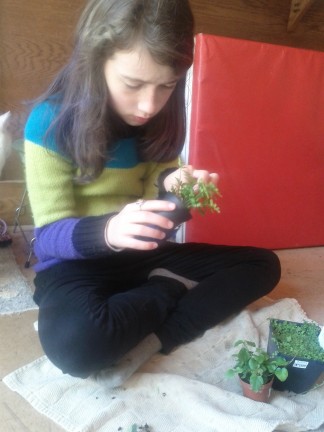
Once the plants were tucked in, we filled in any gaps with more soil.
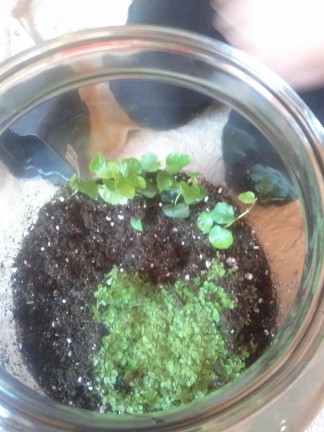 She added about two ounces of water. Â We’ll add more if needed. Â Better to add too little than too much. Â You can always add more, but it’s not easy to take out extra.
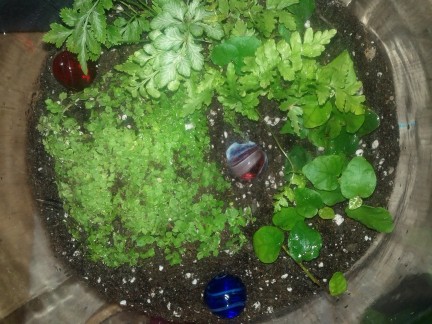
And admire your work!
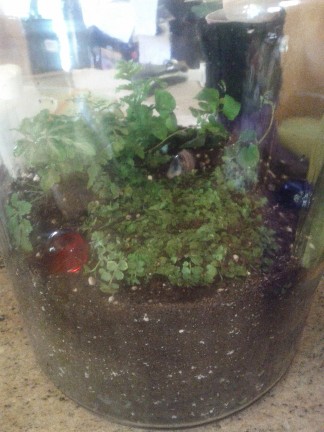 We are excited to see how this grows!
Like a kid in a candy store!
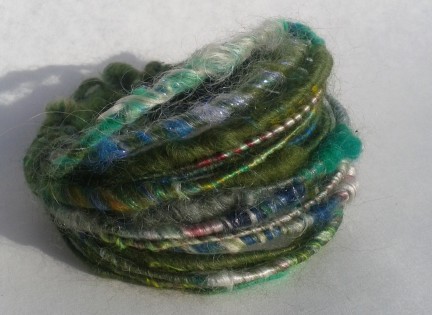
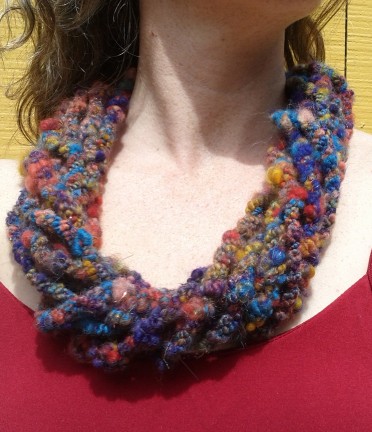
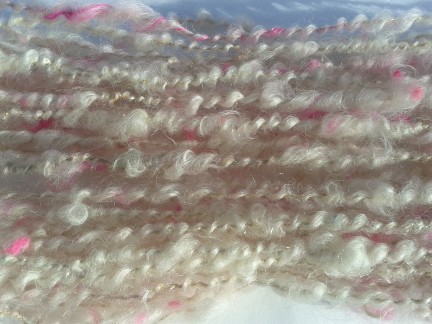
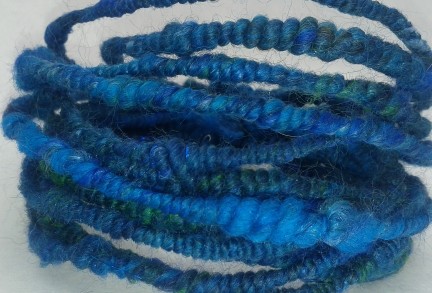
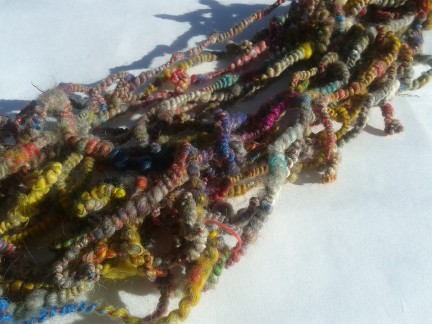
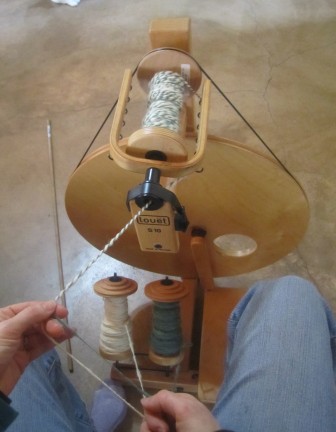
Hello Friends!  Sorry for the hiatus.  Has it really been almost a month?  Well, I kind of dove head first into the fiber world and am having a blast.  Colorful batts, art yarns, funky fiber jewelry, squishy knits… So much fun!  The kids are also enjoying getting their hands on the fibers and spinning on my wheels.  I have to let go of my selfish urge to hog all of it for myself!  🙂  Oh, and did you notice I said wheels?  YES, I have two.  Well, there are two in my house, but I have neither, yet.  The first wheel is a Louet S-10 that was graciously loaned to me by a friend.  I’ve had it for over a year now and felt like it was time to return hers and get my own.  Then, along came another gracious woman who offered me a Schacht Matchless (‘the cadallac of wheels’) for an insanely inexpensive price and I couldn’t pass it up!  So, it’s at my house for a test drive and I hope to pay for it this week.  Such a beautiful machine!
Here are a few images of what I’ve been making lately. Â I’ve got them for sale in my etsy store, but if there’s something you would like in a different shade or color, I’d love to make it for you!!
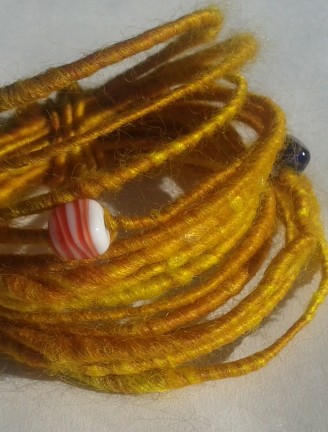
Fiber spun onto a wire core and wrapped into a bracelet!
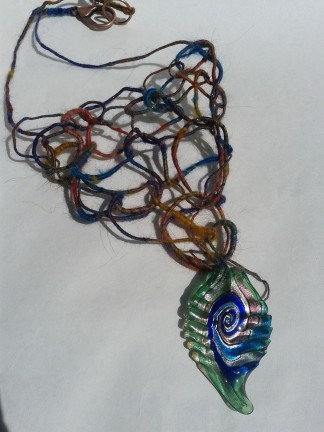
Fiber spun onto a wire, then knitted into a necklace!
Another lovely bracelet.
Art yarn twisted into a necklace.
Art Yarn
Another lovely bracelet.
More art yarn.
Enjoying a fabulous day at a spinning weekend/camp with Pluckyfluff.
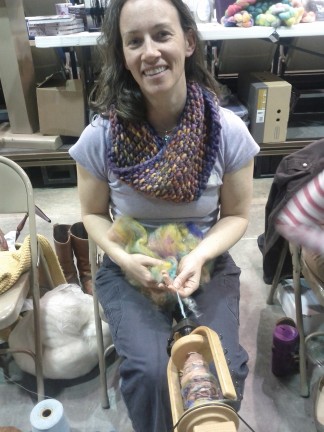
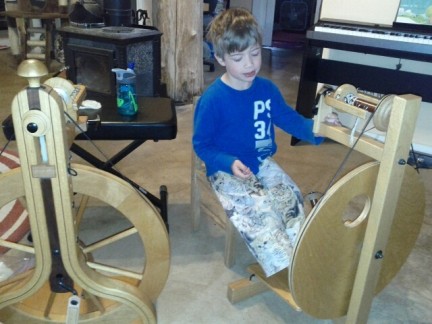
Little man decided that this was his motorcycle and spun for most of the day. Â He is on the Louet and my new Matchless is on the left. Â I can’t keep calling her the Matchless, though…. she needs a name. Â Any suggestions?
DIY Blending Board
Thanks to Nikki and her birthday gift, I’ve been having a wonderful time spinning art yarn. Â But, to make art yarn, you need art batts. Â These can be on the pricey side when you are just learning how to spin. Â So, I thought I’d make them myself. Â Usually they are made using a drum carder. Â I don’t have one of these and they cost just as much as a new spinning wheel (expensive). Â But, last year, something new appeared on the market called a blending board. Â It’s less expensive than a drum carder, but still pricey. Â So, in an attempt to create my own batts to spin, I’ve made my own blending board for under $100.
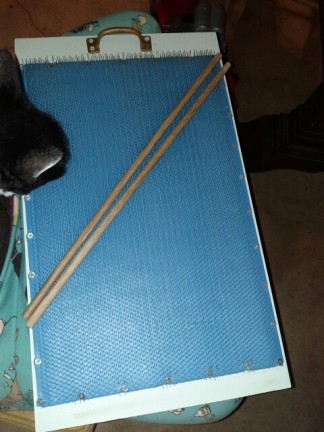
I ordered a piece of blending cloth from Natural Fiber Yarns. Â While I waited for it to arrive, Toby found an old cabinet door that was the perfect size to attach the cloth to. Â He trimmed one end a bit and removed the knob.
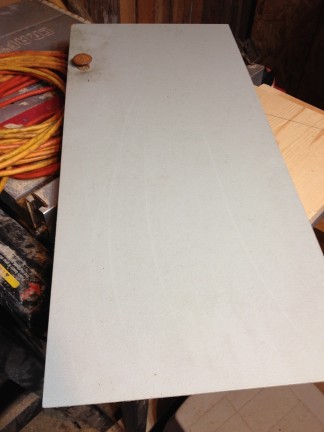
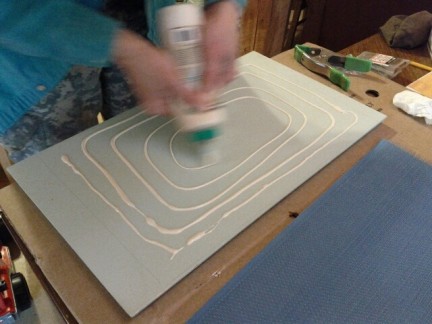
Once we had the cloth, we put some wood glue on the door and placed the cloth securely onto the glue.
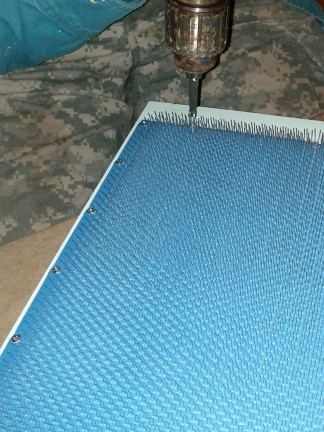
After the glue dried, Toby used tiny screws to attach the cloth on all edges. Â You could also use a staple gun, but we had lots of little screws laying around.
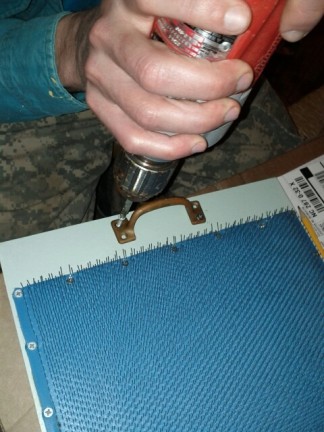
Then, he attached a cabinet handle to the top edge so that it will be easier for me to carry and hold on to when I’m blending fiber.
I found a 3 foot long 3/8″ dowel that I had laying around the house and cut it in half (photo bomb by the kitty!) Â These will be used to roll the fiber up into a batt.
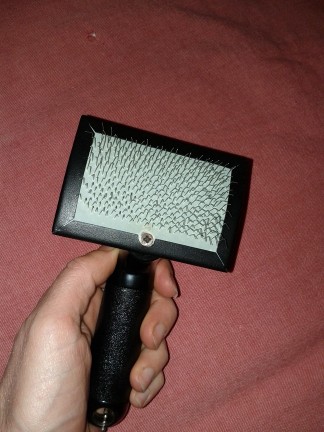
And I found a cat brush to help with pushing the fiber into the blending cloth.
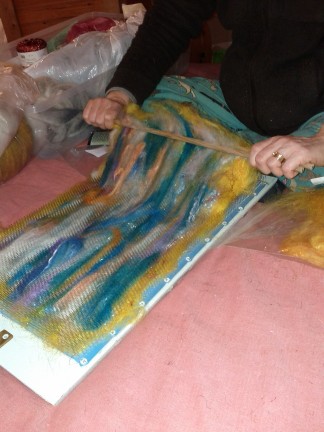
 Then I got to blending. Â Here’s how the process looks. Â I gathered all my goodies and began ‘painting’ them onto the blending board.
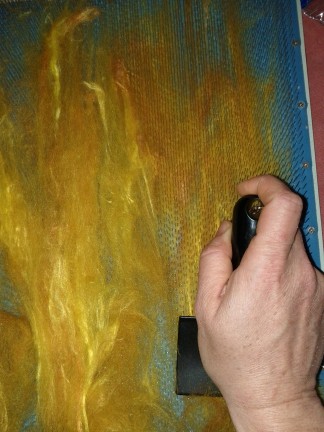
First was a beautiful yellow that the kids and I had dyed with turmeric (wool and bamboo). Â You drag it along the pins so that it catches and stretches.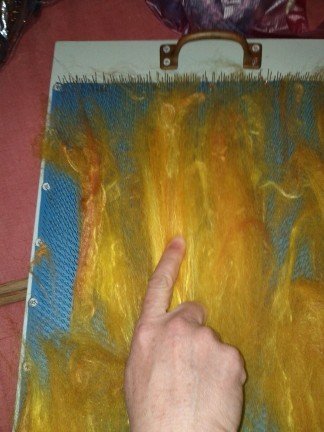
Then, you can use the cat brush (The pins are at an angle so you use the brush upside down so it doesn’t pull the fiber right back out) to push the fiber deeper into the pins.
Keep adding stuff until it’s full. Â These are blue and white mohair locks.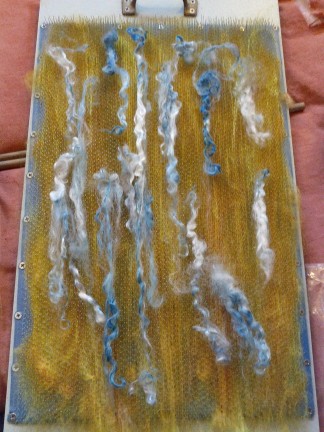
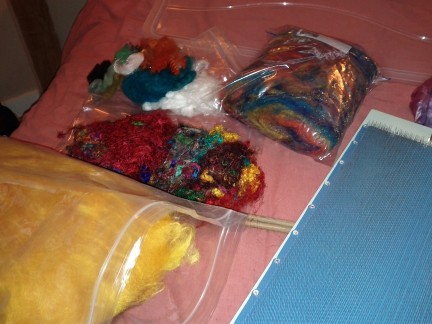
I added sari silk, silk cocoons, tinsel, more wool of different colors, and whatever else I could find.
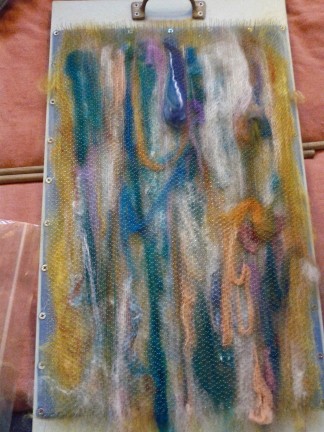
Once it is full, you pull up the end a bit to loosen the fiber. Â Then you place the dowels, one on each side of the fiber, and begin rolling it.
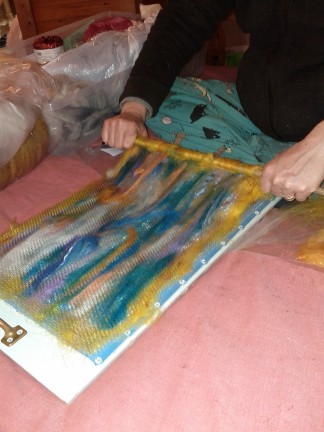
Some of the fiber may stay stuck in the blending board. Â You can pull those up with your fingers or the cat brush and wrap them into the rest of the fiber.
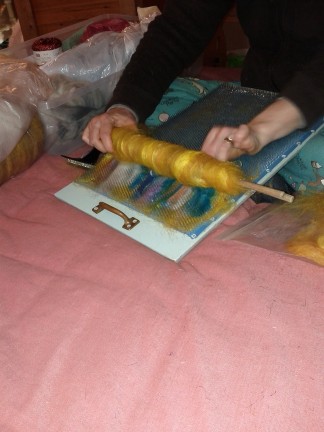
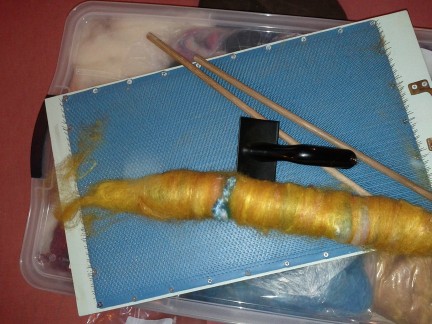
Once you are done, just slide the dowels out and you have yourself a mini batt. Â You pull from one end to start spinning your art yarn.

That’s it! Â Now, I must get to spinning!
HerbalRootsZine Giveaway!
The Vaporizer is getting some attention over at HerbalRootsZine! Â This month’s herb, Eucalyptus, is a fabulous decongestant and one of the ingredients in the Vaporizer. Â Go over and check it out!!
Child guided learning or Going with the Sappy Flow
The other day, Leif and I picked up our camera from the repair shop and noticed a large pine tree just outside of the front door. Â The tree was dripping with sap. Â In fact, there was so much sap that it looked like the sidewalk next to the tree was covered in candle wax. Â Leif began asking all kinds of questions about how the tree makes sap and what it does. Â He stuck his fingers in it and got himself all gooey. Â We talked about how the sap is part of the tree’s immune system and when there is an injury it makes a scab, just like our bodies do. Â I told him that the sap helps fight infections and that you can make it into a salve and use it on wounds.
“I want to make a sap salve for my wounds, Mommy!” Â Leif said as his eyes lit up with excitement. Â And, of course, I thought, ‘Yay! Â An herbal project!!’.
I happened to have a little stash of pine sap that Kaia and I collected when we were out in Arizona this summer.
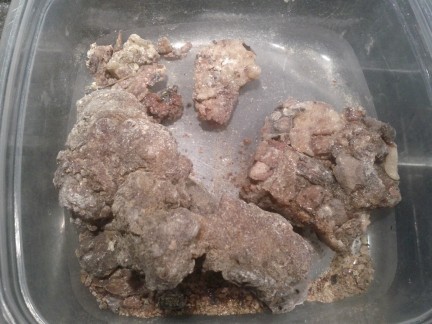
So, we grabbed the sap and pulled out our HerbalRootsZine about Pine (have I told you how much we LOVE this zine?!). We read all about Pine and it’s uses, and then headed to the kitchen for a little mixology 🙂
We warmed the sap in Olive oil and added a bit of beeswax. Â Kaia asked to add some Lavender Essential Oil for its healing properties. Â So, we tossed that in, too.
Once it was all mixed, we poured it into our jar and let it cool.
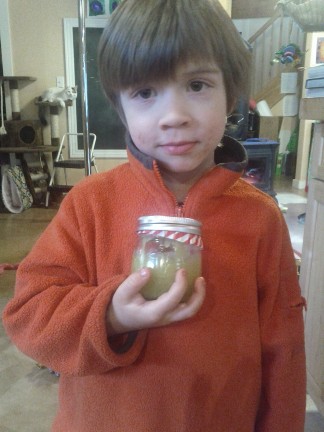
Super simple, super fun, and lots learned. Â Leif went around telling everyone that he has a pine sap salve for his cuts and boo boos, and though his chocolate-covered face looks sad, he was actually super excited about his accomplishment. Â He said he’s looking forward to his first cut so that he can try it out. 🙂
Winter Chicken Soup – Keeping the Immune System Strong
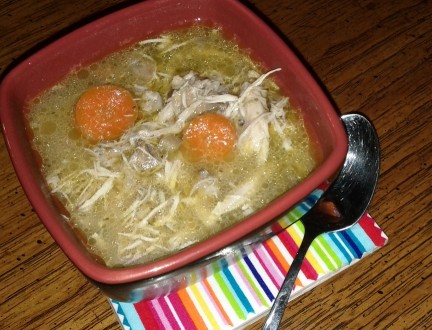 I love to have a big stash of chicken soup in the pantry. Â On those cold, blustery days of winter, nothing is more satisfying than a big bowl of hot soup (well, maybe chocolate, but that applies in any season).
A few years ago, I discovered this recipe and the whole family devoured it. Â I’ve tweaked it a bit over time… adding my own arrangement of herbs and spices to increase the immune boosting properties of chicken soup even more. Â I also leave out the noodles so that I can pressure can it and store it in the pantry.
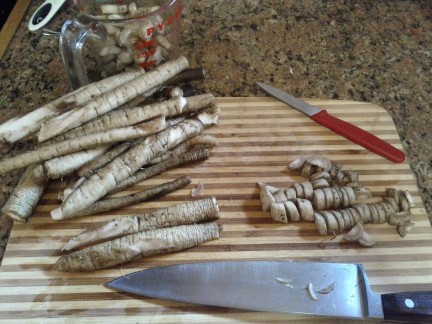
Here you go. Â I hope you like it. Â The elderberries and burdock grow in our yard, so I have easy access to these nourishing and immune-supportive herbs. Â You can usually find them at the health food store or you can omit them.
Winter Chicken Soup
Ingredients
- 1 whole chicken (3-4 pounds. Â I keep the kidneys and liver in the chicken, but take the neck out and give it to our animals… they love it! You can also break the bones up a bit to let the marrow out)
- 1 cup carrots, sliced
- 1 cup celery, sliced
- 1 cup onion, chopped
- 1 cup burdock root chopped (if using dried, use 1/2 cup)
- 6 shiitake mushrooms, chopped
- 1 cup fresh (or frozen) elderberries (1/2 cup if using dried)
- 3 cloves garlic, minced
- 2 bay leaves
- 1 Tbsp. apple cider vinegar
- 1/2 tsp. dried thyme
- 1 Tbsp. salt
- 1/2 tsp. ground pepper
- 8 cups of water or chicken broth
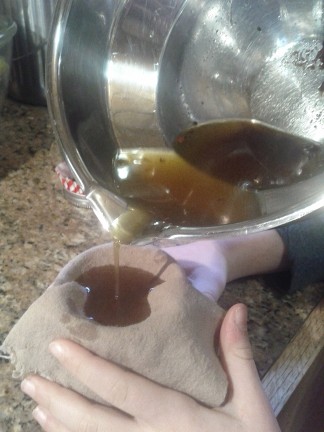
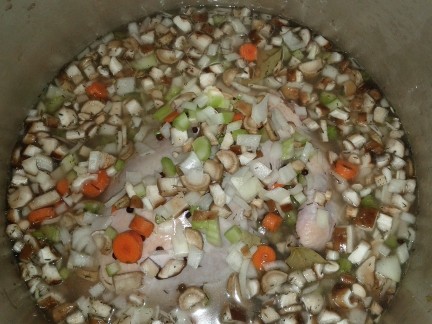
Put all of the ingredients in a large stock pot. Â Cover and simmer for 3-5 hours. Â Once it is done, take the chicken out (be careful, it’s hot!) and remove the skin and bones. Â Shred up the meat. Â The chicken literally falls apart in the soup, so I usually strain what’s left in the pot and go through everything to be sure there are no bones left, removing the bay leaves when I do this. Â It takes a little effort, but it’s very worth it! Â Put all of the veggies, meat, and broth back in the pot.
Done!
If you want to make this in your crock pot, put everything in the crock, cover, and cook on low for 8-10 hours or high for 4-5 hours.
I usually make a double batch and can up the leftovers. Â Ladle the soup into quart jars with 1″ head space. Â Process in pressure canner for 1 hour 30 minutes at 10# pressure, sea level. Â (We are 3000 feet above sea level, so I add one pound of pressure for every 1000 feet above sea level….. so where I live I process at 13# pressure for 1 Â 1/2 hours.)
Enjoy a scrumptious bowl of nourishing soup!
Maple Bacon Banana Ice Cream
Ok, here you go.
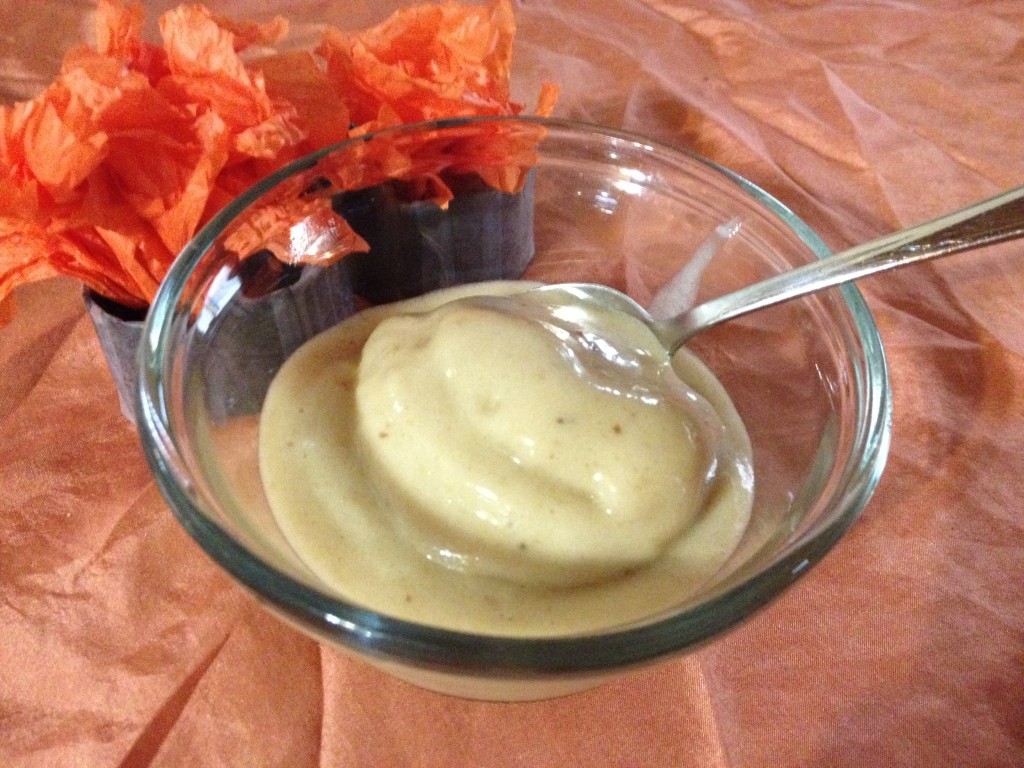
Maple Bacon Banana Ice Cream!!!! Â
Yes, that deserves four exclamation marks because you can never get enough bacon!
Put the following ingredients in your food processor and blend until smooth:
3 frozen bananas
2 Tbsp canned Coconut Milk (the full fat kind)
1 tsp vanilla extract
1Tbsp Maple extract/flavor
8 drops of stevia extract (optional, use if you like it sweet!)
Add in 2 pieces of cooked, diced bacon and stir well. Eat up! Â (There were large chunks of bacon in our ice cream, the picture just doesn’t show them….. don’t dice it up too small.)
Makes about 4 servings.
It came out really good….. I might add a couple of drops of liquid smoke next time to see if I can enhance that bacon-y flavor even more.
Ninja Chickens Giveaway
Head on over to Small Measure if you’d like to try to win your own Tea of the Month Club membership from Ninja Chickens!
I’m off to make some decadent lip balms for the store.
Ninja Chickens has arrived!!
Around our house, it’s very common to find one of us crafting or creating something at almost any point in time.  Blending up soaps and teas, knitting/sewing clothes and toys, carving spoons and turning bowls, making herbal medicine, drawing, painting, glueing, hammering….. If it’s “Do It Yourself”, we will try it  (and even if it’s not, we might try it! Oy!)  We just can’t help making stuff around here.
So, I felt it was high time we open up a little store to showcase some of our craftiness. Â We’ve started small but we plan to add more herbal, knitted, and homesteading item. Â (I’m hoping to get Toby to list some of his beautiful carved bowls in there.) Â Drop in and take a look!! Â And tell your friends!
One of the things I’m most excited about in our Etsy store is our Tea of the Month Club! Â There’s a 3-month, 6-month, and 12-month membership. Â Each month, we send out a new blend of delicious herbal tea. Â I’ve been working on recipes for a few months and they are all so tasty!! Â I’m having a problem keeping the kids out of my December blend (yes, there is cocoa in that mix)… they just keep asking for more!
A place of her own
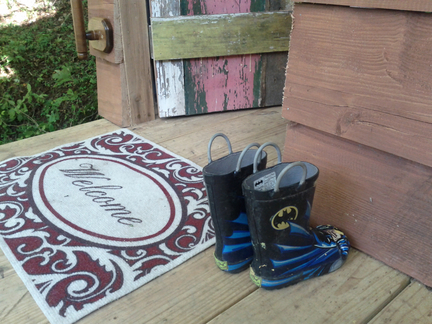
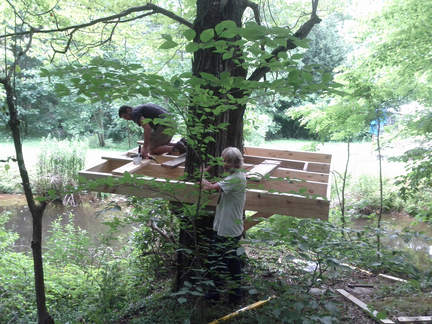
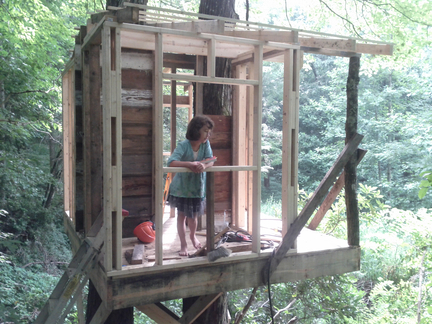
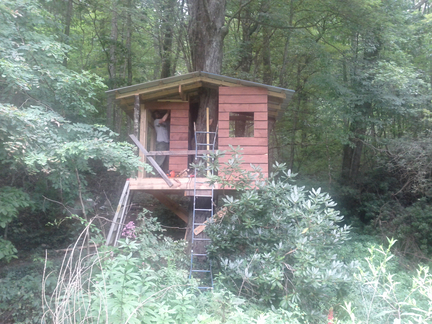
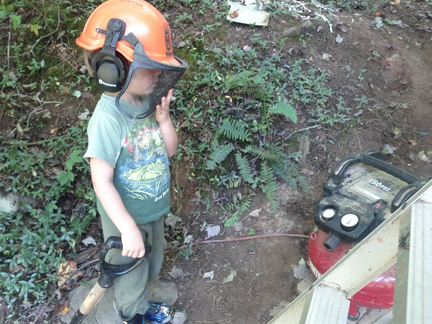
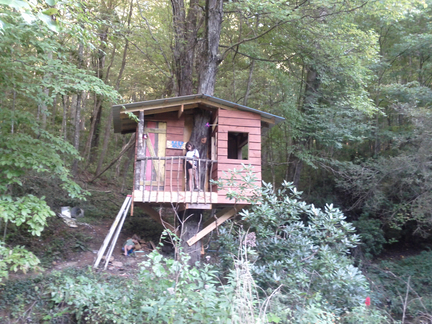
Back in June, I asked Kaia what she wanted for her birthday. Â She went through a few ideas before settling on a tree house. Â “Yes!” I thought. Â “We definitely need one of those on the land!!” Â And so the construction began:
Leif, as always, was a fabulous construction helper!
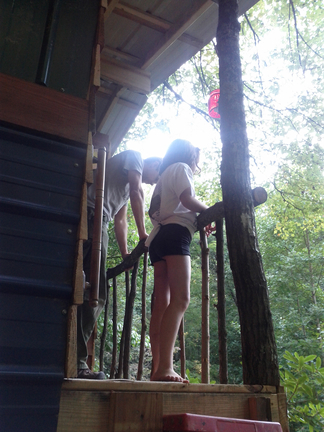
There was a lot of excitement when the platform was finally done! (They don’t look excited, do they? Â It had been a long day of construction, with lots of mosquitoes.)
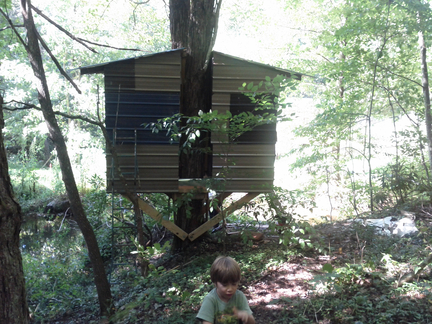
The house is shaped like an H surrounding two large trees.
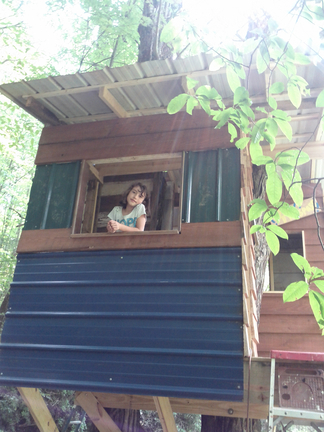
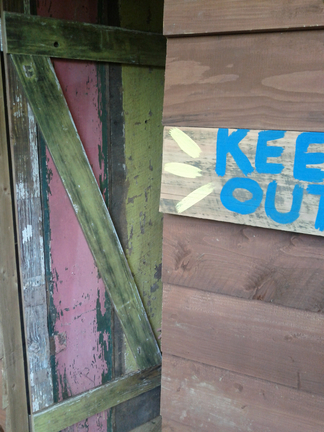
The siding was made out of donated tin roof and lap siding. Â It created a fabulous mash of colors and personality.
It took a while, but thanks to the help of our family, we are pretty much done! Â A rope ladder and pully system are planned for the near future. Â But, Kaia was able to move in today and is looking forward to some quiet time by herself. Â (We’ll see what her little brother has to say about that!)
Know your food
Kaia and I recently began reading The Omnivore’s Dilemma – Young Reader’s Edition. Â She wasn’t super interested when I mentioned it, but she was hooked after the first chapter. Â The first 100 pages discusses the industrial food system from farm to store, focusing on corn. Â Kaia was amazed by how common corn is in our lives, not just in food, but in medicines, packaging, glues, paints, cosmetics, antibiotics, and so much more.
We decided to take a trip to the local grocery store with a list of corn products, just to see what we could find.  We walked down the aisles picking things at random.  Out of 30 products, there were only 5 that did not contain corn:  two varieties of  crackers, Enjoy LIfe Chocolate Chips, some gluten-free wafers, and a B-12 supplement.  In the other 25 products we found corn and its by-products 106 times!!!!!  We found it in things like pineapple juice, mayonnaise, Cheerios and other cereals, non-dairy creamer, pet treats as well as cat food (cats are obligate carnivores and should definitely NOT be eating corn!), fish sticks, wet walnut toppings, candy, crackers, frozen burgers, BBQ sauces, peanut butter, TV dinners, ice cream, baby tooth paste, icing, chili seasonings, gluten free ice cream cones and bread mixes, Centrum vitamins, and in jelly (4 different corn by-products in this jelly)!  All of this and we only made it half way through the store when we decided to stop.
WOW! Â Â Just WOW! Â So, how many of these things really need corn in them? Â Have you ever made home-made ice cream with corn? Â What about jelly? Â Doubtful! Â Corn is shoved into just about every processed food! Â And that’s not even counting the corn that is used to feed the cattle, pigs, and chickens that produce the meat and eggs in the store, or the ethanol that’s used transporting some of these products, or the corn starch used to make some of the packaging, or the corn used to make the glues to seal the packages!
Our country has gotten into a vicious  cycle of over producing, over subsidizing, and over consuming corn.  (King Corn is a fabulous documentary if you want to learn more.)
From the list we brought to the store, we found corn in the form of: ascorbic acid, coloring, cellulose, citric acid, corn, corn meal, corn oil, corn starch, corn syrup, high fructose corn syrup, dextrose, flavorings, hydrolyzed vegetable protein, malt flavoring, maltodextrin, polydextrose, polysorbates, sodium citrate, sucralose, tocopherols, and xantham gum.
If you’d like to take a look in your local store, or how about in your pantry, here is the list we used to get us started.
Making Dimples, a free pattern for you! :-)
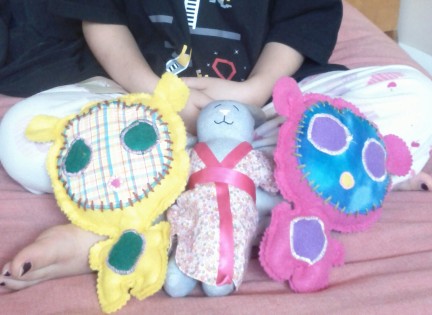
I posted a picture of Kaia’s fabulous doll creation on Facebook and a FB friend, that I’ve never even met in person, was so impressed with Kaia’s ambitious sewing project that she sent Kaia a care package. Â The package had doll making books, supplies, and even a hand made bunny! Â Kaia was so excited that she got to making one of the dolls immediately.
The pink one she made for herself and the yellow one she gave to her dad for his birthday. Â The little bunny was given to her in the care package. Â Aren’t they cute?!?
So, then I was inspired. Â The patterns in the book are so cute that I wanted to try to make one of my own.
Please meet The Dimples
 They are super easy and quick to make.
Here is the pattern (two pages) to download if you’d like to try one:Â dimple2Â Â Â dimple3
First cut the pattern and choose your fabrics. Â Pin your pattern and cut your pieces out. Â I used felt for the body and cut it with pinking shears. (Make sure to read through the instructions first. Â There are different ways to sew up the doll depending on if you are using felt or not.)
Be sure that you cut your legs and ears so that they match up. Â You don’t want two left legs…
Lay out your pieces to make sure you like the fabrics you chose.
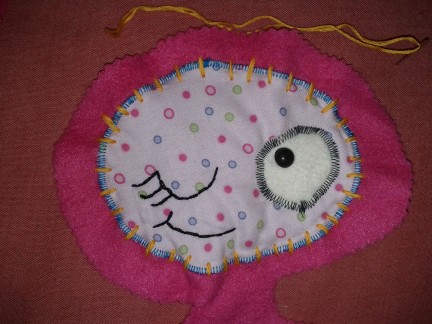
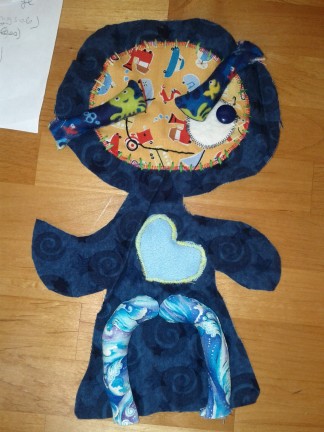
Once all of your pieces are cut, you will start sewing by attaching the face to one of the body pieces with a very close zigag stitch on your machine, or you can do a satin embroidery stitch. Â You will do the same with the eye and the heart. Â Using contrasting thread colors to make them pop.
Next, embroider on the face and attach a button for an eye.  I used a basic back stitch for the mouth and blinking eye.
Next, pick a contracting color of embroidery thread or yarn and make a wide whip stitch around the face.
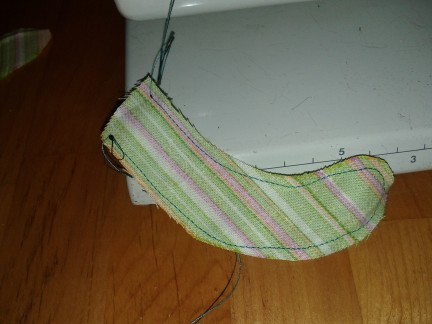
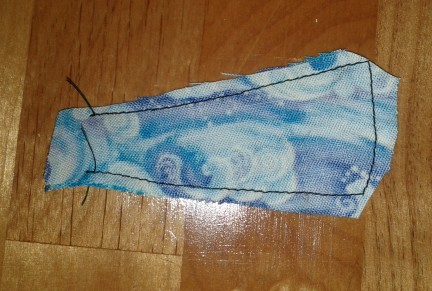
Next, you will sew up the legs and ears. Â Place the right sides together and stitch around, leaving 1/4 ” seam allowance. Â Make sure you don’t sew all the way around. Â Leave a space where they will be attached to the body to turn them right-side-out and stuff them.
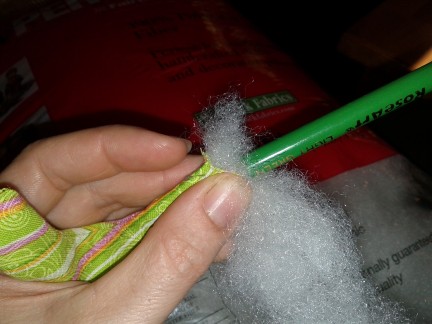
It helped me to use a chopstick to turn them right side out.
Trim the corners of your ears before turning them out.
Then stuff them leaving the end open.
Pin your pieces together making sure the ears and legs are tucked nicely between the front and back body pieces.
Sew it all together using a straight stitch in the same color as the body, and leaving an opening at the top to stuff.
Stuff your doll and sew it up, either with a straight stitch on your machine or by hand.
Now, if you want to use cotton fabric (or a non felt) you follow the directions exactly the same until it comes to sewing the whole thing up. Â You will need to lay it out with the ears and legs on the inside with the edges lined up, like this:
The ears and legs are place up on the top body piece and then the back body piece is placed, right side down, on top. Â Pin it well and sew it up leaving a space for stuffing and pulling everything right-side-out. Â Does that make sense? Â Here it is, ready to sew, with legs and ears tucked inside.
Stuff, and hand stitch it up with a whip stitch.
The pink one was made as a birthday gift. Â Of course, Leif and Kaia wanted one, too. Â Leif’s has an X eye, instead of a blink.
What do you think?
It is definitely that season again!
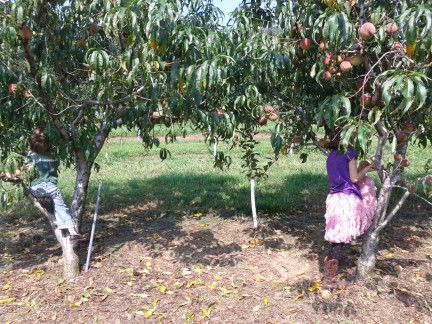
The kids and I headed out to one of our many local orchards yesterday and picked the heck out of some peaches and asian pears. Â So, today, guess what we’re doing?
Cinnamon Spiced Pears
And Ashley English’s Spiced Pear Chutney almost ready to go into the empty jars. Â (I love the look of the blue jars!!)
What I’ll need to tackle in the next few days:
Spiced peaches, brandies peaches, peach cobbler… what else? Â Anyone have a nice recipe for a peach shrub??
While I was working away in the kitchen the house became very quiet. Â Knowing that the kids might be getting themselves into a lot of trouble when they get quiet, I was thrilled when I walked out of the kitchen to see this:
What have you been canning up lately?
Summer
I have to admit, I’m not usually a fan of late summer. Â Aside from being super hot and muggy, it usually arrives with that feeling of overwhelm. Â The garden bugs, the harvesting, the processing, the weeds… And it’s just SOOO hot!
But then there are things like this that remind me of the beauty of this time:
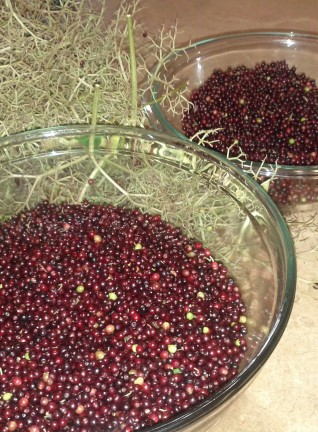
Elderberries!
The Elderberry Harvest has begun and this year the bushes are drooping with dark berries!
Last year I made a huge batch of Elderberry/Raspberry Mead, canned peaches and raspberries together, and made lots of Elder Syrup.
What are your favorite things to do with elderberries? Â Any fabulous pie recipes out there?
Spoon Markers
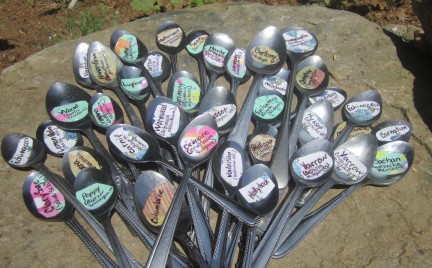
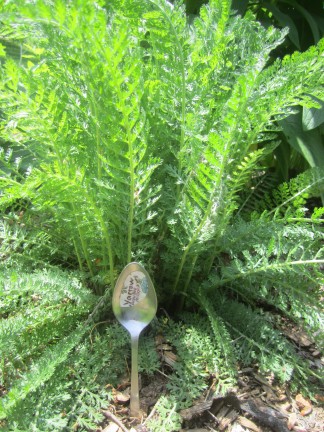
Friends of mine recently gave me some Ashwagandha, Arnica, and Sochan.  They are wonderful medicinal herbs, but I’ve never gotten to know them well as live plants.  So, I decided  I’ve finally acquired enough odd plants that I am in need of garden labels.  This past weekend, I went out to the Good Will and rummaged through their utensils bins.  I bought a large variety, but it’s the cheap spoons that were the easiest to hammer flat.  I pasted the labels on with Modge Podge, and coated it with an outdoor varnish.  I’ll let you know how they hold up.
A bit of Mother’s Day sewing…
I have an ongoing list of sewing projects that has been sitting on the sewing table for months. Â This weekend, with some “me time” for mother’s day (thanks hubby!!), I was able to whittle down the list a bit.
A square skirt for Kaia (if your daughter has a twirl requirement of her skirts, this is a definite must!)
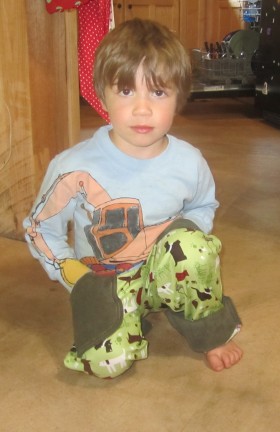
And a few pants for Leif. (He goes through them so fast. Â Being the track-hoe that he is, the knees of his pants take a beating.)
He insisted on lifting his shirt so you could see the waist band.
Then he insisted on a kneeling pose 🙂
Next on the list, some new undies for Leif and a square skirt for ME!
Raising the garden space
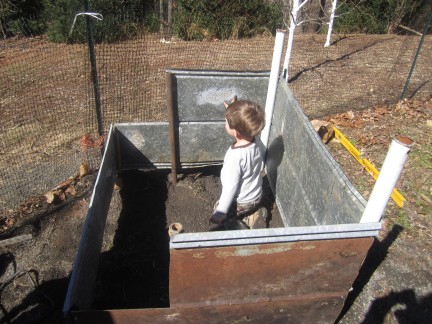
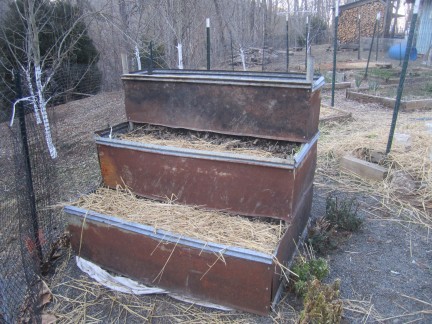
The soil in our garden area is pure clay. Â Seriously! Â Red and solid! Â We put in raised beds when we built the garden area a few years ago. Â Still, I’ve had no luck growing root vegetables. Â So, this year, we built a root bed. Â We used what we had on hand (roofing tin and pipes) and constructed a three tiered bed for our beets, carrots, burdock, and maybe dandelion.
Leif insisted on helping by making thunder noises while running over the roofing tin (over and over again).
Then, he became a backhoe, which little 4 year olds can do, and dug out the root bed area for us.
So far, I’ve seeded the beets and carrots. Â With all this snowy weather, nothing has popped up yet.
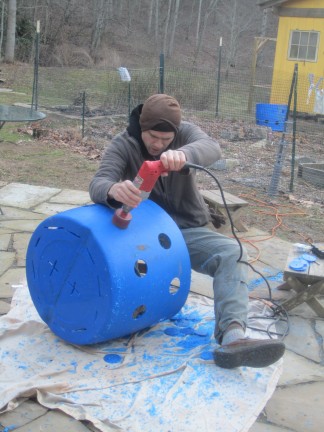
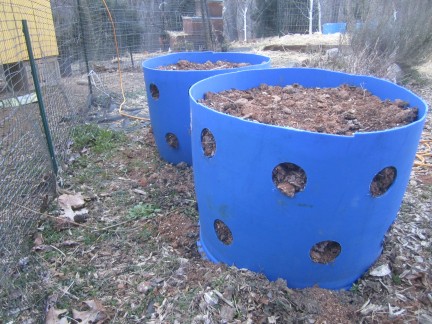
We also purchased some 55 gallon drums to make into strawberry and potato beds. Â The barrels were cut in half and drainage holes were cut into the bottom. Â For the strawberries, Toby drilled large holes in the sides of the barrels for the strawberry plants to grow from.
I’ll put the strawberries in as soon as we get a litter warmer weather.  I may put a borage (one of strawberry’s companion plants) on top of each strawberry barrel, too  The potatoes should be here in a week or two.
I’ll let you know how they all work out!!
Decoupage baskets and a celebration of eggs
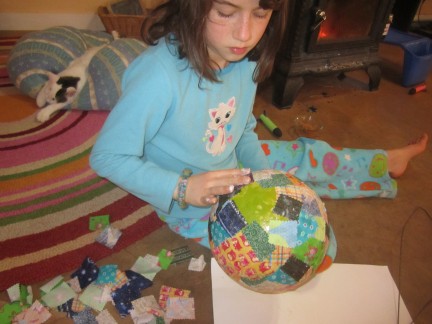
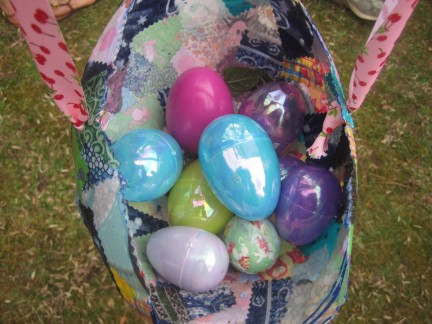
We had a gooey time last week putting together these adorable cloth baskets. Â We followed these instructions, only altering them to make the baskets a bit deeper, and using Modge Podge as the final coat of glue.
Leif tired of the messy, gluey hands very quickly, but continues to pick out fabric pieces for me as I glued them on to his balloon.
After we covered the balloons thoroughly with cloth and glue, we hung them to dry by the wood fire.
When it was completely dry, the kids popped the balloons and removed them from the bowl. Â I WISH I had gotten a video of this. Â The sound that the balloon made as it slowly released itself from the bowl was like a build up to an implosion. Â This sucking sound that made you think the bowl would collapse down to nothing. It was so crazy we all went wild when it happened!
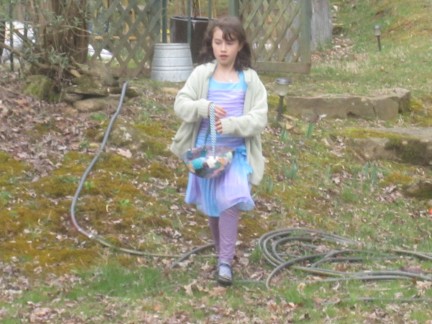
We punched holes in the sides and strung on the ribbon handles… and wore them as hats!

It just so happened that the day after we made these, we headed to a fabulous party, hosted by the also fabulous Ashley English, in celebration of eggs. Â (She is working on her sixth book due out in 2014. Â This one is going to be about handmade gatherings and celebrations, and from the fun our family has had at these parties, this book is definitely going to be a keeper.)
There were, of course, egg hunts! Â Egg hunts in the bamboo forest…
Egg hunts in the gardens…
Egg toss and egg rolling competitions.
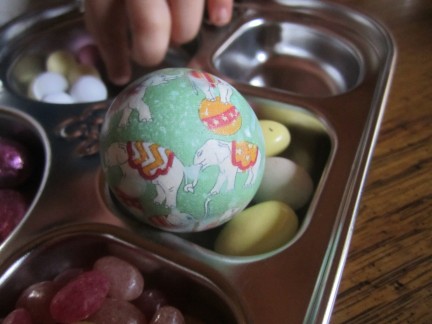
Silk egg dying (Yes! Â You are looking at a hard boiled egg silk dyed with an old neck tie that had elephants on it!!)
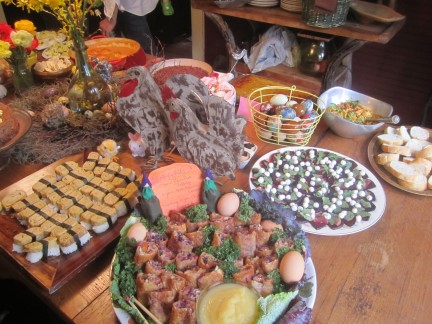
And a table spread fit for a king! Â Everything was either made with eggs or had eggs in the title 🙂 Â We brought a pumpkin flan (yes! Â It was paleo)!!
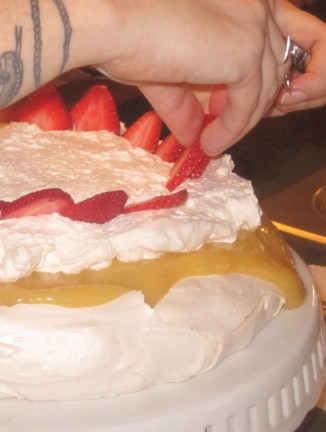
And, to top it all off, a magnificent, melt-in-your-mouth Pavlova! Â (Ashley, this recipe had better be published, because it alone is reason to get the book!!)
(Folks, there were actually two decadent desserts at the party, one made by Ashley and the other by Dan and Jael of the French Broad Chocolate Lounge, and neither of them had wheat!!!  What a treat!!)
“Just one more chocolate, mom??!!”
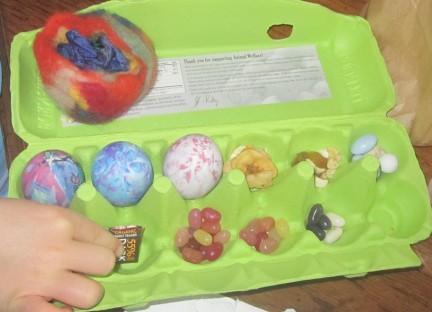
And when we got home, it was time to organize the booty. Â (There are three more silk dyed eggs here, too.)
And, in celebration of the egg, my ladies wanted to let you know how hard they are working now that it is spring.
Hope you had a lovely weekend!
Birch Medicine
Homespun Hat
Blue Food Coloring, Naturally!
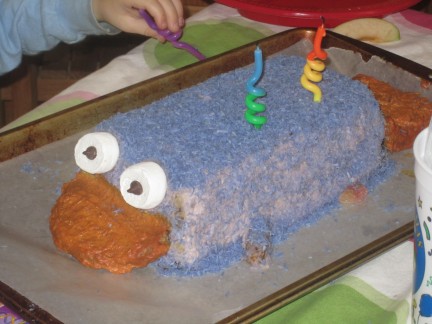
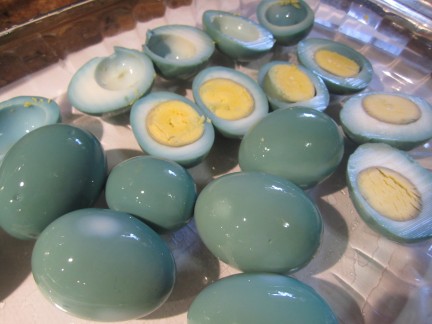
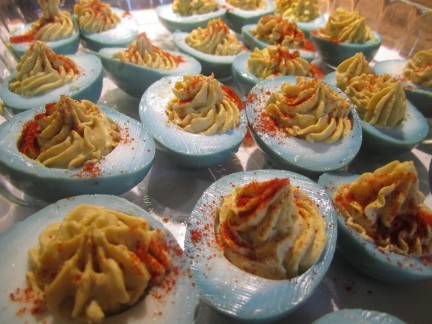
Every year, for my kids birthdays, I make their cake… whatever kind of cake they want. Â I’ve made unicorn heads, construction sites, Ariel the mermaid sitting on an island floating in the water, and more mermaids….. you name it. Â It’s always a fun challenge. Â But, this year when Leif requested a Perry the Platypus cake I was stumped. Â How was I to recreate a little platypus with aqua blue fur without using artificial food coloring? Â There is just no good natural blue. Â Cabbage can be boiled down, but that ends up being more pale blue/grey. Â Blueberries are actually purple. Â Then I found these: Â Butterfly Pea Flowers. Â They grow on vines native to Southeast Asia and are known for their vibrant blue color. Â When steeped in hot water, they color the water a beautiful blue… the perfect blue for Perry the Platypus.
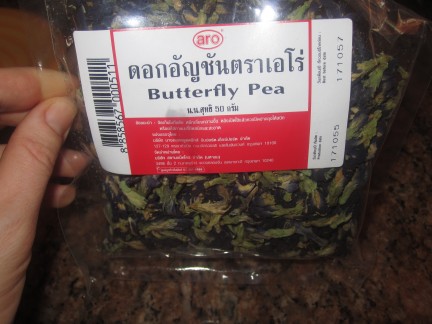
My hope was that the flowers could be infused in oil, too. Â Then I could infuse some coconut oil and use the oil in the frosting. Â But, no such luck. Â The color didn’t transfer to the oil at all. Â I heated them in coconut milk and got a light blue, but not the striking blue I was looking for.
So, I decided to infuse them in water, making a very dark blue with lots of flowers. Â I put this blue water over about 6 cups of coconut. Â I used enough water to coat the coconut, but not drown it. Â Then dried the coconut in the oven at 130 degrees stirring it every 30 minutes. Â I think it took about 3 1/2 hours to dry out completely.
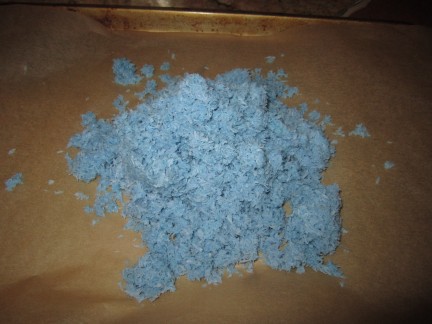
Blue coconut!
And while I was soaking things in this lovely blue water, I decided to throw some hard boiled eggs in there. Â I soaked these for 2 days before the birthday party so that I could make some blue deviled eggs!
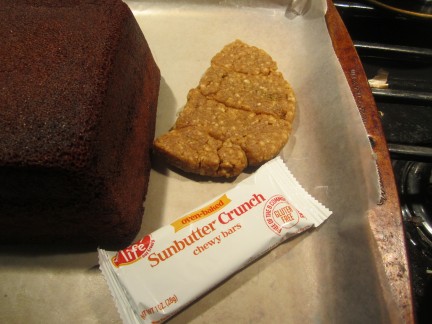
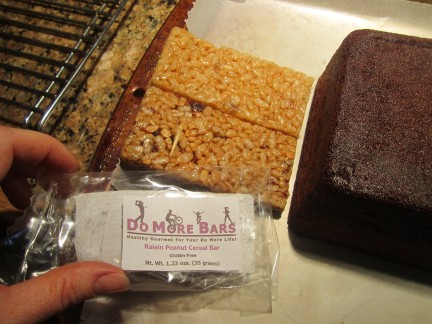
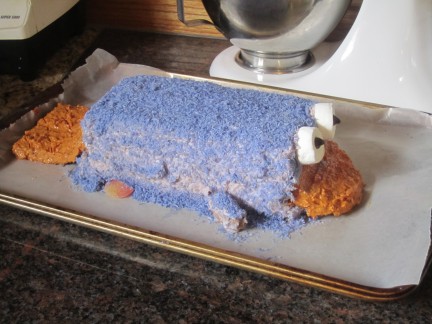
Here are a few other pictures of the process of creating Perry:
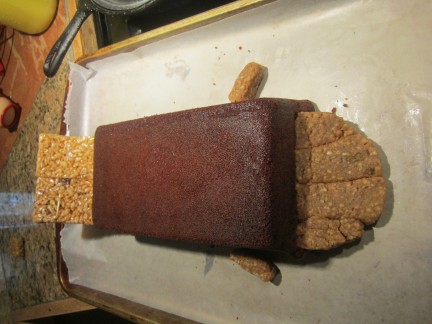
Here’s the pre-frosting set up. The front limbs were also made from Sunbutter bars and the feet from peach gummy candies.
And here’s Perry. Â I put some of the coconut in the frosting as well as coating the whole cake with it after it was frosted. Â It’s certainly not as blue as the real Perry, but I think it turned out pretty dang good!
Leif was thoroughly satisfied with his cake!
Oh, and with his blue eggs!
Filling our days
We seem to have no trouble filling our days with fun indoor activities while the weather is cold outside. Â I’m glad. Â I don’t care to hear the kids moan, “I’m bored!” (I’m sure my mother felt the same way about me 🙂
We’ve been writing letters and numbers in shaving cream on a cookie sheet….. and on his pants, and on his arms, and on his sweater, and on his socks…. (Kaia got into it, too, writing in cursive).
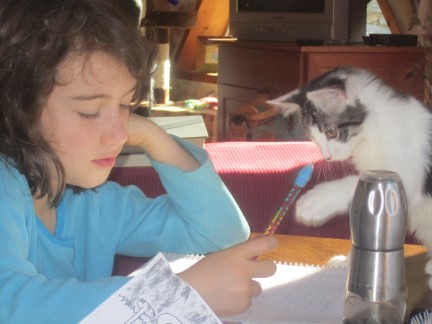
Right now, it’s actually easier for her to write in shaving cream than on paper. Â The kittens are a little too interested in her wiggling pencil.
Kaia and I took a spinning class a few weeks ago and I’m having a blast practicing. Â A friend let me borrow her wheel and this is what I made today. Â It’s my second skein. Â Next, Leif says I have to spin some bright blue yarn so I can knit him a Perry the Platypus hat.
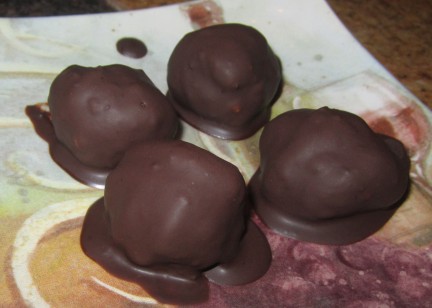
Dark Chocolate Truffles from Hell!
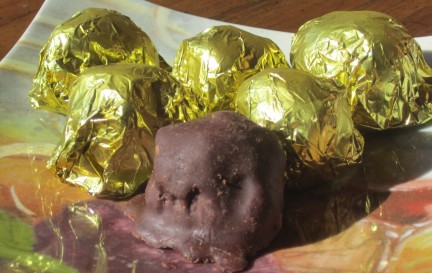
Why are they hellish, you ask? Â Because you won’t be able to stop eating! Â Seriously!! Â Five pounds added to the hips in the last few days, my friends!
So, you still want the recipe? Â OK. Â If you say so.
Truffles from Hell!
- 1 cup coconut cream (Put two cans of unshaken coconut milk in the fridge for a few hours. Â Scoop one cup of the thickest cream off of the top for this recipe. Â You may only need to use one can.)
- 24 ounces Enjoy Life (dairy free) chocolate chips or chunks  (16 ounces for the filling, 8 ounces for the shell)
- 3/4 cup coconut oil (1/2 cup for filling and 1/4 cup for the shell)
- 1/2 cup cordial (I used my home-made Rose Petal Cordial)
- 1/2 cup cocoa powder
- 2 Tbsp cinnamon powder
- 1 tsp. freshly grated nutmeg
