Garden planning

Last year, I really slacked on the garden.  I guess I was just tired of doing it all myself and wanted to focus on other things in the warm weather.  I learned that having a not-so-great garden was just as much work as a full garden.  So, this year, I’m picking up the pace and even growing some new things, too.  I hope to encourage the kids to spend more time in the garden with me, and let them pick out some things they want to grow.

On the list to add to the garden this year is:

  • green beans
  • kale
  • cabbage
  • lettuce
  • arugula
  • spinach
  • malabar spinach
  • carrots
  • beets
  • burdock
  • tomatoes
  • broccoli
  • cucumbers
  • brussel sprouts
  • shelling peas
  • potatoes
  • butternut squash
  • crookneck squash
  • zucchini
  • garlic
  • popcorn
  • watermelon
  • jerusalem artichoke
  • herbs: basil, parsley, cilantro, dill, oregano,  thyme, dandelion
  • and lots more flowers and medicinal herbs.
I’m hoping to build a small green house for starting all these plants as well as a nice deep raised bed for the root veggies.

Have you ordered your seeds or planned your garden yet?  What are you going to be growing?

Being a Trackhoe

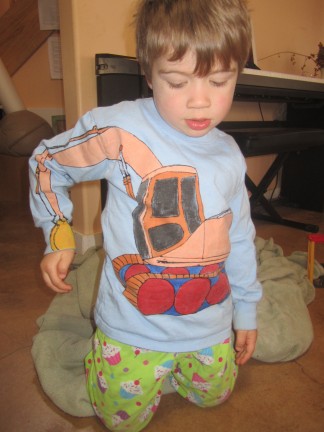
I imagine I’m not the only mom who has to reinforce the knees of her child’s pants because said child spends most of his time on his ‘tracks’ pretending to be a trackhoe.  Leif was more than excited to unwrap his new trackhoe shirt and wouldn’t take it off for three days!  It was a really simple project.  I pulled up  trackhoe images from the internet and found one that I liked.  Then I used a pencil to draw it on the shirt.  I used black fabric paint to outline the image and let it dry for the night.  Then I went back and filled it in with color (again using fabric paint).  Easy peasy!

Hello 2013 and repurposing your tree

Happy New Year my loyal readers!  I hope you have all had joyous holidays!!

We have had a very slow and relaxed time here in the hollar reading books, knitting, playing family games, snuggling kittens…  I felt so lazy 🙂  It’s very hard for me to just chill.

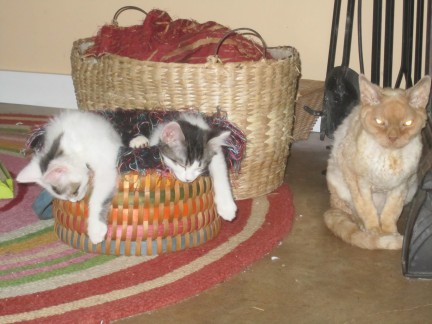
Speaking of kittens, they have been fitting in very well around here.  In fact, last night I found all four cats snuggling on the couch and no one was hissing about it!  There has been a bit of a competition for the only sleeping basket, though.

Cookie Dough and Oreo fit in there nicely together.   It’s a great spot for snuggling and for practicing their ninja fighting skills on each other.

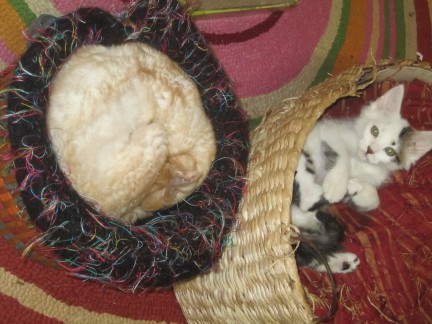
Max, however, felt it was his job to show the little guys how he could make himself into a perfect circle.

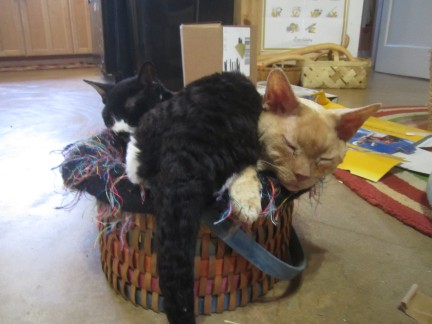
Of course, Isabella wanted in on the action.  Max wasn’t too sure about this.

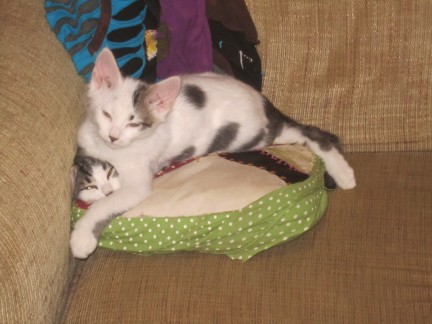
So far, there is no clear winner in the Basket Wars.  Luckily, those not in the basket are finding other comfortable ways to get some sleep.  Well, maybe not so comfortable.

Meowwww!  Ninja attack move #286.

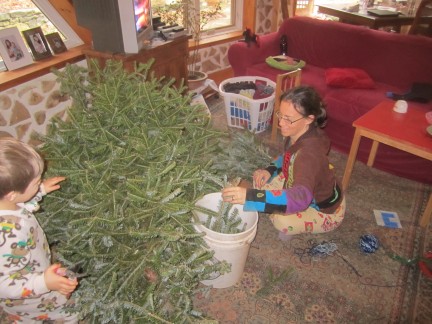
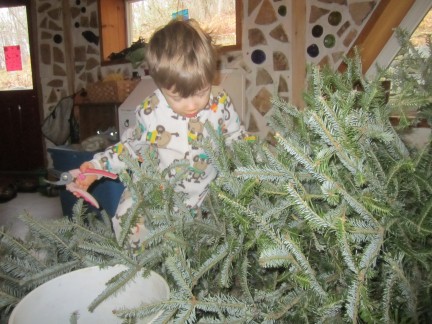
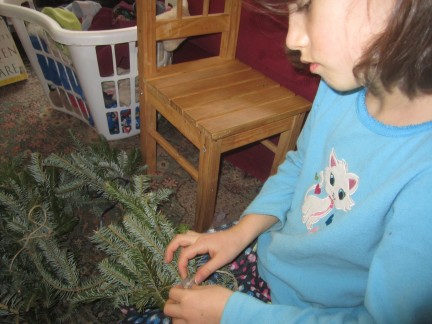
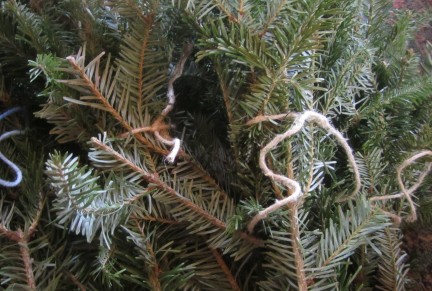
Oh yes, repurposing your holiday trees.  Some years we will get a tree with a root ball so that we can plant it in the yard when the holidays are over.  This year, we got a cut tree and decided to recycle it by making fragrant pine fire-starting bundles.  Everyone helped snip branches, arrange, and tie the bundles.  Kaia even cleaned out the lint trap in the dryer and stuffed some lint into each bundle (lint is a great fire starter).

Many Blessings in the New Year!

Any plans for the year to come?

Fall

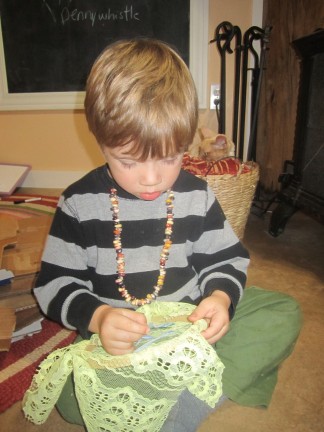
Corn necklaces

Halloween Family Night with home made treats and family games.  (Twix, toffee, butterfingers, and fruit drops… none tasted the like store brand, but they were all yummy!)

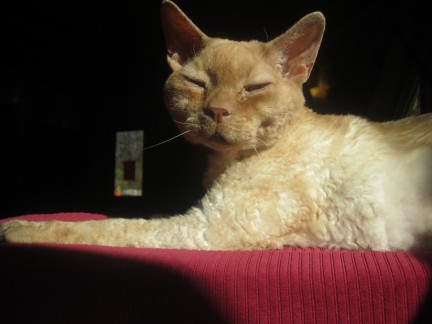
Happy Sunshine Kitties


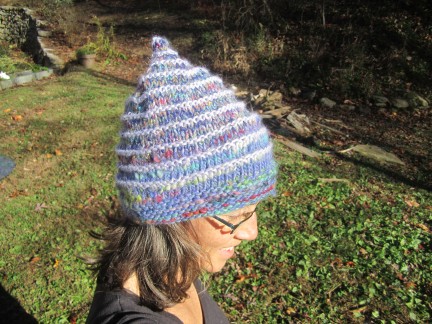
New winter hats

Spy Training

Handstands

Crystal vase and bowl mushrooms

And we are only half way through Fall!!!

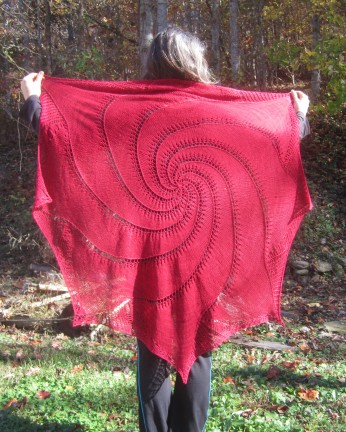
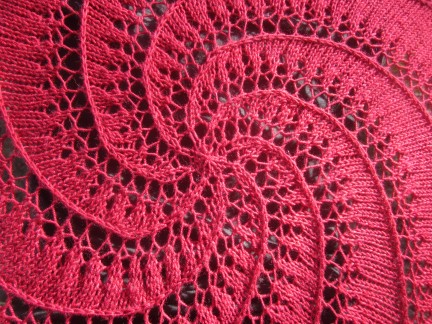
My Vortex Shawl

I started this during the Summer thinking it would be a fun little side project.  Little did I know that it would consume me for months!  This thing was a beast.  I don’t think I’ve ever made anything so large, or knit with such thin yarn (I’m a worsted and bulky kind of girl).  But, I love how it turned out.  Now I just hope I wear it!  You can see my details on Ravelry.

I pinned it to the bed and sprayed it lightly with water to help it keep it’s shape.

The Blue Enchantress

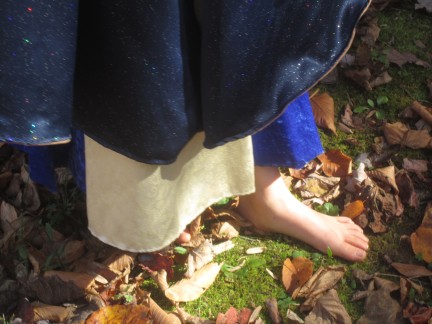
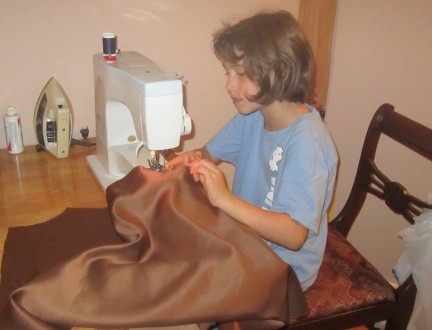
Kaia has become smitten with the Juniper series by Monica Furlong.  She decided, like the main character in the first book, that she wanted to create her own cloak.  Over the past month and a half, she has been cutting, stitching, harvesting, and producing an amazing creation.

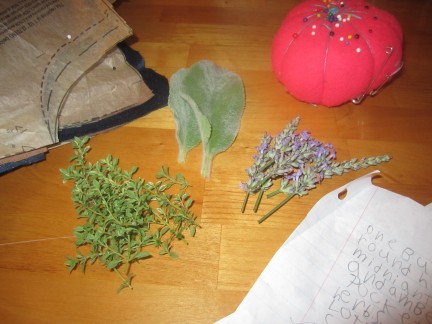
Of course, we didn’t plan to sheer the sheep and weave the wool, like Juniper did.  We just went to Jo Ann’s fabric store and bought some 🙂  But, she did harvest herbs from our land to stuff in the secret pockets. (Lavender, thyme, lambs ear, rose petals, and a few others)


And she used a button that Toby made for her out of Maple and Black Walnut.

And she made the button loop out of yarn that a friend of ours spun from her angora bunny.

I think it’s fabulous and I’m so proud of her!  She’s quite a lady!!

Soap Makin’

This time of year, as the garden settles down and the weather cools, I always start the soap makin’!  Anyone who receives holiday gifts from me can pretty much expect a bar of soap. 🙂

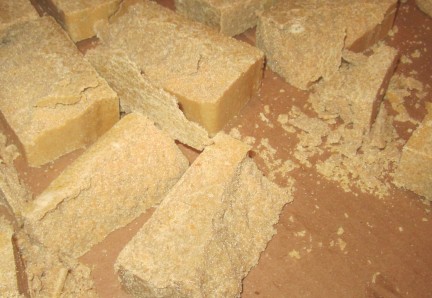
This year, I thought I’d deviate from my tried and true recipe and experiment with a new one I found.  It sounded so delicious!!  Pumpkin & Coconut Milk Salt Bar…. like the kind of soap you’d find at a high end spa, or something like that.  Well, I don’t know what I did wrong with it, but it turned out a flop.  When I tried to cut it, it just broke into crumbly pieces.

It still smells delicious.  Kaia recommended we break it up and put it into little jars, with ribbons and little spoons, so that people could using it as a soapy salt scrub.  She’s my resourceful little one!

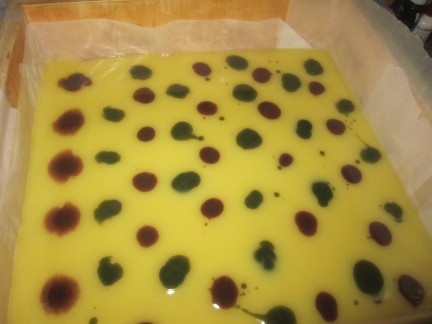
So, feeling the need to redeem myself and went back to my favorite recipe.  We whipped up a batch of Candy Cane soap (using peppermint and spearmint essential oils). But, this time, just before pouring it into the mold, I took out two cups of soap and colored it.  Into one cup of soap, I added a tablespoon of madder root powder.  In another cup I added 2 teaspoons of Spirulina powder.  The result was red and green…

These were put into squirt bottles.  Once I poured the main soap into the mold, we used the squirt bottles to make dots with the colors.

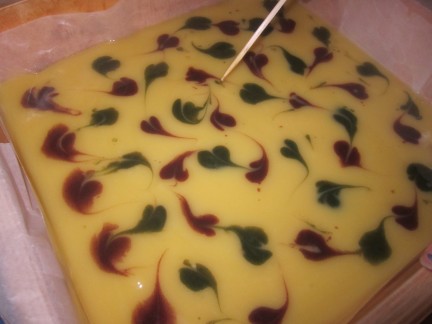
Then, we dragged a bamboo skewer through the dots to create hearts.

We made a double batch and poured the extra into a Tupperware.

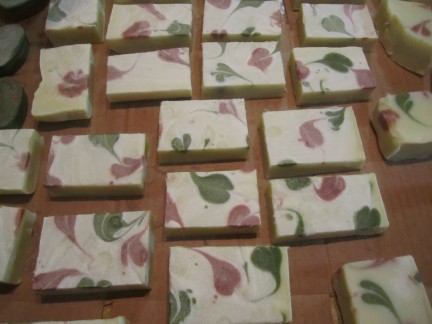
Then, with the small amount of the colored soap we had left over, we poured it into silicone molds and swirled it up!

Usually, this recipe has cured enough in 24 hours that you can pop it out of its mold and cut it.  Not this time.  Even after 3 days it still felt like modeling clay.  I ruined a few pieces just trying to get them out of the molds.  I even stuck it in the freezer to try to harden it up.  What is it with me and soap these days??!!  So frustrating!

Anyhoo,  I still ended up with some pretty nice soap.  I love how the hearts turned out.  If I try it again, I think I’ll make the circles smaller so that there are more hearts on each soap.  I just hope it finishes hardening up fully!

Leif’s new vest

Well, I couldn’t make Kaia a sweater without making something for Leif.  He loved her owls so much he insisted that I knit him a vest with an owl on it.  I think it turned out nicely.  I knit it a size too big so he could wear it for more than one winter.

The pattern can be found on ravelry here.

Tincturing Black Walnut

Black Walnut (Juglans nigra) trees are all around here.  This time of year they are thumping on roofs, smashing into cars, and sending the squirrels into a frenzy.  I was first introduced to Black Walnut as a medicine over 15 years ago while in herb school, though it wasn’t until we moved onto our little homestead, and had outdoor animals to take care of, that I really got to know it.

Black Walnut is traditionally used as an anthelmintic (That’s your vocabulary word of the day.  Use it the next time you are talking to your vet or doctor about worms and they’ll think you are super smart! 🙂  )  That basically means that it works by expelling parasitic worms from the body.

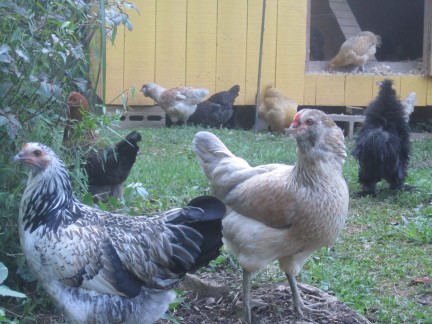
Animals that spend most of their lives out doors (in our case, our farm dog and our chickens) are super prone to getting worms.  I’ve talked about my use of Black Walnut with Suki and heart worm (see the comment section of that post), but I also use Black Walnut as a dewormer for our chickens.  Twice a year, in the spring and late summer, when the weather is humid and muggy, I give them a Black Walnut preventative in their water (60 drops in a gallon of water) for two weeks.  If I ever notice those classic symptoms of a wormy chicken (sluggish, droopy wings, decrease in laying), I will give them another week of it.  It works wonderfully!

Black walnut tincture can cost $10-$15 an ounce in the store…. I can make a quart of it (32 ounces) for about $10.  That’s about .31 cents an ounce!

So, how do you do it?  It’s easy!

Here’s what you need:

  • Black Walnuts (I used about 12 to make a quart of tincture)  You can harvest them this time of year.  It’s easiest to grab them off the ground after they have fallen, because they grow pretty high up in the trees.
  • Alcohol (I like to use 100 proof vodka, but any alcohol that is 80 to 100 proof, or 40-50% alcohol is fine.  Since my chickens aren’t picky about the taste of their tinctures, I just use the cheep stuff.  This 1.75L bottle cost me $18)
  • A large jar (I’m using a 1/2 gallon mason jar)
  • Sharp knife
  • Wax paper
  • Gloves (though you can see, mine are mysteriously absent from this picture.  Oh, yeah.  I wasn’t wearing any.)

The state of your black walnuts is important.  You want them nice and green.  A black spot like this on the outside:

will look like this inside.  Ewwwww!  Though the chickens might not mind tinctured worms, I do!

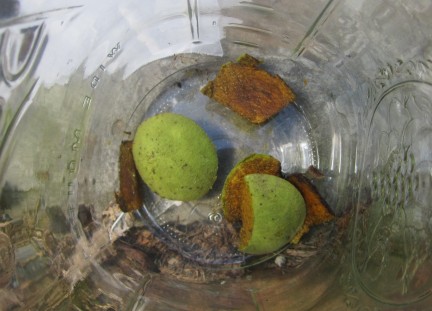
This is what you want your walnuts to look like when you cut off the hull (or outer layer).

Cut the hull off of the walnuts and put the hulls in your jar.  You will see the black walnut start to darken before your eyes!  Seriously!  It starts oxidizing immediately!!

I begin pouring the alcohol into the jar as I’m cutting the hulls.  This keeps them from oxidizing so rapidly in the air, and puts all the good medicine in the alcohol.

So, the gloves.  Yeah.  It’s a good idea to wear gloves while you are cutting Black Walnuts as they can stain really badly.  I forgot to pick any up at the store, so I just went for it.  I think, from all the Black Walnut juice that I soaked up through my skin, I can safely say that I am now free of worms!

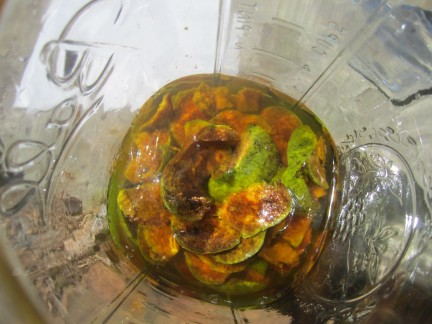
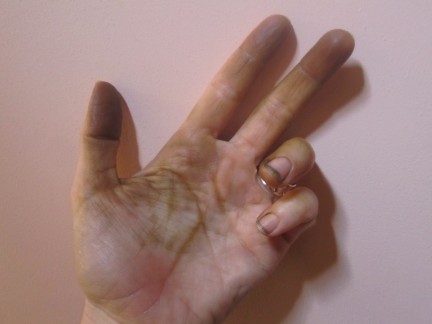
By the end of the cutting process the color of the alcohol had already changed dramatically, as had my fingers.

Lovely!

Once you cut the hulls, put them in the jar and cover them with the alcohol, you want to put the top on the jar.  A layer of wax paper goes in between the glass and the lid.  This keeps the alcohol from reacting with the metal.

You will also want to label your tincture!!  Always label!!  ‘Cause you might just forget what you put in there and what a waste it would be to have to throw it all out because you didn’t label it.  On my labels, I always put the name of the plant, along with the percentage of alcohol, and when it will be ready to strain.  (Sometimes, on you might see things on tincture bottles like 1:2 or 1:5…. that is the scientific method of tincturing and it means amount of herb:amount of alcohol or menstrum used.  We’re not doing that here.  We’re keeping it simple.)

Put your tincture in a shady place indoors and shake it gently for the next two weeks.  Here is mine, happily resting on the kitchen counter.  (Yes, those are many bottles of home made hard apple/peach cider that you see in the background!!  You are very observant!)

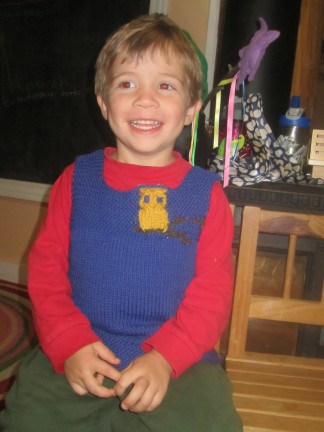
About 15 minutes after taking the above picture, Leif asked if he could be in one of the pictures with the Black Walnut.  Check out the color difference already!!

And my hands…… My fingers are about 10 shades darker as I type this!!

After letting the tincture sit for 2 weeks, you can strain the hulls out.  I use muslin/cheese cloth to get all the little bits out of the fluid.  Save your tincture in a clean, labeled jar (don’t forget that layer of wax paper) and store in a cool, dark place.  You can bottle it up in little dropper jars for easy use.

See, wasn’t that easy???

(The happy, worm-free ladies say ‘hello!’)

Oh, and unlike many of the chemical dewormers for chickens that are on the market today, you can still eat the eggs of your chickens while they are taking Black Walnut tincture!!


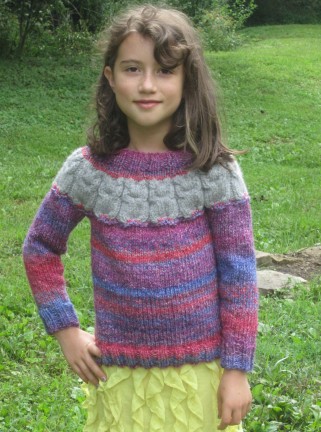
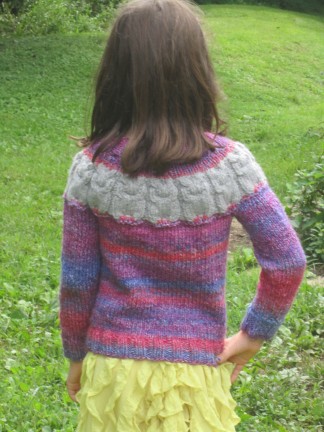
Kaia’s Owl Sweater

After knitting myself an Owl Sweater last winter, Kaia has been asking for one of her own.  It’s such a fun and quick knit, how could I refuse?  Here is the kids owlet pattern.

Kaia picked out the colors and I love how it turned out!  You can’t tell in these pictures, but the grey has silver sparkles in it!!

She wanted to wear it today, but it was up in the 80’s!  She may have a good lesson in patience if this heat continues through this month!

Raspberry Figgy Puddin’ Fudge

Right now, we have raspberries and figs coming out the wazoo!  The raspberries get eaten by the fist full, canned up, put in smoothies…..  I’m sure I can do the same with the figs, but this is our first year harvesting them, and I’m still learning what to do with figs.  I mean, you can only eat so many of them without your bowels talking to you, you know?


So, I was having a hankering for something sweet, the kitchen counter was covered in raspberries and figs, and my food processor was calling to me.

Raspberry Figgy Puddin’ Fudge  (makes ~40)

  • 1 cup almonds
  • 1 cup dates (chopped)
  • 1 cup fresh raspberreis
  • 10 fresh figs
  • liquid stevia
  • 1/2 cup cocoa powder
  • 1/2 cup unsweetened shredded coconut
  • 1 tsp vanilla extract
  • 1/2 cup coconut oil
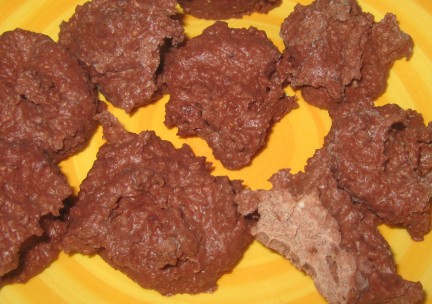
Put your almonds in the food processor and grind them up to a pretty fine consistency.  Then, put in the dates and do the same.  Add the raspberries, figs, and 60 drops (that’s about 2 squirts) of stevia and blend it in with the almonds and dates.  You should have a pretty pink mush 🙂  Add the cocoa powder, coconut, and vanilla and keep pulsing.  Then add the coconut oil and blend until smooth-ish.
Place large (tablespoon sized) dollops of the mix onto a cookie sheet covered with wax paper and put this in the fridge for about an hour.  Once they have firmed up, you can put them in a ziploc and keep them stored in the fridge.  I can’t tell you how long they keep, ’cause we ate all of them in 24 hours 🙂
I really loved the flavor, but the raspberry seeds were a tad bit annoying.  Next time, I might try other fruits, like banana or mango…. or maybe avocado???


Settling in

We’ve had a wonderfully full summer with activities to keep us very busy.  But, with perfect  timing, the weather has started to turn a bit cooler just as we are beginning to settle in to our school year and we are feeling ourselves begin to calm down a bit.

Leif LOVES his ‘school’ time.  He fusses when I put the books away.  He and Kaia spent an hour playing with his new wooden letters yesterday.  I sat and knit while she did the lesson for me 🙂

We’ve been putting up our harvests:

Raspberry/Elderberry Mead, Raspberry Jam with chocolate mint, Raspberries and Peaches in a light syrup, Peach/Apple Hard Cider, Cinnamon Peaches, Peach/Lavender Butter, Green Beans, Pickled Green Beans…

Peaches and Raspberries in a light syrup

And watching our little foster kitties grow big and strong (and very mischievous!)

Wilbur at maybe 3 weeks old

Little bellies getting bigger

Discovering new activities!

Kaia is finishing up a class on stage make up

Looking Older

Zombie Horror Makeup

on the left is 'plump', on the right is 'thin'

This was from Glamour day

We’ve been visiting farms and just enjoying each other’s company.

I have a general feeling of excitement about this Fall without any particular reason why.  I love this time of year. 🙂

What have you been up to?


My new habit

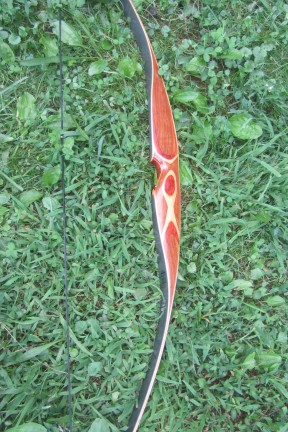
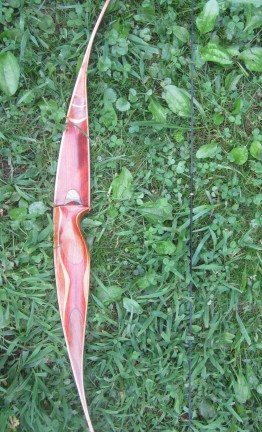
This is my new bow!  I love it!  If I could, I would marry it!  I found it on Ebay and took a chance.  Turns out it was a fabulous find.  It’s a Hoyt Pro-Select 300 Rosewood bow, and I have become addicted to using it 🙂

More Summer Bests

And of course, there are s’mores by the bonfire.

The way to make the perfect s’more?  Put your chocolate on your graham cracker (or soft ginger bread cookie, in this case) and place it on a warm rock by the fire.  This will melt the chocolate.  Then slowly roast your marshmallow over the fire.  Place 3-4 ripe raspberries on the melted chocolate, cover with roasted marshmallow, and top with another cracker.  OH YUM!

The kids crashed hard tonight after a long evening by the bonfire.  They are going to hate me when I wake them up at 3 am to watch the Perseids Meteor shower!


Summer’s best

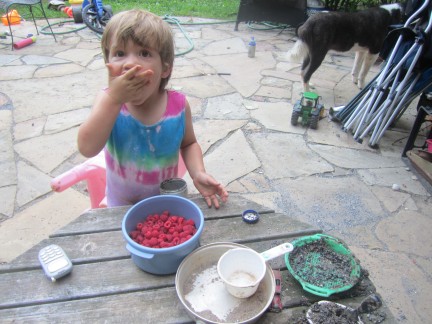
Raspberries and mud pies.  It doesn’t get much better than that.

We have been getting 1-2 quarts of Raspberries every day for many days now, and we have many more days of picking to go!  We’ve made raspberry jelly, raspberry mead, raspberry ice cream, topped our salads with raspberries, and eaten raspberries by the handful!  I never get tired of raspberries.

Gettin’ Busy

Toby and the kids have been at the beach for the past 4 days.  I decided to stay here, in the cool mountain weather, to have a little time to myself and get some stuff done.  (I love ‘getting stuff done’ time 🙂

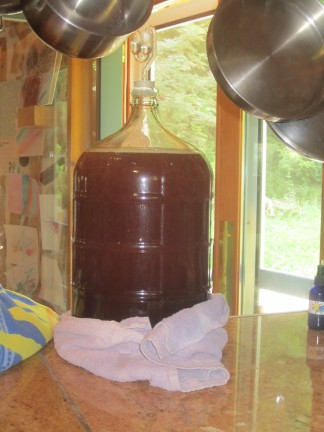
Aside from aerials, movies, a massage, archery practice, and other joyful stuff, I also made 5 gallons of Elderberry/Raspberry mead!!!  I can’t wait to see how it turns out!  (Waiting is a super hard thing when you are supposed to let it age 6 – 12 months!!  I always cheat and have some as soon as it’s done fermenting!)

I also canned up some green beans and jelly (elder/raspberry again because I had a big crop this year!)

I was inspired to can because of my friend, Ashley English.  Aside from being a fabulous author, wonderful homesteader, and mama to one of the cutest little boys around.  She also throws stupendous canning parties!!

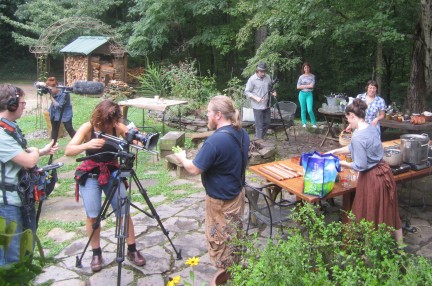
I was super happy to be invited to her pickling party yesterday.  Whole Foods came out and filmed the party for one of their upcoming online shows, and other photographers were their capturing great pickling moments for her new book.  (Ashley, Kaia is taking a stage/movie makeup class…. next time I’ll have her out there with her little make up kit to make sure each of us is camera ready 🙂

I have to admit, I felt pretty important will all the cameras around!

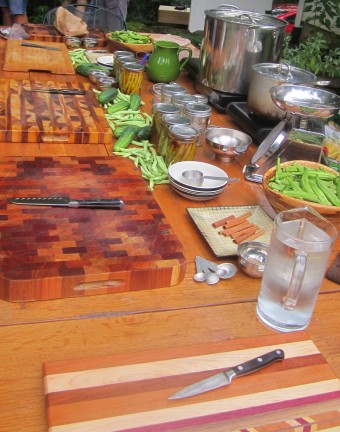
We sat down around a table while Ashley talked about canning preparation and the ingredients we would need.  We created beautiful jars of canned okra (Moroccan Road Okra, she called it) and then crafted our own labels.

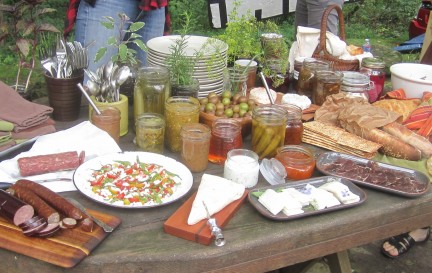
While this was going on, we also chowed down on FABULOUS local and home made foods (well, most people ate daintily, but I seriously chowed down!)  There were all kinds of  home canned foods, from pickles and okra to kumquats and cherries.  There were home made breads, artisan cheeses, salami, and kielbasa.  It made me moan!!

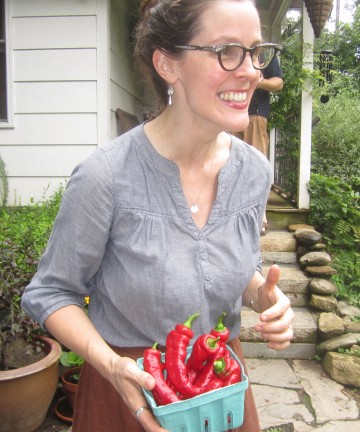
This is our beautiful host!

The family should be pulling into the driveway any minute now and I can’t wait to get some hugs and snuggles!

Have a beautiful week!


Firefly Gathering

This summer, Kaia and I decided to consciously study survival skills.  What would we do if we were without our normal comforts, how would we survive?  What if she were lost in the forest?  What if she had to find clean water… food… fire…

I began a long list of things that I would like us to learn.  Things they don’t teach in schools that are supposed to teach our kids how to ‘survive’ in the big world.

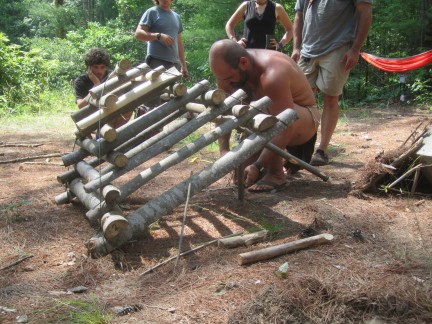
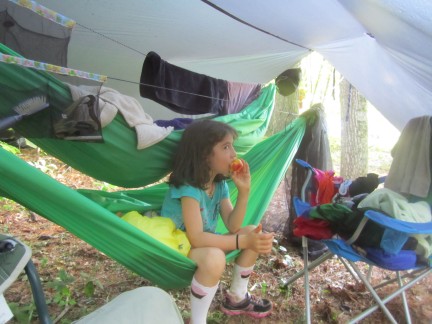
This week, we had a fabulous opportunity to work on this list at the Firefly Gathering.  Only 50 minutes south of us, once a year, is an amazing gathering of people sharing their primitive survival and sustainable living skills.  So, Kaia and I packed up our hammocks and headed out.

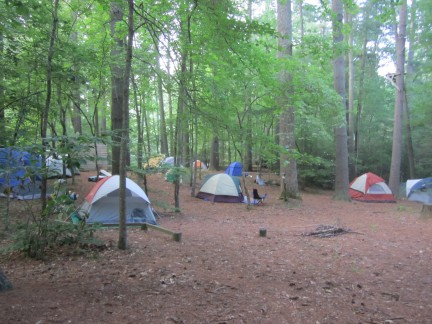
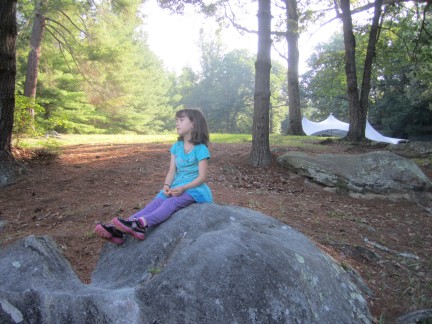
During the 2 days we were there, the woods filled with tents, hammocks, and make-shift living quarters.  This picture above was taken as we arrived and the woods still seemed quiet.  We arrived a little early, so we had some time to wonder and explore.

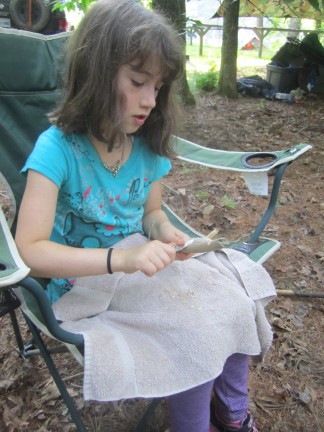
We learned that there are many trade blankets and barter circles, but Kaia and I arrived without bringing anything to trade.  So, she quickly gathered sticks and began whittling.  At the trading blanket that we went to, people were looking to trade things like hand blown glass flutes, and hand crafted jewelry and medicines.  I was worried that no one would want to trade for a simple hand whittled boat.  But a sweet mother went and got her tie-dyes specifically so she could trade something with Kaia.  Very kind!

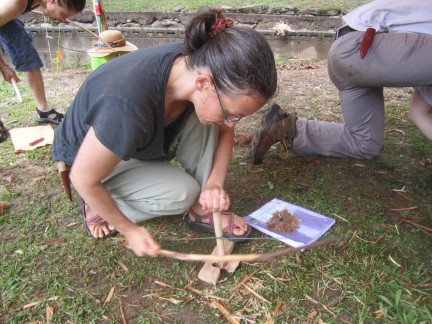
Kaia and I stayed for only two of the 4 days.  Her birthday is the same weekend as the gathering, so we left early to make cake and have a party.  But, while we were there, I took a class on starting a fire with flint and steel.  VERY cool!

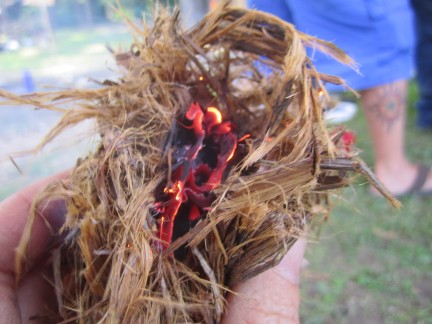
Flint rock, piece of broken steel file, and my fire!!

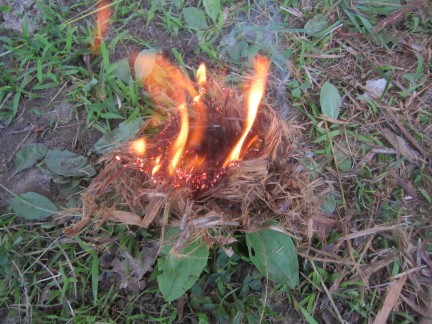
Getting the fire going with a tiny ember.

It felt so empowering and satisfying to get a fire going with just a rock, a piece of steel, and some cedar bark!  I’m planning on making a little kit to carry with me, so watch out people!!

My second class, which Kaia took with me, was on snares and deadfall traps.  It was a fabulous class.  I think I’d like to get a book on this to really study some of the traps and snares in more detail.

Kaia, blocking one side of her figure 4 deadfall trap, so the prey has to enter on the side that will trigger the trap.

This is another fancy trap, I think the teacher said it originated in Africa.  Yes, our teacher wore only a leather loin cloth.  🙂

Snack break.

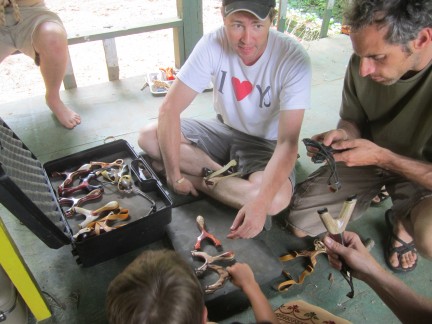
The third class I took was on making and using slingshots.  I really had no idea how potent slingshots could be.  I always thought of them as toys, but man, these things really packed a punch!  We started with a Y branch of a tree, whittled it down, added some rubber bands, and a leather pouch (to hold your ammo).  I was surprised how similar it is to archery in how you stand and aim.  I was able to hit targets pretty accurately.  The teacher is a well known archer and sling shot champion.  He also creates the most beautiful slingshots I’ve ever seen.

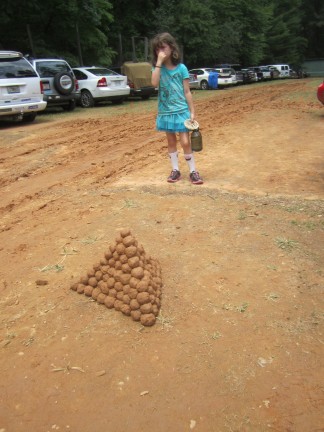
Mud ball pyramid, created after a heavy rain turned the parking lot to a mud pit.

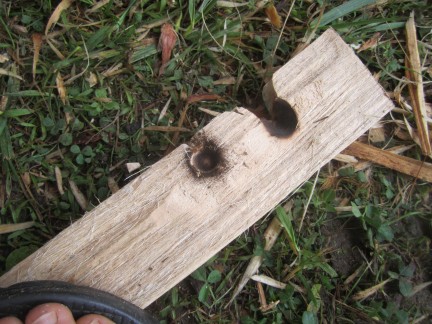
My final class was on starting fire with a bow drill.  We created all of our equipment.  I have to say, flint and steel are so much easier.  I worked my butt off and was able to get lots of smoke and some nice embers, but I just could not get the fire to take.  By the end of the class, my hands had blisters and my arms were worn out.  Very fun though.  I need to practice at home so I can do it if I ever need to.

While I was doing all of this, Kaia was also taking classes on basket making and wilderness survival skills.  We both want to go back for the full 4 days next year!!!


Knitting for kids

I’ve been knitting for less than 4 years, but I love it so much!  It is such a soothing thing, the repetitive motion of the needles.  And seeing the finished product, this thing that I’ve created with my own hands, gives me such satisfaction.  I think this is such an important life skill for our kids to know.  Not just with knitting, but with the creation of anything from their own hands.  So many adults feel powerless to do things because they were never given the skills as kids.  “Oh, I can’t build something like that.  I don’t even know how to use a hammer.”  “I don’t think I could ever learn how to knit/sew/cook/build/craft”

This semester, at Kaia’s homeschool co-op, I’m teaching a kids knitting class.  I have 10 girls between the ages of 7 and 15.  Some have knitting experience, but most are beginners.  Right now, we are simply learning the basic knit stitch but it’s so wonderful to see their faces light up when they get it.  They may only get a couple of rows knit in the hour long class, but each class they build on that and their confidence in their new skill grows.  I’m hoping that, like me, they will find the joy in it to continue even after the class is over.

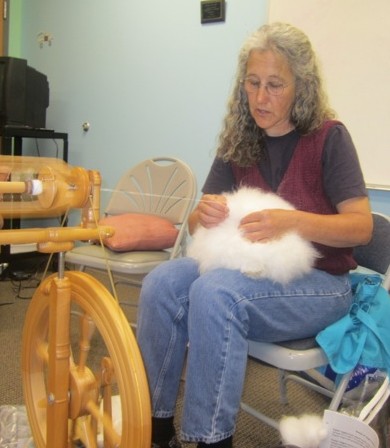
In today’s class, we took a break from the actual knitting to learn a little bit about where the yarn comes from.  A generous spinner, Lorri Helms, brought in her spinning wheel and two of her angora bunnies and volunteered her time to give us a spinning demonstration and talk about angora fiber.  The kids (and adults!) had a blast!

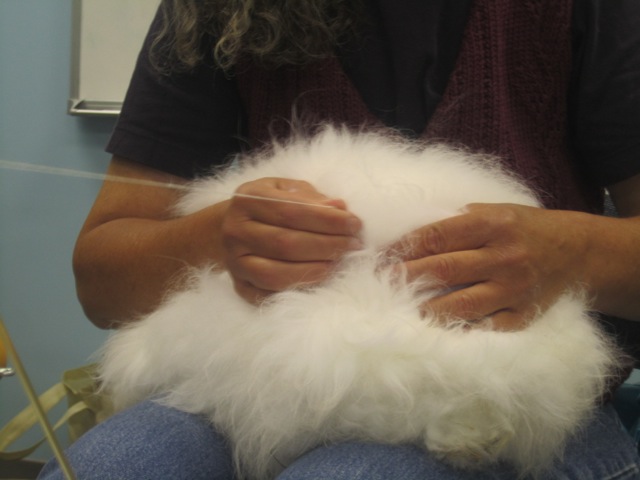
Yes!  That is a bunny on her lap that she is spinning from!  The loose fur comes right out.

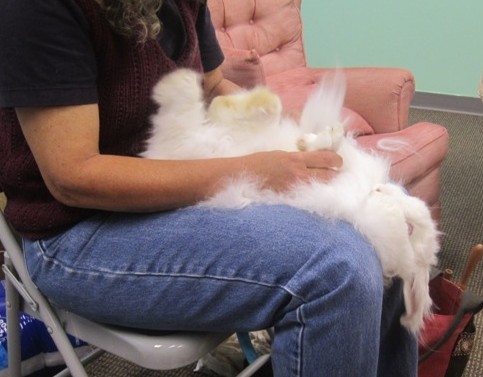
She also talked a bit about caring for angora bunnies, and demonstrated the art of nail clipping.  Too funny!  He seemed to enjoy relaxing on her lap.

The girls then got to try their hands at spinning.

But, most of all, I think they liked petting the incredibly soft bunnies.


The importance of knowing where your food comes from…

One thing I promised myself when I began eating meat again was that I would only eat meat that was ethically raised and killed.  Grass feed, free-range, humanely treated.  I thought, by purchasing my meat from the local health food store, that I was getting just this kind of meat.  They have all kinds of signs about organic this and free range that.  But, a few months back, I asked the butcher to show me which meat was grass fed and he responded, “Right now, none of it.”  So, I asked for him to show me the free-range chicken and he said “We don’t carry that.”  I was floored!  I know it was my own assumption that got me into this situation, but still!  I asked about the sign hanging above the meat cases that talked about the importance of grass fed beef and his explanation was that they occasionally work with farmers who raise their meat that way, but in general, their meat was the same stuff you would get at any supermarket, it just had no growth hormones or antibiotics.  Well, that really means nothing to me if the cow is still raised in a tiny stall, standing belly deep in its own excrement… that is not the kind of farming I want to support.   So, I set about trying to find a local meat farmer who could meet my standards.

This Saturday, we took a trip only a few miles down the road to Beulah Farm.

View from the porch

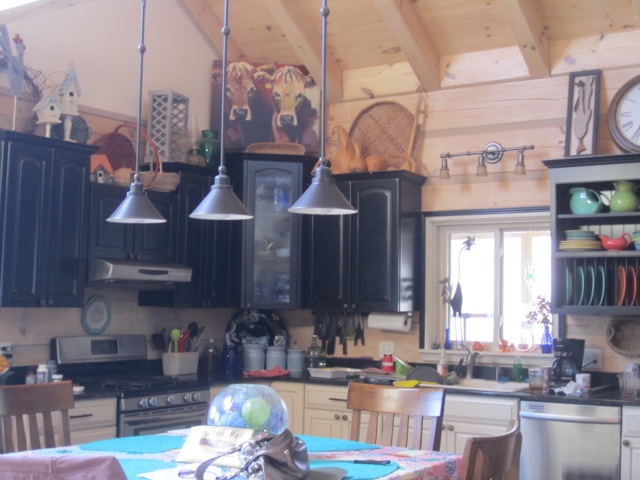
A farmer's kitchen. Check out the picture in the upper center.

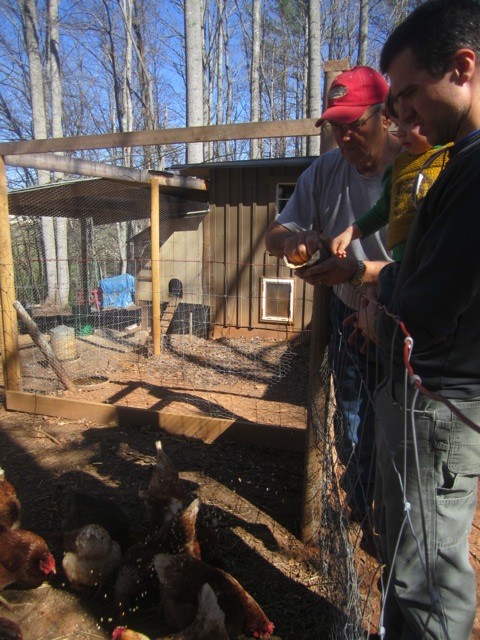
Farmer John, Toby, and Leif feeding the happy chickens.

We were greeted with a hearty handshake by Farmer John.  He talked with us about the importance of knowing where your food comes from and the health benefits of grass fed beef and pasture raised pork.

Then, we hopped in his truck and drove out in the pasture to meet the cows.  He called them ‘his ladies’.  They have acres of green grass to roam.  Their eyes were bright and they seemed to be smiling.

John talked to us about the butchering process.  He brings only one cow at a time to his butcher, with whom he has a personal relationship.

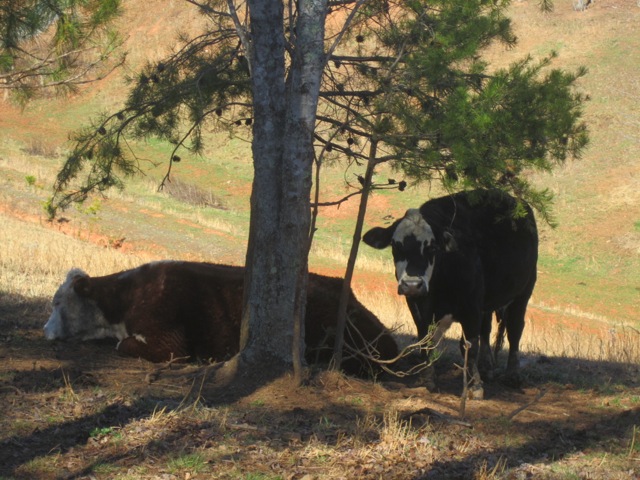
This is one of his bulls. Doesn't he look like a panda bear?

We ended up with 60 pounds of beef and 30 pounds of pork, and couldn’t be happier!  If I’m going to be a meat eater, then this is the meat that I want to be eating!!


It’s done!!

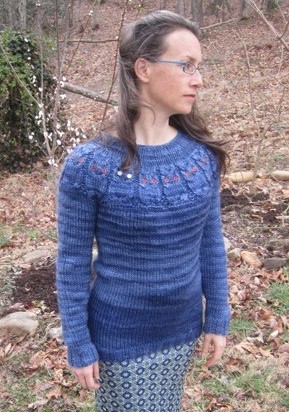
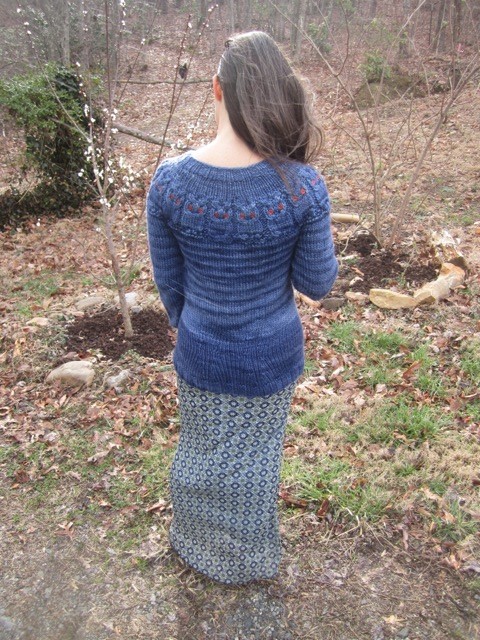
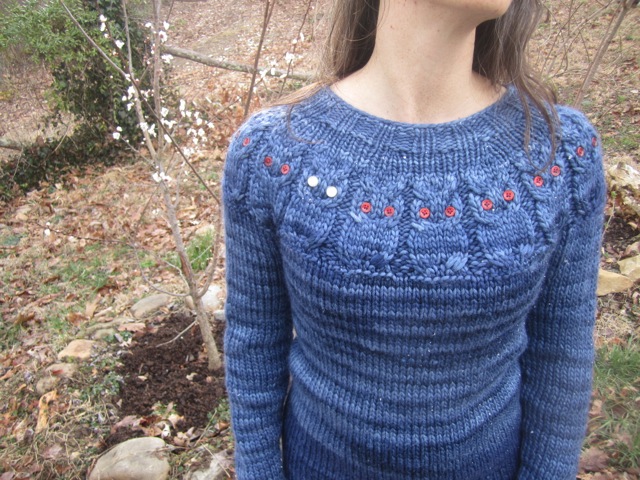
Finally, I’ve knit myself a sweater!  I’d been eyeing this pattern for a while and decided to take the plunge a few weeks ago.  I’m so happy with the way it turned out.  My only problem is that people notice it when I wear it, so I can’t wear it everyday like I’d like to, or they’ll think I never change 🙂  Here is the pattern for the Owls sweater.

Yes, one of the owls has different eyes.  He’s the leader of the pack!  He needed something to distinguish himself from the others 🙂

Toby was so impressed that he’s asked me to knit a sweater for him.  I’ve chosen the Cobblestone Pullover, but I’m going to knit all the way up, instead of changing to purl.  I’m excited to get started so I need to drag him to the yarn store this weekend to pick out his yarn.


Blue Back Hoe Undies

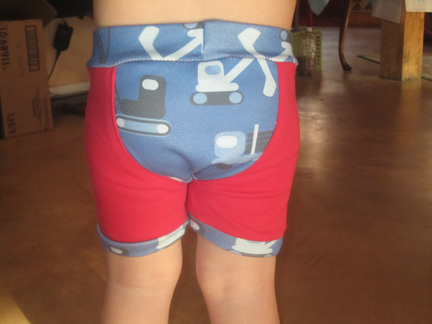
The other day, Leif told me that he would start using the potty more if I could make him some blue back hoe undies.  I said, ” you got it, buddy!”

Behold!  Blue Back Hoe Undies

Cutest Butt Ever!  One day, he’s is going to get tired of me chasing him around the house trying to grab those cheeks!!

Oh, the back hoe fabric is from Spoonflower and the undies pattern is from Fishsticks Designs.

Hanging chairs

From the moment my daughter saw this in a magazine months ago, she has been begging me to make one for her.  So, this morning, since we have been working on types of triangles and degrees of angles, I thought we’d work it into todays lessons.  I planned on making a tutorial for you all, but I messed up so many times, I’m not sure how they ended up looking like they did.  But, basically, I took a 1.5 yard rectangle of cotton canvas and cut it on the diagonal, to form two right triangles.  Flip one of the triangles over so that the longest of the 90 degree angle sides are together.  Then, I sewed these up on the longest edge (that is not the hypotenuse).  That gave me one large isosceles triangle.  Then I sewed the two bottom tips together and put on a circle bottom.  I finished the edges with a nice trim and sew on a nice strong webbing for a loop to hang it from and voila.  Personal hugglepods at a fraction of the cost.  I know this sounds totally confusing, but if you draw it out on a piece of paper, it might help visualizing it.

Happy kids played in their new hanging chairs all afternoon.

Hand Made Holidays

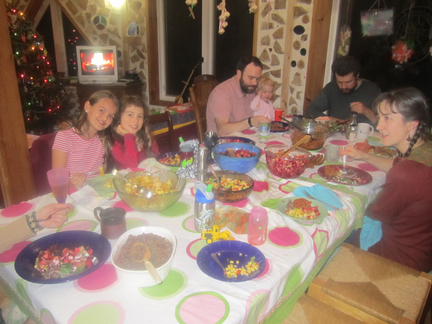
What beautiful holiday celebrations we have had this year!  I am so grateful for the time that I have been able to spend with my friends and family.  We’ve spent many days traveling to others houses to participate in their revelry and had a wonderful time!  At our own home, we had a small Winter Solstice dinner with friends, old and new.

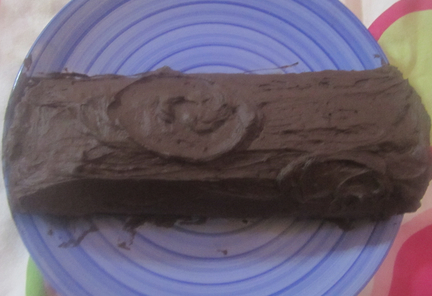
Followed by a decadent, chocolate yule log cake, of course.


Ok, and I have definitely been feeling uber-crafty this year.  I love to give hand made gifts!!  I feel like they ooze with love and comfort… I hope the recipients feel that, too, cause this year, we couldn’t help ourselves.  There was…

Rum infused with Banana and Vanilla

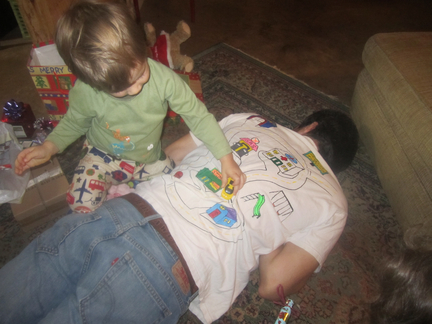
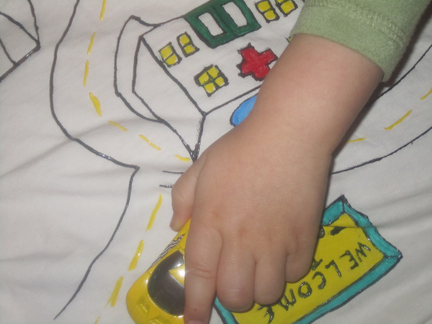
A Car Shirt for Dad to enjoy massages more often

And even when Toby sat up, Leif just kept on driving!

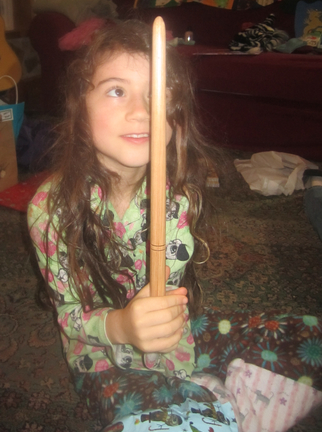
Toby turned a magic wand for Kaia

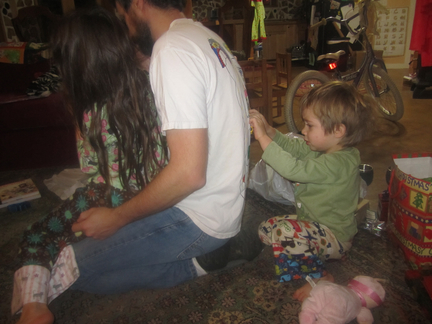
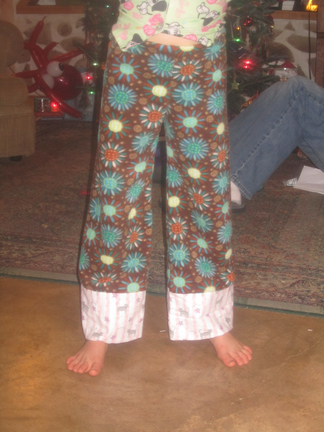
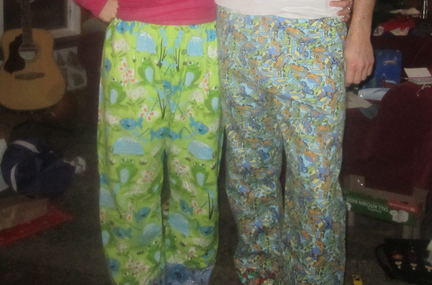
We all got some new flannel or fleece pajama pants

And Leif also got some winter pants.  Both were corduroy on the outside.  One was lined with flannel and the other with fleece.  (and in case you are wondering, Leif did chose the cupcake fabric!!  In fact, he begged me for it!)

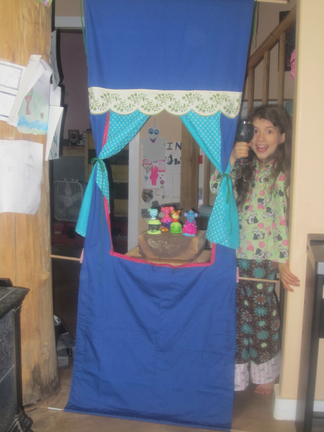
There was also a puppet theater that you can hang in a door way.

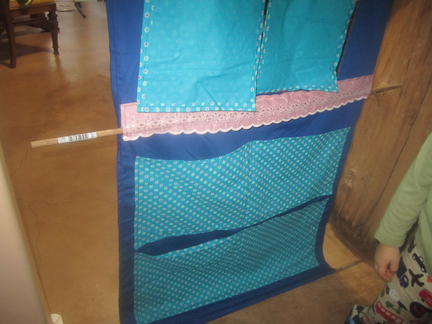
The other side has pockets to keep your puppets in.

Holiday Cards

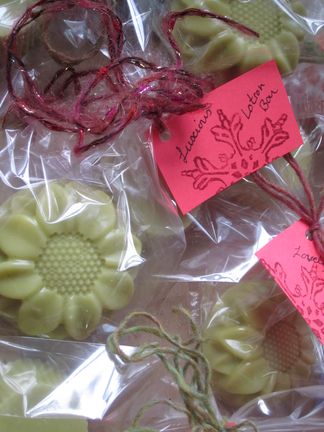
Wintermint Lotion Bars

Vanilla and Candy Cane sugar scrubs (made by Kaia)

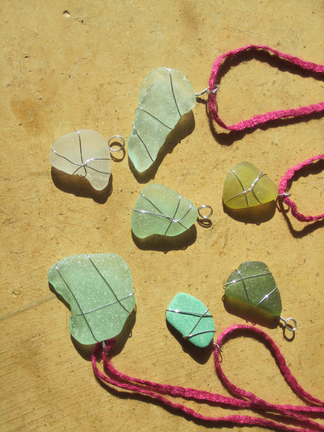
Sea Glass Pendants

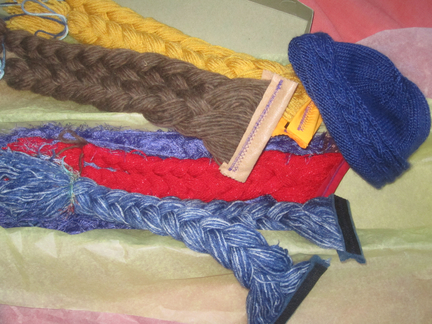
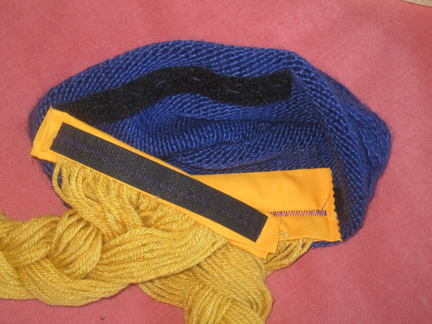
Hand knitted hat with velcro detachable hair for a little friend going through Chemo.

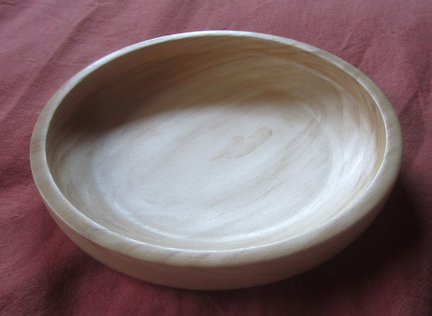
Hand turned wood bowls by Toby

Flannel pajama pants for Pop and a knitted purse for Mom

Now that the holidays are over, I don’t know what to do with myself.  I feel like I should be crafting when ever I have a spare moment.  Guess I need to learn to try to put my feet up.  Ha!

3+ months

This video was passed along to me today and I thought it was a great explanation of why the hunter/gatherer diet feeds our bodies in such a healthy way.  I’ve been eating this way for a little over three months now and I feel fabulous.  My changes have not been as dramatic as the woman in the video, but they have created a dramatic change in my life.  I’m not tired anymore, my brain feels calmer, less chaotic, my skin is clearer, I’m not clearing my throat all the time from allergies, I’ve dropped 2% body fat and 10 pounds, I look and feel fit and capable…  There is so much more, but it’s not easy to put it all into words.  I just love how I feel these days.

Dr. Terry Wahls – Minding Your Mitochondria

Sewing Lessons

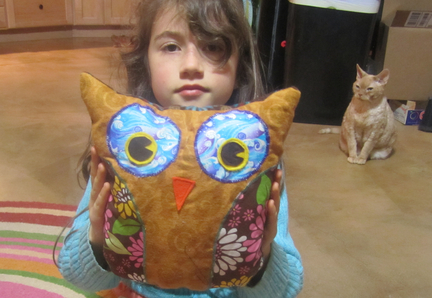
Kaia has been begging me for sewing lessons lately.  She’s done a simple square purse on my machine before, but this time she decided to do something with a real pattern.  She chose a fabulous owl pillow.  I had to stop my hands from taking over and really let her do it all.  I gave her instructions on choosing the fabric and how to cut the pattern, how to change your stitch and how to make your seams…. but she took off and made an amazing pillow!  So proud of her!  I love to see how her mind opens to the possibilities when she learns a new talent.


Yes, the pajamas have changed… we started the project late at night, so she had to finish the next day.


The back has a little pocket.

The Healthier, Happier, Stronger Me!

Two months ago, I took the huge step of clearing my house of all grains, legumes, processed sugars, and processed/prepackaged foods.  From now on, my family and I were going to eat only meats (including fish, fowl, and eggs), veggies, fruits, nuts, seeds, healthy oils, herbs and spices.  We were going Paleo.  For most Americans, (especially us former vegetarians) this would be a huge and daunting task, but I felt like it was needed.  We had become so use to grabbing a quick carb-loaded snack from the pantry and forgetting about the veggies in the fridge.  Our daily intake was super high in grains (mostly processed) and very lacking in vegetables and digestible protein.  I say ‘digestible’ because Toby and I have food allergies/sensitivities, and imagine we’ve probably passed these on to our kids.  Toby and I are both sensitive to dairy, soy, and beans, which doesn’t leave much in the way of protein if you are vegetarian.  I was vegetarian for almost 20 years and began eating meat during my pregnancy with Kaia.  WOW!  Did I feel good!  My body had seriously been lacking in protein!  Still, even after we added meat and eggs back to our diet, those made up a very small portion of it.  The carbs led the way and with them came the frequent blood sugar roller coasters, anxiety, depression, temper tantrums, bowel issues, acne, weight ups and downs, PMS, bloating… (Obviously, the kids had the temper tantrums and I had the PMS…. OK, and the occasional tantrum).  For many people symptoms run even deeper and they develop inflammatory and auto immune diseases, and more.

I saw and felt immediate changes, my energy was up and my moodiness was down, my blood sugar stabilized while I lost weight and inches.  Really, I feel fabulous!  I feel strong and healthy!  I use to work out here or there occasionally, but I found that I needed a place to put all of my new found energy and decided to start doing workouts at home.  This only increased the feelings of strength!

Since it was my decision to clean out the house and change my lifestyle, Toby and the kids can choose to eat as they please when they are out of the house.  However, in the house we are strictly paleo.  Nothing comes in that doesn’t fit into our new food pyramid and the whole family follows this lifestyle when we are at home.   (Well, unless a certain Nana comes to visit and brings along tempting tasties.  You know who you are!)  But, I’ve found that I’m not tempted to eat any other way.  I feel so nourished, and I don’t want to go back to the way I was.  Our meals are nutrient dense and toxin free.

Now, I know many of you are saying “Oh, I could Never go without my morning toast!” or “I just LOVE muffins too much to give them up”.  Well, here’s the kicker.  I can still have toast and muffins, but I make them myself and I make them without grains.  I use nuts, seeds, and coconut in most of my ‘bread’ recipes and love the results.  That being said, I eat those bread-ish type of things much less than I use to.

I know I’ve not talked about the science behind paleo… I’m still trying to wrap my head around all the research and science behind the benefits of living the paleo lifestyle. (How the insulin and glucose are processed in the body from one type of food or another, the gastrointestinal inflammation caused by grains and legumes,…)  But, there are many fabulous blogs and cookbooks out there to get you started if you are interested.

Mark’s Daily Apple

Everyday Paleo and her super, fabulous cookbook

Nom Nom Paleo

Primal Palate and their scrumptious cookbook

Paleo Comfort Foods and their delicious cookbook

Paleo Parents

The Primal Parent

The Primal Home

The Crunchy Pickle

The Foodie and the Family

The Paleo Home

Practical Paleo

And this is just a short list!  There is so much information out there and so many recipes!  I felt like it was a pretty easy change because of all of this support.

So, what do I eat, you ask?

Well, breakfast usually consists of eggs (fried, scrambled, omelets, egg muffins…), sometimes pancakes/waffles (yes, without grain and usually with veggies shredded up and added in),  sausage or bacon, muffins, or leftovers.  Lunch varies greatly and often consists partly of leftovers.  Dinner… well, for the next few weeks are dinners look like this: Tex/Mex Chicken and veggies, Biscuits and gravy with mashed ‘potatoes’ and green beans (yes, all without grains or dairy), Farmer’s Pie, egg salad sandwiches (with paleo bread), chicken and vegetable ‘lo mein’, mini-egg pizzas , lasagna (ok, this one does have cheese, but zucchini instead of noodles), red curry beef stew,  gingered butternut squash soup and lots of carrots, broccoli, other veggies and salads.  Yes, we eat well!!  No, I don’t feel deprived!

Oh, and please don’t worry about that fabulous new ice cream maker I just bought this summer.  It will still get good use!
Creating

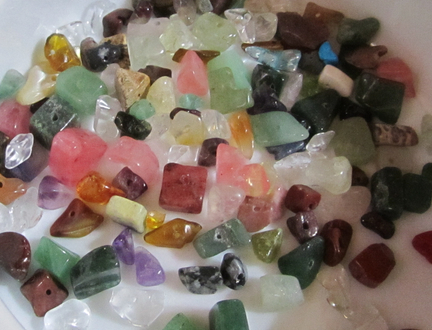
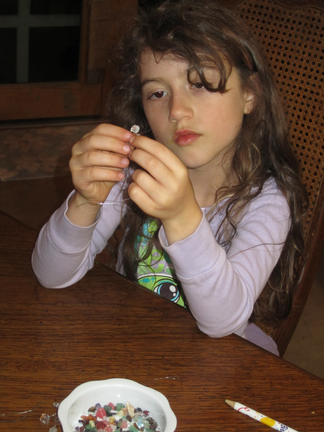
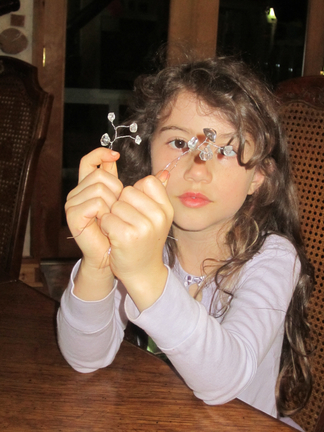
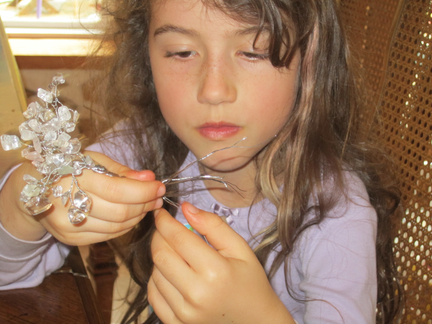
When Kaia and I were at the conference this past weekend, we both entered a raffle for various fun prizes.  Kaia has a hard time with raffles because she gets herself very worked up about winning.  So, she was pretty devastated when she didn’t win the wire tree that she’d hoped for.  And it didn’t help that I did win the two prizes that I’d hoped for.  She begged me to buy her a similar tree from a vendor.  But, I really wanted her to understand that she was completely capable of either earning the money herself, or of actually making her own tree.  (I feel like I placate her too often by buying her things she wants.)  The vendor heard how upset Kaia was about the tree she didn’t win and offered to teach us how to make them.  This was extremely generous of her considering she was giving up her time and the money she could have made if I’d bought a tree.  So, for the past two days, Kaia has been working diligently on her own personal tree.

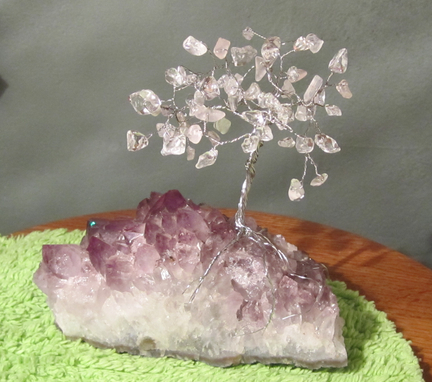
She wanted a white tree.

Check out the concentration on her face:

I’m so proud of her!  She finished her tree and glued it to a piece of Amethyst.  It now adorns her bedside table where she can meditate on it as she goes to sleep.  I think this is a craft that we will do over and over!

My newest addition

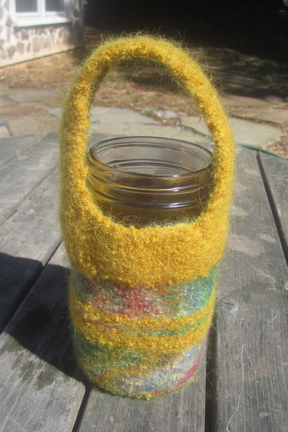
I can’t tell you how excited I am about my newest knit!!  I love drinking out of a quart mason jar, but I always worry about dropping it.  So, I’ve made myself a jar ‘cozy’.  The pattern came from ravelry.

I’ve had a number of people approach me about it and some even ask me to make them one.  Who wouldn’t want one??  It’s awesome!! Keeps the tea warm, the water cool, and protects it from falls. 🙂

Here it is pre-felting.

Leif was my ‘felter man’.